World of Warplanes Mouse Controls Guide
World of Warplanes Mouse Controls Guide by Cheaterhater
Hi all!
Since many users have problems with the new mouse controls and it took me quite some time to configure the controls to be actually usable, I thought I should share what I found out. This guide will focus on controls similar to Mouse 0.4.1 (aka “Lock camera on aircraft”), since I have never used WoT mouse (aka “Lock camera on horizon”) and thus can’t comment on the changes that have been made to this control scheme.
1. Presets
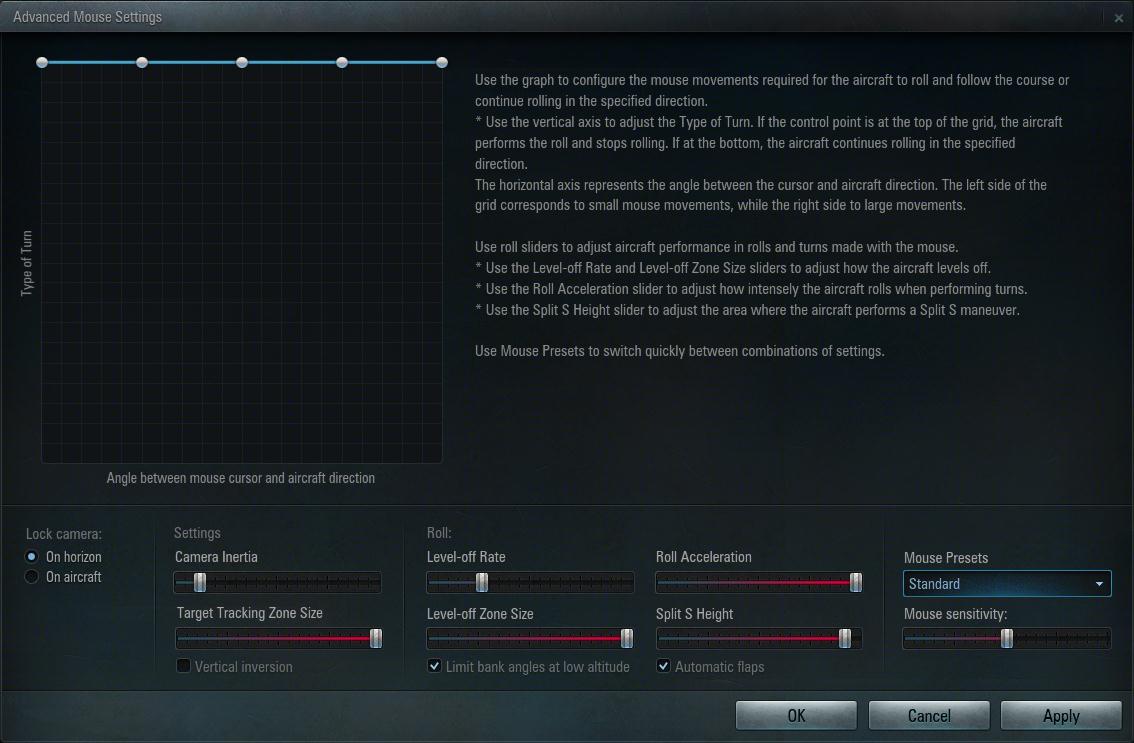
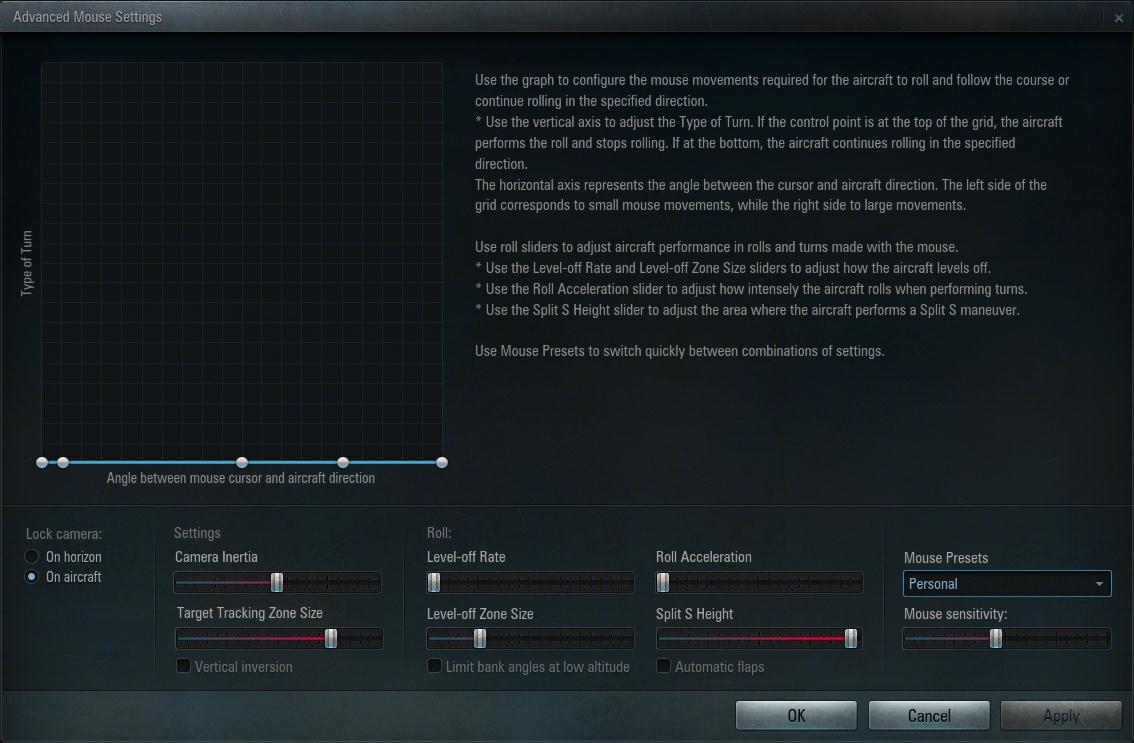
When you first open the control settings in 0.5.3, you’ll have a button “Advanced Mouse Settings”. Clicking it will open up a window in which you can select the preset you want to use – the dropdown box is located at the bottom right of that window. This presents you with four options:
- Personal: This is not an actual preset – this is the option that will be chosen as soon as you make your own changes to the mouse controls.
- Vector: This is supposed to be similar to Mouse 0.4.1. However, it isn’t.
- Hybrid: This is supposed to be a mixture of Mouse 0.3.5 and Mouse 0.4.1. It isn’t close to either.
- Standard: This is the good ol’ WoT mouse, which I won’t talk about in this guide.
If you want to adjust your controls, pick either “Vector” or “Hybrid” to edit them.
Notice: You can select a preset and change any values you like, and it will use these settings as your “Personal” preset. There is a bug in which sometimes all other settings revert to default as soon as you touch any of the settings, which makes it impossible for you to make your own configuration based on one of the presets. If this happens to you, restarting the game should fix it.
2. Mouse Curve
By now you should have noticed that big graph at the top left. This graph allows you to set a curve for your mouse controls. The description in the game doesn’t make it much clearer what this is actually good for. Basically:
If you move the curve all the way to the top: No matter where you place the cursor on the screen, the plane will try to fly to the point which you aimed at (and your cursor will move closer to the center as your plane proceeds to turn in that direction). This is what the plane did in Mouse 0.3.5 and in the WoT mouse. This is also the default curve in the “Standard” preset.
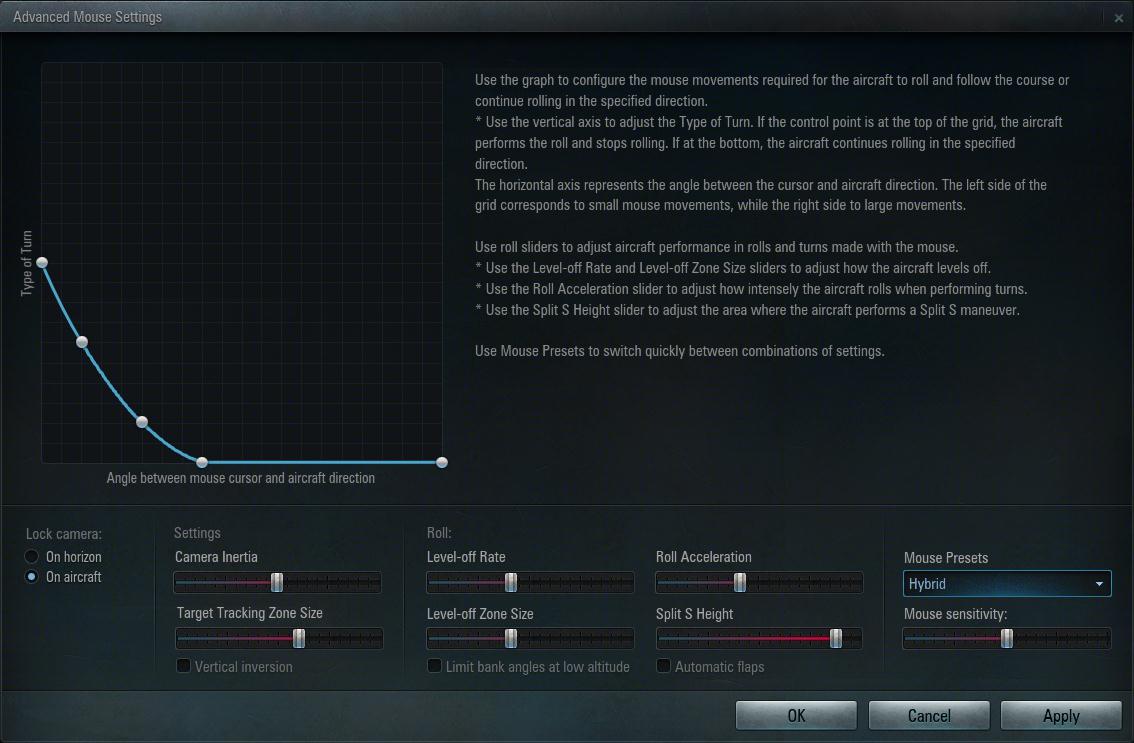
If you move the curve all the way to the bottom: No matter where you place the cursor on the screen, the plane will always try to fly to the direction in which you’re pointing. The cursor will stay where it is and the plane will continue turning until you move it somewhere else. This is what the plane did in Mouse 0.4.1.

If you do something in between: If you raise the curve to the top on the left side, this means that you’ll fly to a point as long as your cursor is close to the center. If you put your cursor close to the outer edge, your cursor will stay at that position and your plane will continue turning. Basically: If you choose a curve similar to that in the screenshot, you’ll have controls similar to Mouse 0.3.5 while the cursor is close to the center. When your cursor is closer to the edge, your controls become more similar to Mouse 0.4.1.
However, I think this needs some more explanation. I’ve tried to visualize how it should look like in the game:
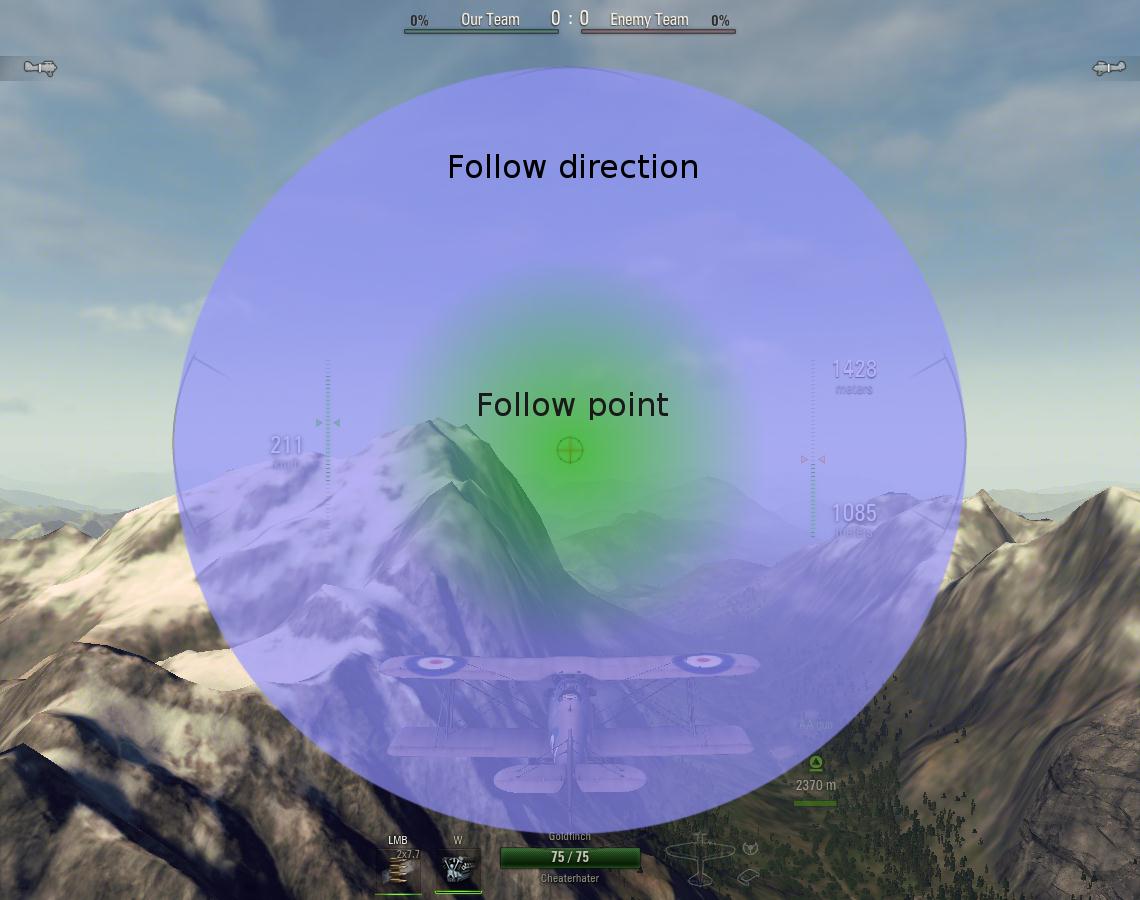
As you see, while your cursor stays in the green area, it will try to go back to the center automatically. This is equivalent to targeting a point in your environment. While the cursor is in the blue area, it won’t go back to the center and stays where it is. This is equivalent to targeting a direction – you just keep turning where you point at.
Now you would ask: “But what why is there an area where both mix up? What does that mean?”. Well, to make it simple: This area is actually a combination of both! While in that “mixed” area, your cursor will return to the center, albeit slower. The more blue in it, the slower it will move. As soon as it enters the entirely blue area, its movement speed is reduced to 0, which is why it doesn’t move towards the center at all in this area. This is also visible in the curve – the line isn’t completely at the top, but rather in the middle, which is half of the way – this means that the mouse will move to the center at half speed (which in return means that you won’t turn towards the point at which you aimed, but will turn twice as much. The lower the curve is, the slower will the cursor move back into the center and the longer you’ll turn. If you move the line down to 1/4, the cursor will go to the center at 1/4 of its original speed, which causes you to turn 4x as far as you aimed. Consequently, when you move the line down to 0, the cursor will move to the center at 0x its original speed and you’ll turn indefinitely, as in Mouse 0.4.1.
If you want to increase the area in which the cursor automatically centers (the green area in the screenshot), you’ll have to move the points of the curve further to the right, so the curve is higher at a greater portion of the graph.
3. Sliders
Below the graph, you’ll find a whole lot of settings. The first option is “Lock camera”. It pretty much explains itself – if you choose “On horizon”, you’ll have a camera like in the WoT mouse. If you choose “On aircraft”, your camera will stay behind the plane like in Mouse 0.3.5 and Mouse 0.4.1.
Camera Inertia
This determines how “loose” the camera is behind your plane. If you move the slider to the minimum, the camera is completely static behind the plane and will follow all of your turns immediately. The more you move the slider to the right, the more delayed and smooth camera movements will be. I would suggest to put it to the middle.
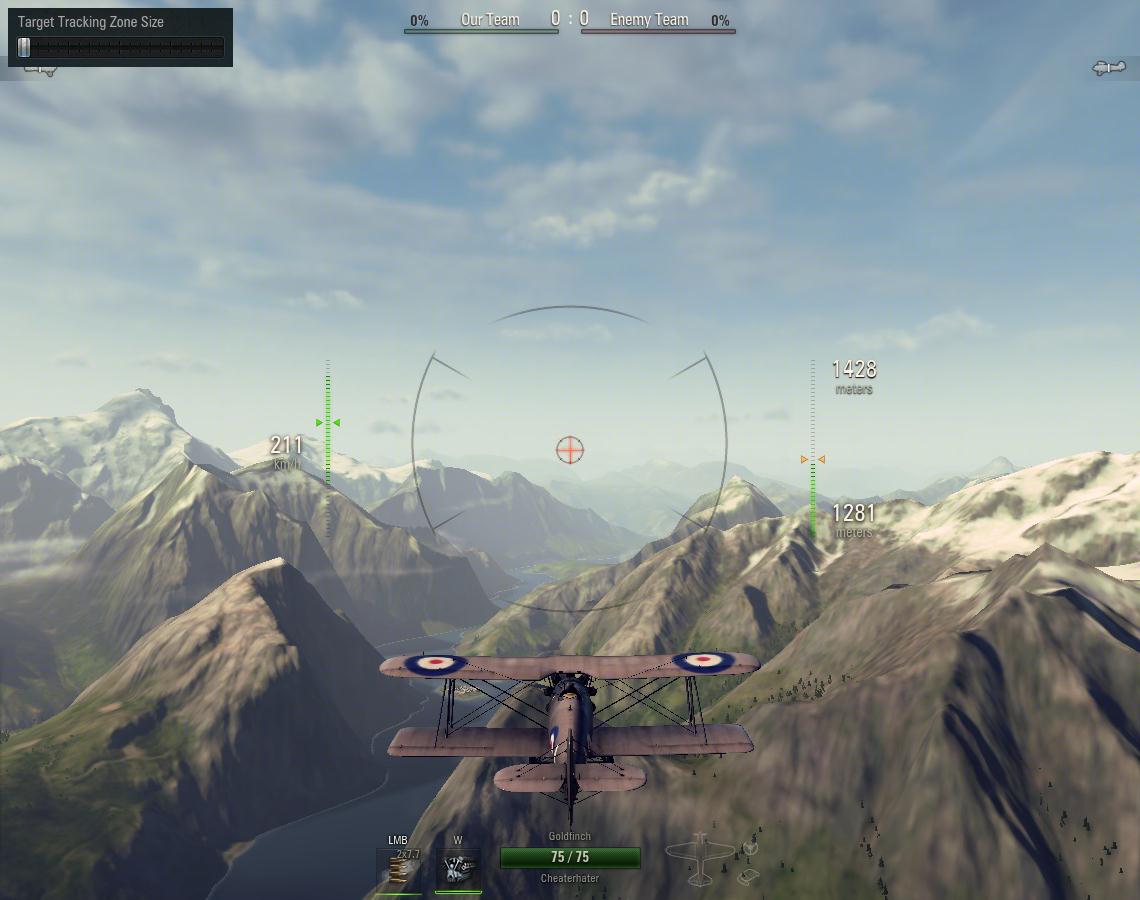
Target Tracking Zone Size
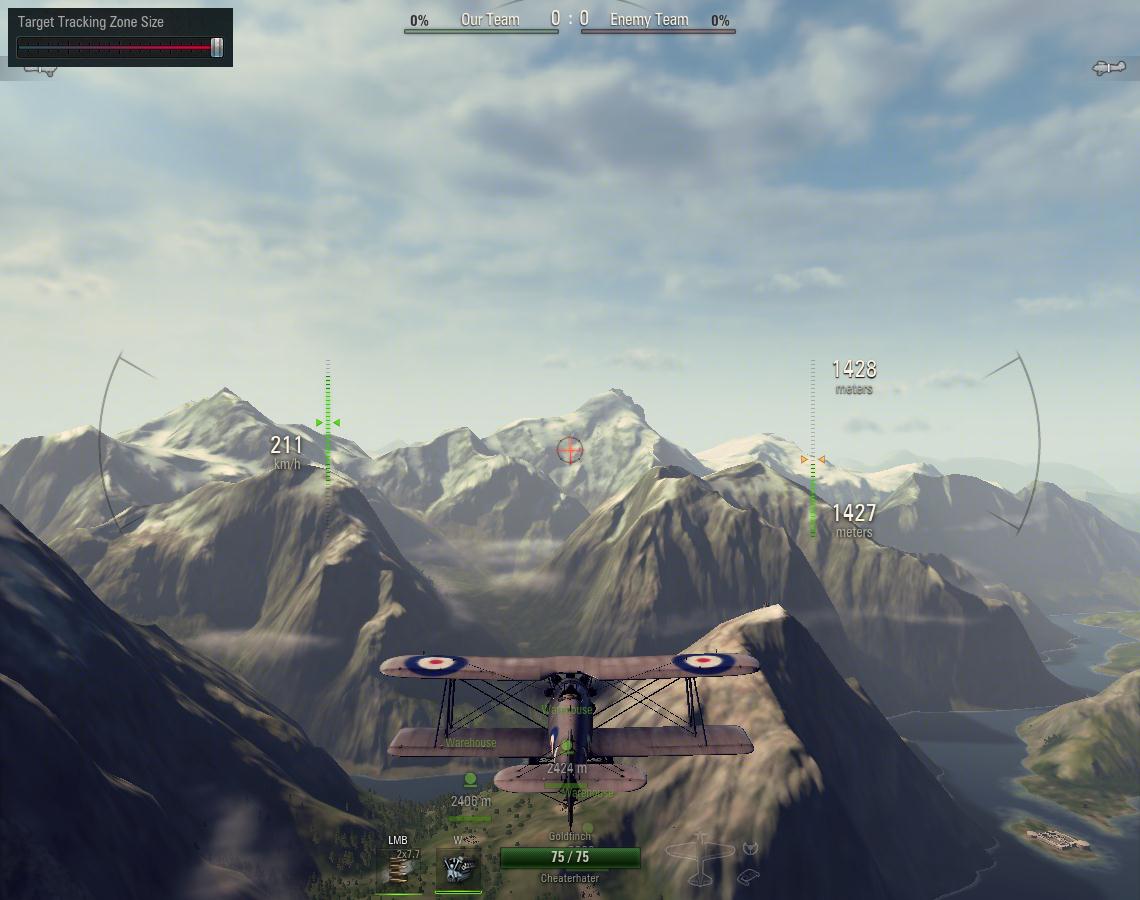
There isn’t much behind that name – This slider determines the area in which you can move your mouse. Putting it to a low value will display a very small circle in which you can move your mouse, which causes slight movements to have quite a big effect. Setting it to the maximum gives you quite a large area to move your mouse in, which potentially allows for a higher accuracy, as you can make very fine changes to your direction. The downside is that you have to move your mouse a lot. I set it to around 75%.
To visualize it, here’s a screenshot with the maximum tracking zone size:
In contrast, this is how it looks like if you put the slider to the minimum:
Level-off Rate
This is part of the “auto-level” feature. Mouse 0.4.1 allowed you to turn it on or off. Now, you can set how significant this should be. Setting it to a high value will try to level out your plane quite rapidly, while setting it to the absolute minimum will disable the auto-level feature completely. I suggest to set it to the minimum, as auto-level interferes with your movements a lot. Disabling it gives you more control over your plane.
Level-off Zone Size
This slider allows you to set an area on the screen, in which the cursor has to stay for the auto-level feature to become active. The idea is that once you leave that area (which means, moving the cursor closer to the edges), your plane will not auto-level anymore. I have a feeling that this feature is bugged. If you set “Level-off Rate” to 0, it won’t have any effect either. I have set it to 25%, just to make sure it doesn’t interfere with other features (you’ll learn soon that some features have unwanted side effects when put all to the minimum or maximum).
Roll Acceleration
This is possibly the feature which I had to struggle the most with. When put to the maximum, your plane starts rolling as much as possible for the slightest mouse movements. Now, if you put it to the minimum, will your plane not roll at all? No! It just won’t roll unnecessarily. If you put that slider anywhere else than the absolute minimum, the plane will have less rudder action and will try to roll and fly all turns only by yawing and pitching, which makes it extremely hard to aim – your plane will just roll all the time and can’t stay on target. Because it’s the only way to make your plane behave as it should, I recommend setting it to the absolute minimum.
Split S Height
In Mouse 0.4.1, you could either enable “Allow Split S” or disable it. The effect was as follows: If Split S is disabled and you move your mouse down, your plane will pitch downwards. With split S enabled, your plane will instead do a 180° roll in order to fly where you aimed at. Now, with this slider, you can select the area in which the plane should just pitch. If you move the cursor outside of that area, your plane will do a split S instead. A higher value in the slider gives you a higher area in which the plane will pitch instead of doing the split S. Now, when you previously had “Allow Split S” disabled, you would want to move the slider all the way to the maximum. This should cause the area in which your plane pitches (instead of doing a split S) to cover the entire area, so your plane will never do a split S when aiming downwards. Now, Attention: This feature is bugged. If you move the slider to the maximum, your plane will wobble around left and right whenever you move your mouse upwards, which makes it impossible to control. Why? I have no idea. The compromise is to move the slider far to the right, without touching the border. Move it as close to the maximum as you want to, without actually reaching the maximum. Then this bug will not occur, although you have a very small area in which the plane will do a split S.
Mouse sensitivity
Well, there’s not much to explain about really. Set the sensitivity to whatever value you like to.
4. Conclusion
Lastly, here’s a screenshot of the settings I’m using right now, which are quite close to Mouse 0.4.1:
If necessary, I might add my XML file later so you can easily import these settings.
I hope this guide helped you understand the new mouse options a bit. I might edit this later on to clarify things or add more screenshots. I know it might be a bit hard to understand without “visualizing” it, but it was intended as a quick guide to give this information to everyone as fast as possible.
If you have more questions, have anything to add, if anything is not clear enough or if you have other suggestions how to improve the guide, please let me know.

Recent Comments