Firefall New Player’s Guide
Firefall New Player’s Guide by Neverloved
Introduction
Now that you have your beta key, you’ll be now starting to create your character. If you don’t have one yet, stay on forums and ask nicely. There’s a lot of beta key giveaways out there. Just keep a close watch.
Contents
I. Where to begin?
B. Battle Lab
II. How to advance and get new Battleframes
B. accord Merit Points
III. Things to be familliar with
B. Missions & Dynamic Events
– Crashed Thumper
– Thumping Group
– Melding Tornado
– ARES Mission
C. The Chosen
– Chosen Drop Pod
– Chosen Invasion
D. Conclusion & Link to Crafting Guide
Where to begin?
Creating Character
You don’t have to worry if you made your character too pale or too grumpy, since the only thing you can’t change about your character anytime later is the name. Yes, you can even switch genders, for free. You can do this on anytime you want in “NewU Station”. I’ll discuss these stations later. Just keep in mind that changing name is almost impossible, so make sure your name choice is final.
Currently there is a bug that might result in new gender’s face and hair defaulting to RedBean-only variant. If that happens, just click on the head and change them manually to free variants.
Battle Lab
This is one of the most remarkable changes made in the latest patch. Here you will start in civilian clothes and PERSONALLY meet NPCs that you will hear often in Firefall, such as Aero and Oilspill. Once you got out of the battle lab, you’ll hear them through radio transmissions, giving you various instructions and notifications.
You’ll learn the basics of play and be able to try all starting battleframes. You’ll also be introduced in various stations such as:
- Battleframe Garage – view, upgrade and repaint your battleframes, equip/unequip your weapons, abilities and other gear;
- Battleframe Station – change which battleframe you are currently wearing with one click;
- NewU Station – total makeover, hats and sex change!
By the time you’re done, Oilspill will lead you and transport you to Copacabana.
Your adventure to New Eden have just begun. You’ll be required to complete some introductory missions and then you are on your own.
Now lets discuss what are your objectives in the game.
How to advance and get new Battleframes
Experience
There are two types of battleframes: Accord and Specialty. Furthermore, every frame belongs to one of the five families, called archetypes: Assault, Biotech, Dreadnaught, Engineer and Recon.
All five Accord frames are unlocked for everyone right from the start. Even though they are considered starter frames, they are just as powerful as Specialty ones.
Specialty frames need to be unlocked first, but can use all weapons and abilities of the Accord frames from their archetype, offering more customization choice.
Specialty frames require 10 Pilot Tokens to unlock, which are obtained from constraint upgrades that have a gear/flower in the upper right corner of their icon. From each frame, you can gain up to 12 tokens, 3 of which can be obtained by spending only experience (by unlocking all the white constraints – all the following constraints require spending crafting materials on top of the experience).
“The goal is to grind experience either by thumping or by accomplishing dynamic events just to get the first 3 tokens then move on to the next Accord frame.”
If you achieve this you’ll be able to gather 15 tokens in total. Enough to buy your first Specialty frame with 5 more to spare
Each frame has three constraints (CPU, Mass and Power). Each contraints are divided into four colors based on their requirements and power (white, green, blue and red).
Since were aiming for getting tokens for additional Specialty frame. We will only look into the WHITE bracket of constraints
Unlockable (for each) constraints in the WHITE bracket progress as follows:
4,000exp
8,000exp
16,000exp
24,000exp
32,000exp ——> this will give you 1 token
Total of 84’000exp each constraint is what you need TO EARN A TOKEN in the WHITE bracket.
Total of 252,000exp per frame will give you 3 Tokens
When you have these 3 Tokens, thats when to stop and move on to the next BASIC frame.
Accord Merit Points
What is it for? And is it the same as pilot tokens when you craft it?
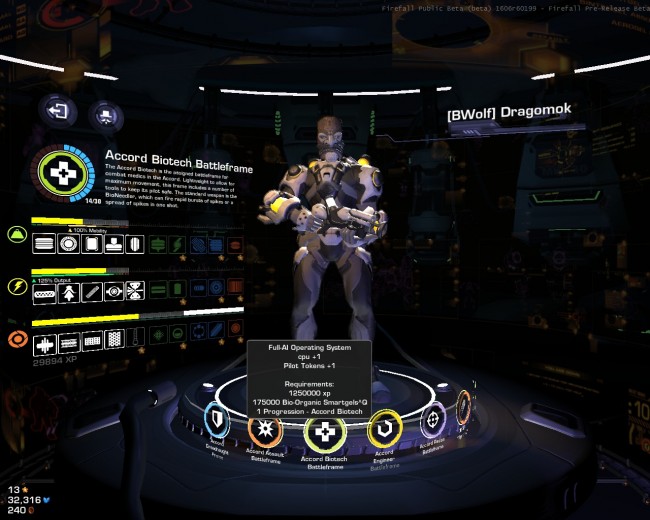
No its not the same as Pilot Tokens. It’s one of the requirement in unlocking the last bracket in the constraint. You will see it in the RED bracket. If you mouse-over the RED box, you’ll see that one of its requirement is the Battleframe Token which is crafted from Accord Merit Points or AMP.
Where can i obtain AMP?
These are obtained by doing quests. Depending on the difficulty of quest or dynamic event, the accord rewards certain number of AMP.
Lets look into this more clearly. Thanks to Dragomok
~~~~
On Pilot Tokens:
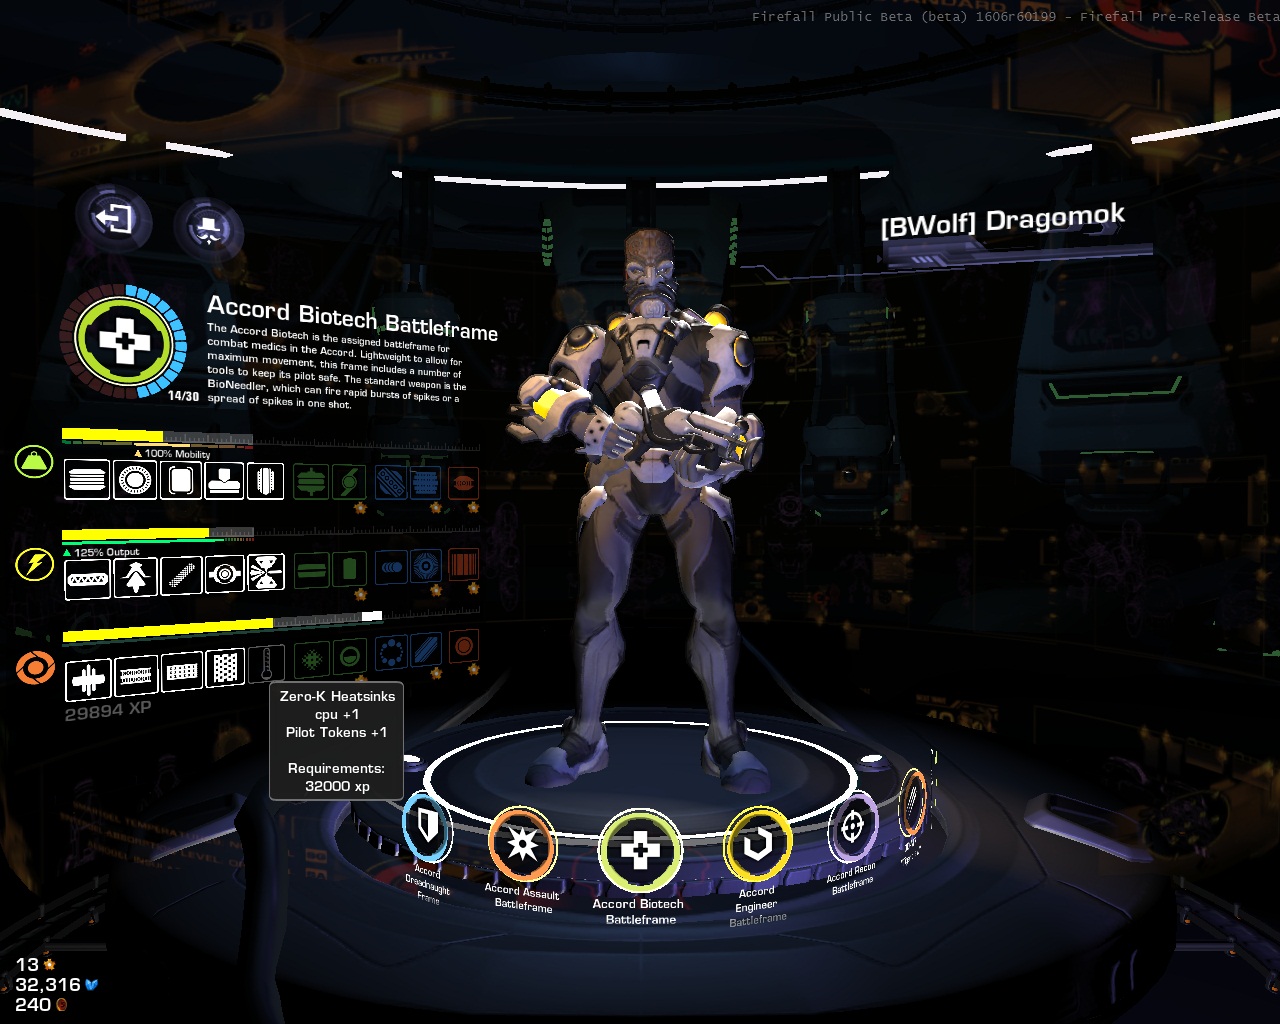
As you can clearly see, the cost of the final white constraint is 32.000XP and nothing else. Pilot Tokens +1 is the benefit of unlocking it, just as (in this case) cpu +1 is. I’m really surprised you thought it was part of the price.
Pilot Tokens are used to unlock new battleframes, each costing 10.
On Accord Merit Points:
- The crafting process goes 10.000 Points -> 1000 Awards -> 100 Accomodations -> 10 Ribbons -> 1 Medal.
- Accord Merit Medal can be processed into any [Classname] Token (ex. Accord Biotech Token, Mammoth Token).
- [Classname] Token, along with 1,250,000 XP and 175,000 units of frame-specific material, is the cost of the red constraint.


~~~~
Again, AMP is actually used to unlock the very last constraint. It is NOT used to purchase T2 by: bobsmith99
Now that you know what to aim for. You should be familliar with the following:
SIN Towers
SIN stands for Shared Intelligence Network. These are the Point of Interests (POI) and you can find them marked on the map. They have unique names such as Truns-Hub & Copacabana. Others are just watch towers.
What about it?
You’ll never be able to see quests and thump groups unless you’re hooked up to SIN. So go find SIN Towers and press E, them map will automatically open and show you the revealed map.
Missions & Dynamic Events
Quest are good source of exp, some are pretty quick and some takes time but very rewarding. And ofcourse you’ll be getting Accord Merit Points too.
Special Reward: this means what you might want to expect for
Difficulty: easy to medium to high, high difficulty means you may not be able to pull it out alone, you might need some help.
Suggested frame: these are the frames that i found easy to use in certain situation or it has some advantage
Experience: though i cant give you the exact number of experience, i want to give you the idea what to expect.
Tips may or may not be always helpfull to you as it may not be also applicable to your playstyle. DO NOT assume that its always correct and effective. I just include this because it might be of some help.
Crashed LGVs
These are marked as bikes (chopper) with an X on it. To begin the quest, press E (clear all the bandits first). There are 2 scripts to LGVs quests; first is the normal script where Aero will send you a Data Worm and you have to defend it by 2:00 minutes, second is where the LGV will self-destruct. Ta-da! Instant loot and exp.
Tip: when im doing Crashed LGV, i just crouch and dont open fire unless the bandits see me. I noticed that they just stand there when they spawn if they cant see you or the Data Worm. (That is if you can’t handle the skirmish and just want to finish the 2 minute script). Of course killing them all gives more experience.
Special Reward: Damaged Courier Bike (1 time use, disappear when logged out, not 100% droprate)
Difficulty: easy-medium
Suggested frame: n/a
Experience: low-medium
Crashed Thumper
This is the most easiest quest. They are marked as thumpers in the map (dont be confused with thumper groups). The objective is to gather 5 parts of Oilspill’s thumper and assemble it. There are more than 5 scattered across the crashed thumper, just press E and carry the part back to the thumper. Dont forget that there is a time limit but every part delivered extends the time. Picking up parts will spawn mobs according to script.
Edit: Remember, the faster time you finish the objective, the better the reward. So spam that afterburner (assault skill). Best reward will be polymorphous fiber since you need to craft it in making thumper, less time will earn you Crystite Engine. Lesser that that, your reward is Brody’s disappointment thanks to: BVKnight
Tip: When pressing E, anticipate the time between the icon when it disappear and the heavy load icon on your back to appear. Pressing the spacebar (jumpjet) on time will disregard the heavy load buff and you can fly faster towards the thumper. Yes, i know, you are welcome.
Special Reward: Crystite Engine & Polymorphous Fiber (used for crafting thumpers)
Difficulty: easy
Suggested frame: assault (afterburner for dash)
Experience: low
Thumping Group
This is not a quest or dynamic event, but just to let others not become confused with Crashed Thumpers, i will discuss it.
These are actually players thumping. Compared to Crashed Thumper Icon, it is smaller. Another difference is that it has similar to ARES Missions’ icon. They both have “skull” above their icon. This will determine what kind of thumper they are using. 5 skulls (i cant zoom it more in but it looks like skulls) means its a Squad Thumper and 1 skull means its a Personal Thumper.
If you happen to see a “hollow” or empty skull. That means that they are less than five in the squad and there might still be spot for you to join in. It doesnt determine how many people are actually helping around that thumper but only the number of people in the squad who called down the thumper.
Example: 5 skulls with 4 shaded part and 1 empty spot. It means they are 4 in the squad.
Remember, even if you are NOT in the squad and you helped defending someone else’s thumper, you will still get apart of what he is thumping. In my opinion, your reward is based on the damage or mobs you killed during the thumper extraction.
Tip: mouse-over and you will see what node (resourse) they are thumping. If you wanna thump on your own and you are looking for specific node, press M and when the map opens, press Tab. This will make POIs and watchtowers scan the area of what possible nodes are nearby. Provided that you are hooked up to the SIN.
Melding Tornado
These are high exp giver. They are marked as twisters on the map. Goal is to take down (kill) the melding shards spinning around the tornado. Constant blasts and spawn of mobs add to the difficulty. Each shard killed will knock players away and drop off melding resources simultaneously. These can be destroyed and pop out loots (not everybody knows that, i didnt even know that when i was a newbie). Next after all the shards gone, the core will be revealed. This is stationary and easy to focus on and show the tornado is coming to its end. After the core is gone a portal will appear.
Inside the Portal
The number of people that can enter the portal is limited (i guess around 7-10 only). Be sure to get in early if there are many people around. If you are in squad, any member will automatically port the squad in. Inside is timed so be fast to get to the circumference of the bubble and find the first wave if hybrid deposits, the color of the first wave is green. After a few moment the bubble will collapse inward and next wave of hybrid will spawn together with angny mobs, shoot the yellow hybrid and look for the loot and move to the next shard. Again, the meld will collapse and be sure to move away too so you wont miss the last wave. The color of the last wave is red hybrids. After some seconds, the melding bubble will finally collapse and eat you. Turn up the volume, get a paper and list what the whispers say to you, there are a rumor they are cheat codes.
Melding portal is a like bonus room, loots can be as high as 200+ random kind of resourse of if you are unlucky it could be just 1 (once inside the portal, i got 1 carbon composite, twice). Destroy as many shards as you can, get the loot, and stay alive.
Can i get out of the portal before it collapse so i wont die?
Yes, climb your way up. You can find a circular “staircase” if you look up. Climb it. But i dont see any reason to do that.
Tip: While killing the melding shard, press F on the shard with the lowest HP so others could see it too.
Special Reward: Shard deposits inside the portal that contains a lot of resourses
Difficulty: hard
Suggested frame: assault (afterburner for dash inside the portal), dreadnaught (great at dishing out focused damage to the tornado), recon (good damage to tornado)
Experience: high
ARES Missions
These are marked as Roman helmets, or probably Ares himself. Pay attention to the skulls on top of the icon. More skulls means higher difficulty (personally i havent seen an ARES with 4 skulls).
These missions happen inside the caves or closed area. Objectives may vary, even the size of the cave/bunker/building/facility could pre-determine the difficulty of the mission. By difficulty, i mean nunber of mobs and the objective itself.
Mobs: Chosen, Aranha, Bandits.
Objectives: Extraction, Hacking, Sabotage.
These could be inter-shuffled. Like for example:
– Sabotage (plant explosives) the Chosen strifebringers protected by Chosen forces ofcourse.
– Extract a client’s important thing left when aranhas overrun their facility.
– Stop Bandits from hacking the Accord database.
Tip: Be familiar with the caves. ARES happens always on the same places and only that the mobs and objective is different from time to time.
Special Reward: A lot of Merit Points (on hard difficulty)
Difficulty: easy-medium-hard-what the **** did i just went into
Suggested frame: assault (afterburner for dashing and mobility), dreadnaught (heavy armor while “ow gad have to press E fast), recon (decoy while “why the hell pressing E takes so long”)
Experience: low-medium-high
The Chosen
I wont introduce you to them, but when you see one, say hi. They can be very annoying when they capture POI which i mentioned earlier. When they take over POI, your connection to that SIN tower is temporarily lost and will turn red. This means you wont be able to see Quests and Thumping Groups around the area.
Incursion
If you see a big red sore in the map. That means there is party. Dont be shy to join in. The first objective is to clear out the area and bring down the Sheild Generator that is protecting the ship (im not quite sure if its a ship or a big pod).
Now to do that you have to call down a Shield Breaker, when ready, activate it and protect it from incoming waves of Chosen sworn to slit your throat and smash the Shield Breaker. The time is 2:00 min per wave and by the end of the wave you have destroy the exposed Generator. Then it will again repeat till all the Generator is gone.
Special Reward: A lot of Merit Points
Difficulty: hard (and time consuming)
Suggested frame: n/a
Experience: high
Chosen Drop Pod
Few Chosen are summoned on drop pods. Destroying it is easy and gives Merit Points too. So shoot if you see one. Remember prevention is better than cure. They might gain number and take you nearest SIN Tower.
Chosen Strike Force
They are a group of Chosen. They will be not stationary on the map because they are moving to invade Watchtowers or SIN Towers. They just give experience.
Special Reward: n/a
Difficulty: medium
Suggested frame: n/a
Experience: medium
Chosen Invasion
Brody will alert all the players in the instance if there will be an invasion. If you heard this, you are advised to get to the the target of the invasion immediately. This could be Sunken Harbor (down int the south) or Thump Dump (way up north). If players fail to repel the invasion, the POI will be swallowed by the melding and you wont be able to get to that POI for at least 3 hours.
The Chosen Invasion is in massive scale and needs a lot players. Series of Warbringers (similar to Incursion) will appear throughout the POI. Aside from Warbringers, chosen will bring their biggest toy, the Chosen Cannon.
The way to finish and survive the invasion is the same with Chosen Incursion, only that it is in massive scale.
Contributing to this Dynamic event is very rewarding, on top of that, i personally find it an awesome experience. Seeing more than 20 players flying towards to meet the waves of chosen. Since the chosen cant fly (jumpjets), we are literally raining fire on them.
Conclusion
These may be shallow and lack consice details but i hope you are now introduced in some quest. I also hope ive given you idea where to get your tokens so you could get your Tier 2 frame. I’ll try to revise this and add some deeper and more specific details. Feel free to comment and add some details of your own. Id be happy to take some corrections too.

Recent Comments