Metal Assault Co-op Mode Strategy Guide
Metal Assault Co-op Mode Strategy Guide by KZee1994
Co-Op Mode: Strategy Guide
Welcome to the Co-Op Mode: Strategy Guide! This guide was made to help people learn how to co-op effectively with one another! You should be able to find out the basic ins and outs of co-op mode, what you’re up against, and finally what to do!
Contents
1) The Basics
2) Enemies and Allies
3) Map Strategies
4) Tips and Extra Help
5) Credits
Without further ado, let’s begin with the guide!
1. The Basics
1.1 – The Interface
Firstly, let’s take a look at the Interface.

1) Your current Fatigue, EXP, HP, MP and SP are shown here. Your portrait will also fill with green, blue and red colour once you gain SSP!
2) The Minimap, with the map title. It shows on screen where you are as a green square, and shows any bases, such as depots.
3) The Scoreboard lists the ranking and your current points. Your ranking score is in white, and is dependant on how many enemies you killed overall. Your Score Points are in yellow, and you recieve points for every kill which can be spent in the upgrade shop at the end of each round!
4) The Timer shows how the time you have left to complete the map!
5) The Round meter shows what round you are currently on.
6) Your hotkey list shows what weapons, items and skills you currently have on, as well as your ammo, grenades and reload time.
7) These are your enemies, and you recieve ranking and score points for each kill. In certain maps, there are special mobs which give more points than others!
8) Your character! In dark maps, your character will be lit up, and where you aim will also be lit up.
1.2 – Basic Killing Techniques!
Now that you know the interface, it’s time to play! The aim for each round is usually the same, and you can see it at the top of the interface. However, it’ll most likely involve you killing a few zombies or monsters! Get stuck in with a few tips!
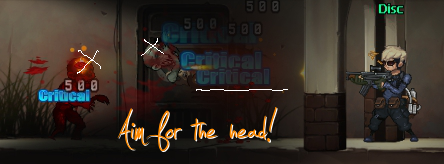
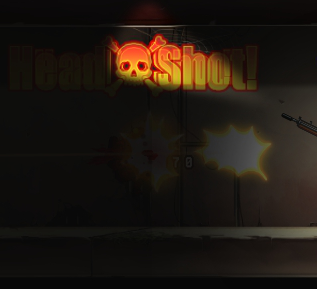
*Critical Hits are perfect ways to get rid of the small fry. Just aim for their heads! Especially with a Sniper Rifle…
Having trouble with an overflow of enemies? Grenades are your friend.

*If zombies are walking towards you, throw one in front of you and run backwards. They should run into it, and BOOM!
1.3 – Power Ups!
During the game, you should encounter a number of bubble-like drops littered around the place. These are power-up items, which give helpful effects!
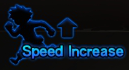 Speed Increase – An orange orb that increases your movement speed by 20%!
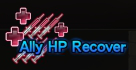 Ally HP Recovery – A red orb with multiple syringes that restores 50% of Max HP to everyone in the team!
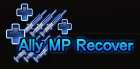 Ally MP Recovery – A blue orb with multiple syringes that restores 50% of Max MP to everyone in the team!
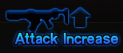 Attack Increase – A red orb with a gun inside, that increases your attack power by 50%!
 Defense Increase – A green orb that increases your defense power by 50%!
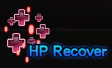 HP Recover – A blue orb with one syring inside, that restores your HP to Max!
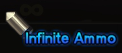 Infinite Ammo – A silver orb with a bullet inside, that gives you unlimited ammo for a while! It’s best used with Rifles or Pistols, as other weapons reload after one shot.
 Area Stun – A golden orb with a hammer inside, that stuns every enemy on the map for a short time. It’s useful when crowded by a large gang! Be careful, newly spawned monsters after the item has been used will not be stunned!
 Mystery Box – This is a gift box that can be either good or bad! It gives one random effect, which can be any of these above… or a debuff! It can give -50% Defense, -50% Attack or -20% Speed, so watch out!
1.4 – The Upgrade Shop
After you’ve completed the round, you should see ‘Round Clear’ appear, and shortly after, the Upgrade Shop!
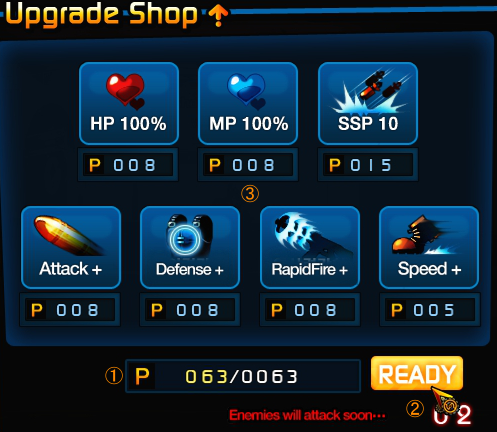
1) This is your Points meter. It shows how much Score Points (yellow) you can spend, out of the total Ranking Points (white) you’ve gained!
2) The timer is in the bottom right! You have 10 seconds to choose what you want to spend your points on. To speed things up, press Ready straight away — the clock is still ticking during the Upgrade Shop!
3) The upgrades are all featured here. You have each icon, and how much points each cost! The cost differs in certain Co-op Maps, so be careful and think about what you want to spend, or if you want to save your points for later!
Here’s a breakdown of what each upgrade does!
HP 100% – It restores your HP to max, it’s useful for when you have spare points and you’re low on health!
MP 100% – It restores your MP to max, it’s also useful for when you have spare points, and you’re low on MP!
SSP 10 – SSP gives you 10 Special Skill Points, which charges your SSP meter. Your portrait will fill up with a green colour, and eventually give you a Ctrl and Alt ability! You can also keep upgrading your meter from Green to Blue, and Blue to Red. Red is the maximum, and has the best skills!
Attack+ – Attack+ gives you around about a 3~4% boost to attack each time. You will see a little Bullet icon with ‘Lv 01’ at the bottom. This is a permanent buff, but the cost increases with each upgrade.
Defense+ – Defense+ gives you around about 2~4% boost to defense each time. You will see a little Armor icon with ‘Lv 01’ at the bottom. This is also a permanent buff, but the cost increases with each upgrade.
Rapid Fire+ – Rapid Fire+ increases your Rate of Fire (how quickly you can shoot bullets), and shortens your reload time. You will see a little Rifle icon with ‘Lv 01’ at the bottom. This as well, is a permanent buff, but the cost increases with each upgrade.
Speed+ – Speed+ increases your movement speed by quite a bit each time. You will see a little Boot icon with ‘Lv 01’ at the bottom. This too is a permanent buff, that increases with each upgrade. It’s worth mentioning that you will not see the effects of the other upgrades as quickly as you will notice your Speed increasing.
*For an in-depth look into the upgrade shop, please visit Thysiazo’s guide to the Upgrade Shop for more information on each upgrade.
1.5 – Rewards
After you successfully complete a co-op with your team, be prepared for the rewards! You obtain more EXP, Coins and LP with more people. The higher your ranking as well, the more points you will get! Afterwards, you should see the Loot Screen appear.

1) The reward for the Co-op map is shown here, along with the amount available. With 4 people or less, only one box is up for grabs. With 5 to 10 people, two boxes are up for grabs. With more than 10 people, three boxes are up for grabs!
2) Your number roller. Pick a number from 1 to 16, and it should become highlighted. It will then roll a number between 02 and 99. Depending on your rank, you will recieve a Ranking Bonus that increases your number. If you are ranked 1st with 16 people, you will get a +16 Bonus to your number. If you are ranked 2nd, you will get a +15 Bonus, and so on.
3) The number rollers. Everybody else’s number will be shown here with their name underneath. The people with the highest numbers will win a box. Depending on how many boxes are available, the top three, top two or the highest number will get a box.
4) Your final number. This number is what you have rolled. If it is in the top three, top two or the highest, be sure that you may get a box!
Inside each box is a random item, ranging from an Old Medal, Army Outfit Set items, and Monster Outfits! Certain army and monster outfits drop in certain boxes, so try a range of maps to find a set that’s right for you!
This concludes the basics part of the guide. By now, you should know what everything in co-op mode does! Refer to any other guides I have linked in this post for more information!
2. Enemies and Allies
So, you know the basics of Co-op mode. Now for a little more knowledge. Mindlessly killing monsters might be fun and is rewarding, but it’s also a great idea to know what you’ve got, and what you’re up against. It may be the difference between victory, and defeat!
2.1 – Allies: Machines
There are various machinery littered in maps, in place to help you hoard off monster invasions! They are found in Zombie maps, and currently are not in any Monster Maps. So, let’s start with the first one. The Tomahawk-743!
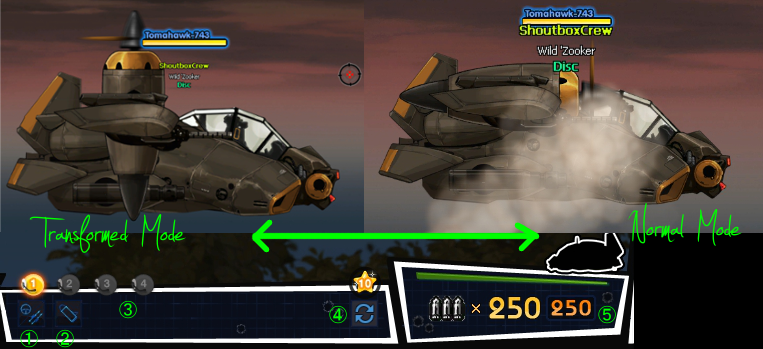
Name: Tomahawk-743
Number of People allowed on: 4
Special Features: Transformation
Ammunition Reload: Yes
1) Pressing the 1 Key on your keyboard places you in the Driver Seat, as well as control over the Tomahawk’s Gun. Use WASD to fly, the mouse to tilt and aim, and left click to shoot.
2) Pressing the 2 Key on your keyboard places you in control of the Rocket Launcher. Use the mouse and right-click to aim and tilt the launcher barrel, and press/hold left click to fire. *You cannot drive in this seat!*
3) Pressing the 3 and 4 Keys on your keyboard places you in the 3rd and 4th passenger seat respectively. These are for when you need to be quickly dropped off into enemy territory (by using a parachute!). *You cannot drive in these seats!*
4) Pressing the 0 Key on your keyboard transforms the Tomahawk from Fighter Jet Mode to Helicopter Mode.
5) This is your ammo and reload meter. Guns reload very quickly, while Rocket Launchers have a longer reload. Check here to see whether you need to reload your ammo! You can do this at a Helipad, marked by a helicopter sign on the map!
The Tomahawk can be a very useful killer, as well as a great transport device. With the ability to hold 4 people, you can easily get into a Tomahawk and go to places, while having people deal damage to enemies down below. Tomahawks are special because they can switch between Fighter Jet Mode and Helicopter Mode. The difference between them is that Fighter Jet can tilt up and down with the mouse, while the Helicopter’s aim stays horizontal, and is better for people with poor aim, or for a linear walkway. Pick and choose your favourite style!

Recent Comments