Brave Frontier Raid Battle Guide
Brave Frontier Raid Battle Guide by ChangMania
Listen up boys and girls, this is a guide to help the players of society complete raid battle successfully and without worry. If you already know how to raid or are completely 100% sure of your “outstanding” abilities, you may leave now and do whatever it is that sub-reddit dwellers do in their free time. Alright, ready then? Good, cause i’m continuing on. Try and catch up if you can! :p There is a lot of links, so if you’re ever stuck, click on them for more help!
Part 1: Getting your priorities together: A Quick FAQ
1. What the heck is “Raid Battle?”
A. A co-op multi-player experience where a group of up to 4 players have the common goal of defeating raid boss(es) within a 30 minute time frame. the player with the most contributions (items used, damage dealt, killing blow) will receive the most medals as a reward for their outstanding services.
2. Can I play Raids in Global Brave Frontier?
A. Only if you got accepted to the Raid Closed Beta.
3. What the heck is a “Raid Closed Beta”?
A. A testing environment where players work out the chinks and bugs in raids for the betterment of the entire player base at large when raids is released fully and for the public.
4. Where is Raids located?
A. Swipe to the left or right until you see a large red icon with “Raid Battle” over it. Done? Congrats, you made it to the raid screen!
5. When i try and enter raids I get the message that “We are preparing for Raids Closed Beta.” What in the world does this mean?
A. His means you were not accepted to Raids. Wait patiently like the rest of us as we want raids as well. Simple as that.
6. Can we move on now? I know enough now, thanks.
A. Certainly, it’s time to move on. Let’s go!
Part 2: Basic Raid Functions
1. Let’s enter Raids! This will be fun.
2. Once successfully in raids, you will see the raid lady, Elise. She will be your guide. Click the “World 1” icon. Since this is the Raid Closed Beta, there shouldn’t be any full or heavy rooms. Also, the bottom right hand corner has an option to join rooms your friends have made. Quite useful, especially for when you want to coordinate battles against tough enemies. Let’s continue!
3. Now you will get to the next screen. Before it overwhelms you with choices, I will explain them to you. The top icon is to make a room yourself. You can choose the boss and specialize the room’s functions. The middle icon is to search for a room. Useful if you don’t want to go solo and want to instead join friends or random people in their room. The bottom icon is quick join, where you are paired with a random open room for raids. I will continue in more depth below over all three possible choices.
Part 2a: The Three Forms of Raiding
Form 1: Create a Room
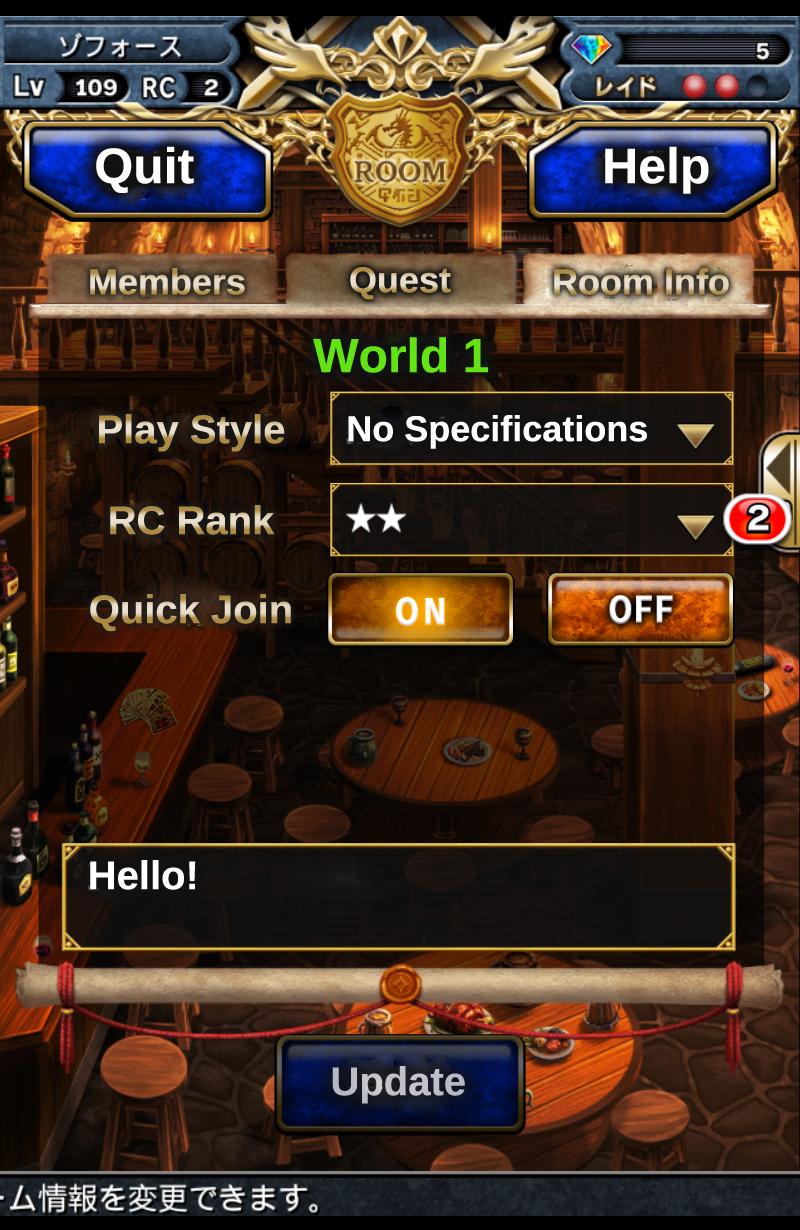
Lets start with the top box. You see that there will be four screens for you to go through. Confusing? Let me explain. Screen 1 is the play style, where you can adjust how you want to play. Screen 2 is auto join, where you allow or deny other players from joining. Screen 3 is force quit, where you make the the inactive players get removed after some period of inactivity. Finally, Screen 4 allows you to write a message that all prospecting players will see. Make it worthwhile, as it can let players know who you are!
Form 2: Room Search
For room search, it’s very different from create a room. You click its button and it brings you to where you can choose you play style, RC rank, and raid boss of your choosing. After picking your boss, you are brought to a list with several people who selected the same boss as you. Note that while entering a room, you can see at the bottom if the other players allow you to join or not. The room master has control over their raid room, so please be courteous and respectful to them. :)
Form 3: Quick Join
Quick Join instantly brings you to a random raid room. You have absolutely no control over the RC or boss, so this method is generally not preferred except for the fun of it. Alright, that’s all for the forms. Let’s go over mechanics now!
Part 3: Raiding Mechanics and Procedures
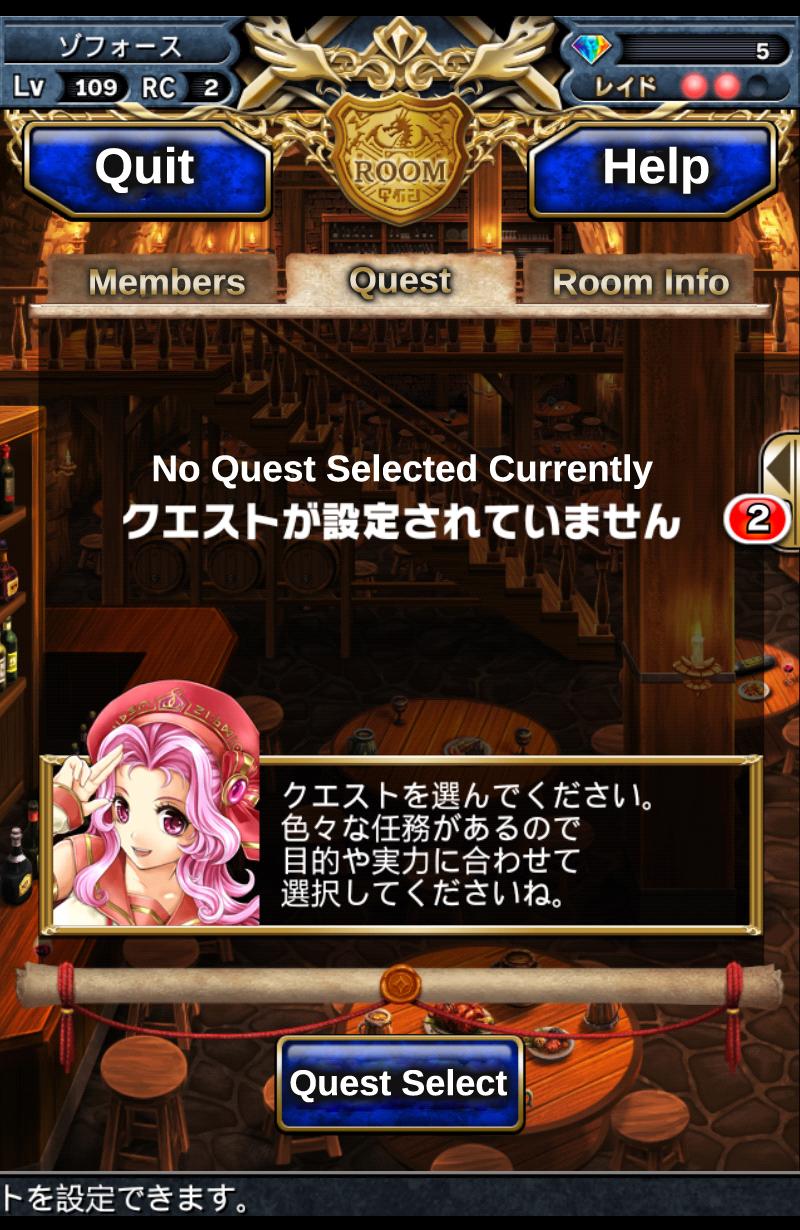
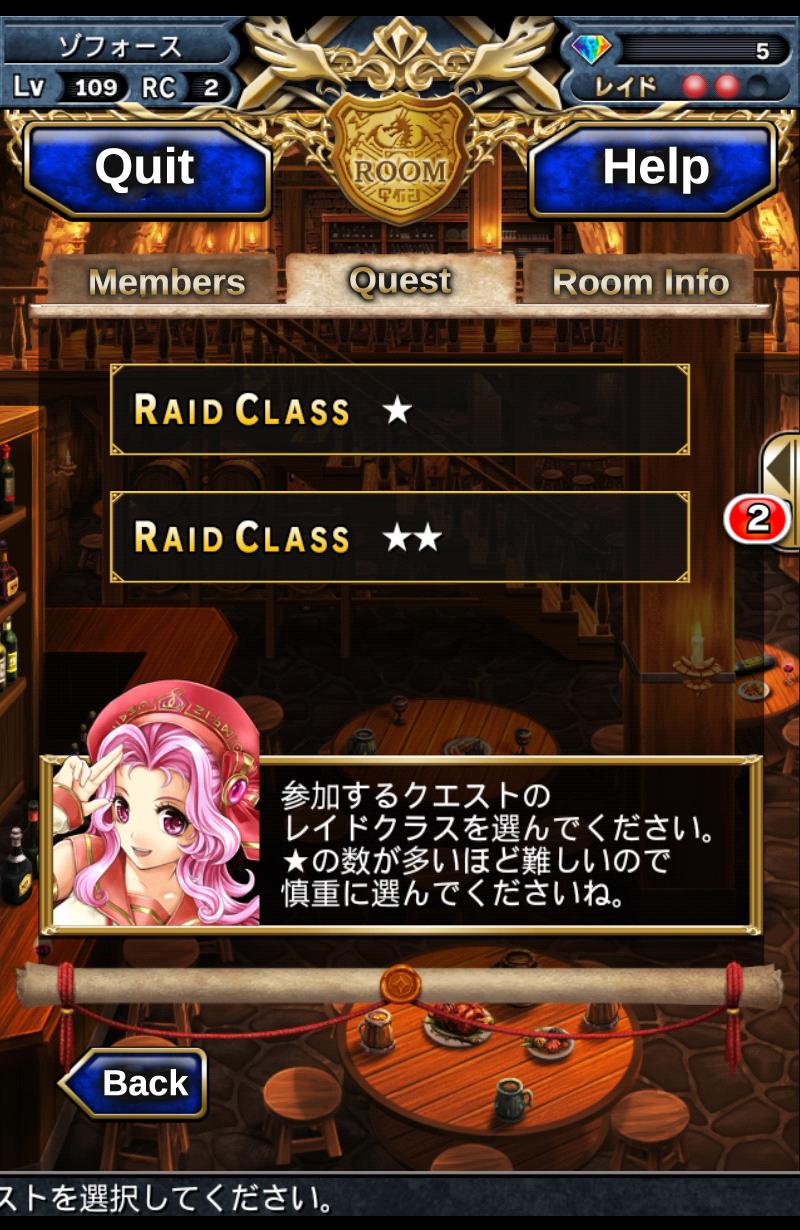
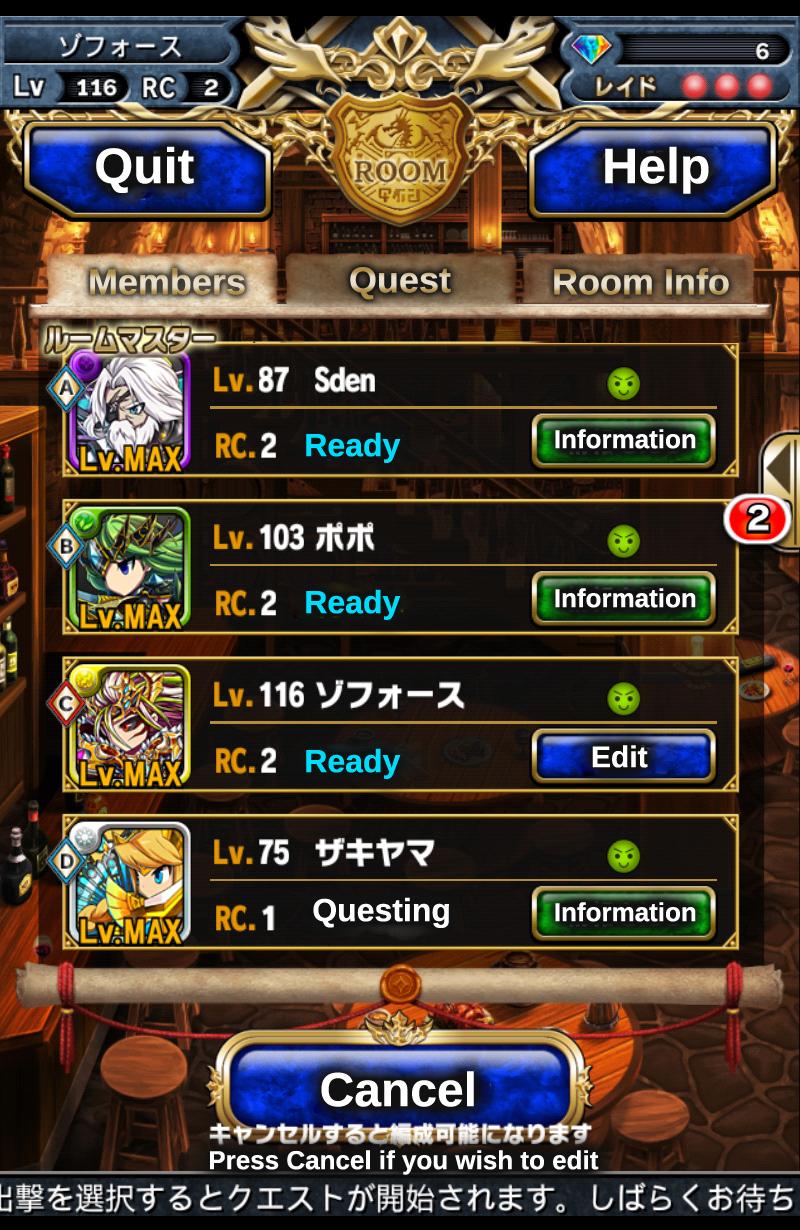
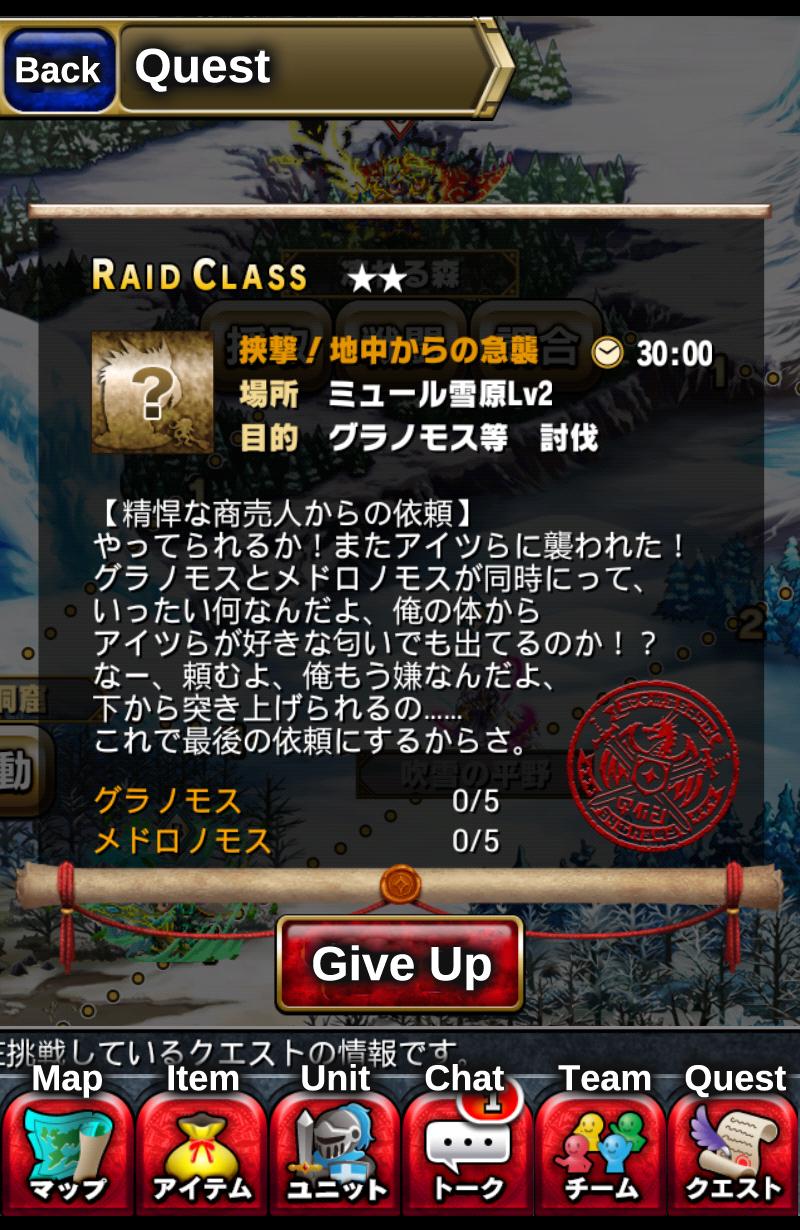
1. Raid is complex, so let’s start simple. Entering a room brings you to the Quest Select Screen where you can select your Raid Class, your Raid Boss, and overview your Mission Objectives. After choosing your boss, you can edit your Play Style, RC, and Auto Join Status.
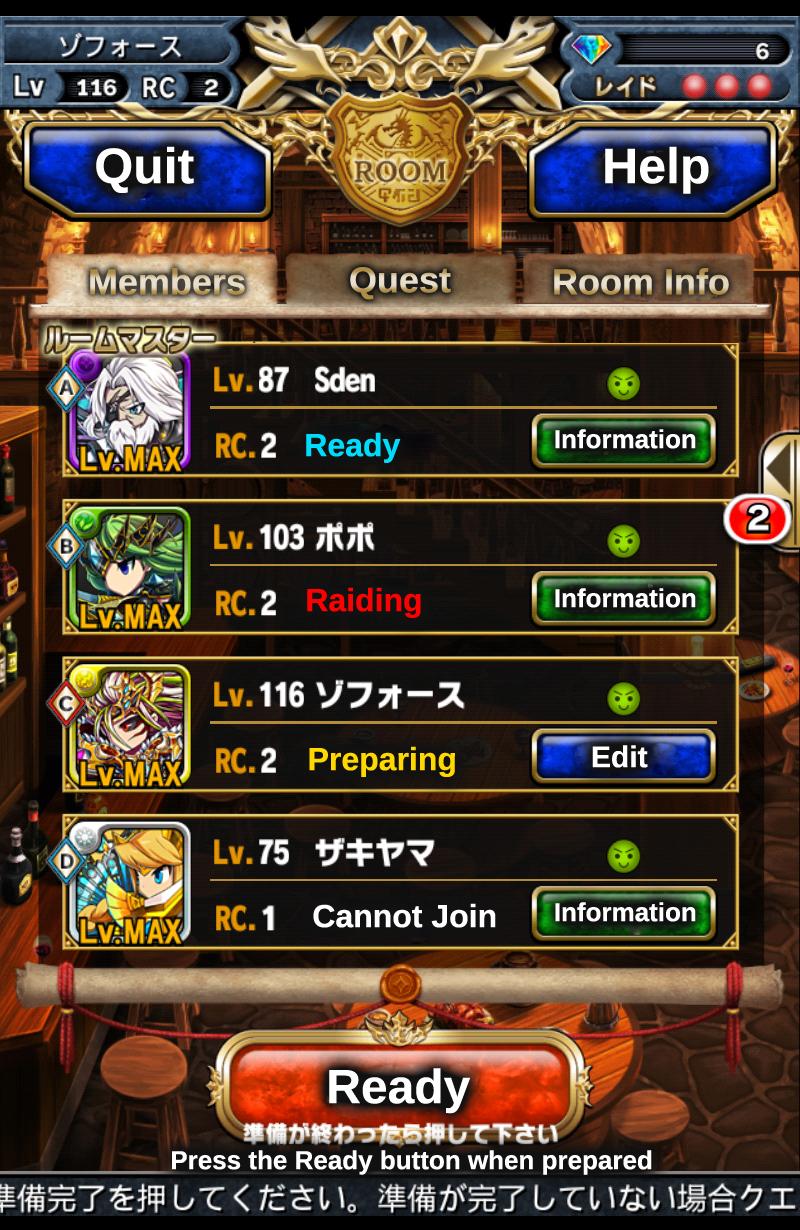
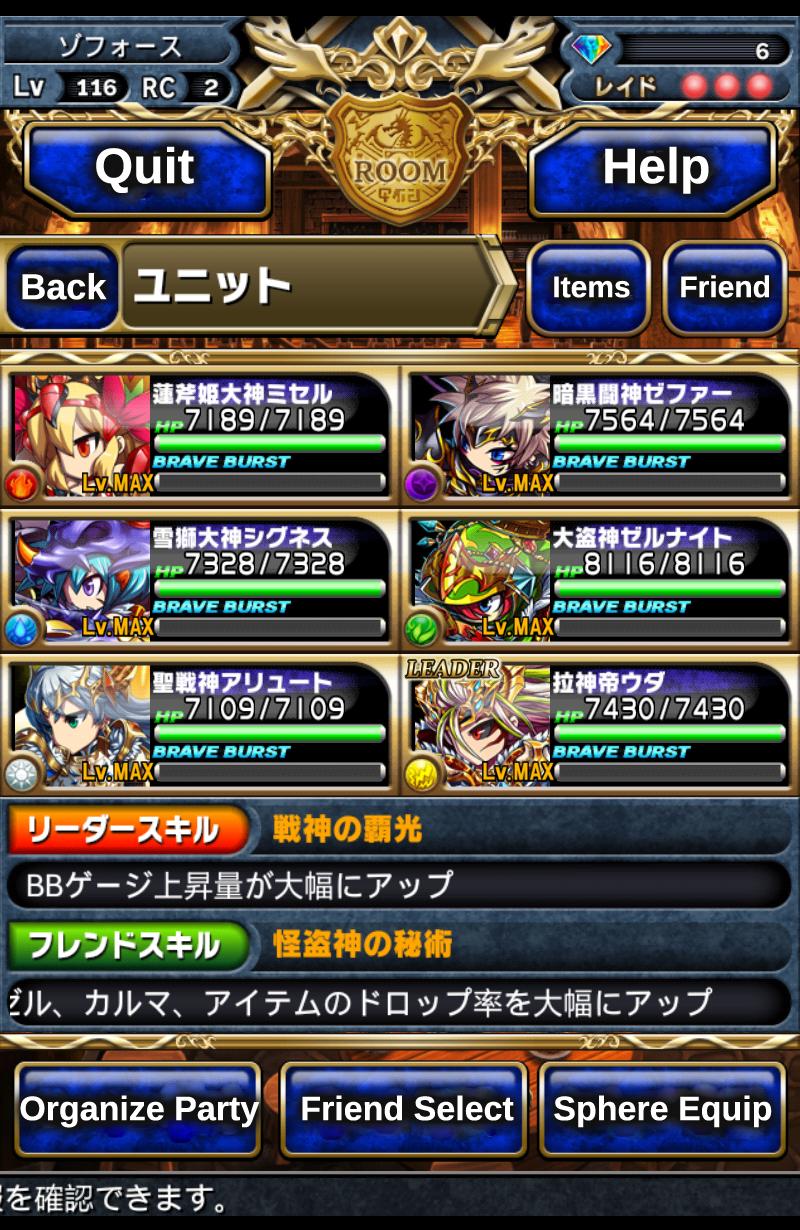
2. Now, let’s go edit our squads! By clicking the Edit Information by your name, you can see your squad and are also presented with 5 choices. The bottom three choices allow you to organize your raiding party, choose a friend, and swap spheres, while the 2 boxes on the top right allow you to change your items and select a friend (yes, second time!). This is a learning curve, but it will soon feel like second nature to you.
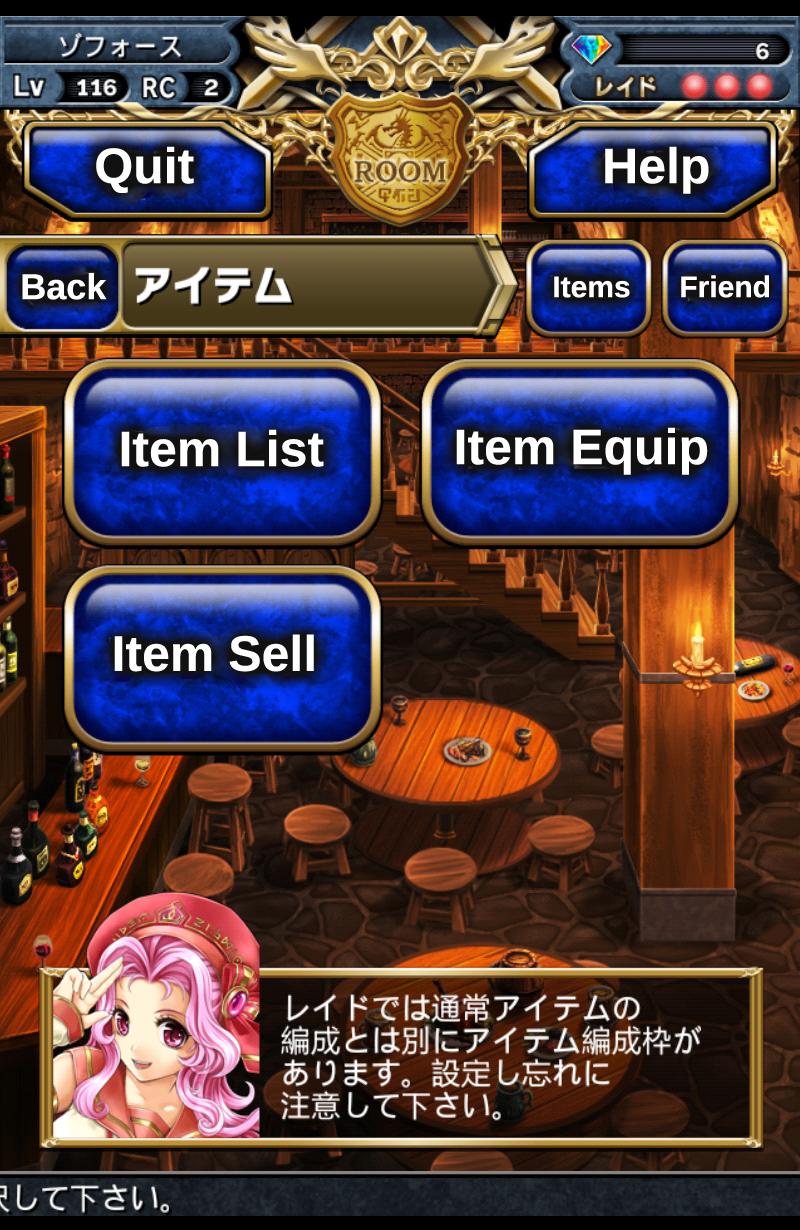
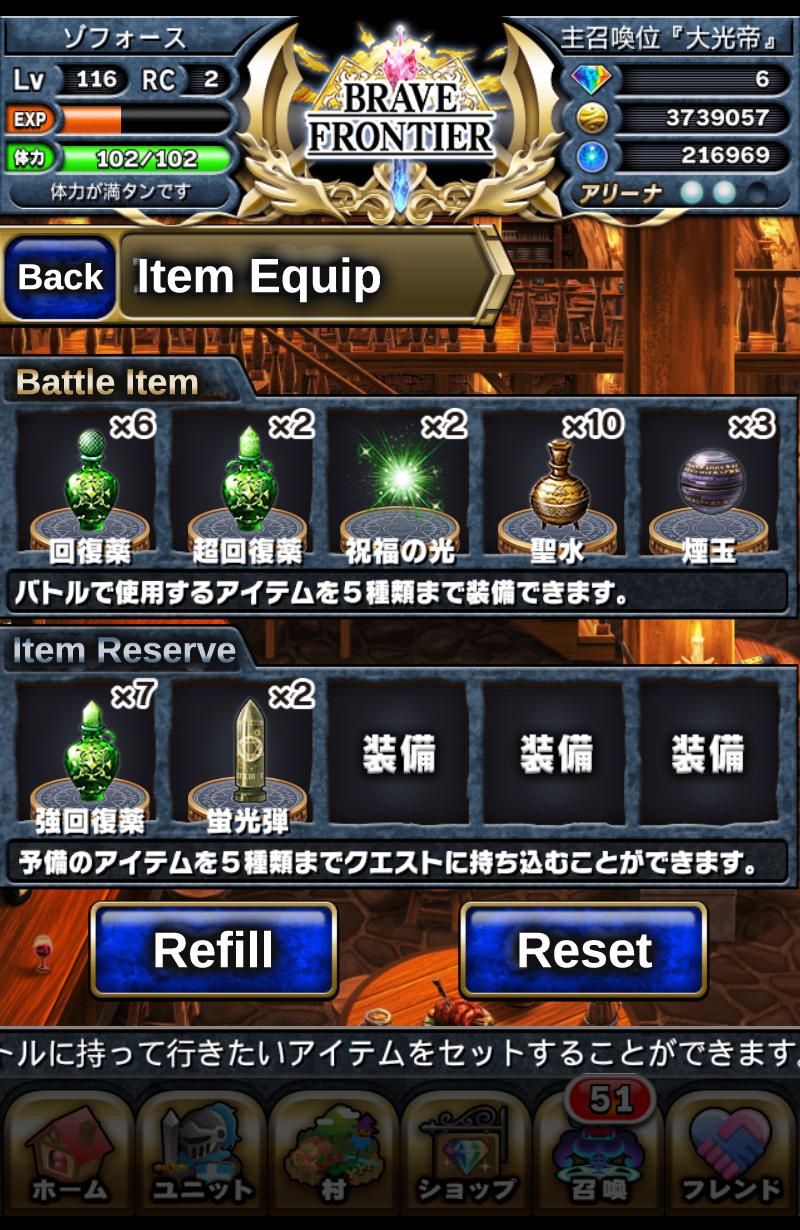
3. The items tab needs some elaboration, as items function differently from regular quests/trials. For raids, you have 3 buttons for items, which are item list, item equip, and item sell. You are able to use 2 items sets, but not both at the same time. Let me explain. You are given Battle Items and an Item Reserve. You can only use Battle Items while fighting mobs/bosses, but you can use both battle items and item reserve while scouting the map. A Japan Raids update allows your Battle Items and Item Reserve to be switched and swapped, so that will make carrying items much more convenient.
A List Of Raid Items and Their Uses Here, Courtesy of App Invasion.
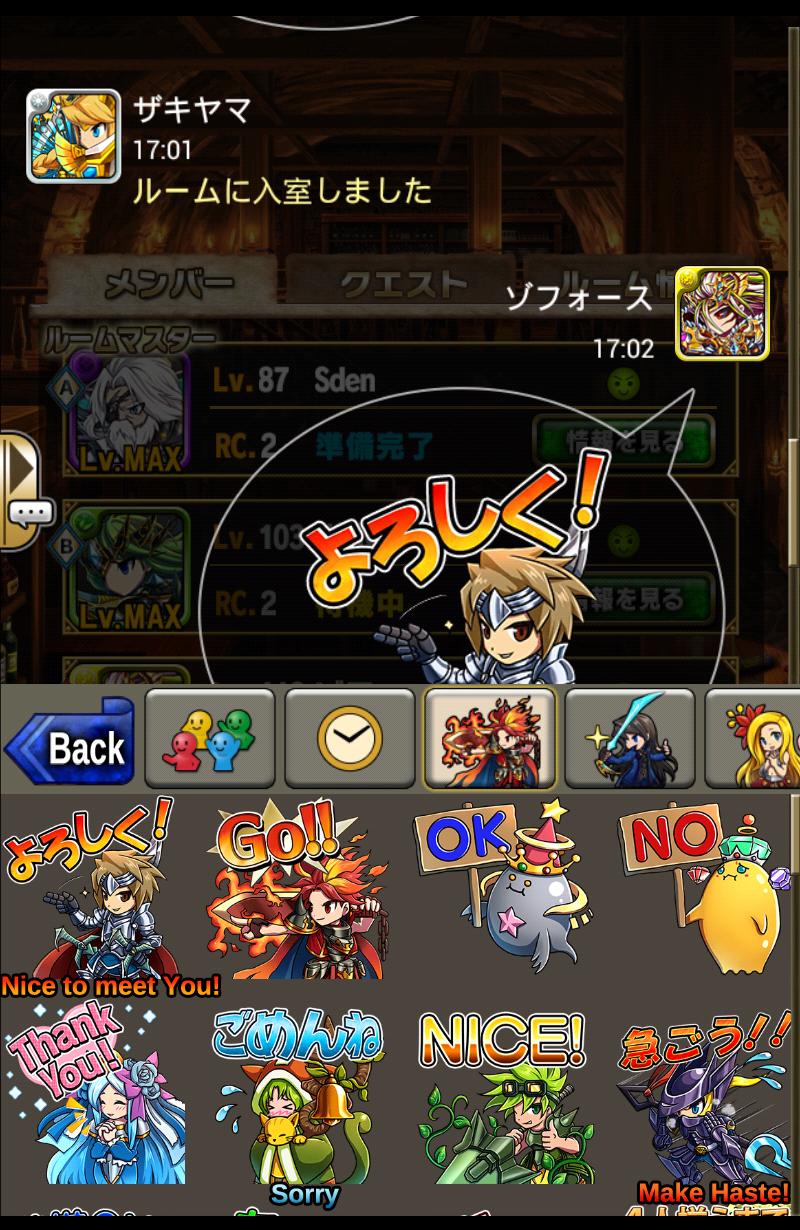
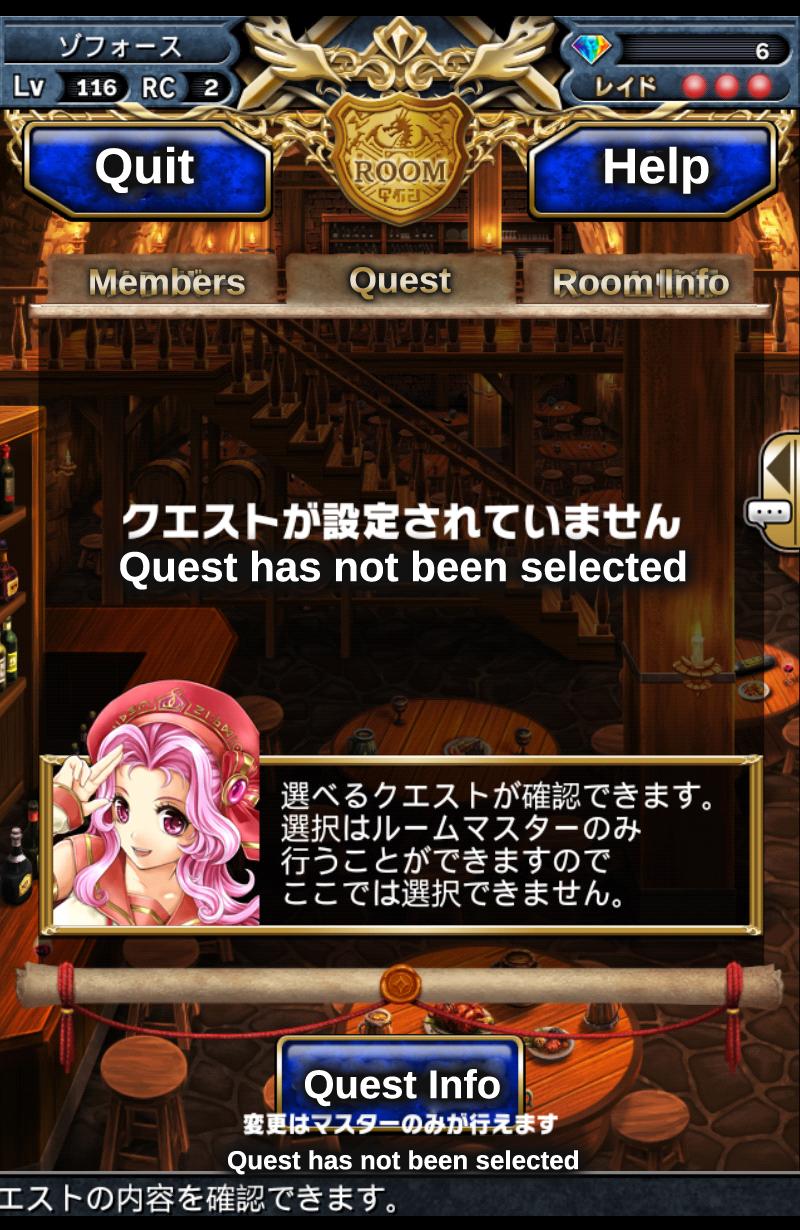
4. One last thing before we get to the battle! If the Room Creator isn’t ready, the raid will not initiate. You’ll have to wait until they initiate the raid. You can also press the cancel button if you want to rearrange your squads, items, or friend. You can communicate via Raid Stickers, but no text chat/typed words can be used. Lastly, if for some reason Raids isn’t started, it either means the Room Master is inactive or they haven’t selected a quest. If worse comes to worst, you can click the button on the top left and quit at any time.
5. Let’s check things off. You have your teams, items, and friends all ready to go. You/the Room Master is satisfied, so they initiate the Raids. The adventure begins now! Lets lead out to the battlefield for glory and riches beyond your wildest dreams!
Part 4: Battle Mechanics and Procedures
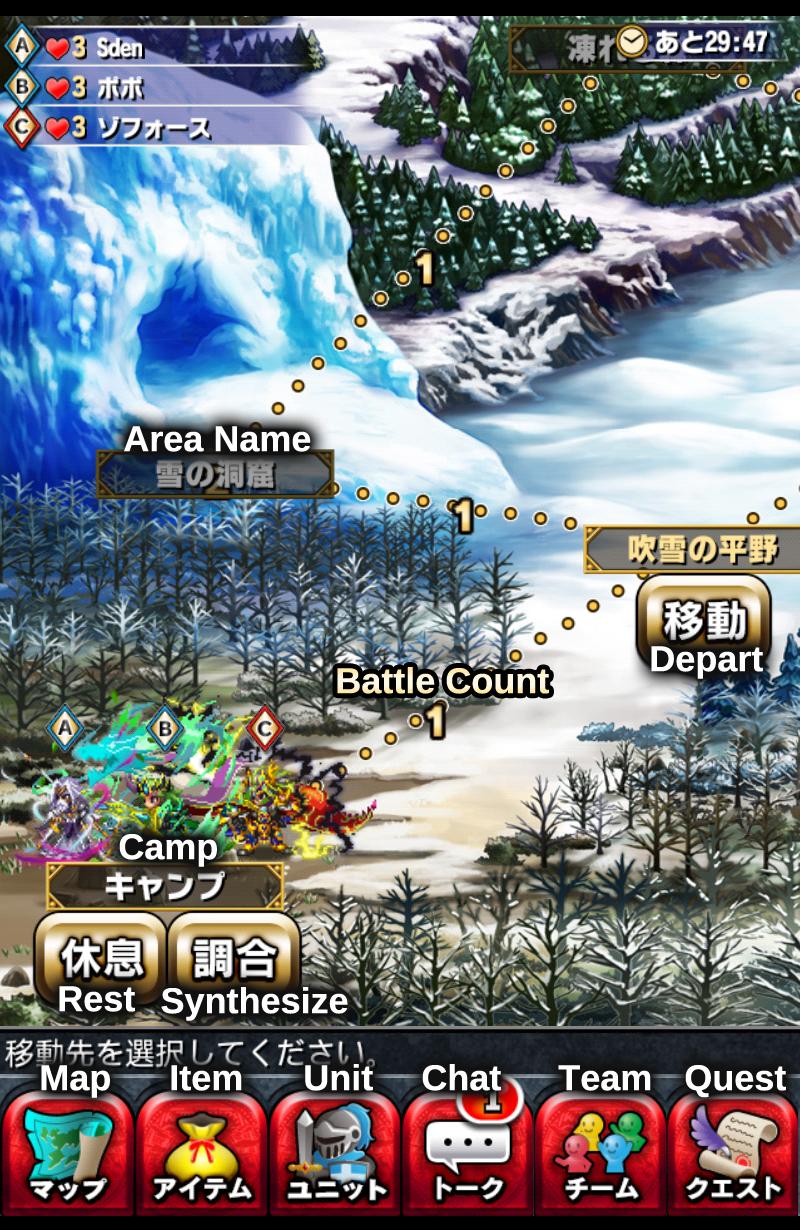
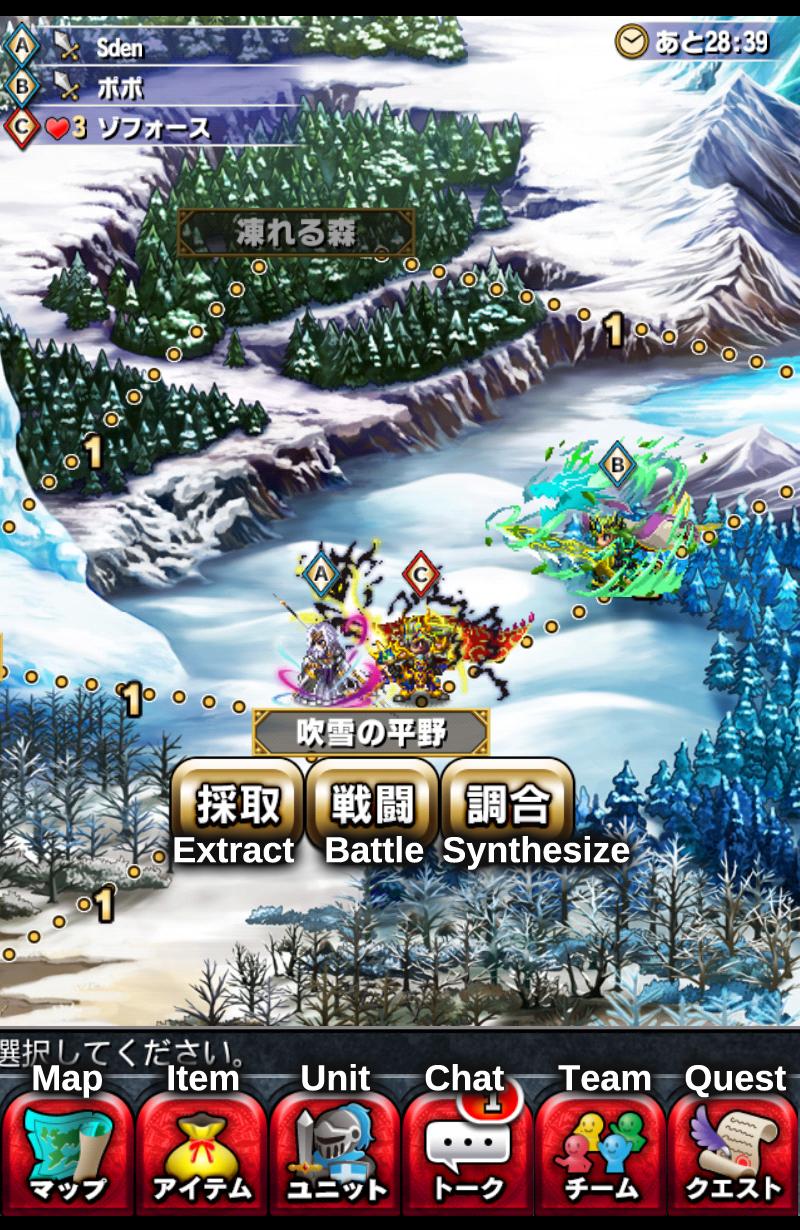
1. Once in the raid map, you are brought to this screen where you and your friends (if you are with them) start at Camp, a base where you can Synthesize Raid Items or Rest (resting revives dead units and gives them 1% of their HP back, similar to a Revive/Revive Light). From there, you are instantly brought to the mission objectives, which display a short story on the aforementioned boss, who you have to kill, and how many of the boss you have to kill. From there, you can depart from camp and go to different areas depending on the map. Each movement costs one battle count, or one turn.
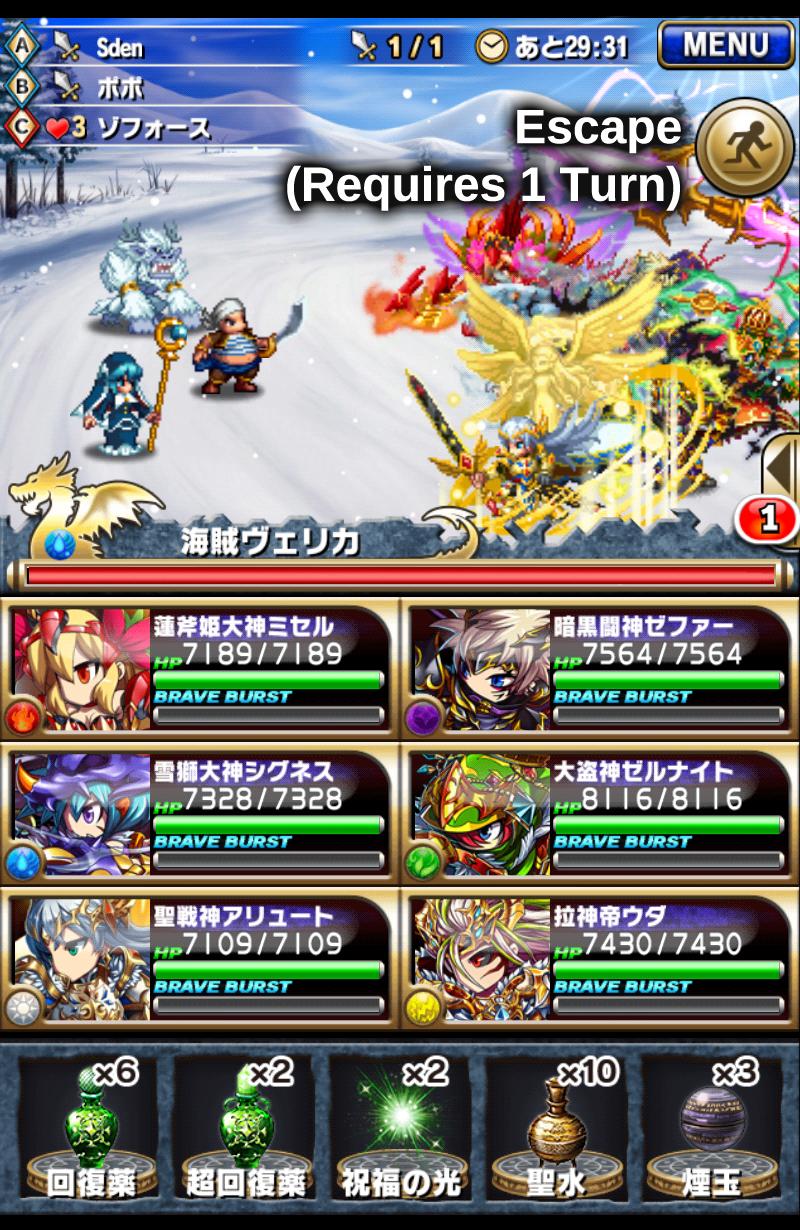
2. Once you have departed from camp, every movement you take brings you to a battle scene. Even returning to camp brings you to a skirmish with some mobs. You can choose to either attack the mobs or flee, which costs you one turn and allows the bosses a turn to attack your team. There can be multiple stages to each movement, as each block is not limited to one wave of enemies.
3. On every area that is not Main Camp, you are given 3 options. You can battle the mobs in that are present in the area, you can extract materials (raid-exclusive) which can be used to craft Raid Items, or you can Synthesize Raid Items while on the map. However, your main objective is finding the boss. /u/iAffect made a great guide over RC2-RC3 boss locations, so I highly recommend checking it out!
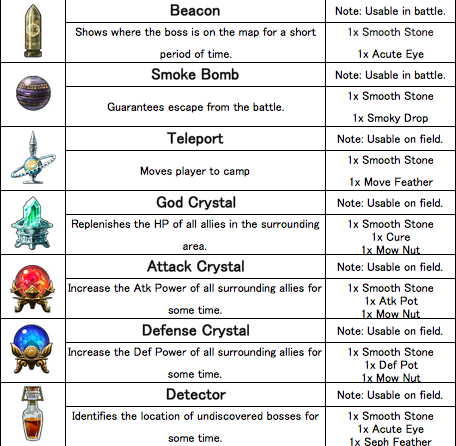
4. Once on the map, you can scroll around to find out discovered bosses. The Raid Item Beacon can help greatly with this. I will explain the items below and their uses in more detail below! Some bosses are hidden and are randomly triggered when you step on the area they’re hiding on. You can use Detectors to show undiscovered bosses for some time. Once you see the boss, give it your all, crush the boss, and emerge victorious! You have beaten the raid boss!
5. Lastly, an important thing to cover that is pretty unknown is lives. You are given 3 lives for any raid mission. When the raid boss wipes out all 6 members of your team, you are sent back to Main Camp and lose a life. When you get to 1 life, your name starts to flash. Upon dying for a third time and losing all your lives, you are sent back to camp and given the chance to use a gem to revive. If you choose not to revive, you are sent back to the Raid Room and cannot enter the Raid anymore. If you do use a gem, you are restored to full HP and you get 3 lives back. There is no limit to the amount of times you can revive in a given Raid, only as long as it is within the 30 minute time constraint.
Short Raid Items Guide
- Beacon Shows where bosses are on the map. This is useful if there are multiple bosses present or if the map is large/hard to navigate. Usable in battle Carrying Capacity: 10
- Smoke Bomb Allows 100% escape from a battle. Some raid bosses prevent you from fleeing, and therefore if your Flee fails they can attack your team while you may remain without mitigation for one crucial turn, possibly spelling death for your team. Usable in battle Carrying Capacity: 3
- Teleport Allows you to move to Main Camp instantly. Useful for when you need to heal/revive deal units and cannot deal with fighting the mobs in each area. Usable on field Carrying Capacity: 1
- God Crystal Heals all surrounding allies in close proximity to where this is activated. Good for emergency heals outside of the boss battle. Usable on field Carrying Capacity: 3
- Attack Crystal Increases ATK power of all surrounding allies by 10% for 5 minutes. Great for quickly killing raid bosses with high defense or mitigation. Usable on field Carrying Capacity: 3
- Defense Crystal Mitigates 10% of damage taken for all surrounding allies for 5 minutes. Very Useful as this mitigation will stack with mitigators and is useful against hard hitting RC 4 & 5 bosses. Usable on field Carrying Capacity: 3
- Detector Identifies the location of hidden bosses. Veru Useful since some bosses are incredibly hard to find. Can save you a good 3-5 minutes of searching for the boss.Usable on field Carrying Capacity: 5
Part 5: Victory! Let’s Claim Our Prizes
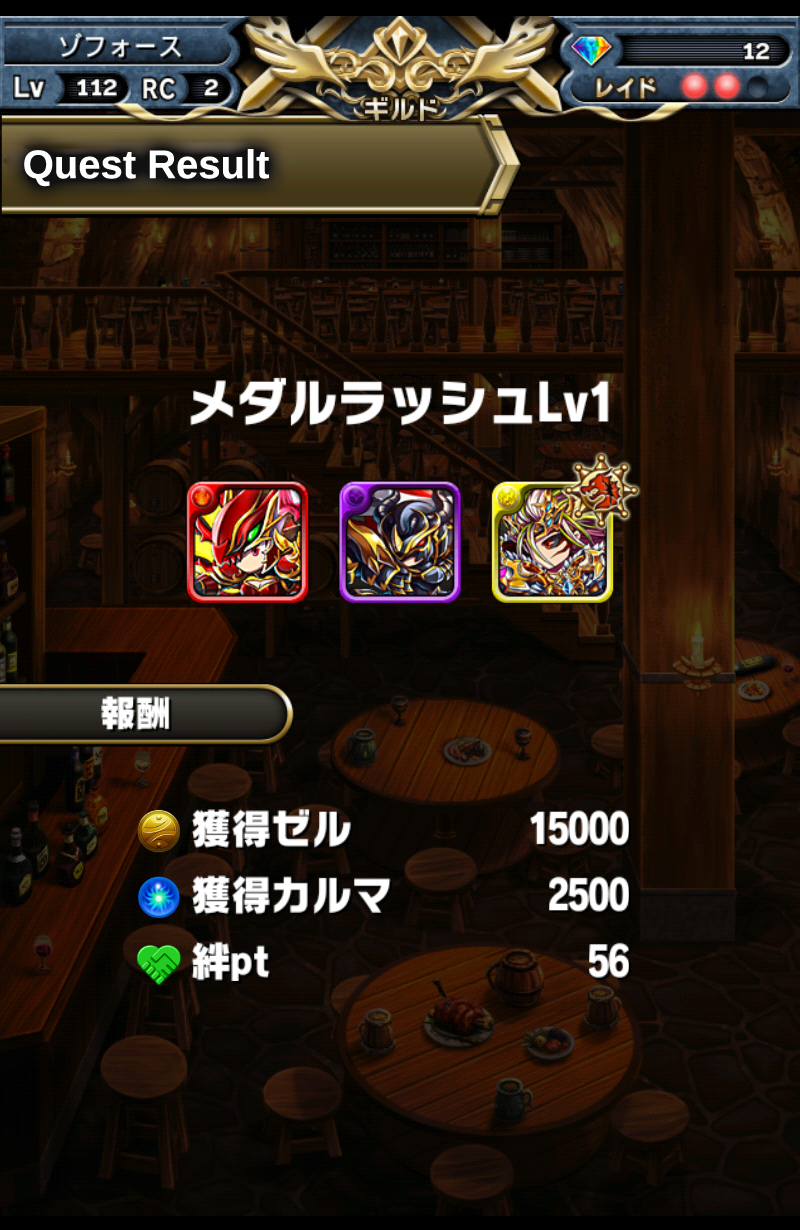
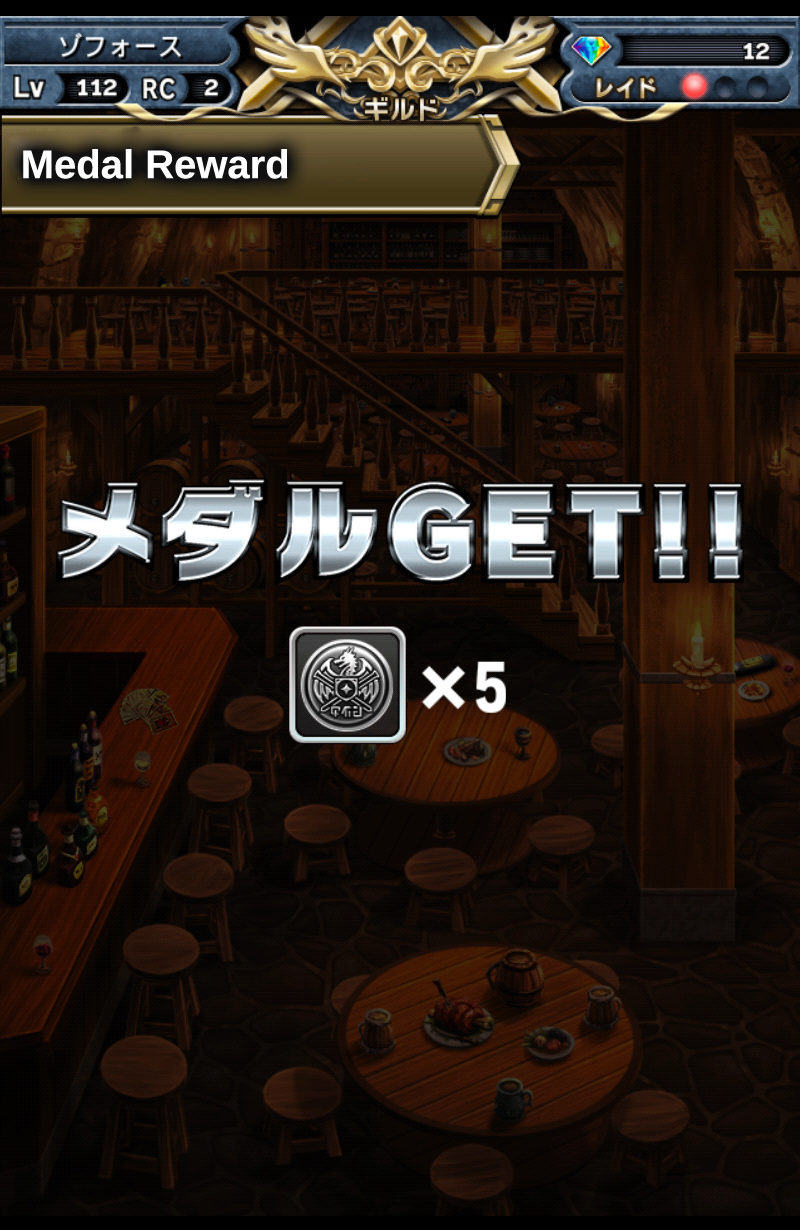
1. Congrats, you have defeated the raid boss! The results screen should look like this, where you get some Zel, Karma, Items, raid materials, and Raid Medals for your contributions. A contribution number is given based on your contributions to the raid.
2. You get more points via these three methods. You can either
- 1: Deal a large portion of the total damage to the Raid Boss
- 2: Deal the killing blow to a Raid Boss (a cracked medal by your leader icon shows who dealt the final blow)
- 3: Use of raid items during the Raid
These methods are very useful for getting the most points. Contribution points are on a scale from 100 to 400, adding 100 per player. The higher your contributions, the more medals and raid materials you get!
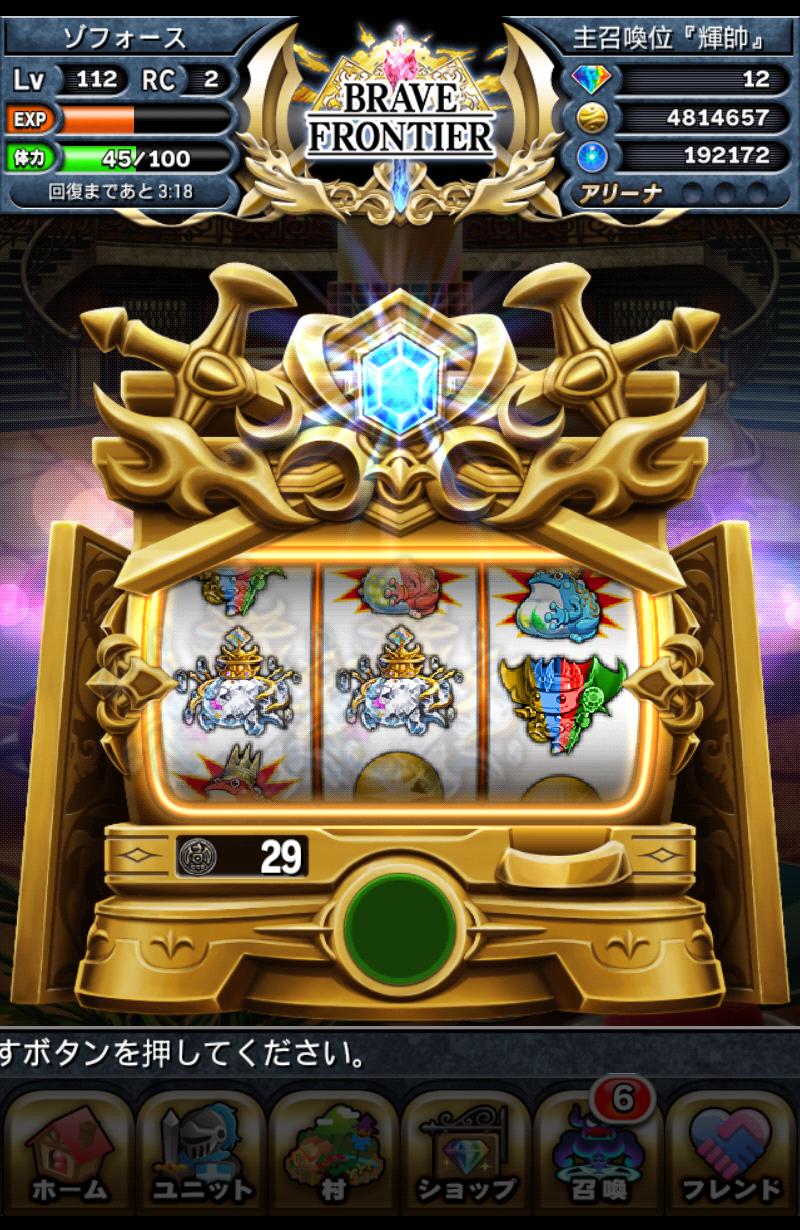
3. The battle has ended. You have earned yourself some Raid Coins, which you can spend in the Imperial Capital Randall at the Slot Machine Congrats!
Raid Slot Machine Can Give You:
- Jewel King if items don’t match up
- Jewel Units
- Metal Units
- 1 Raid Coin
- Raid Materials
- Spheres
- Imps
- Burst Frogs
- Sphere Frogs, but they are very rare!
4. Celebrate! You’ve done great things! :D Have fun in raids!!!
Pro-Tip: Having 1-3 leechers (AKA alt accounts) and with only you attacking the boss can increase your item earning by over 400%!!! Useful for super-rare materials.
Pro-Tip: Medal Rush, when that is released, can allow you to get ~20 Raid Medals a run in RC3. It’s super worth it, so keep an eye out! Also, bring poison, as the boss has millions of HP!
- These Features Are Currently Unavailable Now.
Part 6: Closing Statement
I feel that Raids is great and integral to keeping our community together, and is a great way for players to interact in ways that they have never interacted before. However, the Malice Jewel grind gets tedious fast, so I can’t say it will stay fun. ;) But, if you’re ever ready for a half hour or so of fast paced, raid boss fun, Brave Frontier Raid Battle is there for you, all the time. Let’s cheer for the release of Raid Classes 1 to 3 and for the many hopes for Raid Class 4 and 5 when they come out! May many challenges be ready for us, as we are prepared!

Recent Comments