Hearthstone Deck Building Guide
Hearthstone Deck Building Guide by CynthiaCrescent
Preface
This article is written as a multi-part guide that has its base in philosophy, although real-world and visual examples will be provided. It’s kind of a side-bar project, as there’s not many resources for such a new game.
I wrote this having about 6 years of competitive Yugi-oh! under my belt, and having done some direct research on the subject with MTG, a game that’s much more similar to Hearthstone.
Opening
Hearthstone is a relatively new CCG, and the card pool is therefore significantly smaller than some of the aforementioned games. Blizzard’s card releasing schedule also seems to be significantly slower. Thus at the moment there are not that many deck archetypes/combinations/etc. being discovered or played yet. Eventually this will change, and those with good deck-building skills will have a significant advantage in the long run. We’re already seeing this now to an extent with recent tournaments results after very new additions of cards within the month.
Objective
The plan is to lay out the fundamental principles of good deck building. It’s not meant to be comprehensive nor ground-breaking, instead to sum up established knowledge that may not be known to many players. After all, Hearthstone is a casual game by design.
This would also reduces net-decking to an extent, not that people would ever stop whining about it.
Audience
So who is this for? Well, mostly semi-experienced player, because deck building isn’t really something you’d want to learn just coming into the game. This is where you feel like you have a good understanding of the mechanics and interactions within Hearthstone, and want to personalise your experience more, ‘leaving a mark’ one would say.
Those who’ve had excellent deck building skills from MTG would not need it, although it might be quite charming to look at.
Part 1: Terminologies & Concepts
Note that concepts of mana cost, battle cry, effects, mechanics etc. will not be covered
Terminologies
- Tempo: Advantage gained when a player is able to play more/stronger cards in a shorter time frame due to efficient use of resource. Can also be thought of as “the upperhand”, tempo is the ability to dictate the flow of the game, expanding one’s option while reducing their opponent’s.
- Card advantage: Also known as “value”, depicts the difference between the immediate amount of resource that a player has access to, in this case cards. It’s also a companion concept to tempo, and are the two most important indicator of a how a game is proceeding.
- Board control: The advantage in being able to play threats first and respond to the opponent’s accordingly. In hearthstone, commonly minions have to wait a turn before they are able to attack, so placing your minions down first usually means you can choose the trades or deal damage, being ‘active’ instead of ‘reactive’.
- Burn: spell with damage used straight against the enemy hero instead of minion(s), weapons aimed for the face, and can also sometimes cover Charge creatures aimed for the enemy hero.
- Reach: the ability to pull out unexpected damage/instant damage that the opponent cannot immediately react. The more burn a deck has, the more reach it has. Some decks have reach even without burn, by playing minions like Ragnaros or Ysera, or a spellcard that is board reliant without instant charge minions like Bloodlust. Burn could also be combined together, like Aliki’r + Rockbiter, Force of Nature + Savage Roar, to deal instant damage, unlike the minion-wait-next-turn-hit-face concept. Since HS doesn’t have instants or trap/quick-play spells etc., the ability to stop ‘burn cards’ are relegated to decks with specific secrets.
- Threat (usually minions): Something that will eventually defeat the opponent should it be left unchecked. A Deathwing is a threat. A Wisp is a threat. All threats are equal, though some more than other. A Ragnaros, for example, is a large, slow threat. A Bluegill Warrior, in contrast, is a fast and smaller threat. Can also be referred to as “questions”.
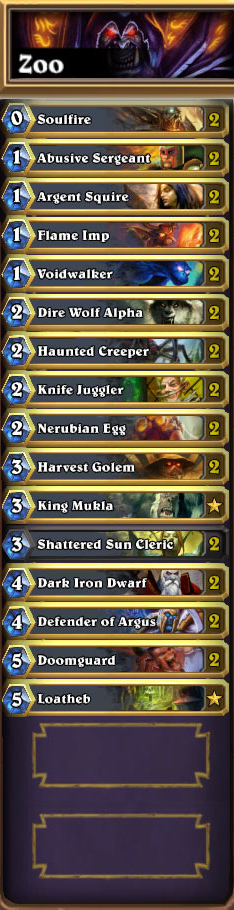
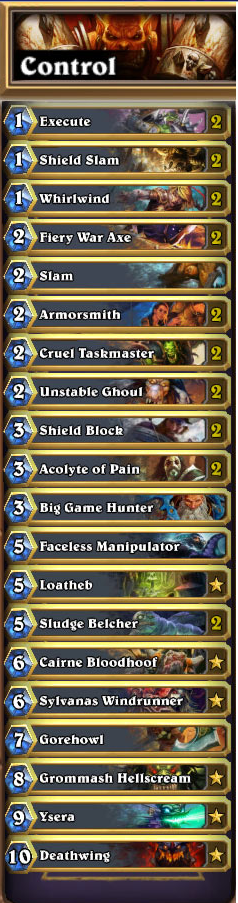
- Win Condition: A, realistic, way to win the game. Naturally, you can’t expect to play a deck full of Wisps and Goldshire Footmen to win a game, even though they are technically threats. Win conditions are either threats or effects packed inside a deck that helps the deck to kill the opponent. A heavy control deck like Control Warrior can run Grommash, Sylvanas, Ragnaros, or even Deathwing as win condition, with other cards fitting in to steer the game into a direction that a player can use a win condition to defeat the opponent. It’s possible for a deck to run out of win condition entirely, seen frequently in control vs. control matchups, and often games go into fatigue. An aggro-midrange hybrid like Zoo can have 20 different win conditions in the deck, however, as they rely entirely on their solidity and efficiency to overtake the game.
- Answers: a way to deal with threats (questions). Obviously, a threat can be an answer in itself. A Chillwind Yeti trades with an Ancient Brewmaster. They’re both questions and answers. However, plenty of answer cards are not threats of there own. Assassinate, or the infamous Flamestrike, are ‘reactive’ cards, that rely on opponents being ‘active’. They literally won’t do anything without interaction, thus they cannot be threats.
- Meta: short for ‘metagame’, not to be confused with ‘metagaming’. In a HS context, this usually means the current set of popular decks and archetypes that are being ran. Zoolock, at the moment of writing, is a very meta deck. It’s popular, it’s strong; and every other deck has to take it into consideration.
Deck archetypes
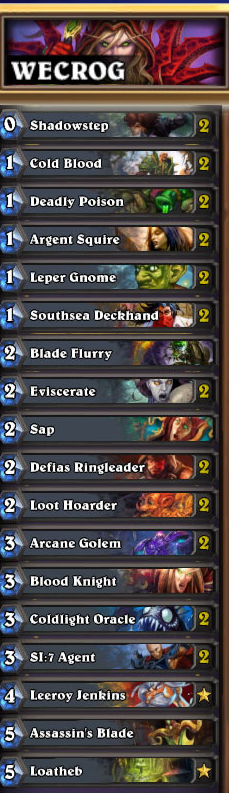
- Aggro: Decks that attempt to kill your opponent as quickly as possible. These types of decks put an emphasis on converting their resources in to direct damage (a.k.a burn) or efficient cheap minions to take early game tempo and end the game. They may also run disruptions effects (silences etc.) in order to guarantee the success of their game plan.Backspace Rogue is a good example of this.
- Control: Decks that attempt to slow the game down through attrition, and aim to overtake the late game (usually 7/8+ mana turns) due to the sheer power of their minions or spells. Their decks are built upon strong late game cores that can often overtake the game on their own should they be left unanswered, while the rest of their cards revolve around getting to this point. Control Warrior is a prime example.
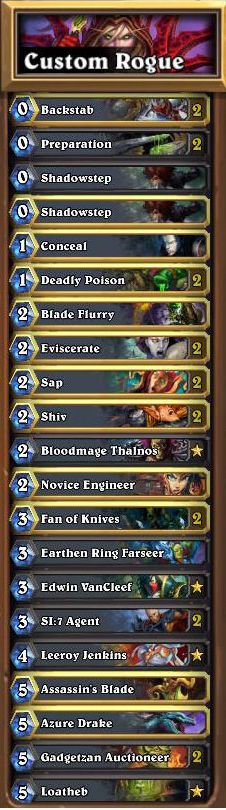
- Combo: Decks that utilise interactions between cards to be powerful enough that they can often overtake games by itself. These decks rely on power, speed and consistency to win.Miracle Rogue is a good example of this. On a smaller scale, there are also decks that is built on a smaller combination (synergy). Token Druid is a good example of this.
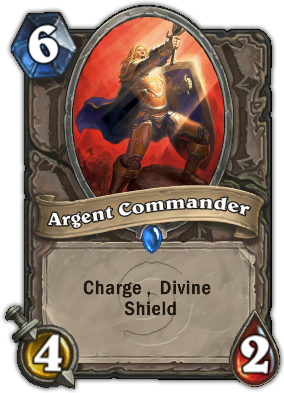
- Midrange: The ‘middle ground’. These decks don’t usually have amazing early plays or amazing late game monsters, but rely on their arsenal of effects to climb back from an extremely early deficit, while building enough of a board presence during the mid game that can overtake or rush the enemy down before their late game threats can swing games. They rely on good mid game minions like Fire Elemental or Argent Commander to make good trades or to put the opponent at a desired amount of health to execute the rest of their game plan. Midrange Shaman is an example of this.
- Hybrids: There are many combinations of the aforementioned archetypes that plays to the strengths of both while sacrificing a bit in power/consistency. Zoolock is a good example of a aggro/midrange hybrid.
- Ramp: A bit of an odd one out, as it’s only accessible to Druid and arguably Warlock. Druid Ramp uses Wild Growth and Innervate to bring out bigger creatures/combos earlier than they normally would be able to, essentially ‘cheating’ mana costs at the price of not affecting the board state directly.
Match-ups
Generally, the rock – paper – scissor balance is usually Aggro > Control > Midrange/Combo > Aggro. The balance of the current hearthstone meta isn’t like this due to specific power levels and the general lack of options, but from a pure strategy perspective should pan out like this.
Match-ups in game typically depends on who’s the faster deck. Aggro will try to kill Midrange early, Midrange would try to kill Control early. There’s usually the ‘defensive’-side, which tends to take board control, and the ‘offensive’-side, which tends to go for damage more often, with slower decks being the former and faster decks being the latter. This is crucial in making decisions regarding later parts of the guide as to what kind of game speed are you looking to go for. It will be further elaborated down the line.
Part 2: Card Selection
- Threats
This is a concept I’ve touched on briefly (very briefly) during the last part, and it deserves further explanation. As said, a threat is something that’s when not dealt with, will cause the opponent to lose. Anything minion that can attack is technically a threat. If you get hit by a Wisp 30 times in the face, you’ll lose. Obviously, not also threats are the same, and Hearthstone is filled with unique ones.
Let’s start with our old friend Wisp. It’s a neutral 0 mana 1/1, with no other text or type. Wisp only has the 3 most basic perimeter for us to look at: mana cost, health and attack. When you look at the card in a vacuum, it actually doesn’t mean anything. All stats’ values are relative, and changes with the game and the board state.
Take a Young Priestess as our next example. She’s a 1 mana 2/1 that has an effect, which we will not discussed at the moment. Say you play a Wisp on turn 1, and the opponent play a Young Priestess on their turn 1. You can then use your Wisp to trade with the Young Priestess. This is an example of Threat Equality. It doesn’t matter what is played first or who did it, those two threats, while going directly against each other, will trade evenly.
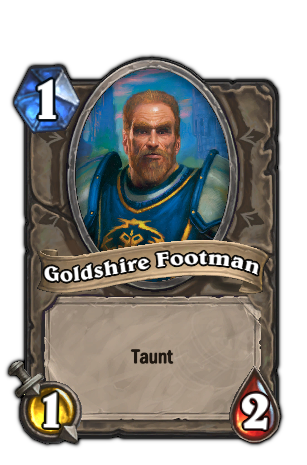
However, take a Goldshire Footman. He’s a 1 mana 1/2, the same mana cost and the same total stats as our Young Priestess. However, in battle with a Wisp, he’ll survive with 1 health. This is Threat Inequality. In this extremely basic and specific scenario, Goldshire Footman is better than a Young Priestess. Naturally this is a rather unrealistic example, but the concept is the same. Your cards are selected based on what you want them to do, instead of what they look like in a vacuum.
- Efficiency
A rough measure similar to ‘value’. It’s the determining factor between a card’s effects and presence to its opportunity cost. In the most basic example of the Wisp: playing the card gives you a 1/1 with no text, while the cost is the card itself. Inexperienced deck builders (and players) often overlook the card cost itself, and therefore not realising how many cards simply do not have the effects to justify their costs.
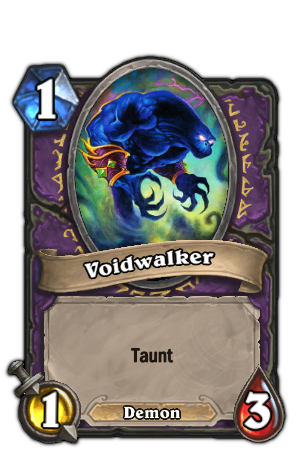
A card efficiency, as eluded to before, cannot be measured in a vacuum. Depending on what the deck you’re building is designed to do, a card’s value should always be compared to its alternatives. There are a few ‘strictly’ better scenarios in Hearthstone, when comparing our Goldshire Footman to, say, a Voidwalker. Certainly, there are corner cases where a Goldshire Footman are of equal value if not better than the Voidwalker; but these are not worth taking in mind, as it’s impossible to account for all degrees of variance.
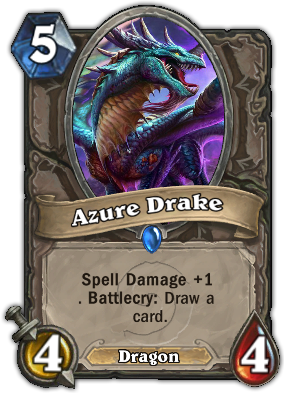
A lot of card selection decisions come with experience playing in a specific metagame. Take Azure Drake. It’s a 5 mana neutral rare Dragon (a type which currently has no special interaction), with a 4/4 body that has Battlecry: Draw a card, and a continuous +1 Spell Damage effect. If you put the card in a specific scenario: on turn 5 (you go second), you drop Azure Drake on an empty board and end the turn. On turn 6, the opponent plays an Argent Commander and kills your Azure Drake. The end result: it’s your turn 6, you have an empty board while your opponent has a 4/2, and you have effectively replaced the card you used to play your Azure Drake. You should consider how often this situation happen in a specific metagame (do a lot of decks run Argent Commander), in a specific match-up (does the Druid deck you’re trying to beat always run Argent Commander), and whether or not it’s worth it (does giving up tempo worth digging one card deeper into your own deck).
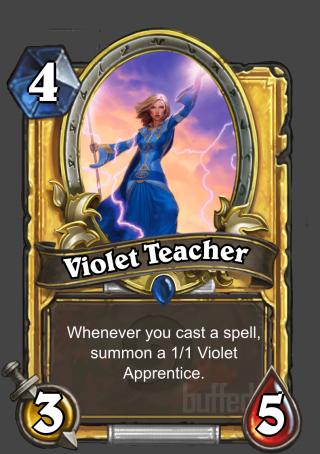
In the card selection process, we would want to look at both a card’s body (if it’s a minion or a spell that summons a minion), and its effect. Think of a Chillwind Yeti, a 4 mana neutral 4/5, with no card text. He has no strictly better or strictly worse alternatives. Do you want him to be a part of your deck? If yes, think of his alternatives. Is a slightly better body, for the same mana cost, worth a possibly negative effect (like Anub’arak Ambusher)? Is a slightly worse body, for the same mana cost, worth a positive effect (like Violet Teacher)? Card synergy is very important here, as if there are no ways to abuse a seemingly negative effect, or no ways to take advantange of a positive effect, suddenly the vanilla card becomes a better choice. This is a matter of card efficiency.
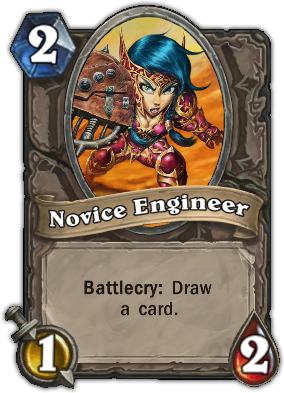
Another good rule of thumb is to look at raw mana cost. An Arcane Shot deals 2 damage for 1 mana. Literally nothing is better when you look at damage/mana cost ratio. The Chillwind Yeti mentioned above, is also an extremely good body for its cost, and is often picked because of it. However, it’s a lot more frequent that card efficiency outweighs mana efficiency. Take Novice Engineer. Even though her body/cost ratio is terrible, she’s a lot more often picked than the aforementioned Wisp simply because she replaces herself. Her old body (a 1/2), while piling the same amount of stats as a Goldshire Footman, was considered one of the most broken cards available, and is ran double copy in pretty much every deck.
- Consistency
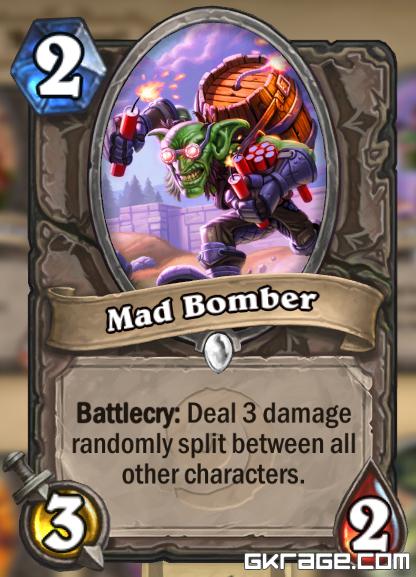
It’s no secret that Hearthstone is a game full of RNG (short for Random Number Generation, replacing ‘randomness’ in cases), sometimes as a means of balance. If Mad Bomber wasn’t random, he would be extremely insane as a card. In such an environment, consistency is an even more important factor. Fact is, a better built and more consistent deck wins more over a large sample size. Since we cannot control luck (or variance) it’s crucial to manage RNG to your own advantage, or simply build a deck that minimises bad RNG it may faces. Mad Bomber himself maybe the most broken card in the game if RNG always goes your way, but that’s flat out impossible, and his lack of consistency is why he’s so rarely played. However, in a deck that runs Acolyte of Pain for example, he might be run in tandom for synergy.
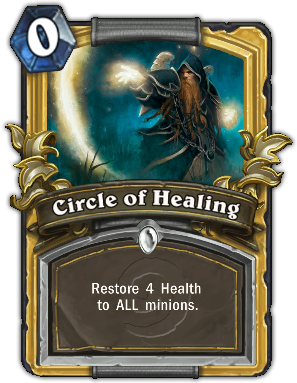
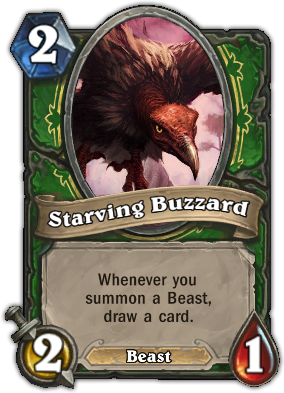
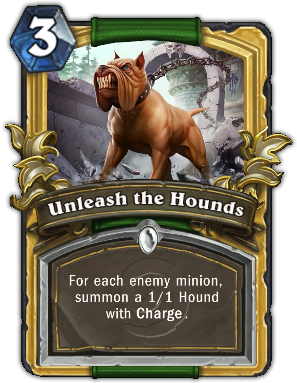
Synergy is an extremely important concept, and is key to building a deck with a good strategy and a purpose. A deck without any synergy, while by its nature can be extremely consistent, will fall flat against a less consistent deck with powerful synergy. The problem, of course, with synergy is that the more synergy your cards all have together, the more risks in consistency your deck has. A card like Circle of Healing has tons of synergy within a well-built Priest deck, and can often wins game. However, if you don’t have those synergy ready to go, it’s either an extremely dead card or a very inefficient one. A balance between card dependency is important: the less consistent a combination is, the more powerful it needs to be to make up for its inconsistency. Obviously, the best combos are the ones that are both fairly consistent and powerful, and should be the aim of the deck. An example of this is the Starving Buzzard + Unleash the Hounds combo. Both cards are good enough to be played on their own merits, but working in conjunction, they can simply destroy a game.
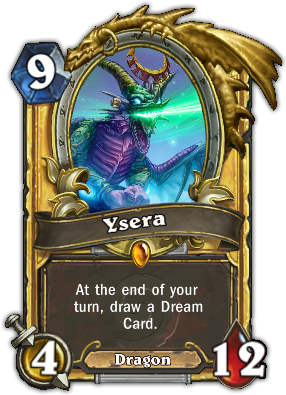
Another type of consistency is mana consistency. In a game where it’s fairly exclusive to manipulate how much mana you have to work with (only Druid has this ability directly), it’s important that your deck can actually play the cards in them. A Ysera is indeed powerful, but she won’t be playable until turn 9 (or less if you’re a Druid). During any earlier turn, she’s effectively worse than a Wisp. Thus, if you plan on running these high-cost, late game monsters, your deck has to have the ability to support itself during the turns when you can’t play them. If your deck has a Ysera, but finds itself dying often before you can play her, or just simply cannot play her as she’s stranded in your hand while you try to deal with the fact that you’re 1 card down for those first 9 turns, then maybe she just doesn’t belong in the Deck. A card is only worth a card if it can be played. A card is only consistently worth a card if it can be played consistently.
- Niche cards
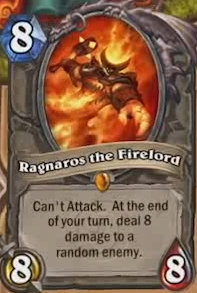
Sometimes a card is simply necessary. Take Ragnaros the Firelord as an example. He’s a late-game card, so not very good with mana efficiency at times. His effect is also entirely random, so it’s even more RNG. However, his impact and effect is sometimes absolutely required for a deck. Your other cards can do the job of influencing the game state so that his bad RNG is minimised, and he can win the game for you. He can also turn games around in desperate situations, purely through luck. These are the types of cards the serve an extremely specific purpose, and will only fit your deck if you desire it. Niche cards should also be limited in quantity, but just enough.
Just enough to fuck things up.
- Tech cards
What are tech cards? Well, in a specific meta, sometimes there are just really powerful or popular decks that you meet really often. In such a case, there usually exist specific neutral cards that are usually really situational, too much in fact that it doesn’t belong in your deck.
However, these cards are just so good against all of the decks you’re meeting right now that they could give you insane advantages if you manage to get their effects off on the right targets. These are called ‘tech cards’ that you can throw into your deck in order to counter an opposing strategy, indirectly strengthening your own. Some decks do not have the slots for tech cards, but if you can, then they are certainly valuable.
While laddering, a tech card is one to counter the more popular decks, and increases your win rates accounting for variances. Playing in a tournament, however, a tech card is usually put into the deck to counter specific strategy that the deck is weak against.
Specific examples:
- Blood Knight: against Divine Zoo
- Acidic Ooze/Harrison Jones: against weapon heavy Warrior/Doomhammer Shaman/Assasin Blade Rogue
- Mind Control Tech: against Mid-range minion flooding decks and more, as more strategies and discoveries emerge.
Part 3: Arguing Over Strategy
- A Purpose:
Every well built deck has a purpose. If you’re building a team of individuals, what did you assemble them for? What is the primary and core reason that the team was put together? This is where the talk about archetypes from before come in. Usually a deck aren’t so specific that it can’t be described within the realms of archetypes and their hybrids. Of course, specific decks need specific “mission statements” that dictate what it does. Here’s some examples:
General Aggro: Play too many threats and/or deal too much damage too quickly that my opponent cannot respond before they’re already dead.
Aggro Rogue (Specific example): Play early small minions to get in damage before sweepers come out, then finish the game with charge creatures, and direct damage.
General Control: Slow down the pace of the game and disrupt the opponent’s board development with efficient removals, then play my threats later on in the game and win with them.
Control Warrior (Specific example): Uses cheap, efficient hard removals like Executes and Shield Slam to clear opponent’s threat, use weapons to stem opponent’s board development, use synergy like Whirldwind effect + Armoursmith + Acolyte of Pain to keep up on health and draws, then finish the game with threats like Ysera or Raganaros.
General Combo: *Using card draws until the desired combination and mana is available, while manipulating the board state to prepare for its resolve. Then, the combo gathered is so powerful or efficient that it wins the game.”
Miracle Rogue (Specific example): Uses cheap early effects like SI7: Agent, Backstab, Fan of Knives to keep the board clear and cycle the deck until you draw Gadgetzan Auctioneer. With its effect, continuously cycle through your deck with spells and dealing damage to the opponent due to the overwhelming card advantage provided. Then finish the game with Shadowstep Leeroy, which is easily assembled through the massive card draw.
Every deck must have a purpose of it wanted to win. If you cannot product one for your deck, it’s probably not very good. You’re not going to win a game without even knowing how to win it.
As far as archetypes go, that’ll be for another article, and more extensive hours of research. For the sake of keeping everything moderately succinct and straight-forward for everyone, I’ll not delve into it.
- Plan B:
Sometimes things just don’t go according to plan. It happens. Maybe you had terrible hands (that cannot be mitigated by just being better at deck building that is), maybe early game RNG doesn’t your way, maybe your opponent’s hand is too perfect. A good deck should win even when things go wrong. Well, how do you do that?
Firstly, you have to determine what is a good plan B? Well I can’t just tell you. I don’t know your deck, and I don’t know you. What I can tell you however, is the general approach. Naturally, you don’t want your Plan B to be susceptible to the same thing as your primary Plan is. If your plan A is to burst your opponents down with buffed Charge creatures, your plan B shouldn’t be weak to multiple Taunts. Your plan B isn’t supposed to be complicated or independent. It doesn’t even have to be particularly good. It just has to be there, as long as it doesn’t hamper your plan A.
What if a Miracle Rogue doesn’t draw their Gadgetzan Auctioneer, or the early pressure is just to much for them to be giving away a free turn to Conceal that Gadgetzan? They can expand early resources and spells to clear the board, the leading off the mid-game aggression themselves with SI7 and a giant Van Cleef, then locking out the game with a well-timed Loatheb. It’s not what the deck is made to do, but the deck could certainly do it.
- Repetition:
This is touching base with the concept of consistency we talked about in the last article. Just like a card, a strategy is only as useful as it is repeatable. Most of the general approach is largely the same. There are some unique approaches of course.
You attack me; I try to kill your creatures. If any of your creatures live, you win.
This was a quote by Neil Reeves, during the Semi Finals of an MTG Master Series.
Every strategy has a purpose, as stated many times above. It’s how a deck wins, after all. If you continue deny the opponent of this, you’ll win right?
The answer is a short and sweet “No.”
As Trump once said: “Not losing is not the same as winning.” (I’m sure many people shares the same sentiment, he just was the first one that I personally heard it from”)
Your deck also has to have a purpose of its own. Sure, a control Warrior can continuously deny kill all of the enemy Zoo’s threat and keep the board clean. However, if they run out of cards, or threats for that many, trying to stop the aggression, then they’re not winning. They’re simply losing the game slower. A Zoo deck that continues to draw two cards per turn will eventually overrun the opposition, if the opposition poses absolutely no threat to the Zoo player’s life total. In this case, the Control Warrior is actually disrupting his own deck’s purpose, trying to play to “not lose”. All the while, the Zoo deck is repeating what has to be one of the most by-the-book thing that they do. The Zoo’s strategy is not at all disrupted, though their board development might.
So what SHOULD the Control Warrior do? Well you have to stop dying first, of course. You can’t win if you’re dead. However, they have to be careful not to overextend with their resources. It maybe be tempting to Slam Execute that Nerubian, but what if he Doomguard to follow? Can you deal with it? Can you afford not to use them, and do something else instead with your left over mana? You only draw one card per turn, while they can draw two. Your answers have to be more efficient than their threats, or you’ll just lose by sheer virtue of running out of resources. What you should aim to do is be as risky with your life total as you can afford to, while sticking to your plan of developing big threats. Your threats win you the game, not passively answering your opponent’s.
- Predictability:
In Hearthstone, there’s no ability for a player to selectively disrupt an opponent’s play. A secret cannot be selectively activated, and no other card effect activates on the opponent’s turn. The eventual outcome of a play is instead determined by the factor of RNG in this game. We’ve all heard so many times how RNG wins games. That Juggled Knife could mean losing or keeping your 3/2. That Ragnaros hit could mean punching through your opponent’s 8 health or being swiftly slaughtered on the next turn. That Sylvanas steal could mean you’re ahead on board with an opponent’s Cairne or getting decked out by being forced to go full Northshire. It’s a substitute for MTG’s Instants or Yugi-oh!’s Traps (and Quick-play Spells, I know). Certainly, those games have RNG cards of their own, but none to the impact of RNG in Hearthstone.
While I feel that RNG cards in Hearthstone is necessary in a certain sense, this is not the place for that. Within the context of the article, RNG means that you cannot know the final play of the turn before waiting for the RNG to resolve itself (unless of course when the RNG resolves at the end of your turn). Many good decks (but not all of them) rely on how generally solid and consistent their gameplan pans out that they can build a deck on it.
We can go back to the good ol’ Zoo deck. The way the deck is built gives its player so many turn 1 and turn 2 plays that through drawing and smart mulligan, it’s almost impossible for the deck to have bad hands. Certainly, really bad luck can screw you over, but that’s just variance. Nothing beats variance, so we can’t account for that. With the card selection of cheap, efficient and sticky minions that things like Defender of Argus, Dark Iron Dwarf, and Abusive Sergeant almost always have a target to get their full value off. You play your cards so quickly that you can drop your Doomguard frequently and consistently early on with very few drawbacks.
The new Trap Hunter works in the same manner. You play good early minions (or minion spells) like Haunted Creeper, Mad Scientist, Webspinner and Animal Companion (that you mulligan into). You can almost guarantee early value with things to compliment them with Houndmaster or Eaglehorn Bow. In case you fall behind, Buzzard + Unleash the Hounds + Hunter’s Mark removes big threats and dig you deeper into your deck. Against control match-ups, slamming Savannah Highmanes wins games. The amount of times games turn out just like the player planned to is insanely scary, and is one of the reasons why this deck is so good.
- What now?
At this point, what kind of deck should you build? If you don’t know where to start, take a quick look at the archetype list. Fit any of the archetype with any of the classes, and look at what cards specific to that class that works with that kind of strategy. Then you fill in the slots of your deck based on the card selection guide. If you have spare slots, fill it with tech cards.
Let’s do a deck building exercise.
With the rise of Trap Hunter, I want something to counter Hunter. That’s my idea, but it’s not a ‘purpose’ per say. You’ll lose against every other deck thinking like that. First, let’s dissect Trap Hunter: they rely on the insane value of Mad Scientist and Bow, as well as mid-game Houndmaster to seal games. What are its weaknesses? They rely a lot on Trap value, has no heals, and they also have a hero power that does not affect the board.
From these observations, a minion-based aggro deck sounds better and better. The perfect counter is appearing. The best way to counter Hunter’s Trap, is Hunter’s Flare. Suddenly, we have our skeleton to work with.
Deck: Aggro Hunter
Purpose: Take advantage of the prevalence of Mad Scientist Hunter, have a good match up against them, while being a general aggro deck otherwise with the tools that Hunter has always had.
Alright, now that we have that in mind, let’s do some brainstorming.
Beating Mad Scientist Hunter
Flare: x2, hands down. Best card against secret, cheap, cycles itself. No argument.
Leper Gnome: x2, perfect 1 drop for an aggro deck. Does damage, is cheap, trades up.
Leeroy Jenkins: x1, best neutral burst damage card, can have synergy with Unleash the Hounds. Loatheb: x1, directly counters Buzzard Unleash, as well as efficient spells of Hunter.
Alright, our match up is already looking pretty good. However, a deck that only beats one other strategy is a terrible deck. Let’s fill the decks with good aggro cards, since that’s our strategy:
Kill Command: x2, Amazing mana/damage ratio, can target anything.
Eaglehorn Bow, Explosive Trap, Freezing Trap, Mad Scientist: x2, ironically enough, this trap core is perfect for an aggro deck. It smooths out your curve, gives you reach, and is also very card efficient.
Animal Companion: x2, an all purpose card that belongs in every Hunter Deck just because of the kind of value it gives. Starving Buzzard + Unleash the Hounds: With Leeroy already in the deck, and possible Leook draw from Animal Companion, this combo just fits. It gives you card draw, response well to early minion flooding, and synergies with the rest of your deck.
Hunter’s Mark: Cheap, synergies with Unleash, and is required to get through Taunts.
Haunted Creeper: Synergy with Buzzard + Hunter’s Mark, is a beast for Kill Command, is a cheap drop, very sticky, and is usually ignored.
Webspinner: A 1 drop that has potential to gives you late game reach, and with all the benefits of Haunted Creeper except for being sticky.
Suddenly, that’s a 28 card deck right there. The deck has synergy, a purpose, and a good matchup against a popular strategy.
There are many cards you that you could throw in for the last 2 slots, based on your perception of the way the deck is playted:
Undertaker: A good 1 drop that synergies grealty with the 8 other Deathrattle cards in your deck.
Timberwolf: Combos well with Unleash for a lot of damage.
Misdirection: More trap synergy, and is good for getting passive damage without minions.
Ironbeak Owl: A cheap beast with great effect, can be used to remove taunts, and cycles deck with Buzzard.
What we have, after everthing, is this:


Recent Comments