Allods Online Paladins In Depth Guide
Allods Online Paladins In Depth Guide by compassone
Table of Contents
1. Introduction and Basics
2. Skills
3. Rubies
4. 2H Physical In-Depth
5. Holy DPS In-Depth
6. Conclusion
Introduction
Paladins are a class that can be best described as a hybrid of a direct damage warrior and a holy caster healer. The Paladin Archetype comes in 4 types, split evenly amongst the more well-built races of each faction: Orc Reaver, Xadaganian Avenger, Kanian Crusader, and Elven Templar.
Special Ability – Barriers. One to three barriers that store the highest hits you’ve taken for ten seconds. After 10 seconds, they will break and you will take the damage. Paladin skills can be used to modify or reduce the damage taken from each barrier. This guide is meant to be a guide. It is not meant to be an end-all auto-win resource. As you develop your class, you will find that certain builds will favor you more than others. The builds and descriptions in this guide are meant to be a step towards your unique build. For this very reason, I will only entertain a “recommended” basic cutter build. The rest of your rubies are up to you to fill out.
Mark Functionality
![]()
![]()
Paladins unlock additional attacks by generating Marks of the Pariah on their target. These Marks last for 15 seconds and can go up to 3 stacks per target. Marked Targets can be DoTed with Condemnation, silenced with Penance, slowed with Heavenly Nova, or critically hit with Retribution. They can also be used to generate an AoE attack with Sacred Sunrise. Righteous Word will always apply a Mark. Crusader’s Blow will only apply a mark if actual damage is done.
Canon Functionality
![]()
![]()
Canons are the Paladin’s form of mana. They are primarily used for healing skills and Heavenly Nova, and are stored in your inventory in a single stack of 10-60 depending on your stat distribution. They recharge slowly over time and can be quickly recovered with a full out-of-combat Martyr’s Salvation.
Barrier Functionality
![]()
![]()
The barrier stores the highest one to three hits you’ve taken. Each barrier has an individual countdown, and will flash when close to being broken. Barriers are ordered so that the lowest timer is to the left, and the highest is to the right. If you take a hit for more damage than any of your available barriers, your LOWEST barrier is automatically broken and the highest hit is placed in the newest barrier. Barriers can store virtually unlimited damage, though some mobs and environmental effects may go through them. If damage is equal, the barrier does not break. Your biggest weakness with barriers is when a large amount of mobs attack for holy damage, which continually leak through. Your best use for barriers is against heavy-hitting, slow-attacking mobs and players like 2H Paladins, Melee Healers, and 2H Warriors.
You start off with one barrier by default, and unlock the second at Level 22. Your third is unlocked at Level 40. Barriers appear above your primary skill bar in round bubbles.
[New2.0] Paladins can now control barriers while stunned, meaning you can avoid taking lethal damage while stun-locked, to a point. You cannot control barriers while knocked down, paralyzed, or CCed from such effects like Fear.
Wand Power* [New2.0]
As of the current patch, wand power is bugged. Holy DPS will be harder than normal. Take that into account when choosing your class.
Archetype Members and their Racial Skills
Orc Reaver
Exhaust Evil, High Hit, Mark [New2.0] (no longer drains mana)
Xadaganian Avenger

Kanian Crusader

Elven Templar

[New2.0]With the introduction of the new DPS Rousing Shout and removal of Spear limits on Zealous Blow, all Paladins have access in terms of a general PvE/PvP high-hit attack.
Weapons
1H/2H Sword/Axe/Mace/[New2.0] Spear, Paired Sword and Dagger
Stat Point Allocation – Ultimately up to you, but my recommendation is Luck every point per my Old Spice discussion.
compassone Old Spice time. Look at your inventory. Look at all that green Luck swap gear, waiting for you to quaff that Luck Elixir that you can’t live without… Now look at mine. No gear here! You tell me I have to stat up for that super robot unicorn that’s about to spear us like a shish kabab and tell me to get armed for bear, because apparently unicorns are a subclass of bear. What do I use?
1. Strength Potion +60
2. Daily Strength Cash Potion +50
3. Strength Elixir +106
4. Strength Trinket +107
5. Maximize Strength +20“But wait? What about your other stats?”
Already balanced! All I have to do to get more DPS is to bump up Strength. Everything else is already exactly where they should be. Swap gear? Don’t need it. Found another upgrade for my wand? No problem, let me upgrade the one I already have and just put it back in the same slot. It became Legendary? No problem, I just got +3 Expertise and +3 Strength from my Wand. Expertise was fine before, it’s fine afterwards, and none of my other stats were effected negatively.
This guide is meant for classes that don’t need to spec into off-stats like Conviction and Faith. It can be used for those classes, but will have lower effectiveness.
With the advent of upgradable Astral Gear, it should be MUCH more apparent why I have continued to advocate for this. Once you balance your full set of Blue Astral Gear so that you have ideal or slightly subpar secondary stats (which will become par and above par as your Blue gear becomes Epic and Legendary), you will most likely NEVER have to rebalance your stats again. Upgrading your gear improves your stats slightly, so if they’re optimized before, they’re going to be optimized afterwards. Until you reach the Astral Gear balance point, most of your gear can simply be balanced with a few disposable green pieces of gear.
That’s why I’ve been using the following strategy.
Point Allocation via the Pivot Method
This is a justification of Luck stacking at early levels with the expressed goal of developing an end-game stat allocation method that minimizes dependence on continued stat maintenance and cash shop items to remain effective.Often times, players will /Z and ask what stats they should allocate. Undoubtedly, the most-widely accepted response is “Luck. Every last point.” There’s a bunch of varying reasons, such as “There’s not enough Luck gear,” or “it’s the most important stat” you can use.
At the end of the day, however, it actually has nothing to do with not having enough Luck or Luck being the most important stat.
It has everything do with the fact that managing a block of stats is much easier than managing an assortment of slightly balanced stats.
Look at it this way. Let’s say I level from 20 to 21. I get a Red Arrow telling me that my Finesse is low for my level. I can go ahead and throw a Stat point into Finesse and call it a day, and then look for Finesse gear, or I can ignore the temporary setback and throw it into Luck. Why? Because undoubtedly, I will come across high-Finesse gear at 22 or 23, and then be short on Expertise or Luck again. Stacking it all into Luck results in having a unique decently sized piece of what could almost be considered a second set of Earrings.
What about me? I have all 74 of my points in Luck. Why Luck? Frankly, it doesn’t even have to be Luck. It could be all Expertise or all Strength if you felt like it. I’m not lazy. I like math, but I don’t like doing math all the time. I’m practical.
It’s much easier to manage a block of 74 Strength or 74 Luck than it is to manage 32 Strength, 16 Luck, 20 Expertise, and 6 Finesse. However, relative to other skills, with the exception to Strength and Intelligence, at end-game, you’ll be hard-pressed to have too much Luck.
Player dependence on Luck should be minimal at best. For most new players, you will never go wrong with statting into full Luck. Dependence on Luck Elixirs. Potions, and Trinkets results in you requiring either gPotatoes, gold, or a time-locked cooldown to be able to reach a crit level that you find acceptable.
One of the most difficult roles a player can have is attempting to balance gear to be effective at-level. The pivot method utilizes three associated points to ensure that you can properly develop and upgrade your character with the minimum amount of gear swaps or recalculations necessary at end-game, where it will matter the most, as opposed to short term gains and losses, where a pick-and-choose mentality may result in the required purchase of a Water of Life.
Primary Pivot: Patronage
Your Patronage is your primary pivot. It follows the stat balance of a single piece of major-slot gear closely as you level and is easy to switch to any low stat quickly and effectively. There is no question what moving this pivot will do. At Level 42 with max Patronage, it is 73 in any major stat. If you are missing 7X Luck, you can readily switch it in. It takes no inventory space, so it is much easier to field-swap than a Potion.
Alternate Pivot: Alchemy Stat Potion “Slot”
Stat potions are flexible blocks of scaling stats. They provide the easiest way to obtain a smaller at-level chunk of stat points. These are equivalent to a swappable ring’s worth of stats in most cases. If possible, you want to localize your stat potion to the maximum possible. At Level 42, for example, you can opt for a +60 Strength potion over +45 Luck/Expertise potions because you get a +15 bonus overall from opting for Strength. Also, because not every stat is available, this is harder to pivot. If your maximum available alchemy potion is not in your primary offensive stat, then treat the potion slot as a piece of GEAR, NOT as a pivot. This maximizes your gained stat points. This does not happen at Level 42, but may happen at later levels as potions better than +60 may become available.
Secondary Pivot: Cash Shop Potion/Elixir
This pivot will provide you with either an easier or harder time at end-game, depending on your set-up. This can be considered a chest-piece swap gear in level. With the implementation of free daily 4 hour cash potions in your primary offensive stat (Strength/Intelligence), it has become more practical to get all your secondary offensive stats (Finesse, Expertise, Perception, Faith, Wisdom, Luck) in their proper places and buff with the shop potion. Raid instances or periods where you need to upgrade to Elixir-quality, you would simply upgrade to an elixir-strength primary stat. If it is unavoidable, then utilize a secondary gear set for daily potions versus elixirs. The reasoning: if you are 88 Luck short of your cap and plan to use a +88 Luck Elixir, you are forced to depend on that Luck Elixir to reach your nominal stat balance, or be ineffective once they tick out. The daily potion comes as Strength or Intelligence, so that will not help you with your 88 Luck deficit. If it does tick out, you have to switch in Luck gear in order to reach the nominal Luck level or suffer a lower crit rate. On the other hand, if all your stats are in relatively balanced range for your class, you can look at daily potions as a direct damage increase with no need to rebalance when using, and not require a second gear set when your potions wear out.
Locked Pivot: Stat Points
To minimize dependence, as opposed to the “what you need as you level” method, this is a long-term stat development that simplifies high-level gear modification, especially during endgame gear acquirement, when utilized. You should not consider a low stat warning in any stat to imply that you should put the stat there when leveling. Gear balance changes fluidly as you level, so you could very well stumble upon a +6 Finesse cape that fixes your Finesse at Level 13. You could very will discard that cape for an Expertise one at 15. You might have too much Finesse or Perception to be comfortable at endgame Good luck feeling you have too much Luck at endgame.Utilizing the pivot:
As you level, dump every last stat point into Luck, if you’re looking for an easy run. You can choose another stat if you wish, but Luck is the easiest one to devote to. If it breaks and you’re Level 47 and Full Mythic/Draconic and you’re in the rare state of nature where you’re luck-high, THEN buy a Water of Life. Until then, the benefits of a few reallocated stat points are negligible and not worth the mental effort required. This is nominally locked to minimize your cash shop influence on Water of Life requirements.
Balance your gear. Try to each your recommended stat balance. In most cases, start with Luck first, then your non-offensive accuracy/resist stats (Perception/Expertise/Faith), then your augment stat (Finesse/Wisdom), and finally your primary offensive stat (Strength/Intelligence). Any time you have issue reaching a stat and can’t find gear for it, apply your patronage or the maximum alchemy potion possible first. If you get too much, you can then swap out gear down to the nominal level. Do not be afraid to be a few points short or high, but don’t have it exceed more than +/- 15. Use your patronage first since you may have less access to higher-level alchemy potions in your alternative stats.
Do not expect to fill all your slots with Legends and Epics and hope it works out. Sometimes, sacrificing a few stat points is better than being heavily over your limit to the point that it is detrimental to your other stats. Go down a quality level if necessary.
If you are still short a secondary stat and have used your patronage, then select for potion. You should never have to use your elixir pivot if you have sufficient gear available. If it is REALLY necessary and you cannot balance any way at all, THEN select for elixir, but you shouldn’t need to use it.
Once you finish balancing all your secondary stats, all your remaining pivots can be converted to primary offensive stats.
If you manage to complete this process without using any pivots, you can enjoy a nice hefty chunk of more than 200 additional primary offensive stat points.If you manage to complete this process using only the primary pivots you have an additional augmentation ability.
-[Normal] You can use your secondary elixir pivot for the primary offensive stat, as needed (i.e. for raids).
-[Heroiconomic] Juggle. Put the elixir in your patronage stat, and move your patronage to your primary offensive stat, as needed (i.e. for raid bosses and harder heroics). This is especially useful if your stat is just 10 or so stat points shy of where you want it, as it gives your patronage stat an additional 15 or so points at 42 to help you meet your preferred cut-off when it counts, and skimp a bit on normal grinds. It can also be used with one piece of swap gear to purposefully over-stat if you have extra elixirs in the patronage stat and a piece of light gear to swap out. For example, if I’m running 400 Luck preferred, I can elixir up to 416, patronage into Strength, and swap out a [+20 Strength/ +16 Luck] belt for a +35 Strength belt and have 400 Luck, plus an additional +15 Strength and Patronage. In addition, since I have more buff rubies for Strength, I can enjoy an additional +3% benefit for swapping the patronage out of Luck.And that, simply, is how you stack Luck and only have to use a Water of Life once in your life.
Skills
Secret Scroll Skill #1
Saintly Aura, party-wide constant heal. The buff is constantly applied and cannot be removed, and has a range of about 30m. The heals ar relatively low and negligible, less than 1% of your health on average. This is more of a convenience for when you are AFK than a life-saver.
Secret Scroll Skill #2
Renewed Courage, 30s CD, instant cast, removes all Fear effects, makes Paladin immune to Fear effects for 10 seconds. This is very helpful PvP skill against against Summoner fears and removes the Firewall fear debuff as well. It is less practical for leveling and against mobs, with perhaps only three or four mobs in the game that make it practical for use.
Row 1 – Points Needed to Unlock (0)
Crusader’s Blow
Righteous Word
Retribution
Row 2 – Points Needed to Unlock (5)
Overcome
Light’s Guidance
Light Infusion
Row 3 – Points Needed to Unlock (12)
Challenge
Condemnation
Healing Touch
Row 4 – Points Needed to Unlock (20)
Strike of Justice
Deliverance
Tenacity
Row 5 – Points Needed to Unlock (28)
Absolution
Surge of Light
Row 6 – Points Needed to Unlock (36)
Penance
Aura of Ferocity Reduces Paladin armor by 30%. Increases party’s physical damage by 5%/10%/15% for 10 seconds whenever the Paladin does a weapon attack. Cannot equip a shield. Cast Time – Instant Energy Cost – 50 Cooldown – 1s
Heavenly Nova
Row 7 – Points Needed to Unlock (44)
Crusader Seal Upgraded Melee Crusader Blow Physical Attack, Adds a Mark to target. Unlocked in Kirah. Type – Physical Cast Time- Instant Energy Cost – Weapon Speed Cooldown – Weapon Speed Damage – Weapon Damage
Reckoning Upgraded Melee Retribution Physical Attack, Can only be cast when target has Marks. Removes all marks and does damage and regenerates energy equivalent to the number of marks applied. Unlocked in Kirah. Type – Physical Cast Time- Instant Energy Cost – Weapon Speed Cooldown – Weapon Speed Damage – Weapon Damage
Row 8 – Points Needed to Unlock (52)
Light Immersion Auto-target Upgraded Light Infusion Heal over Time, allows you to heal the lowest HP target in your party for 12s every 2s. The heal is reduced by 4 seconds per hit the target receives. Consumes 2 Canons. Target becomes immune to Eternal Light for 20s. Shares a cooldown with Light Infusion. Unlocked in Kirah.
Type – Holy
Cast Time- Instant
Energy Cost – 20
Cooldown – 15s
Heal – Wand Power*
Light’s Blessing Upgraded Light’s Guidance, allows you to store 20/40/60 Canons, which take up an inventory slot, and recharges at a rate of one per 3m/2m/1m (in addition to normal charging). Can be manually filled with Martyr’s Salvation. Unlocked in Kirah.
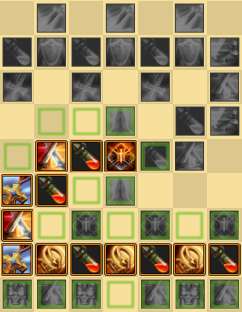
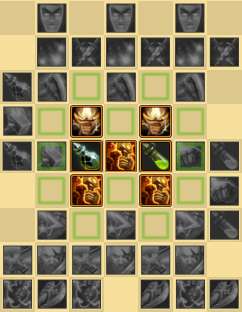
Rubies
For the most part, these rubies are self-explanatory. The real challenge is assigning rubies, which I will describe later. For simplicity, I’ve listed the active skills you can obtain. Most of the passive skills should be easy to understand. I’ve also listed the new rubies to explain their purpose and their relation to the rest of the grid.
Vindication
Melee skill, breaks a barrier, reflecting 30%/50%/70% damage back at the target, up to a defined cap. You take the rest of the damage. Missing with Vindication does not break the barrier.
Type – Physical
Cast Time- Instant
Energy Cost – Weapon Speed
Cooldown – 30s
Damage – Weapon Damage
Sacred Sunrise
Melee skill, detonates Marks, generating a physical attack on the target and an AoE holy attack on all targets within 10m. Can miss.
Type – Physical/Holy
Cast Time- Instant
Energy Cost – Weapon Speed
Cooldown – Weapon Speed
Damage – Wand Power*
Reparation
Resurrects an ally. Can be used in combat.
Cast Time – 3s
Energy Cost – 90
Cooldown – 15m
Shadow Protection
Protects the party from Shadow damage for 1 minute. Consumes 1 Canon.
Cast Time – 2s
Energy Cost – 10
Cooldown – 15s
Simplified Salvation Reduces cost of Overcome and Deliverance by 35%/45%/55%
This ruby is really far off the grid on the CB tree. Most players don’t even venture this far, and the energy saved is 4/5/6 energy and 7/9/11 energy, respectively. They don’t appear to have any practical purpose.
Harsh Light Increases your Holy Damage by 5%/10%/15% and increases Condemnation time by 2/4/6 seconds.
Take these rubies before you take Swift Justice. These rubies are much better and easier to reach for the cost.
Holy Indignation Increases damage of Strike of Justice by 5%/10%/15%, increases Crusader’s Blow and Seal damage by 3%/6%/9%.
This skill is for those who want to squeek out extra damage. For their cost, you can get all of these rubies quickly. For Holy DPS, the Strike of Justice Damage increase is about 7K damage for 3 rubies at Level 45. However, if you’re a Physical DPS Paladin, you may want to consider pursuing Powerful Blow instead, as it ups all your attacks and has the same ruby cost relatively, along with a better filler Ruby.
Mental Stability Decreases durations of CCs by 10%/20%/30%
This is a very useful tanking spell and PvP spell. The difficulty is with obtaining it for non-tank Paladins, since it is deep in the heart of the tank part of the ruby grid. It reduces the need for Willpower to protect from stuns.
Divine Steel Increases your physical damage by 3%/6%/9%
This is slightly better than Holy Indignation initially because it increases everything at a flat rate. It also nests nicely in the Vindication tree, making it more practical to go towards this direction as well.
Divine Energy Recover an additional 1/2/3 energy every 4 seconds.
This ruby unlocks the ability to use 2H axes at a native 4 second rotation as opposed to the 6 second rotation, as well as provides minor energy bonuses for those with lighter weapons. Depending on your play style, this can be amazingly useful or almost useless, as the net gain in energy is not sufficient for most players when compared to the energy gain aura.
Unbreakable Faith Grants you 1/2/3 Canon every time you receive a critical hit up to 10/20/30 Canons with a 30 second cooldown.
This skill is kind of weird. How it works is that it’s entirely passive. When you take a critical hit, you’ll gain the associated Canons, then be unable to gain any for 30 seconds. Rank 1 only allows you to regenerate Canons up to 10 in your bag, Rank 2 only allows you to regenerate Canons up to 20 in your bag, and so on, so the skill only applies if you’re really using Canons with a low capacity. It’s difficult to reach these rubies, and I never had any success with building something that was beneficial for me in utilizing it, though I did get a boatload of Canons.
Repel Evil Reduces incoming Magic Damage by4%/8%/12%
This ruby by itself doesn’t appear to be much, but it is very useful for most PvP encounters, less so Astral since many of the trash mobs tend to use physical attacks with a few additional magic attacks. At Rank 3, you can imagine it as a full additional level of runes against casters.
Flickering Light Reduces damage in your second and third barriers by 3%/6%/9% every 3 seconds
The augment for Pulsing Light in the tank grid, this is perhaps even better than Pulsing Light for the main reason that it deals with the barriers not on your front slot, since it works twice as much for barriers, and applies it to subsequent big hits you may not be able to Overcome or Deliverance.
Ruby Development
Ruby development is much more in-depth for Paladins compared to most other classes. We are offered few opportunities to reach our skills when we traverse the trees without spending Blank Rubies. In fact, with the locations of some of the rubies, we are encouraged to spend on blank rubies to squeek out an extra ruby.
As you will notice in my in-depth guides, I have not provided full builds, simply because different players have different favorites. There is no one best build. There are assorted decent builds, and there are builds that are bad.
Playing a Paladin, or any class for that matter, will not always be about pressing three buttons and face-rolling. You should understand why your class works the way it does.
I have also neglected to add any 47-patch rubies because overreliance on them belies the understanding of the basics behind your class. You should hammer out your build and rotation and special skills rather than focus on damage buffs at the outer edge of the tree.
If you’re leveling, they give negligible damage. If you’re at endgame, you should know enough about which ones you like to swap them in on the fly.
Anyways, back to Rubies.
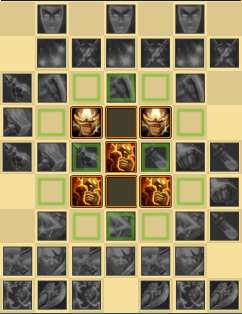
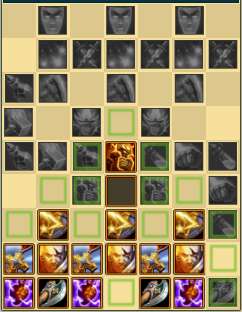
Take this example, the Crusader’s Blow Physical branch. You want to reach the last Strength Ruby.
The straightforward path gives you a few extra perks, such as a 50% chance for a free Crusader’s Blow on Parry, and +50% chance to crit with Crusader’s Blow. You also get a 100% chance to proc Atonement, which may or may not be your style if you have a spear. However, it costs 12 rubies for you to access that, and depending on how you play, you might not even like the parry rubies.
Behold the alternative.

At the cost of one blank ruby, you manage to get the Strength rubies for 10 rubies instead of 12, and have an additional 2 to spend towards Atonement and the Crit Rubies, or elsewhere on the tree. Furthermore, you get a coveted cooldown reduction as part of your tree.
Weighing the costs and benefits of your ruby grid should take up a significant part of your time. Sacrificing a ruby can very well allow you to get access to other areas of the tree you would normally not be able to access readily, or without great sacrifice in other trees.
Let’s look at another example.
At first glance, a lot of new Paladins may not think there is anything wrong with this center Righteous Word Grid. You access both SoJ rubies and both RW cooldown rubies at the cost of 2 blank rubies.
This, on the other hand, turns those blank rubies into Agility and Conviction. This would be the appropriate choice for a 6 point development.
However, as you expand into the Tanking Tree and the Vindication Tree, you’ll notice that you’re spending an ADDITIONAL ruby for access because you have no central root to reach them. You end up picking either 2 minor defensive rubies and a blank ruby or 2 blank rubies and a spare ruby.

Even the simplest short-term decisions can break your build. It all comes down to how much you are willing to sacrifice to get that extra DPS.
I’ll leave you to ponder this one yourselves in your theoretical development of a 2H Physical Paladin.

As you can see, this is why am I reluctant to provide builds for Paladins. Different people value their rubies differently. Some want to maximize their rubies, and some want to maximize their capabilities. It comes down to your playstyle, which is why I would prefer players discuss their builds as opposed to going for a single cookie cutter build.
In-Depth Role Development of the 2H Physical DPS Paladin
- The 2H Physical DPS Paladin is a very well-balanced single-target DPS build that is designed to serve as a direct off-tank or single-target burst DPS role. It may not have heals, but it makes up for this fact by having a large amount of heavy-hitting capabilities that may at times destroy heroic mobs in a matter of moments at the cost of high energy expenditure. This is much more useful in endgame raid and PvP nuking. It is highly effective against most caster-type classes with the exception of Mages. Recommended Weapon – 2H Spear or 2H Sword
Analysis 2H Physical is at a disadvantage for energy management. It is difficult to maintain a constant flow of energy after approximately 10 seconds of combat. After that point, you will have to operate on an operational cycle rather than whatever skills you have available. This makes abilities like Pious Anger, which appear good on paper, utterly useless after a few seconds of actual combat. Your cooldown for the skill is short, but you still can’t cast it due to lack of energy. With the removal of Motivating Presence, energy management has become much more important to counteract the loss of a quick free additional strike. For a 2H Spear/Sword, you operate on a basic 4 second cycle. You must normally wait 4 seconds to regenerate 40 energy in order to use your Crusader’s Blow. Spears net more energy than Swords, and Maces net no energy from a Crusader’s Blow cast. Most other abilities take less than CB, and provide an additional surplus of energy for later cycles. For a 2H Axe/Mace, you operate on a 6 second cycle, since you need a bit more than 40 Energy to Crusader’s Blow. A full stack of Retribution that succeeds allows you to cast an additional Crusader’s Blow without worrying about cycle for any weapon. Inserting a Righteous Word into a cycle allows you to operate on a 2 second phase rather than a 4 second phase in rare cases, at the cost of comparable damage. 2H Physical Paladins highly effective at single target DPS. Threat generation can easily be done by a single stack of Condemnation, and readily maintained by generous use of Retribution, racial skills, and Vindication. Damage for your skills is based on weapon DPS. While a 2H Spear is significantly faster than a 2H Axe, the Spear will have much lower outputs (and associated energy costs) on heavy-hitting spells like Penance and Vindication, but have the same cast time. In other words, the 2H Spear is more efficient and easy to manage, but has a lower DPS cap than a 2H Axe due to the significantly lower power/cool down ratio. For example, Vindication with a Sword and Dagger will do less than half the damage of a 2H Sword, so even though Vindication costs less (~12 energy compared to 32 for the 2H Sword), the Sword and Dagger for a 42 will max out at 60-70K, while the sword will max out at around 140-150K. Take this into account when weighing out whether you want energy efficiency or maximum output. You should also take into account your expertise. Missing with a spear is less of an issue than missing with an axe, which puts you out of a mark for potentially 6 seconds. Your attacks should all be heavily used and on cooldown. Penance, your racial, and Vindication are proportionally high-burst attacks and can be used to aggressively one-shot mobs and players given their gear level Leveling with this class will cut you somewhat short on heals, but allow you to level up quickly and efficiently, swapping in to 2H weapons of your choice when they become available. Against most classes, your simple role should be building up Marks, Retribution or Penance when available, and Vindicating big hits against soft targets.
Nominal Stat Balance
- PVE Offensive: Finesse: 0%, Expertise 12-15%, Luck 50% PVE Balanced: Finesse: 0%-10%, Expertise 12-15%, Luck 45-50% PVP: Finesse: 5-10%, Expertise 10-15%, Luck 45-50%
Talents
- Recommended Base Build (42 points spent) Crusader’s Blow 3 | Righteous Word 1+ | Retribution 3 Overcome 3 | Light’s Guidance 2+* | Light Infusion 0 Challenge 1 | Condemnation 1+ | Healing Touch 0 Strike of Justice 3 | Deliverance 1 |Tenacity 2+ Absolution 0 | Surge of Light 1+ Penance 3 | Aura of Ferocity 3 | Heavenly Nova 1 *There is an additional balance functionality for 20 Canons for 1 fewer Talent Point at Level 47.
Skeletal Sample Build – http://www.allodsbase.com/calc#-29x1s9o … y20i4hs4w2
- Crusader’s Blow – This skill is your basic attack. It’s self-explanatory. Righteous Word – This skill can be used for additional Canons or tagging, but should not be heavily emphasized on. Retribution – The culmination of 3 Marks is enough Energy to pound your enemy again, and a significant hit. Since it costs less to cast than Crusader’s Blow, casting it at 2 Marks results in all the energy being expended returned, meaning a free hit if you choose to do so. Overcome – This is a defensive skill. Whether you choose to raise its level is up to you, but it should be at least Rank 1. Light’s Guidance – This skill is helpful for heals and Heavenly Nova. Don’t spend too much, as they aren’t easy to use with an energy-intensive rotation. Challenge – This ability is up to you. It is a decent taunt for PvP and PvE and is used for off-tanking lesser bosses and for getting a coveted high hit for Vindication. Condemnation – Not very necessary, but a ranged DoT might help you a bit if you end up chasing an enemy. Strike of Justice –Strike of Justice allows you to close gaps on targets and stun them for 2 seconds. Raising the rank decreases its cast time to 2/1.5/1 second. Sword of the Just rubies reduce the cast time by an additional 0.5 seconds each and decreases the cooldown by 3 seconds, down to an instant cast Strike of Justice with a 14 second cooldown. The revamped ability now has a 5/6/7 second chase time. It is not effective against fleeing targets due to buggy hit detection, but can be used in almost any other direction. Instant Strike of Justice can be used in midair to avoid fall damage if done correctly, and makes you immune to most slowdowns and stuns, as well as traverse through caltrops and acid puddles rapidly. Note that this skill is dependent on your weapon’s speed for energy cost. It is essential to max out the skill and rubies in PvP to avoid difficulties in casting from constantly running players. Deliverance – Rank 1. Self-explanatory barrier removing skill. You won’t be able to get the cooldown rubies and it’s not practical to rank it up. Tenacity – This skill should be Rank 2 at a minimum. It protects you from the horrors of lethal barriers breaking and can be cast while stunned as an emergency for low cost, as well as to juggle 3 lethal barriers indefinitely. Surge of Light – The only healing spell you can take. It has no cast time, but requires 2 seconds to heal and bounce to another target, from 3/4/5 targets depending on rank. There is no line of sight penalty, but the order is self-determined based on actual HP as opposed to relative HP. This isn’t quite effective enough to be considered off-heals. Penance – This skill will do as much as a full-stack Retribution for less cost, but has an intense cooldown. For physical targets, one stack is sufficient. For caster targets, you may choose to stack additional for the Silence, though the energy/damage ratio isn’t as practical. Aura of Ferocity – It’s a double-edged sword. This will help you guaranteed eek out up to 30K on Level 45 Vindications, but you will undoubtedly draw agro and have to remove the aura in combat. Heavenly Nova – Initially scoffed as a boring spell, Nova has now proven to be an effective CC effect, emergency AoE, and a minor threat generator. At Rank 1, you can apply a 50% speed debuff for 9 seconds on any tagged mob. Furthermore, it works with any Paladin’s marks, meaning a group of Paladins can rely on a single player to debuff. This is best used for escaping combat or with Strike of Justice in PVP. It is not a taunt, meaning you can cast it to gain a second or so of agro, but you will not hold it unless you commit sufficient threat generation to overcome other players’ agro.
Rubies
Atonement – This is based off your weapon damage. Rank 2 is a minimum because of the low attack speed.
Sword of the Just – This is useful in PvP, but can also be used for multi-kiting mobs for AoEs and reducing fall damage from throwing mobs. Simply put, the cooldown and cast time reduction turn it into your most powerful weapon.
Swift Reprisal – These aren’t necessary. They help, but they aren’t as practical for the cost due to the ruby grid development.
Swift Justice – These are mandatory for increasing your Canon-detonating skills. Each at Level 42+ should be considered an additional minimum +5K damage for a full-cast Retribution or Penance.
Reparation – This skill is useful regardless of your class. For heroics, astral, and other endgame, this saves you in a pinch, and since it’s on the way through Swift Justice, it’s nice to have for the ride.
Blessed Light – Your heals aren’t great enough to warrant most of these.
Vengeance – This is very practical in increasing your single-target DPS to one-shot standards against most players and mobs.
Sacred Sunrise – Call this a write-off. Its cast cost is expensive for the amount of damage it does for 2H. You might go through the ruby, but very rarely will you be able to use it to its full potential except with a lot of swap gear.
Vindication – The ultimate attack a Paladin can have. Your Vindication reflects a barrier’s damage at an opponent and reduces the damage on you by 30%/50%/70%. There is a cap, but at end-game it is so high you should aim to get as large of a barrier as possible to reflect. Small barriers do negligible damage. This can be used to one-shot players if planned carefully.
Angelic Harbinger – Who can say no to a +50% crit per ruby? This falls in with Rage of the Righteous in lowering your Luck Requirement.
Rage of the Righteous – Who can say no to a +25% crit per ruby, especially when this is your basic attack? These rubies will allow you to hit an 80-90% crit rate if you take 4 of them.
In-Depth Role Development of the Holy DPS Paladin
The Holy DPS Paladin is arguably one of the most unique multi-role Paladins in the game, as it eschews an off-primary statistic and ALL of its physical damage capabilities for increased Holy damage, AoE effectiveness, Healing. At endgame, it can fill in for assorted off-specs on the fly with only minor gear swapping and on the fly, with ability to off-heal, off-tank, AoE DPS and CC, and single-target stun. It is highly effective against other Paladins, melee classes, and Mages.
Recommended Weapon: Sword and Dagger or 1H Spear and Shield
Important Note about Gear: Since you do not need Finesse, avoid ANY gear with Finesse. Shoulderpads with 40 Strength and 20 Finesse do less for you than shoulderpads with 53 Strength. You will also be gimped for gear selection, as gear with Finesse practically becomes off-limits for you.
Analysis Holy Paladins are less effective at single target DPS when compared to a Physical DPS Paladin, due to limits imposed by its attacks: Condemnation, the strongest single-target attack, serves as a threat generator, which may cause you to pull off your tank with the amount of damage you are generating. Sacred Sunrise is the only alternative canon-removing skill, and in crowd-control situations, may inadvertently disrupt CCs due to its immeasurable range compared to target hit boxes. This leaves high-DPS single target attacks: Strike of Justice (14 seconds) and Righteous Word (~8 seconds).
Damage for your attacks is based primarily on Strength, and not on weapon DPS.
The primary difference between building a Holy DPS Paladin and a Phys DPS Paladin is the stat balance. Unlike a standard Physical DPS Paladin, which relies on Strength, Luck, Finesse, and Expertise as its primary offensive stats, Holy Paladins ignore Finesse entirely. In fact, the goal of building a Holy DPS Paladin is to reduce it AS LOW as possible. An ideal Holy Paladin should only have the base stats gained from leveling and any regalia buffs that may have been obtained.
If the issue arises that you must choose between slightly higher quality/level gear with Finesse and lower quality gear without it, add up all the non-Finesse stats and compare. The one with more non-Finesse stats is the one more suited for your build.
Comparably speaking, a well-geared PVE Physical DPS Paladin at 42 will have ~600 Strength/~300 Finesse/~320+ Expertise/400+ Luck. A well-geared PVE Holy DPS will have ~750 Strength/~80 Finesse/~340+ Expertise/420+ Luck offset.
Mainly speaking, the only Physical attacks you have at your disposal that are of use are Crusader’s Blow, Penance, and perhaps your racial. It’s not practical to gimp on your high-powered fast-hitting Holy spells for these three abilities, two of which have 30+ second cooldowns. Furthermore, you can’t use Sacred Sunrise on a dead target, so a Crusader’s Blow that does 2K and keeps the mob alive is sholyly more practical than one that does 40K and nukes your holy pole in an AoE pull. The Finesse output impinges on your other stats, especially considering your Crusader’s Blow is Rank 1.
The secondary difference is how Holy Paladins are developed. It is VERY difficult to develop a pure Holy Paladin from Level 1 simply because the talent tree will be unfriendly with you. You won’t get your first AOE spell until Level 13 at a minimum, and your ideal Holy Paladin weapon set won’t be available till Level 20 at a minimum.
Your primary (and only practical) heal won’t be available until 20. You will end up getting Canons before you can use them, and have to continually toss them from your bag. Furthermore, the paired weapons don’t open up until Level 2X either, and they are rare.
By my count, I owned 4 pairs of Sword and Daggers before I got my Legendary pair, the first a green 26 from a quest, the second a blue at 38 from Heart of Tensess Temple, the third and fourth at 42 from Heroic Labs and Heroic DBC, blue and epic, respectively. The alternative would be Sword or Spear and Shield, and those eschew rate of attack for increased defense.
It’s not terribly hard to level, but the practicality of leveling an early Holy Paladin is minimal because you can level faster in most cases with a Physical Paladin, and most gear won’t be specced towards non-Finesse. My recommendation is that you level as a physical DPS and consider a respec at around Level 30, when you have sufficient points and rubies to class for full effectiveness, and then build on. When AoD was around, it dropped them as well, but they include Finesse and were not suited for the Holy DPS stat balance. With the broken wands, you might have an even harder time leveling.
Against Paladins, Holy DPS should rapidly generate stacks and Condemnation and then continually harass the target with lower-hit Holy damage.
Against Mages, Holy DPS Paladins can rapidly remove Reflections with Heavenly Nova and immediately start doing tick damage by casting Condemnation through Stone Barriers. If another physical DPS is nearby, you can rapidly destroy barriers by casting Crusader’s Blow and Basic Attack to remove stacks in 5 seconds without running out of energy.
Nominal Stat Balance
- PVE Offensive: Expertise 12-15%, Luck 60-70% Balanced: Expertise 11-14%, Luck 50-60% PVP or Wound Complexity Healing: Expertise 8-10%, Luck 45-50%
Talents
- Base Build (42 points spent) Crusader’s Blow 1 | Righteous Word 3 | Retribution 1 Overcome 1+ | Light’s Guidance 3* | Light Infusion 0 Challenge 0+ | Condemnation 3 | Healing Touch 0 Strike of Justice 3 | Deliverance 1 |Tenacity 2+ Absolution 0 | Surge of Light 2+ Penance 3 | Aura of Ferocity 0+ | Heavenly Nova 1+ *There is an additional balance functionality for an additional 10 Canons at Level 47.
Skeletal Base Build – http://www.allodsbase.com/calc#-29xs9pg … 822jklt480
- Crusader’s Blow – This skill is bread and butter for Mark application and Atonement if you choose to overspec in it. It is NOT a DPS skill. It unlocks many of the Paladin’s additional abilities. Ranking this skill up is not necessary, nor is it recommended. Righteous Word – This skill is the primary offensive weapon of a Light Paladin. This is the skill that will do initial damage for ranged pulls, and provided ranged Mark generation. With full cooldown rubies and ranks, the cooldown is a slim 8 seconds, making it very effective at single target option. This should be maxed out as soon as possible. Overcome – This is a defensive skill. Whether you choose to raise its level is up to you, but you will have difficulty reaching the third tier if you pass over it entirely. You can augment Overcome to heal with Faith’s Grace, but you will have to spend empty rubies to get the skill. Light’s Guidance – This skill is mandatory. You use the Canons it generates for healing and for CCing. Unfortunately, even Rank 3, 30 is rarely enough for the field and you will often run out during or after combat and have to Salvation to recharge. You unlock an additional 30 possible Canons at Level 45 with the secondary skill, but the recommended maximum is 40 by ranking both skills evenly to Rank 2. Challenge – This ability is up to you. It is a decent taunt for PvP, but in PvE you have Condemnation and Nova to generate threat as well, and both of those appear to be much more effective as they are already part of the build. Condemnation – This is the ultimate single-target tool. It does significant damage over time, and can be extended to 22 seconds fully rubied. However, it is a double-edged weapon. You will gain massive threat generation. It does say that the threat generation of Crusader’s Blow is increased, but you are also receiving additional threat from the DoT itself. Use the skill with care. In PvP, this is less of an issue and highly effective against Paladins, Scouts, and Mages. Utilizing this skill with a speed potion allows you to speed tank a mob. Strike of Justice – Contrary to its implication, Strike of Justice is a Holy spell. It allows you to close gaps on targets and stun them for 2 seconds. Raising the rank decreases its cast time to 2/1.5/1 second. Sword of the Just rubies reduce the cast time by an additional 0.5 seconds each and decreases the cooldown by 3 seconds, down to an instant cast Strike of Justice with a 14 second cooldown. The revamped ability now has a 5/6/7 second chase time. It is not effective against fleeing targets due to buggy hit detection, but can be used in almost any other direction. Instant Strike of Justice can be used in midair to avoid fall damage if done correctly, and makes you immune to most slowdowns and stuns, as well as traverse through caltrops and acid puddles rapidly. For a Holy Paladin, it should be your goal to cast this as often as possible. It does a significant amount of damage, both in PvP and PvE. When combined with Heavenly Nova slowdowns, any knockdown, or a fear, you can add in an extra Strike of Justice to your chain. This skill should not be underestimated. For its cost, it is arguably the strongest single-target skill, only hindered by its minimum cast range and rare terrain mapping issues. Deliverance – Rank 1. Self-explanatory barrier removing skill. You won’t be able to get the cooldown rubies and it’s not practical to rank it up. Tenacity – This skill should be Rank 2 at a minimum. It protects you from the horrors of lethal barriers breaking and can be cast while stunned as an emergency for low cost, as well as to juggle 3 lethal barriers indefinitely. Surge of Light – The only healing spell you can take. It has no cast time, but requires 2 seconds to heal and bounce to another target, from 3/4/5 targets depending on rank. There is no line of sight penalty, but the order is self-determined based on actual HP as opposed to relative HP. This is guaranteed Rank 2 because of its effectiveness. You have the Canons, might as well go the distance. Penance – While this isn’t a great DPS skill since it is Physical, it provides you with the opportunity to regenerate 4/5/6 Canons and cast 6/9/12 second Silences with ease. Aura of Ferocity – You can use it since you’ll proc it like crazy, but if you draw agro, you’re paper. Heavenly Nova – Initially scoffed as a boring spell, Nova has now proven to be an effective CC effect, emergency AoE, and a minor threat generator. At Rank 1, you can apply a 50% speed debuff for 9 seconds on any tagged mob. Furthermore, it works with any Paladin’s marks, meaning a group of Paladins can rely on a single player to debuff. This is best used for escaping combat or with Strike of Justice in PVP. It is not a taunt, meaning you can cast it to gain a second or so of agro, but you will not hold it unless you commit sufficient threat generation to overcome other players’ agro.
Rubies
Atonement – This is based off your weapon damage. It also procs quite a bit. Rank 1 or 2 since it lasts so long for negligible damage.
Holy DPS Rubies – These are self-explanatory. You need them. You want them.
Sword of the Just – This is useful in PvP, but can also be used for multi-kiting mobs for AoEs and reducing fall damage from throwing mobs. Simply put, the cooldown and cast time reduction turn it into your most powerful weapon.
Swift Reprisal – An additional 30% reduction allows you to mark much faster, providing you with a way to deal with Mages especially, since your other marks won’t lay a hand on them with barriers.
Swift Justice – Condemnation is much more useful in PvP than you may think. The 15% can easily account for an additional 3K damage per tick, accounting for 32K additional DoT damage. It also provides access to healing rubies and Battle Res.
Reparation – This skill is useful regardless of your class. For heroics, astral, and other endgame, this saves you in a pinch, and since it’s on the way through Swift Justice, it’s nice to have for the ride.
Blessed Light – These are helpful when leveling, but at endgame, you are likely to not need these anymore. Prepare to spec out around 44-45.
Vengeance – The 100% damage buff sounds great, but it is a PvP skill more than PvE, since the amount of threat generation your Holy DPS does will pull agro on you and get you slammed.
Sacred Sunrise – If you don’t have this skill, you’re not Holy DPS. This is the Holy equivalent of Retribution. While it may not feature the energy regeneration, it off-sets it by creating a massive unmarked AoE effect that damages all enemies in 10m. The attack itself is a PHYSICAL attack, meaning it can MISS or be DODGED. However, if it is absorbed, blocked, or parried, it will detonate. The original stack is the physical component on the target, which is negligible due to lack of Finesse. The detonation of the Canons occurs regardless of whether the target took damage from the physical component after it connected, and is a Holy attack that damages ALL valid targets, that DOES NOT MISS. They can only BE RESISTED. In other words, if you are fighting multiple mobs, picking the one with the least amount of Dodge (i.e. not scouts) you will guarantee hits on ALL the other mobs. They may resist, but they WILL be hit. Against Paladins, this generates not one, but TWO barrier values. Maxing this ability out turns your melee attacks into decimating hits, allowing you to use weaker mobs and players to attack larger ones, especially those with resistance to physical attacks, indirectly.

Recent Comments