Free Realms Building Guide
Free Realms Building Guide by chammy
I noticed there was no guide on this subject, so i decided to make one 
Building. it was introduced in the Snowdays update of last year, and ever since people have been thinking of things to build that would be cool looking, but alas due to the low amount of techniques given to you by the games housing server, putting your imagination to work has been a bit difficult. and so i make this thread, to help you with the basics of building, and the more advanced placement techniques. we’re going to start with the basics.
Basics
Placing a block correctly
you want the placed block to touch the one by its side, but if the block is placed slightly inside the other block, it will flicker, causing lag affect to all who see it, however sometimes necessary. if you look at your placed block, and rotate your camera using the mouse. if it flickers, its too close.

CTRL + ALT
Holding ctrl key, along with the alt key, can allow you to rotate and play with the object better. rotating sometimes helps fit other things in the wasted space, and helps you make your imagined building come to life. this is the most basic, yet most useful tool you have. (you need to have a middle mouse wheel)

Lifting (Up/Down)
this is tool is used for raising or lowering placed objects. you can also use ctrl alt tool, along with this one to move objects in more directions.
now, on to the slightly harder tools you have available.
Medium
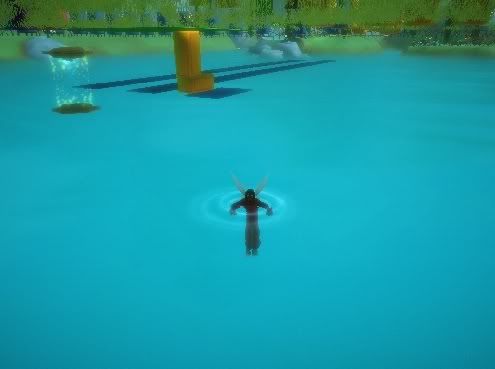
Lifting
one of the more useful things you can do, is lifting yourself, so there isn’t a need for stairs or scaffolding while you are building. this is done by placing a block under yourself, and aiming the camera down by the floor. then raising the block up and you with it. this will not usually work with two or more people on the same block.
Placing a floor.
so you want to make a multi story building, but you want it to not take a month. heres how to make your life simple when placing floor boards. as usual the game made it hard making most floors not flat. so place a floor in the mid air at an easy to get under and above level, make sure its absolutely perfect. lower the completed floor down to your first story. and depending on how many floors you want, if you want a 3 story building, make 3 more floor layers above the floor you just made (one for the roof included) then raise them up high for storage, build the walls, and as needed pull down one set for floor for the roof of the completed floor and the floor for the above. doing this will make your life so much better when your building.
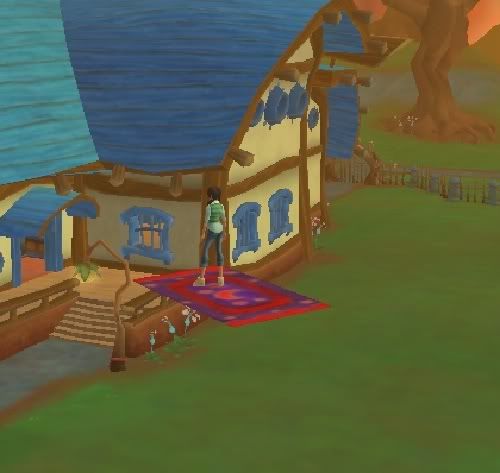
Burying.
you can bury objects below the floor by extending your camera all the way out, and then slowing dropping it on the floor and grabbing where it hits first, your camera is now looking half at the top, and half below the floor. this is useful if there is a floor below the floor, such as in the shrouded glade lot, or the beach lot. you can aim the camera down there. and drop a teleport down so you can work later.
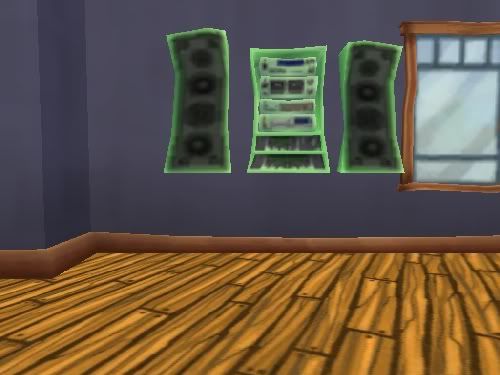
Block Fitting / Block sinking.
have you ever wanted to put a block inside another block, but you just can seem to get it to sink inside it? well heres how. first you have a tall block standing up. now you have another tall block on top of that, but you want the top tall block, halfway inside the bottom one. first you click the bottom one, click up/down, and it wont move up or down as you can see. so without moving the mouse if at all possible. use the ctrl alt and scroll it away to the side. about 2-3 clicks away. now you can lower the top block as you see fit. and then click the bottom one, and up/down + ctrl alt scroll it back into place. and there you have it. a fitted/sunk block. this is also a useful tool for when you just cant get something to raise or lower or place. simply rotate everything else around it. place the block. then rotate them all back. as you may notice, sinking makes spelling with blocks easier

now the next methods are for builders with a lot of time on their hand as they are harder then the above
ADVANCED
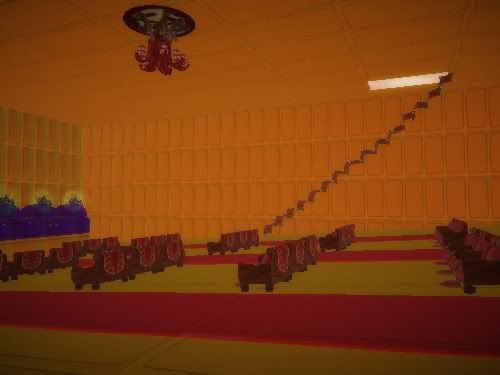
single angle removing.
have you ever wanted to make a floor that has a 10 degree tilt? have you seen chammy pie’s theater lot? well that isnt a 30 degree tilted floor as the default clicks are. thats a 10 degree angle. if you want to know how to make angles yourself read on. OK, first step, is to get the angle you want on atleast one side of your rectangle flat block, this is done by going to the fence, or finding a defect in the lot’s floor and taking its angle. so first method, going to the fence, and bring a rectangle flat block with you, take it outside the lot and run it along the outside terrain until you have the angle you want on atleast one side of the block. hold ctrl alt to preserve the angle, and bring it back in the lot and place it. you now have two angles, one you want, one you dont want. next step is to put a flat square block over it, and hold ctrl alt, and scroll one up, and once down. now the square block only has one of the angles. if this is the wrong angle, let go of ctrl alt, and turn the block 90 degrees and do it again, once you have your angle sample. place it on the floor. use a rectangle block to copy the angle. and carry it to the roof or floor you want to use it. and there you have it, your perfectly angled floor or roof. if you’ve made it this far in the guide, making an angled wall would be cake for you.
Burying the unburyable.
So you want something under the floor. but you have no floor underneath your floor such as in a wugachug lot. so first step is to place a flat rectangle block on the floor where you want the item sunk into the ground. next step is to bring your camera down through the floor and place a block underneath it. once its under, it can be lowered quite a bit before turning red. then you have a platform for placing your object that needs sunk. seems simple enough. but it isn’t.
Helpful hints:when making a large circle, use rectangle blocks like for a fountain
BE CREATIVE! if SOE wont give you new housing materials, make your own! is that a hundred lamps? or is it a waterfall?

Recent Comments