Elite Dangerous Guardian Module Blueprint Segments Guide
by TheOriginalB
Let’s talk about the Guardian Module Blueprints (now called Guardian Module Blueprint Segments). Perhaps you’re interested in the Guardian FSD booster for extending the jump range of your ship? Or perhaps the Guardian Shield Reinforcement to help turn that hull tank into a shield tank? Maybe you’re interested in the of-dubious-usefulness Guardian Hybrid Power Distributor? This guide should help you comfortably get through this.
First off, let’s discuss expectations. You’ll be jumping about 800ly out of the bubble to a Guardian site in Synuefe NL-N C23-4 and landing on Planet B3. There’s a “Guardian Structure” Nav Marker that you can spot from 1000 ls away to guide you in. You’ll land, and then you’ll navigate the site in your SRV, and, while fighting roughly twelve guardian sentinels (not all at the same time!), you’ll “charge” six pylons, which will then allow you to drop an Ancient Relic, which are available at the site, into a hole and thereby release the Glowing Golf Ball Of Module-ness, which you can scan for the reward of one blueprint. All the Guardian modules require one blueprint each, so to unlock all six of them, you’ll need to perform this task six times, logging out and logging in before each run. You’ll also need to collect other necessary materials during all of this!
What you’ll need:
- A ship with a decent jump range, such as this Diamondback Explorer
- An SRV (preferably two)
- Several point defence systems( in your utility slots)
- SRV synthesis materials (I recommend, at a minimum, having 14 sulfur and 8 phosphorus, as well as half a dozen iron and nickel)
- Approximately 30 minutes of time per run
- A shopping list of materials you’ll need, which you can make off the blueprints on Inara.
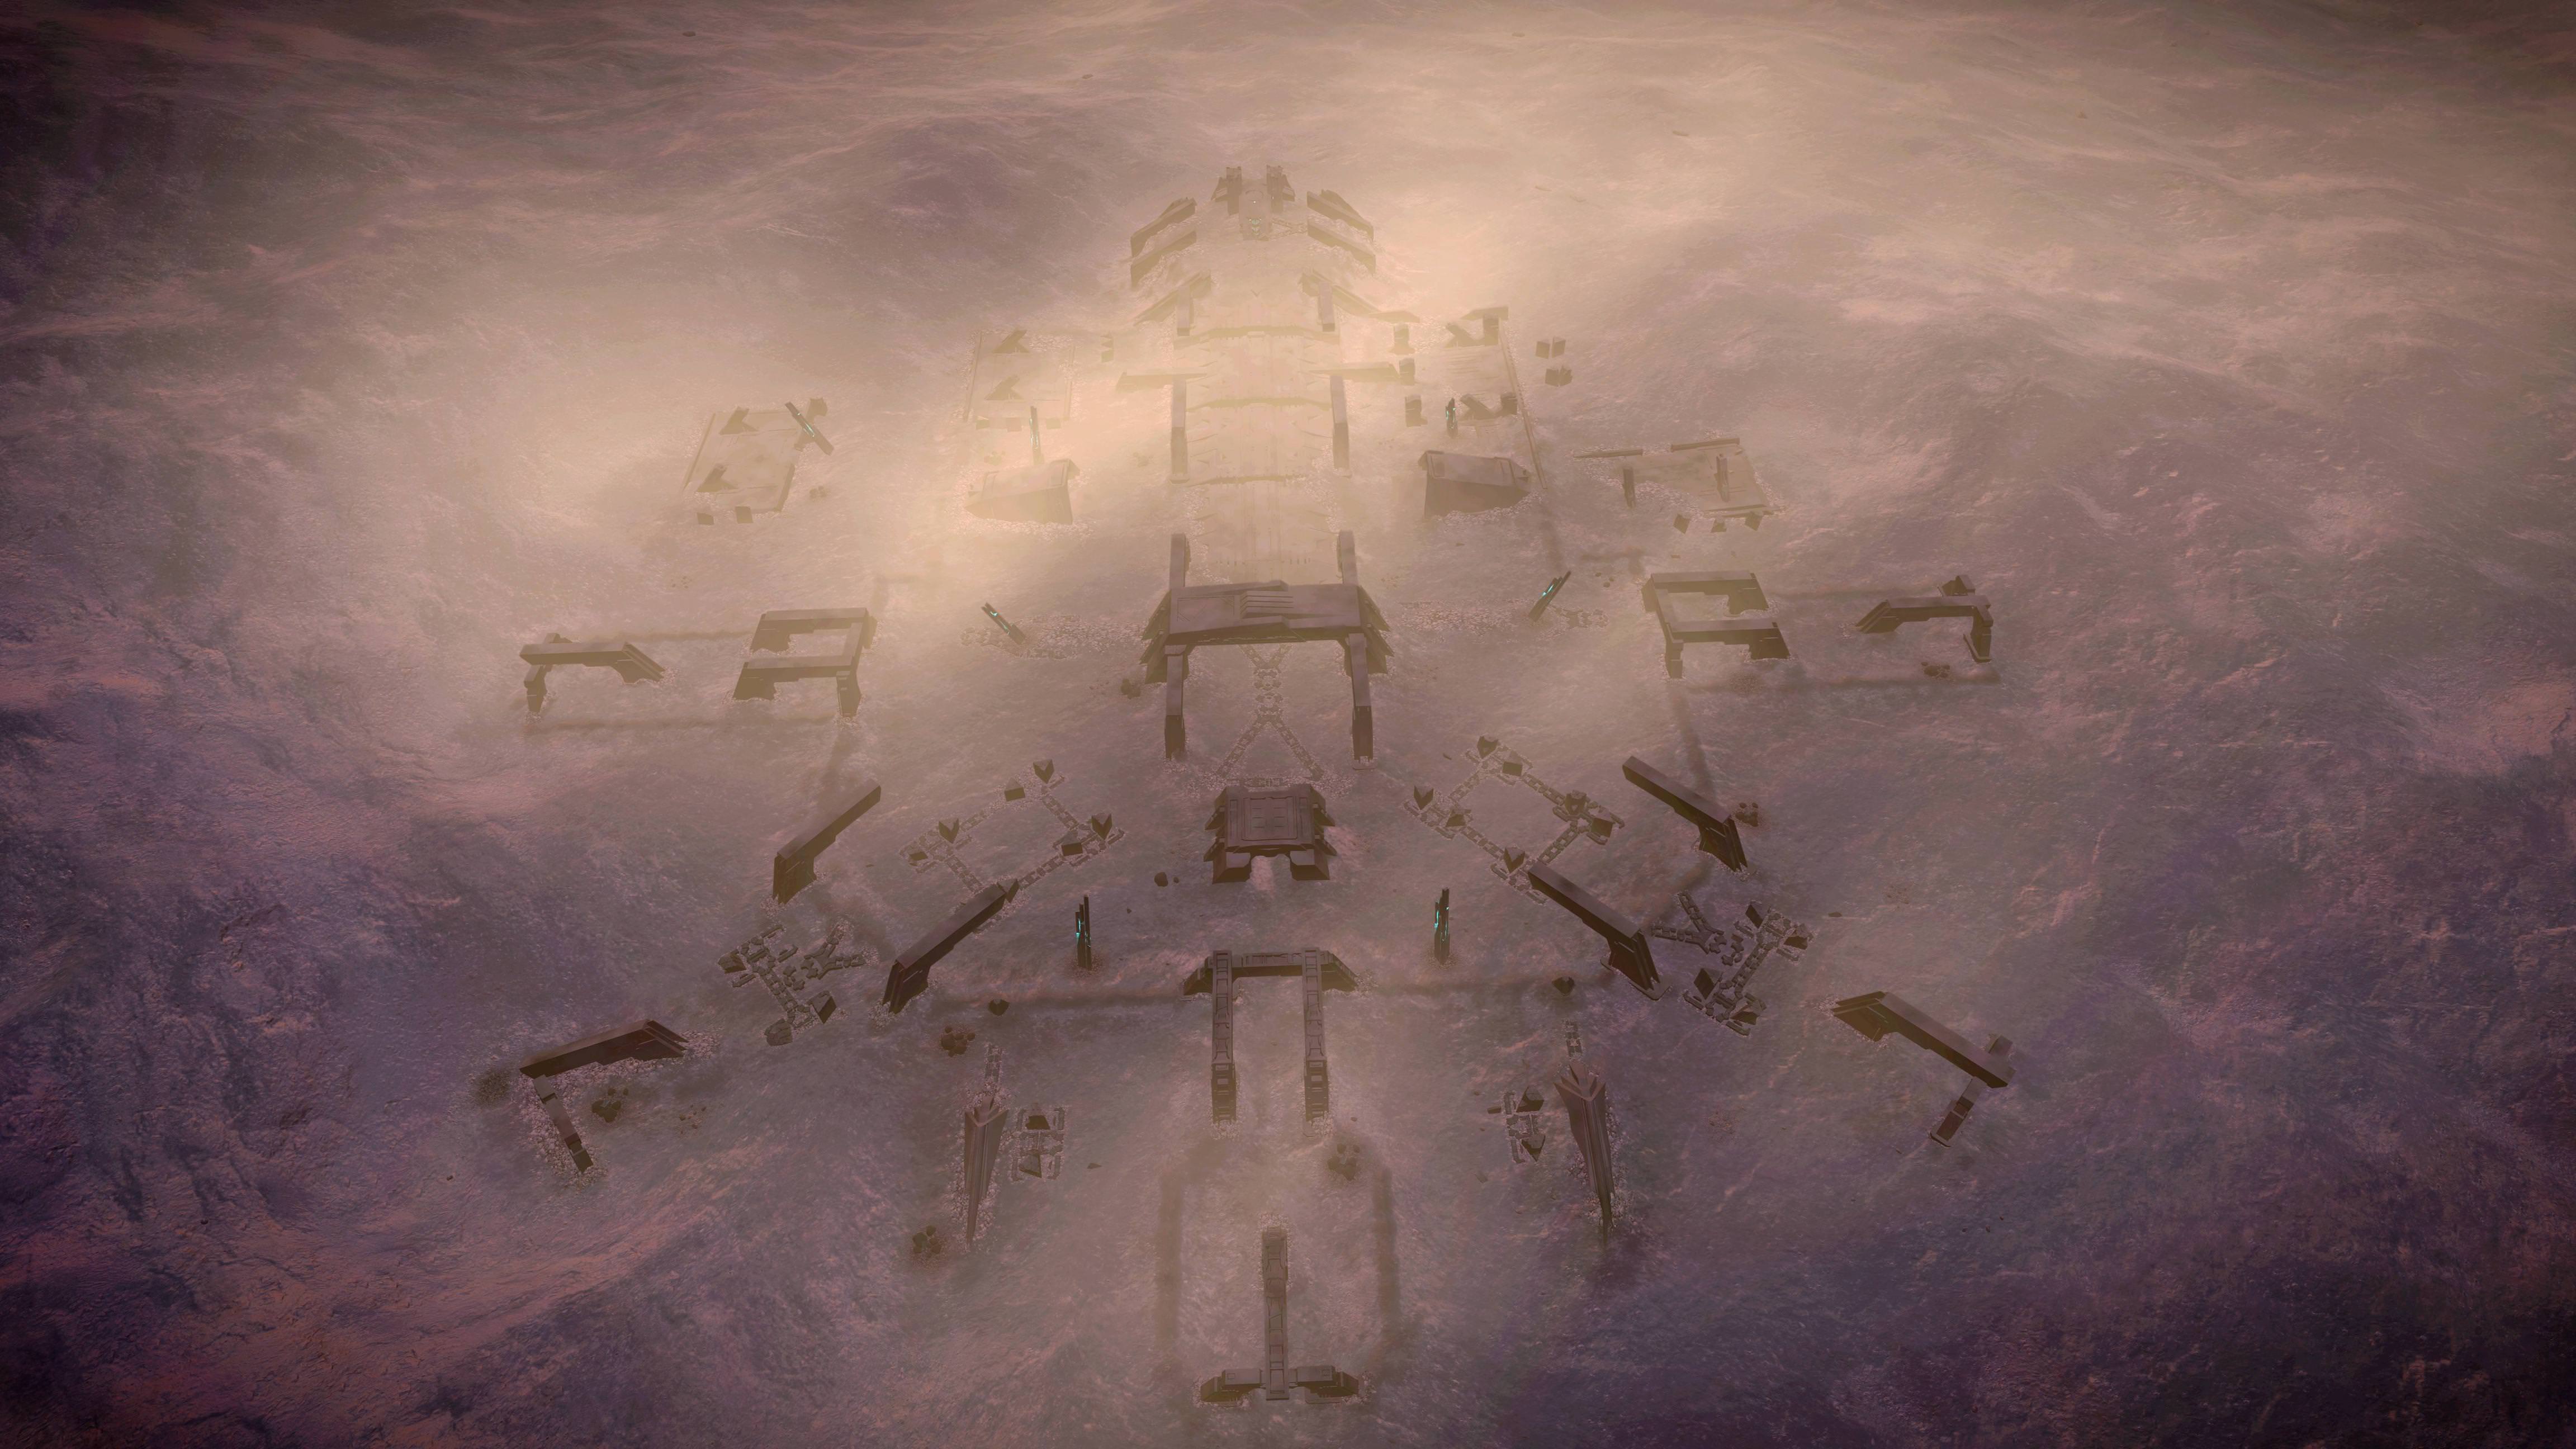
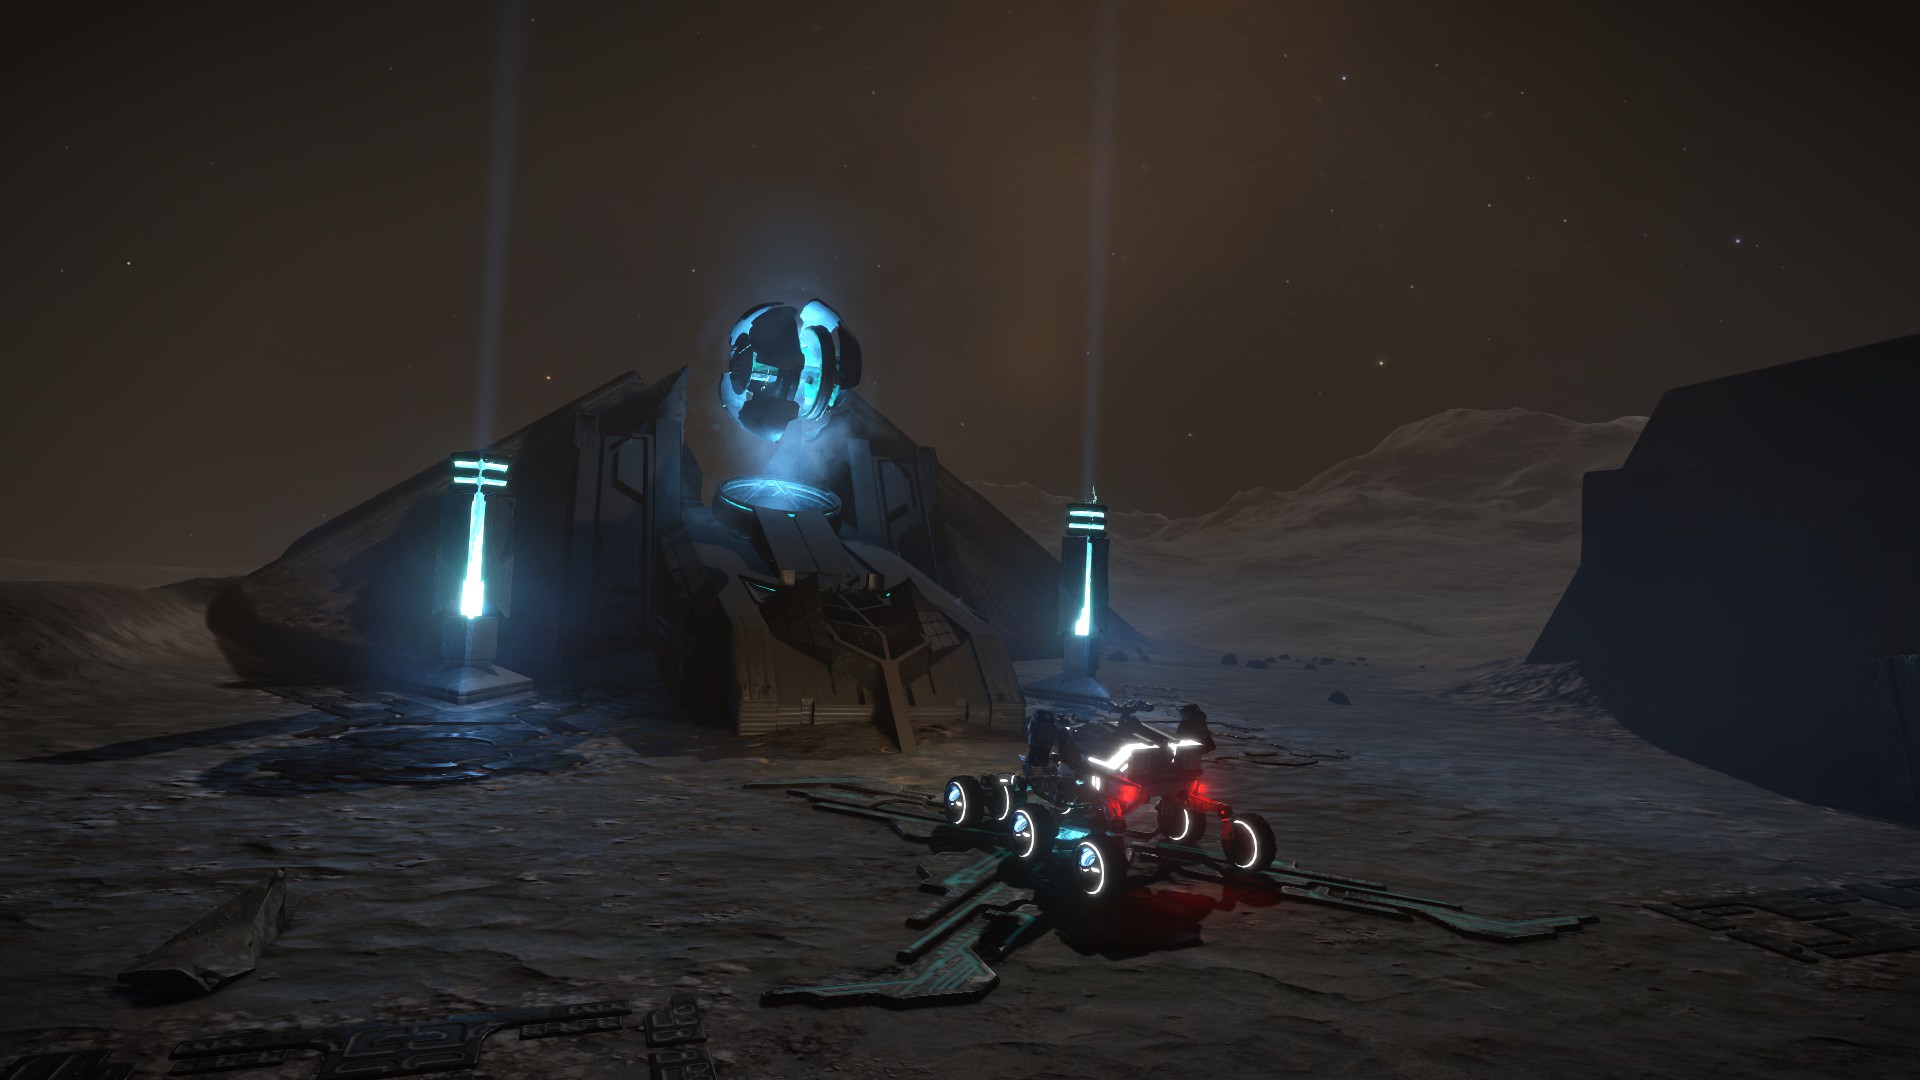
If you’ve gathered everything you need, let’s fly out to Synuefe NL-N C23-4! When you approach the site, you’ll see “Guardian Structure” and three “Ancient Ruins” in your nav panel. You want to fly to the Guardian Structure, where, as you come in, you should see this:
Ideally, you’ll land close to the site itself. If you the picture above, there’s a nice place to park a small- or mid-sized ship in the southeast quadrant of the site. See here:
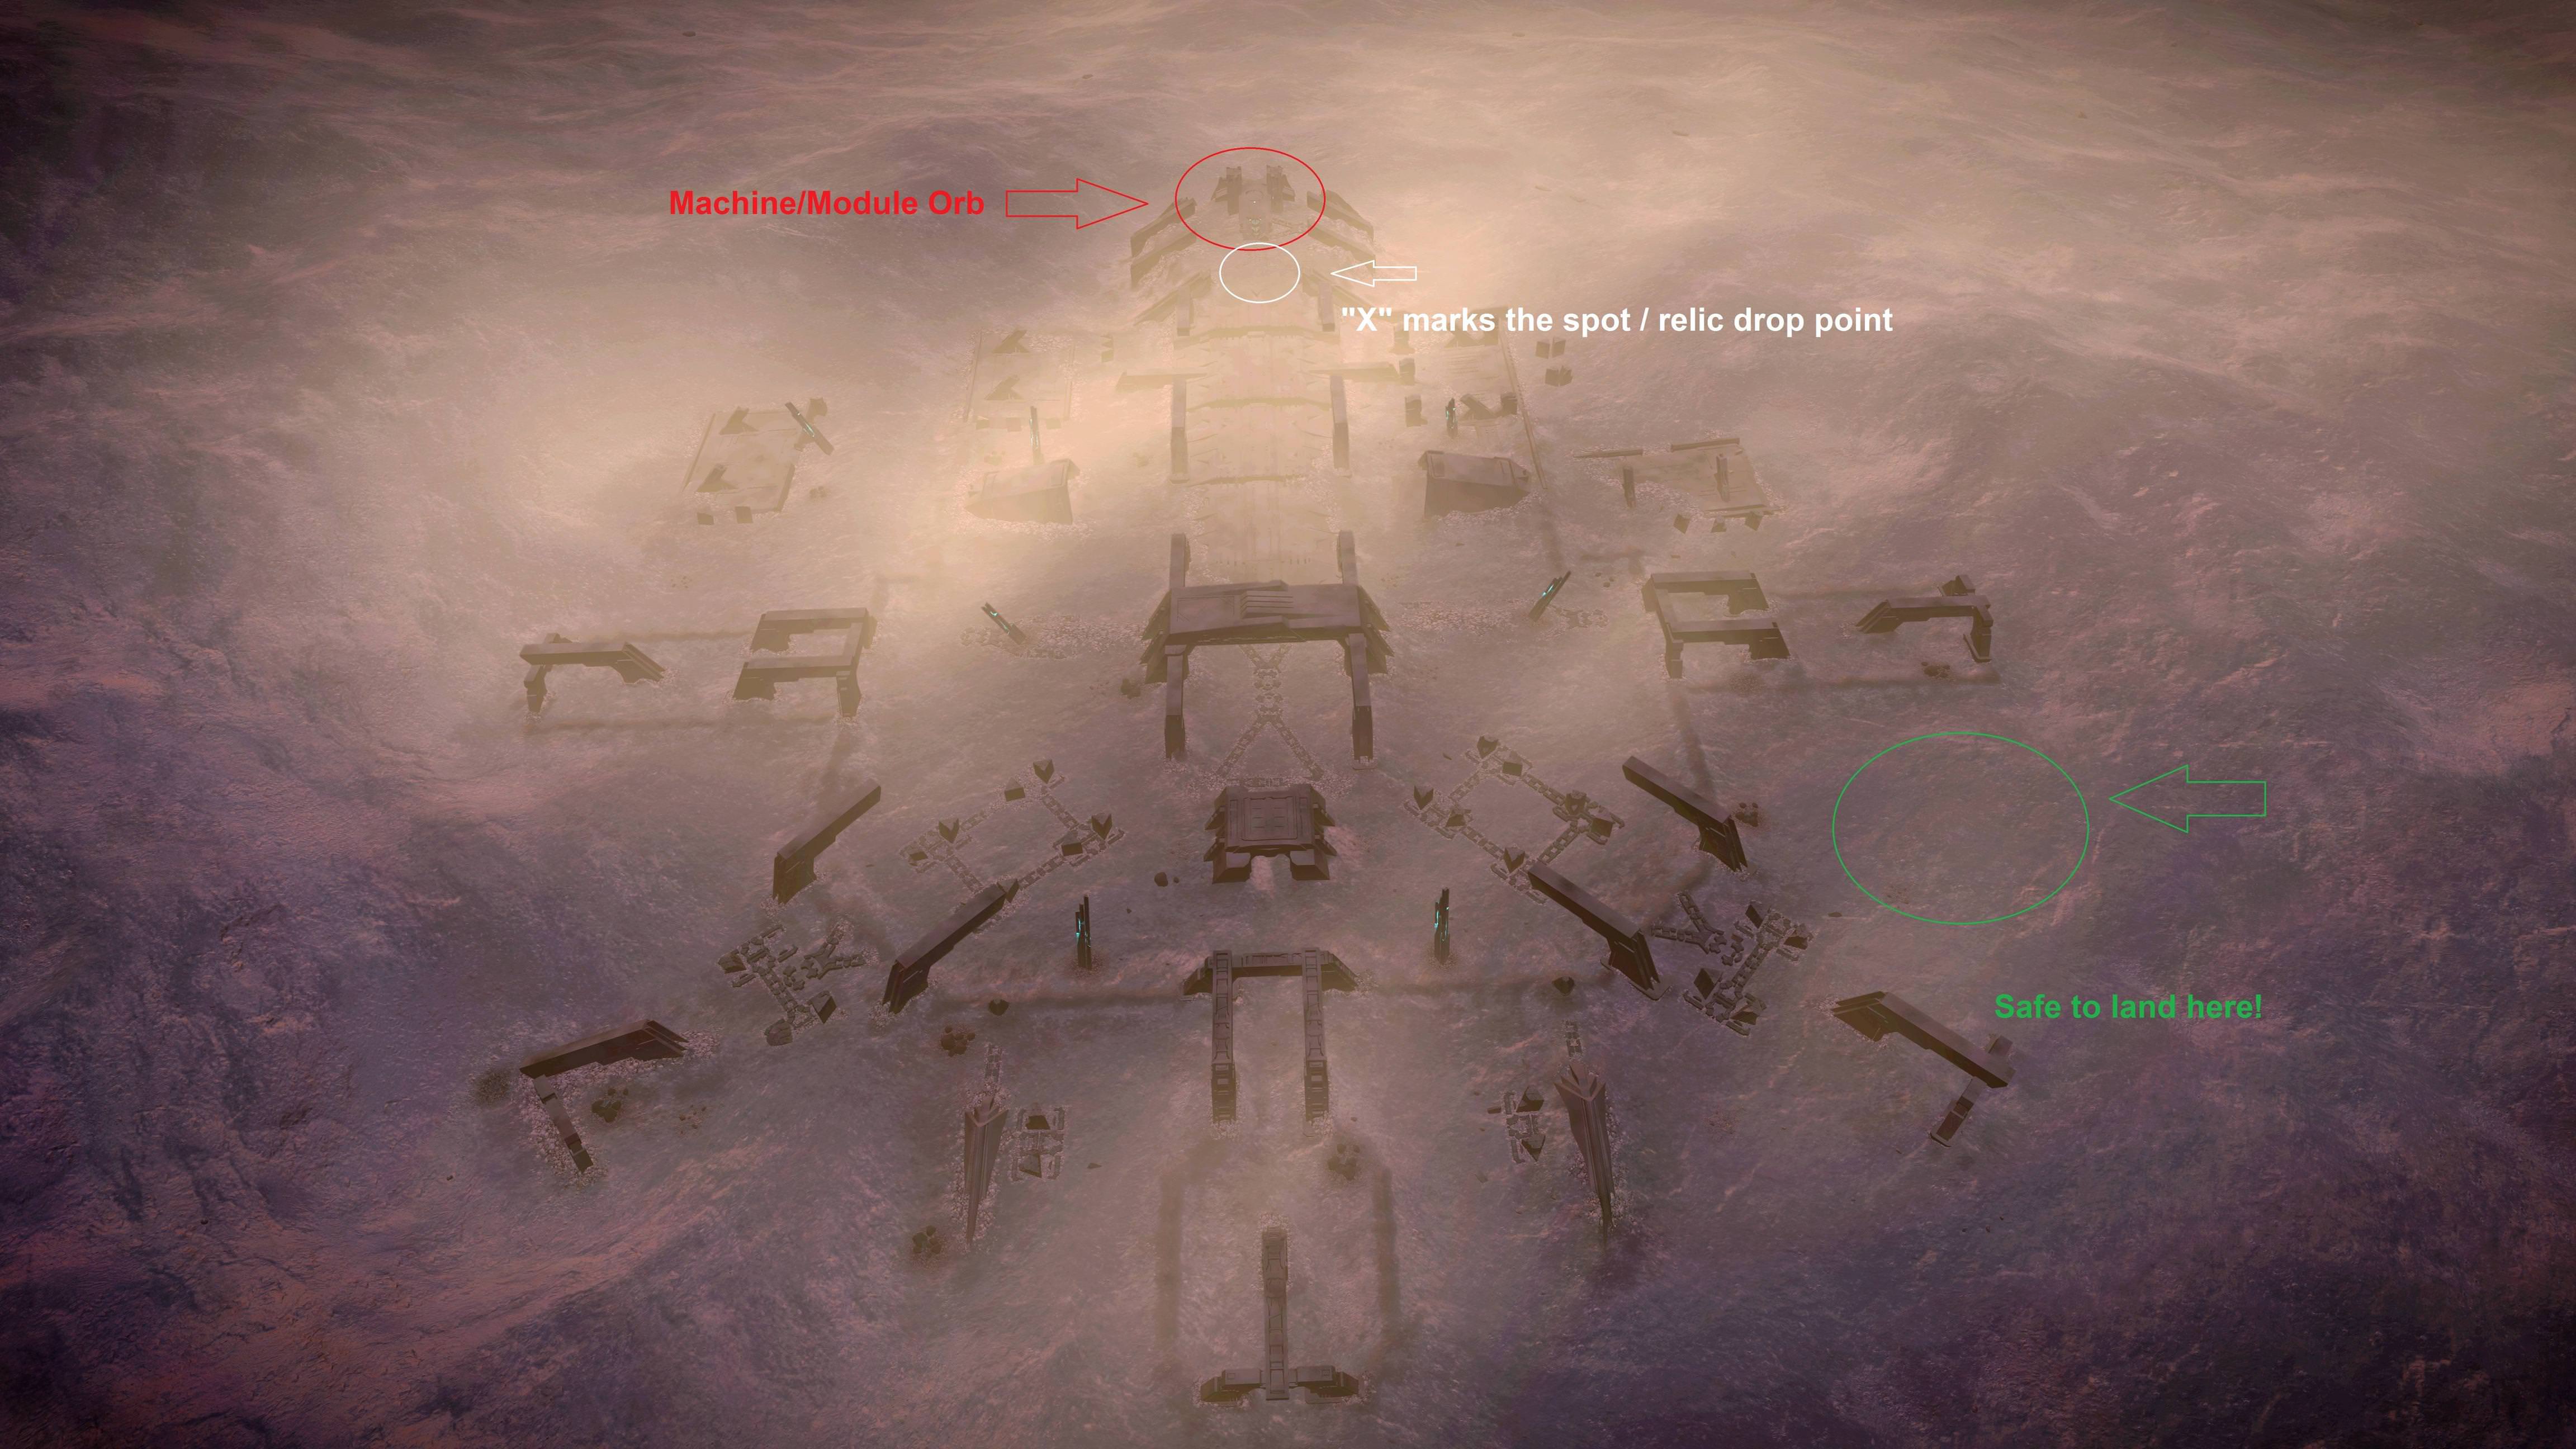
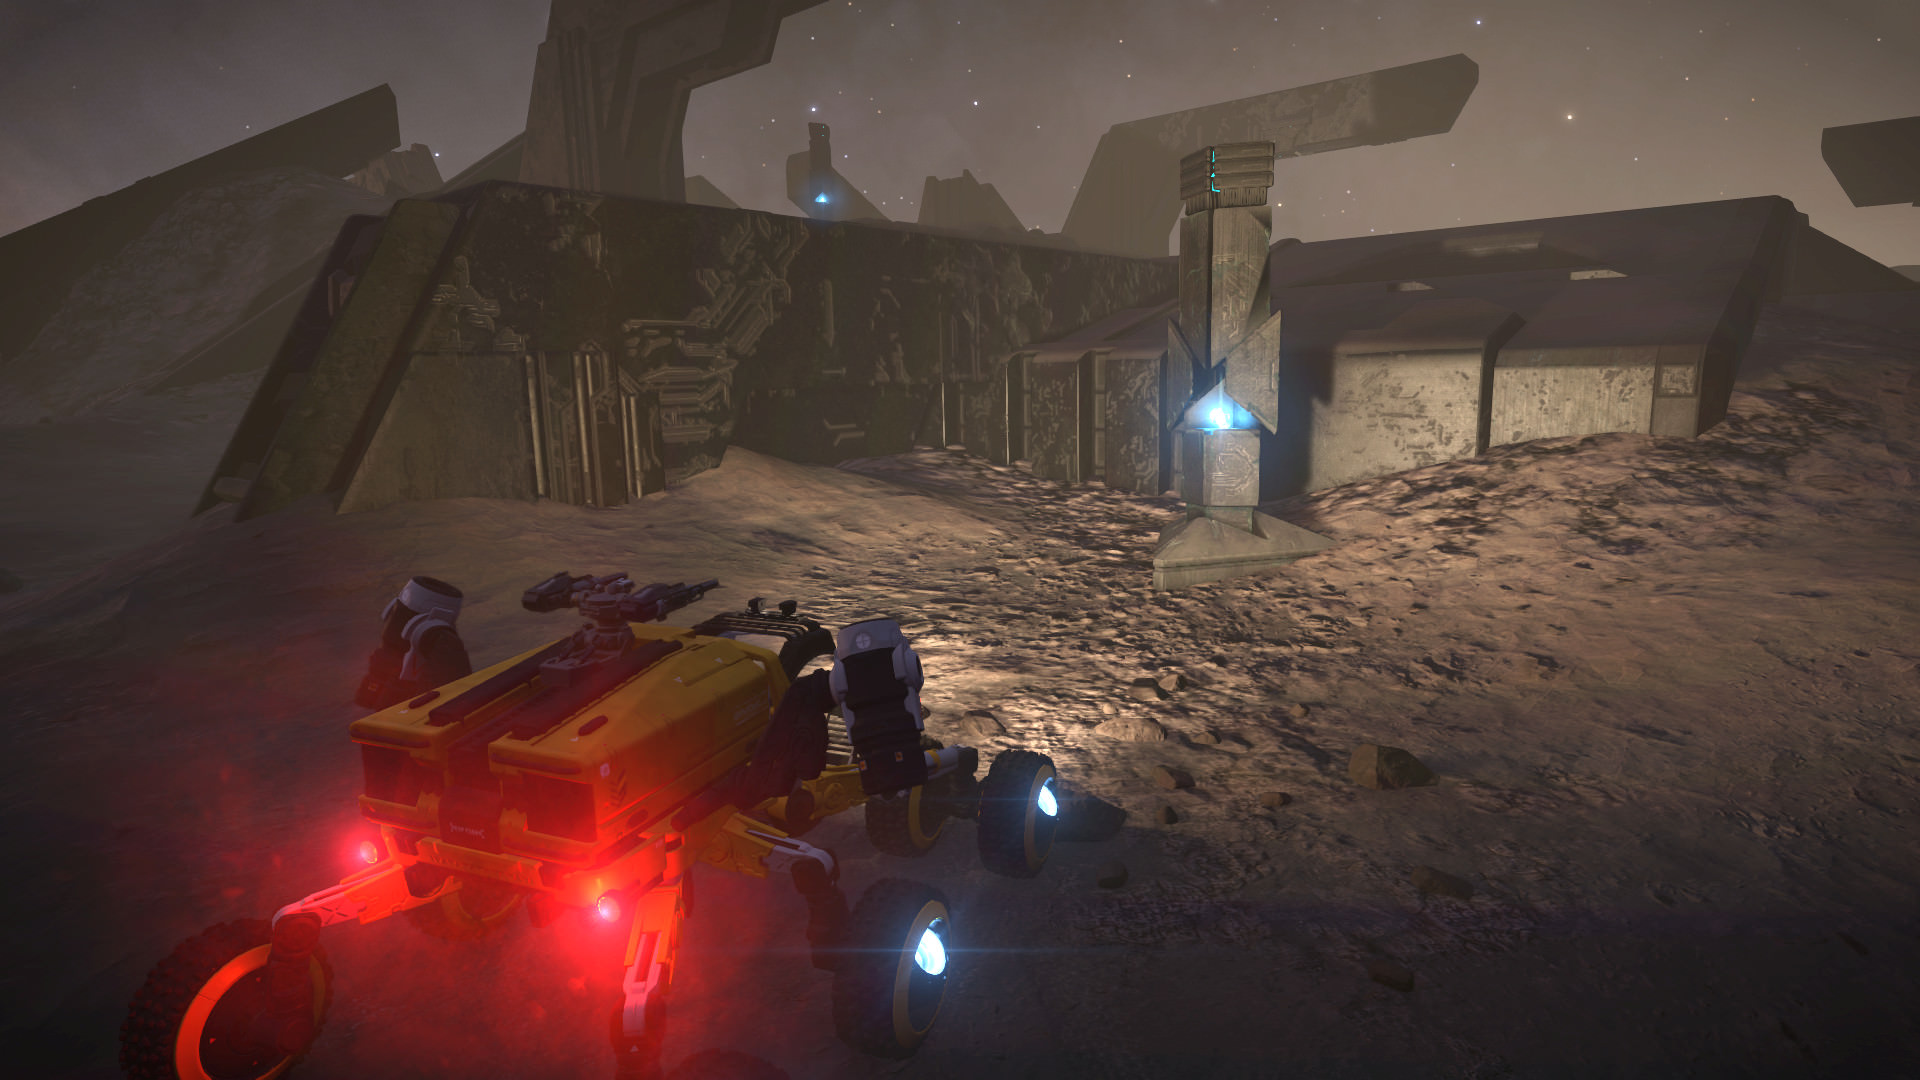
So let’s disembark and get started. Go ahead and drive up to the machine (see above), at the top of the map. You’ll see an unraised pylon location (looks like this). Behind it, you’ll see an “X” on the ground right in front of it, with what looks like a small, white button sticking out of it. Parking on top of that should “activate” pylon #1; you should hear it rumbling up above ground behind you.
And you’ll be under attack! You should see two sentinels in the middle of the site! They look like this:

Quick, throw two pips to shields, four pips to weapons, and pop out your turret to return fire. Sentinels have two attacks. They shoot blue plasma discs at you, and they can fire indirect missiles toward you. The good news is that, one on one, there’s very little chance a sentinel could damage your SRV. Even if everything they shoot at you hits you, you shouldn’t take more that about 50% damage before they take a break. They’ll pause for a while, and then they’ll charge up missiles for an indirect attack. You’ll see them charge, and sometimes, if you can’t kill them quickly enough, they’ll launch missiles at you. This is why you have point defense on your ship, though. Your ship’s point defense will shoot down the missiles!
Clearing out those two can take a bit of ammo, though. Even with four pips to weapons, I drain the capacitor and have to still keep firing for a while to destroy a sentinel.
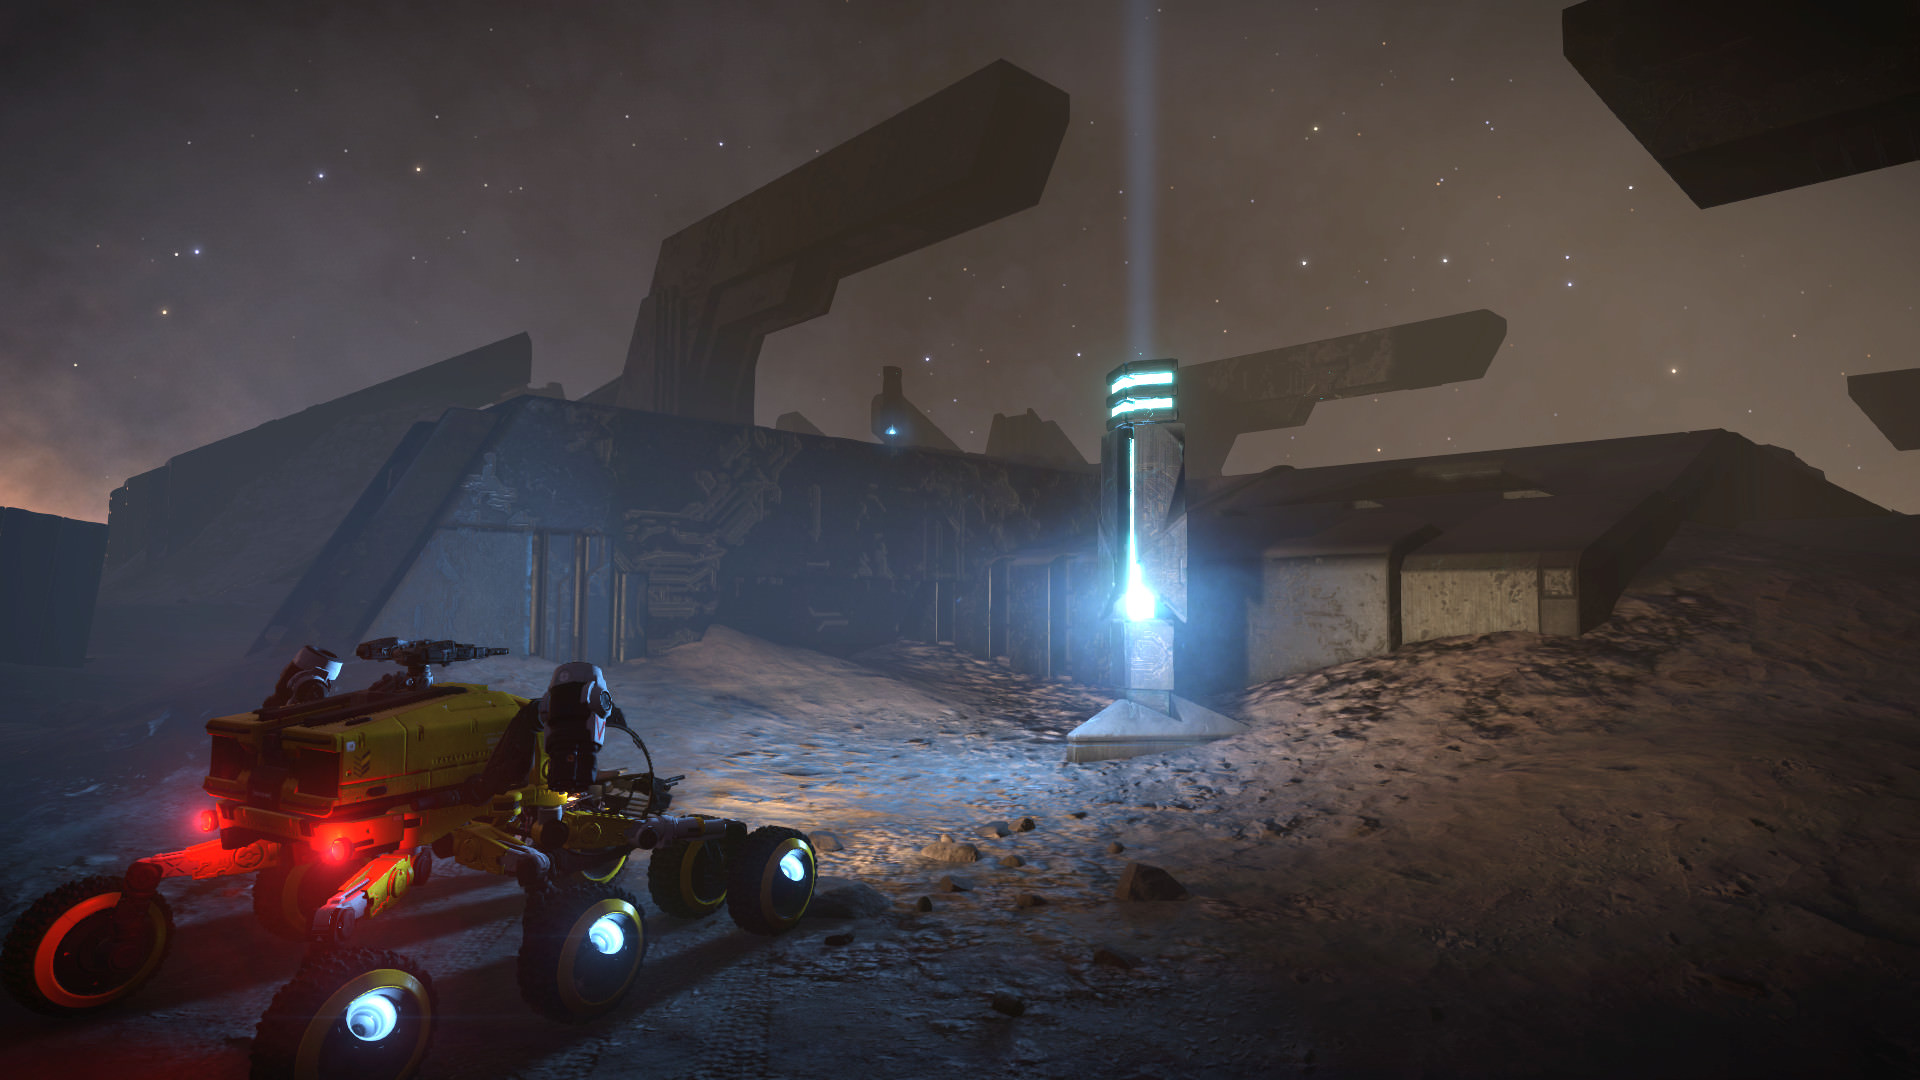
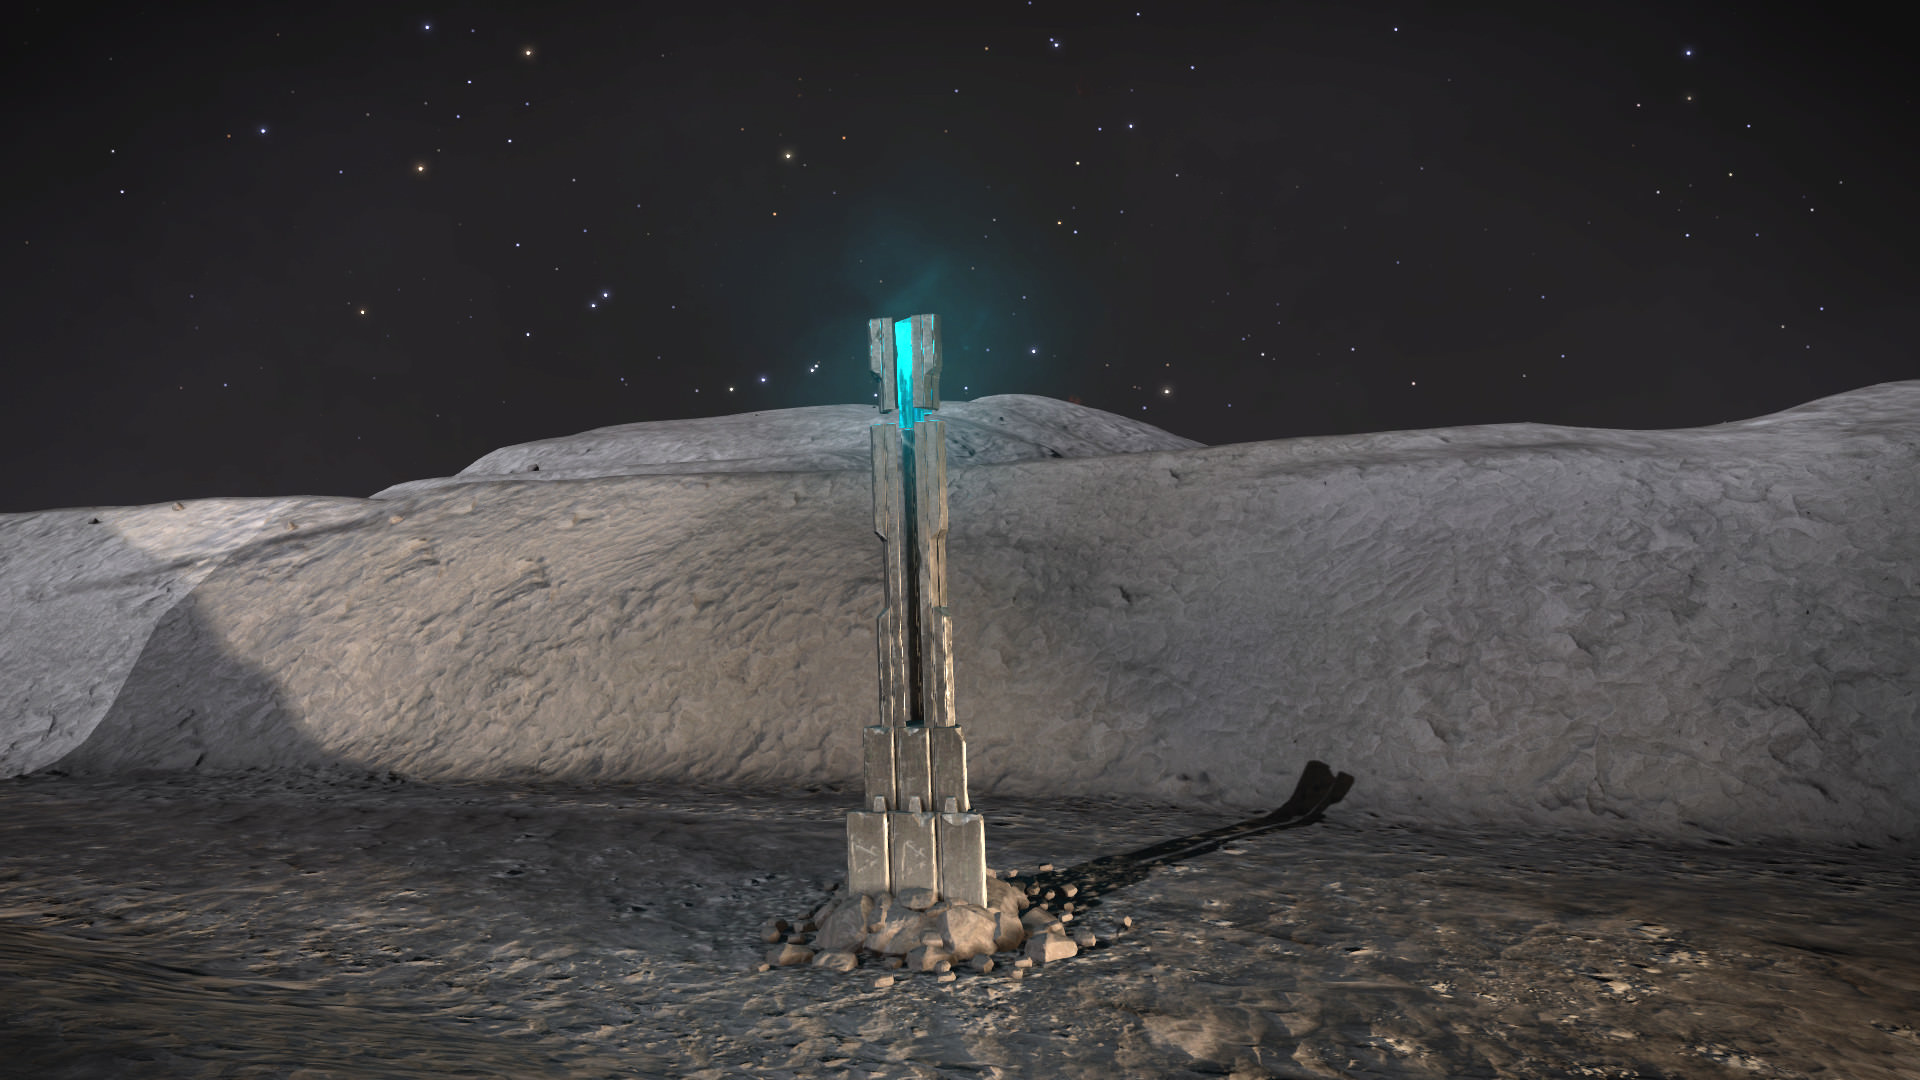
But now you’re ready to charge the first pylon. It should be exposed, looking like this (but in the central location):
Use your turret to shoot at the glowing ball, which charges the pylon. Keep shooting until a light beam comes out of the top, like this!
Now the pylon is charged! You should see a timer on your screen, though; this is a timed exercise. Time to pick up whatever the sentinels dropped and head for the rest of the pylons.

Looking at the picture above, at each of the pylons 2, 4, 5, and 6, you should encounter a lone sentinel. (Pylon 2’s sentinel seems to be a little further out and may not activate.) At each of those pylons you’ll also see an obelisk that’s glowing blue with ancient symbols on them. You’ll want to select and scan (with your SRV’s data scanner) each one of them; this is where you’ll get the Pattern Data (Alpha, Beta, Delta, Epsilon, or Gamma.)
Charge the pylons in the order 1, 2, 3, 4, 5, and 6. After you charge pylon 6, four more sentinels will emerge in the center of the site. Fortunately, you have good cover from where you are, so you should be able to dispatch them without too much difficulty. Be sure to collect any parts they drop – Guardian Sentinel Wreckage Components and Guardian Sentinel Weapons Parts are key for several blueprints, and those aren’t super-frequent drops. Also, the timer on your screen should have disappeared when you charged the last pylon.
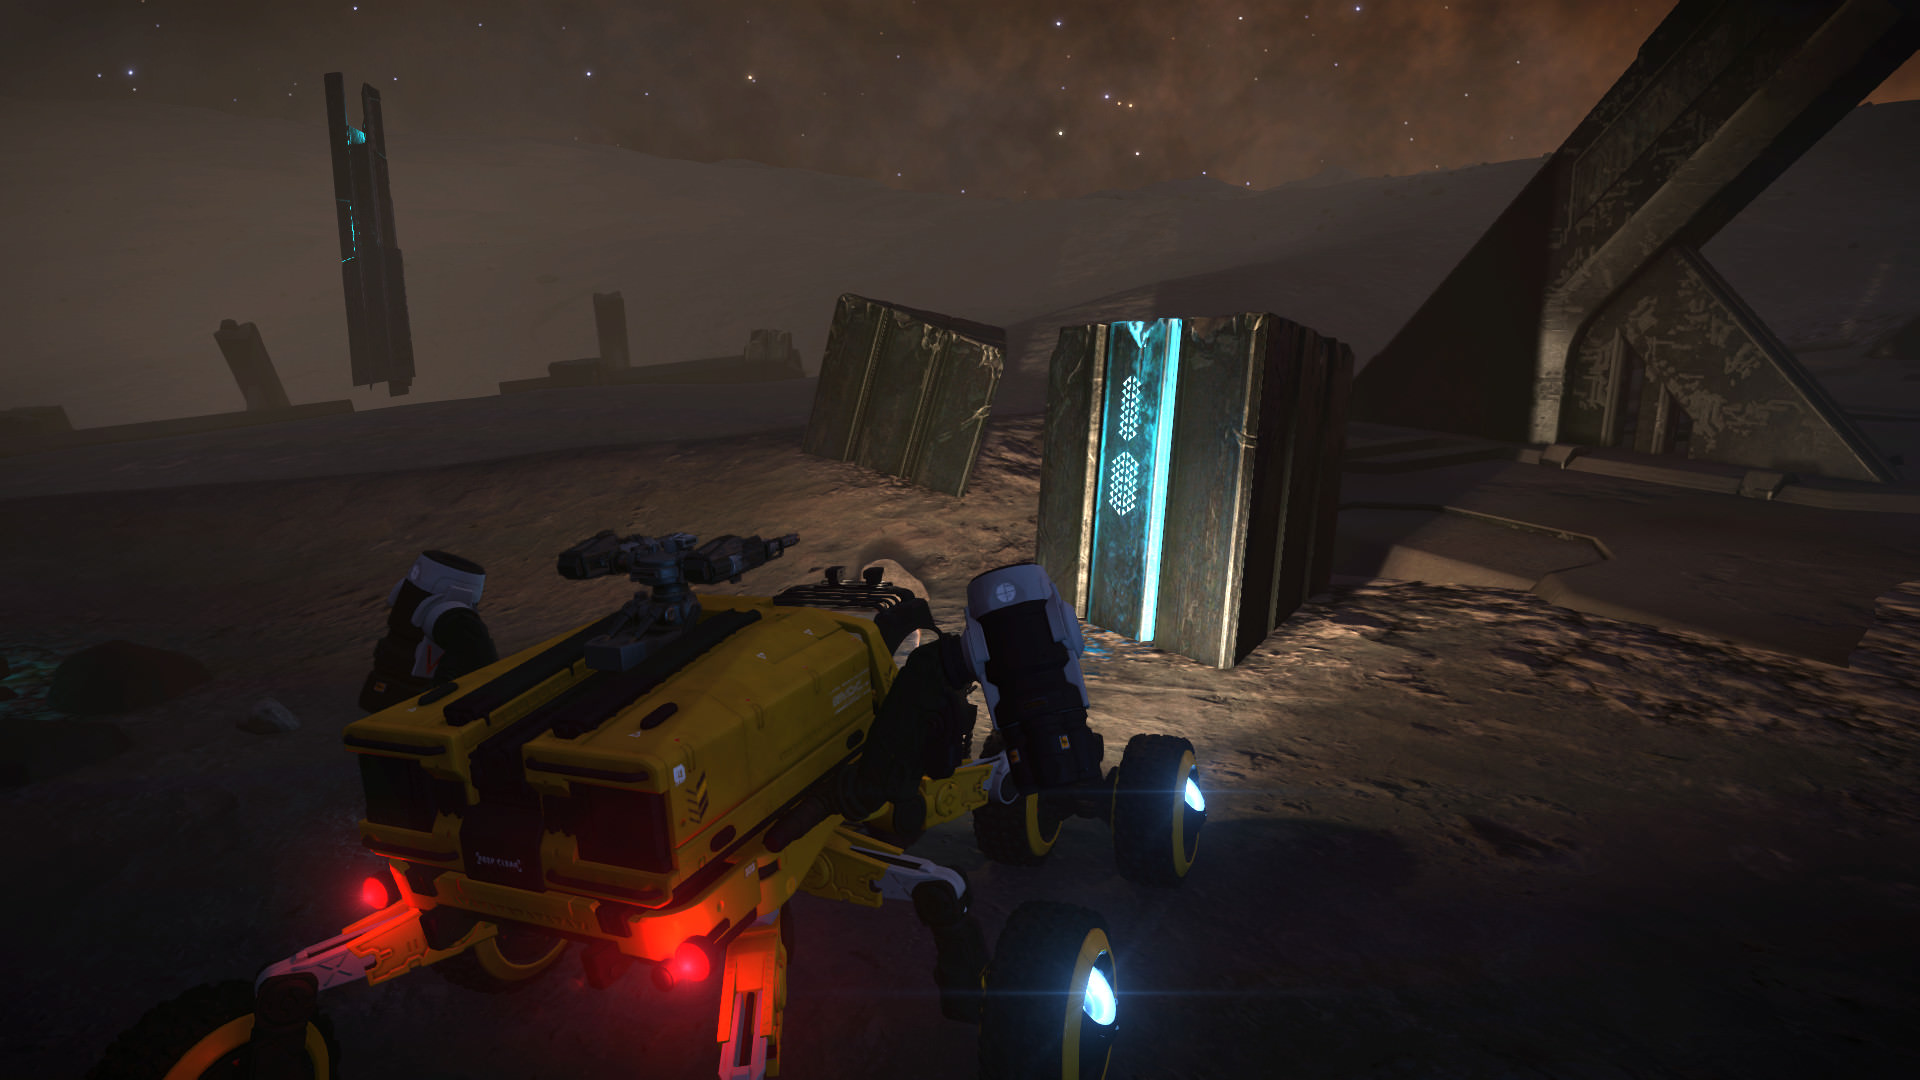
Now it’s time to get an Ancient Relic. As you’ve been driving around, you may have noticed (or heard) these towers emerge from the ground. Time to target the relic at the top and shoot it down.
You’ve got a relic and you’ve charged the pylons, it’s time to head back up to the machine and visit the “X” on the ground between the machine and pylon 1. Remember that white thing that looked like a button? It should have recessed a little. Park your SRV right on top of that and, from your inventory panel, jettison the ancient relic. Jettison and Jettison (Abandon) both work in this case. As soon as you do that, you should see the machine open up and a blue spinning globe should float up. Time to target that with your turret and scan. Note: use your data scanner, not your composition scanner! Bingo, one module blueprint segment.
… But the fun isn’t quite over. You should have one more sentinel spawn right next to you and one more in the middle of the site. Destroying these will wrap up this experience.
Once you’re done, drive around the site. You should see towers and archways with blue, glowing “destructible panels” on them. You can shoot these, and more necessary materials will drop.
Then, drive away from the site a few hundred meters. You’ll want to make sure you have enough ammo and fuel for the next run; I use between 800 and 1200 rounds of SRV ammo per run. Now you should be able to log off. (Too close and you’ll be given a warning about being in danger and being moved further out – make sure you’re out of the zone!) Then log back in and repeat.
If you’re doing this with friends, even better! After scanning the module globe, the pylons can be re-activated and charged without having to fight all the sentinels again. Once each person has been able to scan the blueprint, everyone should head out of the zone and log off so it can be reset.
Note: A few modules require Pattern Epsilon data. If you’re struggling, I wrote up a Reddit post with a way to get it reasonably quickly. Basically, hop over to the Ancient Ruins at 48.1808, -48.3718 and look for two obelisks right next to each other. Scan both, relog, repeat.

Recent Comments