Epic Seven Guild War Offensive Comps and Gear Guide
by SatorArepoT
This guide details how to gear units used with success as relatively generic offensive comps in GW.
The comps section won’t list every comp we use (imagine listing all comps usable with DC) but will aim to explain the subtleties of the non-straightforward ones.
Don’t treat the builds shown here as gospel or goals : some of the units shown here have a high level of investment it would be hard to replicate, and players also have their own preferences so adapt with what you are comfortable with. Keep in mind that the principles behind the comps will work even at lower gear quality, as long as you’re facing roughly similarly geared opponents.
Basics
AI bait and anti-bait
Most of the time, AI will choose targets in that order :
- Favourable element
- If no favourable element, any non-unfavourable element
- Otherwise, unfavourable element
AI will also ignore invulnerable targets (except if all are, in which case the above applies)
Finally, if there are several targets with the same priority, the AI will target the lowest hp% first, and if all have the same hp%, it will choose randomly.
This means that you can “bait” attacks using for example F Maya against A Coli. You can also “anti-bait” by bringing 2 unfavourable element units and 1 neutral, for example Krau A Montmo DC against a Lilias comp (Lilias will only target DC after s3).
Damage Mitigation
There are 2 types of unit or artifact based damage mitigation effects. Damage Sharing and Damage Reduction. Both of these effects stack with each other, but for each mitigation type only the strongest active one applies (e.g. SSB 30% transfer will overwrite the 20% Aurius transfer, it will not stack to 50%).
Note that the damage reduction with condition (adamant shield for example, only works against crit) still counts as damage reduction and can’t be stacked with another damage reduction effect.
Artifact and Buff Stacking
Current indications are that artifact effects and buff effect stack additively instead of multiplicatively. This means e.g. the aurius 10% def increase and the defense buff 60% increase total to a 70% increase instead of the expected 76% increase.
Conditional damage modifier stacking
In general all conditional damage multipliers stack additively with each other. That means e.g. the extra 50% damage of Yufine against buffed targets stacks additively with the bonus 20% damage from Portrait to a total of 70%, effectively turning Portrait into a 13.33% increase for her S3 against buffed targets.(Another example would be ML Charlotte’s bonus damage against dark units on her S3)
EHP
Effective Health Points, represents the actual tankiness of an unit. The calculation is very simple: hp * (def / 300 + 1)
Comps
Dizzy Armin Healer
Example : https://streamable.com/ductc6
Stall comp meant to chip down teams without sustain or oneshot potential, using Armin s2 as main damage source. It’s especially effective against FCC/Kayron/Charles or FCC/Arby/Charles. The healer used here are usually Achates/Montmo/Ruele but anyone would do.
Artifacts :
- Violin or Crown on Dizzy, up to personal preferences
- Rod on healer, Vial on Ruele (vs FCC to avoid tauntlock)
- Aurius against Arby, PoV or Noble Oath against Kayron.
If you’re unconfident in your Armin you can go with Pov/Noble Oath against Arby too. The Armin artifact will depend on how confident you are in your Dizzy relative to Armin, keep Aurius on Armin if you don’t think your Dizzy can handle Charles. A good tradeoff is to use a +0 Aurius, so that Armin only takes on 10% of the extra damage (it costs a lot of flat health tho).
Alternative noteworthy comp : Dizzy Krau Healer, replacing poison with nukes.
Fmaya Krau Monty/Achates
Example : https://streamable.com/d6pe74
Another slow and stable comp. With Krau and a well built bruiser Fmaya you will also have sizable burst damage, but on a big timer. Outside of their S3 abilities it will be a chip damage comp.
In general it works against most comps without reviver or good sustain, but the fights can possibly take a while.
Artifacts:
- Adamants on Fmaya
- Aurius on Krau
- Rod on the healer
Basar Dizzy DPS
Example : https://www.twitch.tv/videos/648654639?t=04h02m54s
Another : https://www.youtube.com/watch?v=jaOcoUkjEXs
Very effective against comps without fire units or speedster, especially maid comps, you disable the enemy team using Basar soulburn and Dizzy s3, then your DPS goes ham. An example of comp this works against would be Maid SSB FCC but it is very polyvalent.
You need a relatively (~190-200) fast DPS and a Dizzy faster than the DPS for it to work optimally. Suggested DPS : Arby, Kayron.
DC Krau Healer
Example : https://streamable.com/etiqz7
This is the most popular DC comp as Krau on Aurius provides a 2nd burst on top of the one from DC, allowing to quickly get rid of 2 units or of one reviving unit.
Krau also gives 2 souls on s2 and 4 on s3 (post molas) which means as long as the healer gives 3 souls and DC attacks once (easily achieved by having Krau and the healer faster than DC), you can have a soulburn s3 on DC on his 2nd turn (at the cost of Krau s3 however), giving this comp good adaptability.
Variants :
- Armin / C Armin/Eaton DC healer : only 1 nuke but frees Krau and has more permanent mitigation
- any DC comp really
Auto Comps
Example : https://youtu.be/7zDIBdc3z04?t=67
Once bread-and-butter of the offensive comps, it is now fairly rare to be able to use them. The basis is usually :
- Elena or fast C Armin to provide invincibility before the opponent acts,
- Slow SSB or ML Ken to counter kill under invincibility,
- Diene or Maid (faster than Elena/C Armin) to give attack buff and protect somewhat.
All units used should be on immunity.
You can also use Elena/C Armin with ML Ken and SSB. These comps are countered by a dispeller like Alencia/Basar and lack stability against Charles but are still a good default answer on scouted comps without surprise.
SSA (Shooting Star Achates) A Lots Nuker
Example : https://streamable.com/ductc6 (2nd fight)
While this comp has limited use, it’s very good against comps having no speedster (or not at the level of your A Lots) or reviver, no dispeller and no or a single consistent AoE threat. You want immunity on both SSA (Shooting Star Achates) and ideally on your nuker as a caution and either push SSA or your nuker on the first turn depending on what’s more urgent, kill (soulburn) someone with the nuker then use A Lots to refresh the cooldowns faster. This is shown with W Schuri but Lilibet or Sigret work better nowadays, and there are tons of alternatives.
The spirit of the comp is to quickly dispose of a threat preventing you to bait, then use the immortal DPS as bait while waiting for cooldowns.
Variant :
- SSA Wall DPS, with a somewhat bruiser DPS to sponge the AoE damage and possibly dual attacks.
Spez double Lots
Example:
Very simple and effective answer to double squishy threat comps without speedster, get a solidly built Spez then nuke the fools.
Variant :
- C Dom against no revive can work but you’d need her not to need her crit buff or the CR push on s3, otherwise using s3 means you won’t have the attack buff after Lots push. Midnight bloom on Lots and ego imprint on C Dom can help.
A Lots Nuker F Kluri/Ruele/Carmin
Examples :
- ALots CDom CArmin : https://streamable.com/rt3qzm
- ALots Yufine FKluri : https://streamable.com/6u2vno
This comp is fairly polyvalent and works well against tons of double threat comps, but it relies on the opponent using orthodox builds and artis. It would lose to a Charles on Holy Sacrifice, an especially tanky SSB on Proof of Valor, or other shenanigans so it’s advisable to use it only on scouted comps.
The most known variant is A Lots Yufine F Kluri, which is used against SSB FCC Charles. You nuke Charles with Yufine s3, soulburn F Kluri to def break and provoke SSB, then A Lots breaks FCC’s s3 with his own s3 and Yufine can kill ssb. This is safe by using Bastion on F Kluri to ensure Yufine can’t get provoked by a speedy FCC, since she won’t be the lowest hp% target (see baiting), but you risk losing A Lots.
Another common variant is A Lots C Dom C Armin against SSB Lilias Charles. A Lots pushes c dom, she s3 then kills charles, c armin uses s3, ssb s2 is triggered by A Lots while invulnerable then c dom kills ssb, and you just need to finish lilias which is easy. You want a slightly tanky A Lots for that since he’ll outspeed easily but even if he dies it’s an easy victory.
Finally, a more recent variation is A Lots with S Tene, which makes use of a double book to soul burn S Tene twice, giving her 2 non-counterable attacks + her nuke in a row. Last one can be Ruele/C Armin/F Kluri, anything that ensures you can finish the team.
A Lots J Kise
You know how that works. Last one would be Roana/Destina against Kayron, otherwise C Dom, Arby for extra safety, speed imprints like Surin/Schuri for +14 speed or Mirsa/W Schuri to have a safety nuke.
Suicide comps
Suicide comps are comps with an overwhelming chance to lose one of your units – usually A Lots – but providing safe wins. They’re usually used as last attacks or if you planned your next attacks beforehand and know you won’t need the units.
Typical examples :
- A Lots Arby W Schuri against a ML Ken comp : A Lots pushes Arby, he cleaves then get killed, then cleaves again and gets killed again, leaving only ML Ken alive, then W Schuri finishes ML Ken.
- A Lots Arby Kayron against an arby comp : A Lots gets killed by the Arby return cleave, but your team cleans up.
Gear
Soul Weavers
Achates

Achates can work with almost any gear but you want her tanky enough to survive an arby normal + dual attack / DD proc Kayron or in general unplanned burst during her non-invincibility turn, so 90k EHP as shown above is a nice basis.
Her main threat is being debuffed so you want at least 100 ER, which with the ER EE gives her 150 ER, and finally 190 speed or more allows her to s2 herself before most DPS on the first turn on a fight, removing any threat on her at that point. It also allows her to s3 before the rest of your team goes on the next turn in case critical debuffs were landed.
As with every healer, you can consider building her with an ER ring and switch to health% or def% ring for fights where you worry about their tankiness more than debuffs.
The arti should always be rod, as it means she can heal someone during the turns she s2 herself, and supplements her somewhat weak s3 heal.
Mola investment should be the -1 turn on s3. Additional molas on s3 are a luxury.
Angelic Montmorancy
(see Code’s here : https://imgur.com/a/3Pyn5yo)


Montmo is pretty hard to gear in the post-w13 era as she needs both high tankiness and an increasingly higher amount of ER to handle specialized debuffers on crown. As can be seen in the builds above, 180-190 speed is desirable, then you either opt for high ER or higher tankiness, or you somehow can do both. Although the builds here don’t display it, 210+ ER is considered pretty normal nowadays on Montmo.
Note that anything lower than 90k EHP is probably not worth using, and as with Achates, you can switch between ER ring and def/hp% in some situations depending on what you need most.
Artifact would be rod most of the time, she can’t really handle heals properly without it.
Skill-ups wise she should be +15, it’s free.
Ruele
(see Code’s here : https://imgur.com/a/3Pyn5yo)


On Ruele you want high ER and tankiness, with speed as you can muster. An alternative and rarer build as shown here would be to insist on speed and disregard ER. This is especially good in the Dizzy Armin comp as it provides additional safety but you need to use Vial against FCC in case it’s an high eff FCC.
Destina


Destina is particularly tanky so builds using her make use of that, with 130k EHP on both despite 190 speed. ER is as you can afford it.
The appropriate EE will depend on the fight, a comp with low damage will make use of the lower s3 CD whereas the s1 cleanse can be more appropriate for fast fights.
Mola investment would usually be only the -1 turn on s3.
SSA


Used mainly in one kind of comp, SSA is pretty gear exigent so you have to decide if the tradeoff is worth it for you. 180+ speed and immunity with a base level of tankiness can work, but for it to be really trustworthy you want 205+ spd and 100k+ ehp, while maintaining immunity.
Vial is the right arti on her against provoke defs (Lilias/FCec especially), since even after her buff she doesn’t cleanse herself on s3. If you don’t have to fear a debuff, Magahara tome could help with cycling, especially if you use her without A Lots.
Molas should be -1 turn on s2, and luxury would be -1 turn s3.
Singelica


Singelica just wants high speed and very high ER, with the tankiness you can muster afterwards.
Elena
(see Code’s here : https://imgur.com/a/3Pyn5yo)
Diene
(see Code’s here : https://imgur.com/a/3Pyn5yo)

Diene wants immunity and higher speed than C Armin / Elena for use in the auto comp, as well as some tankiness. The arti here is placeholder, rod is what you want.
Tanky bruisers
Krau
(see Code’s here : https://imgur.com/a/3Pyn5yo)

There’s a good diversity of builds for Krau, here are 3 variants : first one uses a slow Krau as a wall, with an impressive ~205k EHP (with an arti) but sacrifices eff res and speed, second one is a speed one with again 172k EHP, but no eff res, and the Code’s is speed with eff res, but only 145k EHP.
In all cases, you want hp high enough to oneshot or near oneshot an opponent at mid health with your Krau, keeping in mind it’s around 1:1 with a 850 bonus, so 23k health at mid health (11500 health missing) would do around 12.3k damage with s3 (without miss, 9.2k with miss). Adapt depending on the health of the opponents you face often.
As for the speed, it depends on the playstyle and how much you value an early shield. If you have DC, Krau being tuned faster than him also has advantages as discussed in the DC Krau comp.
Mola investment should be -1 turn on s2 and s3, and you can also go for the extra 10% cr push on s2.
DC
While DC is allegedly easy to build, you still need to be cautious of a few things. You can’t just push HP and neglect def and speed, and it’s a good idea to either run immunity or get a 80% ER basis (or more). The 80% ER basis means you can get 140% ER if you equip Strak, which wouldn’t hold against specialized PvP debuffers like some Basar or Tene but would work against non debuffers (kayron, maid) and give a decent chance to resist against normal debuffers (F Cec, SSB). You obviously can go higher than 80% ER, and since you run him with healer you can just give immu then focus on other stats like the first example.
It’s important to know one’s damage with DC on s3. 30k HP variants would do 14.4k damage on a non-soulburn non-light, which is enough to kill a lot of bruiserish threats or DPS protected by Aurius and/or FCC.
Artifact should be adapted as needed. Proof of Valor and Sepulcrum help alleviate the burst he takes (meaning your healer can focus another unit) and is helpful against Arby, Strak if you have ER helps against some debuffs, good against SSB, Portrait is an option against Krau or FCC if you’re not otherwise worried.
Mola investment should be max s3 and max s2.
ARavi
(see Code’s here : https://imgur.com/a/3Pyn5yo)

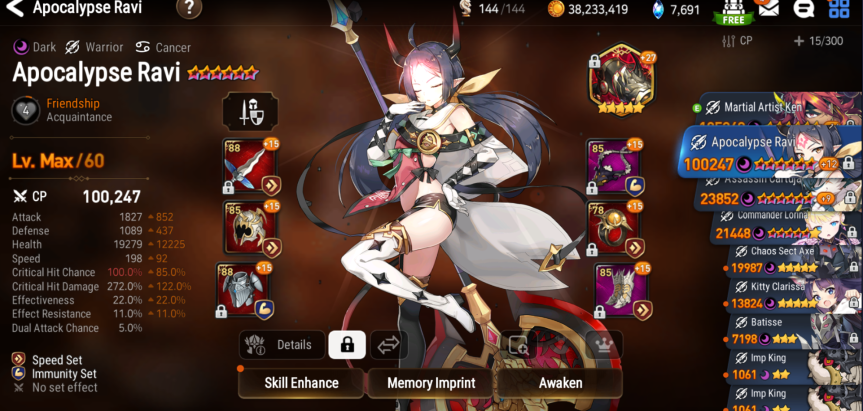
For GW non-counter is usually better as it prevents a counter at inopportune moments if you’re against AVildred, Krau or SSB. Otherwise Draco is usually the best arti to help with both tankiness and damage.
LQC
(see Code’s here : https://imgur.com/a/3Pyn5yo)

A bruiser/speed charles-like build LQC makes her particularly polyvalent in GW Offense, way more than the nuke variant as it makes use of her entire kit.
FMaya
(see Code’s here : https://imgur.com/a/3Pyn5yo)


If you want to use the FMaya Krau comp, a bruiser build is usually what you want to go for. This also requires mola investment on her s3. A bruiser F Maya with max s3 and 240+ cdmg can nuke typical Arby with s3 from full, which gives her a lot of additional flexibility.
As for ARavi, counter set can create additional risk since you may kill arby when you don’t want to, up to you.
The wall build is obviously doable too.
Mola investment should be s2 for all builds, s3 for bruiser builds and s1 is luxury.
DPS bruisers
ML Ken


Violet

Violet works well into Dizzy or as the DPS in the Basar Dizzy comp.
CZerato

Czerato is mostly used against Basar comps if you can’t outspeed.
Don’t neglect the tankiness on CZerato, and don’t hesitate to put PoV on him if you’re unsure. You don’t need to religiously stick to 0% ER on him, the 15% base resist means anything up to 15% ER total is exactly the same as 0% ER.
Pure DPS
No example needed, you know how to build them. Be sure to hit 100% crit and get immu when needed.
Tanks
Crimson Armin


C Armin has one main build and two variants (the second one not being shown here) : the main build is a 190-210 speed C Armin with immunity as part of auto comps, and the two variants are a slower, tankier C Armin which is especially good against Vivian or with DC, and the second variant is a high 230-250 speed build to interrupt Cerise comps. The second comp in particular is very rarely needed and hogs very good gear so it’s more of an adaptation made during a GW to handle that situation.
Armin

Armin has one build as shown above. You want very high tankiness, 150k EHP in the example above, in order to survive Kayron s3 (against Kayron you wouldn’t use Aurius ofc), a decent eff (50-70+) and a decent speed at 160-190. If you use a slow Dizzy, it’s good to have her slightly faster than your Dizzy to use s3 before Dizzy goes, but this isn’t too important.
In case you have extra available stats after reaching those, extra tankiness would usually be the goal – it is indeed not realistic to get enough eff res to matter (FCec would be the annoying one here) so don’t worry about it.
You’ll use the extra stun proc EE most of the time, the cleanse is also useful in DC comps
Mola investment would be the +% effect on s1, and you can go for the +% effect on s2 too but it’s a luxury given its price.
Do not use Adamant on her, it is the same effect as her s3 and as a result useless.
Eaton

Ideally you want immunity to avoid being stunned/silenced on first turn and being unable to use s3.
Misc
Dizzy


Dizzy mainly has 2 available builds for GW. In both cases, you want her to have >60% eff and more than 100k EHP. The nuance is exclusively on the speed : A speed lower than 180 will usually go after fast Charles and standard Kayron, allowing her to use s3 from her first turn in the Dizzy Armin comp, which is safer. The second has around 220 speed, which means you risk getting countered on the first turn but it also makes her usable in the Basar Dizzy comp.
Counter set (as shown in the 2nd example) helps a bit but isn’t central to the build.
Artifact would be violin or crown most of the time.
Mola investment is just the -1 turn on s2 and s3.

Recent Comments