Rocket League Offensive Positioning and Rotation Guide
Rocket League Offensive Positioning and Rotation Guide by lmfao_schwarz
Here is a basic guide to offensive positioning and rotation. Be prepared for some awful Paint editing.
Basic offensive positioning:
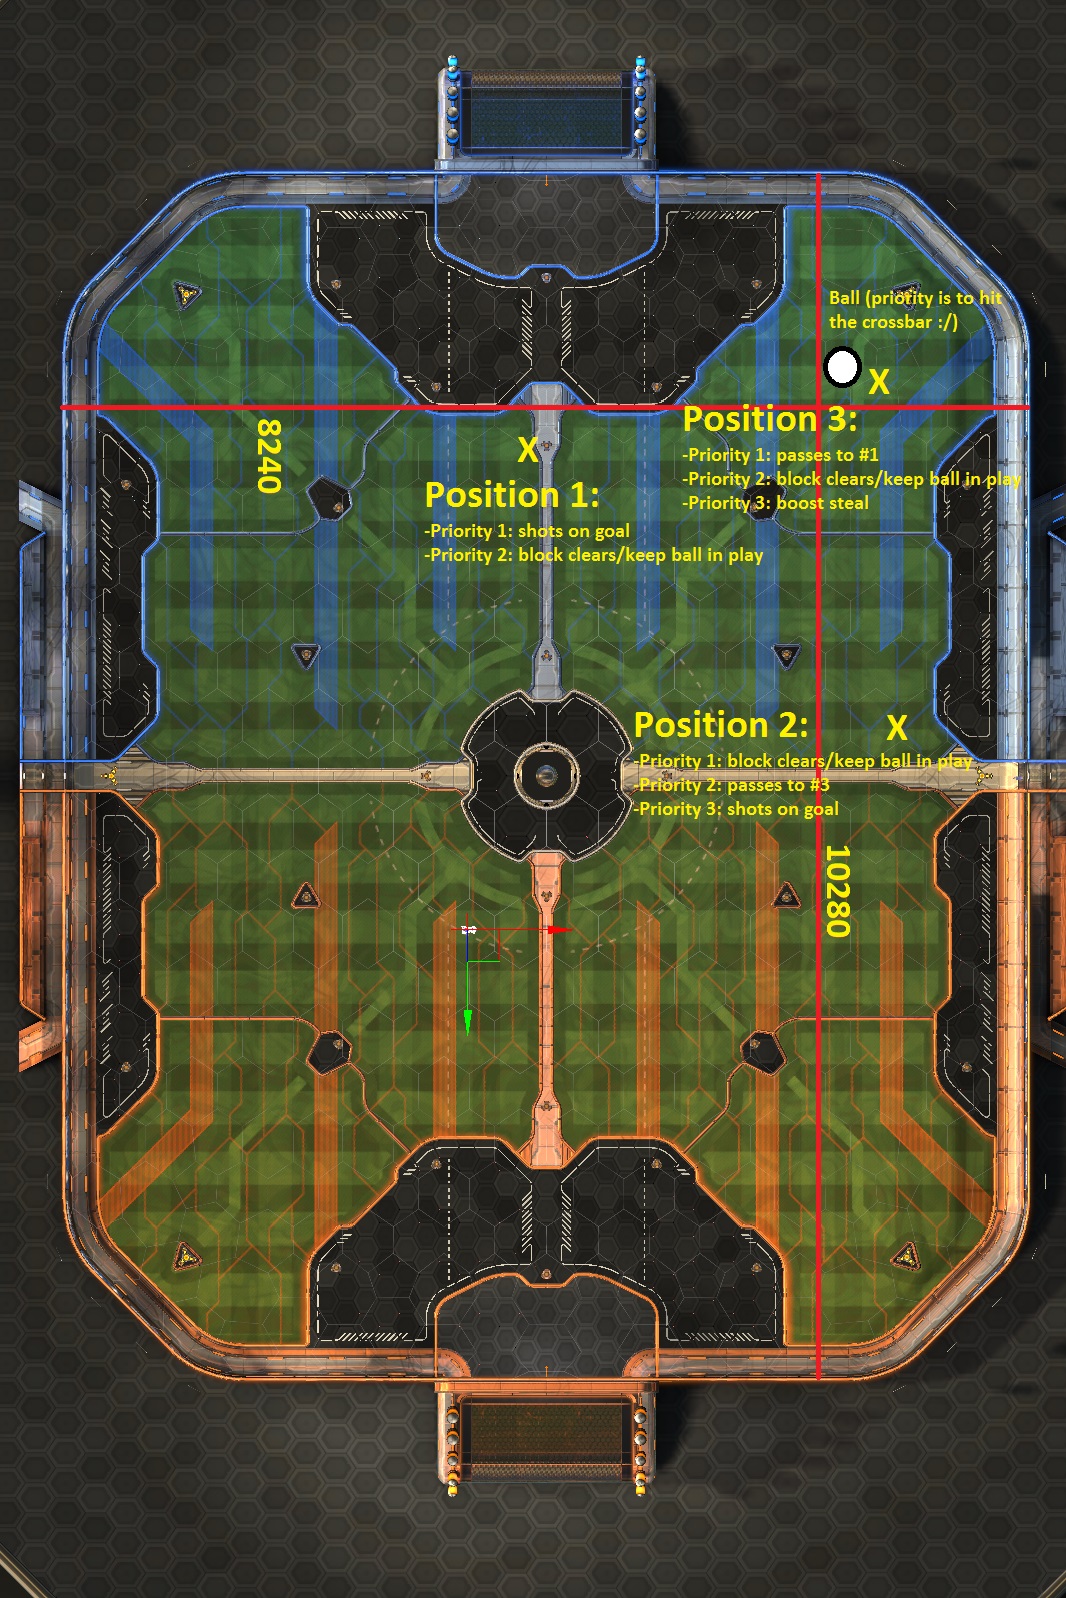
These should be the default positions that your team sets up almost every time you have a “halfcourt offense” opportunity. I’ll run through a few scenarios as well to see how these positions operate and rotate.
Scenario 1: successful pass to middle
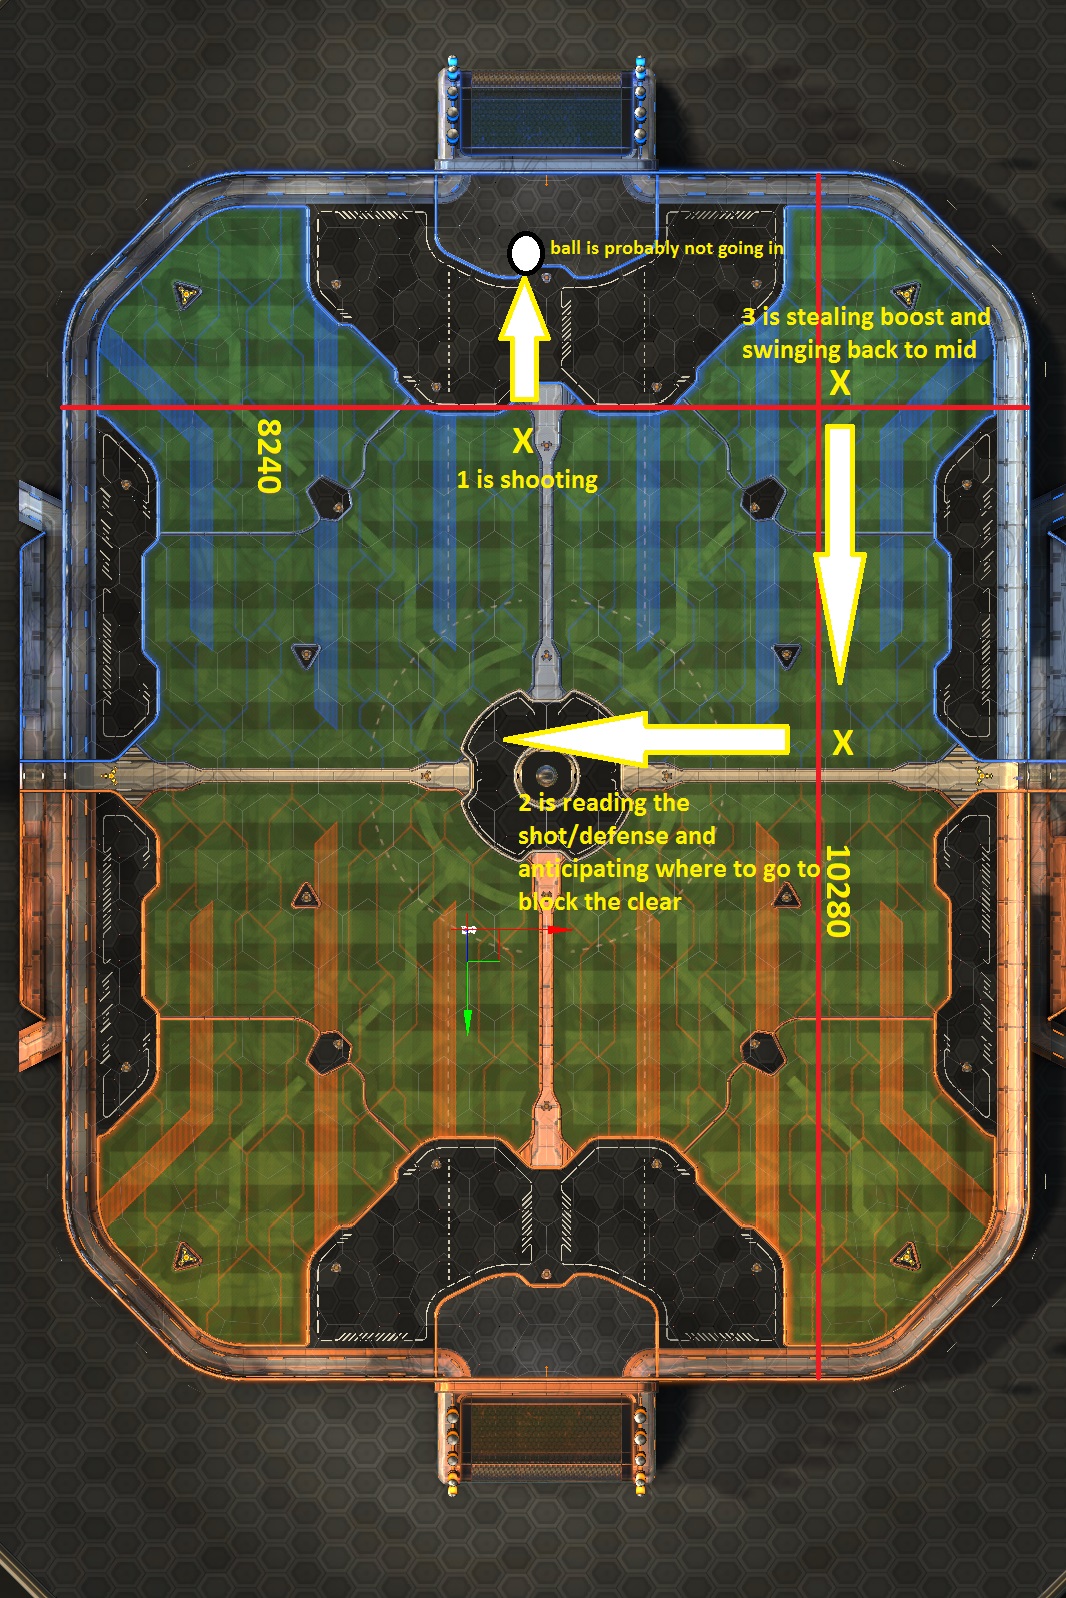
1 attempts to score, 3 steals boost and replaces 2, 2 reads the shot/save to follow up on the ball
Scenario 2: clear to right side of pitch

2 tries to block the clear and replaces 3 as the passer, 1 swings in behind 2 and is now trying to block clears, 3 tries to steal boost and shifts to the scoring position
Scenario 3: clear to left side of pitch
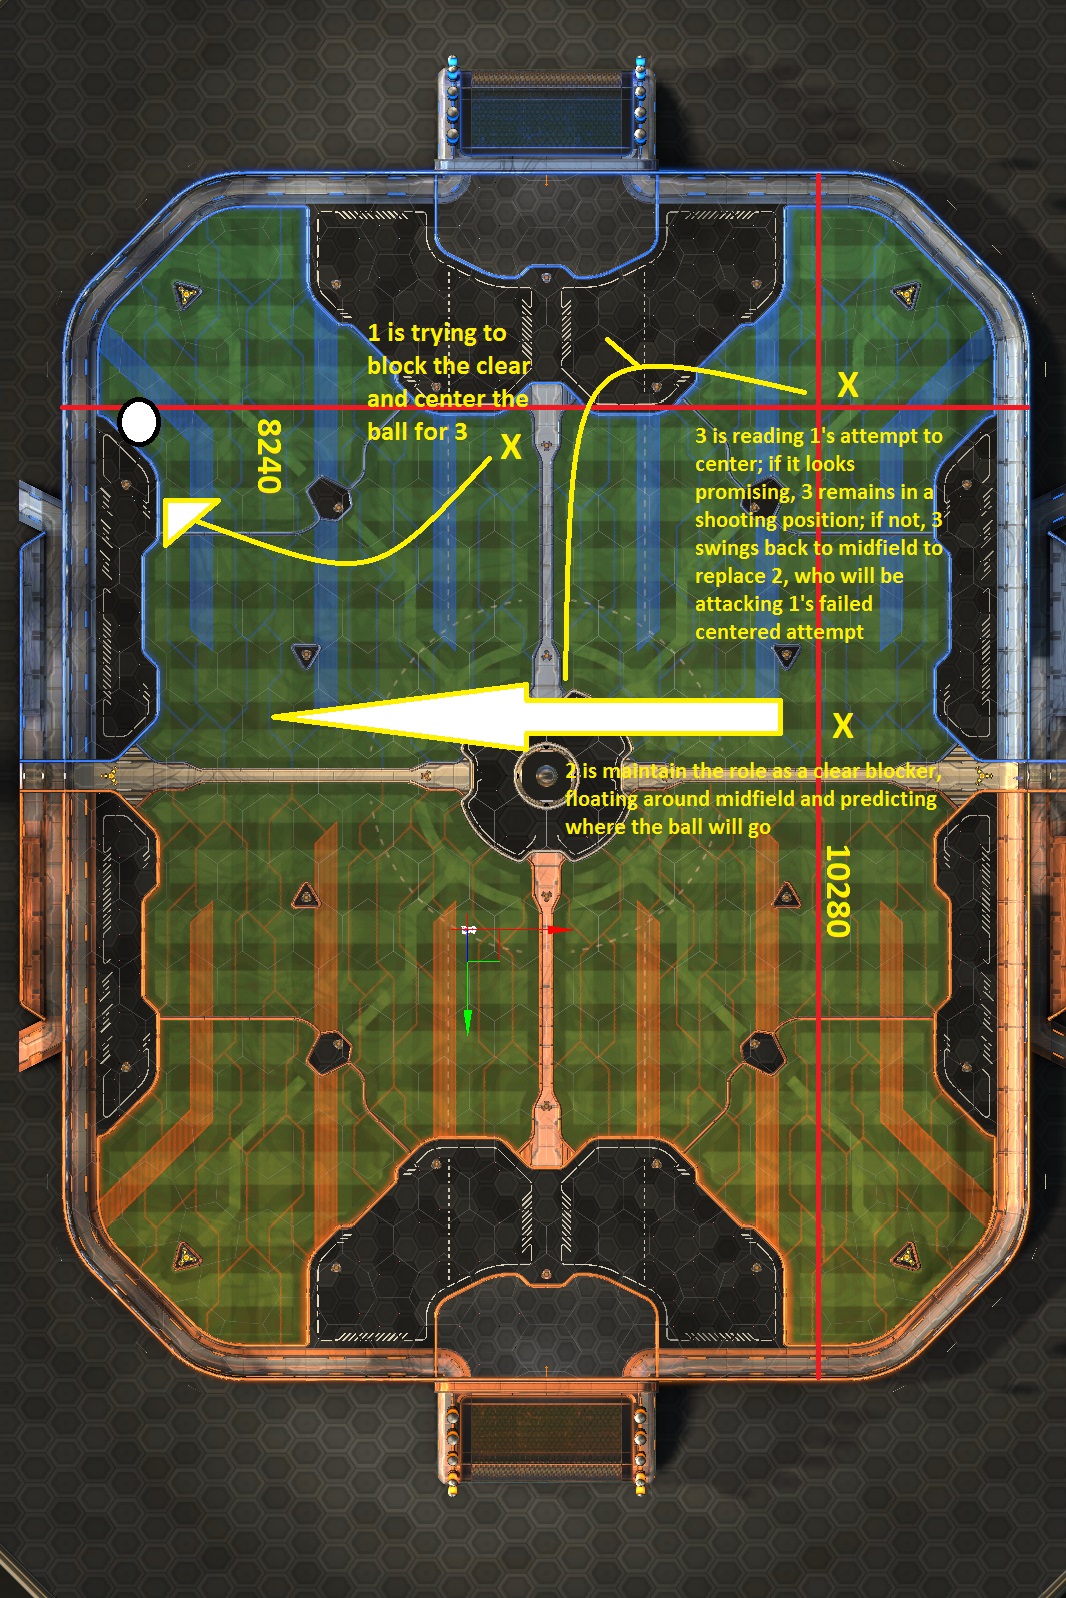
1 tries to block the clear and replaces 3 as the passer, 2 maintains the position as defense/blocking clears, 3 becomes the scorer but is wary of a failed attempt by 1 and ready to streak downfield to defense (note: this scenario does provide for more ambiguity, as sometimes it will be beneficial to have #2 attack the ball first rather than #1)
These are just a few of virtually infinite scenarios, but hopefully it gives you the right idea of effective 3s positioning and rotation.

Recent Comments