MMDOC Control Deck Guide
MMDOC Control Deck Guide by TheTechnomancer
Preface:
This is a guide to creating a simple and cheap control deck using the most accessible cards available for newer players. Coming from an MTG background, I was slightly frustrated, as a new player, by the somewhat limited strategic options available to newer players. I loved deck building and my favorite decks were control. Coming up with new and interesting ways to frustrate my opponents through absolute dominance of the state of the game was the best part of the game for me. So naturally the first thing I wanted to do was make a control deck in MMDoC. Sadly, this was not as simple as I had hoped. Most of the best options for control are found in less accessible expansions sets, and even then usually at the rare and epic rarity. If you, dear reader, are anything like me, the difficulties of breaking into competitive control-style play in this game could be quite frustrating. Well, I am here to ease some of that frustration. I will not be posting decklists, but rather discussing some of the card options available and how they fit together using as few rares and epics as possible, and using primarily cards from the base set.
Chapter the First: What even is control?
Many, if not most, of the decks in the low-middle level ELOs are aggressive rush-style decks which seek to bring the opponent’s HP down to 0 as fast as they possibly can. Often, these decks will ignore their own life, preferring simply to out-race the opponent by doing more damage. Control is the antithesis to this strategy. We will be favouring a more defensive strategy. It is the aim of the control player to establish a state of “stability” in which the threat of losing is mitigated as much as possible. Once this is achieved, you simply bring the HP of your opponent down in whatever manner suits you, and in your own time. There are many different types of control, but for our purposes we will be favouring the “turbofog” or “stall” strategy, which seeks to render the cards that the opponent has in play and in their hand irrelevant.
Chapter the Second: Shut up and show me the cards already!
Alright, I’ve prattled on enough, let’s do this! This deck will begin, as all decks must, with a hero, then, as all decks should, proceed onto events.
Hero:
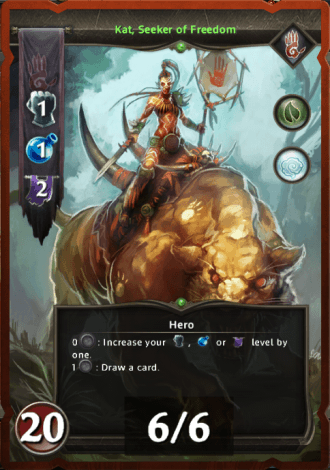
Kat, Seeker of Freedom
I can’t really recommend any others in good faith at the moment. Kat is the Stronghold starter, and most players will unlock this card for free upon completing the extremely short single-player content. Shaar could also work, but is harder to obtain, and Kat’s 1/1/2 starting stats are ideal for this deck (which usually maxes at 4/3/4). I will explain why I have chosen Stronghold when we get to main-deck card choices, but first…
Events:
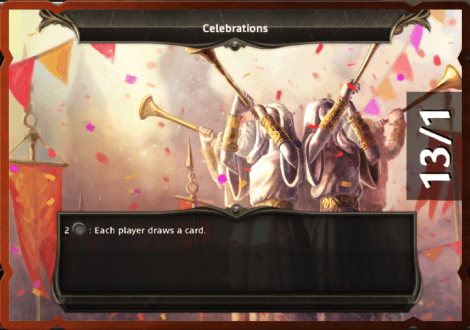
Celebrations
Four of this one, pretty much no matter what. You need to draw cards as much as possible, and our strategy is built around trivializing the opponent’s cards, so giving them more is really not a problem.
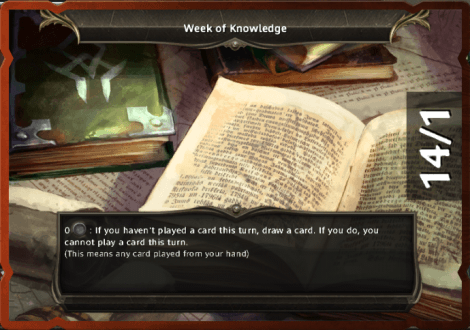
Week of Knowledge
This card can be nice on early turns when you have nothing else to play. It’s a solid addition, and in super-cheap builds I would not hold it against you to run 4. I would recommend looking for other options, though.
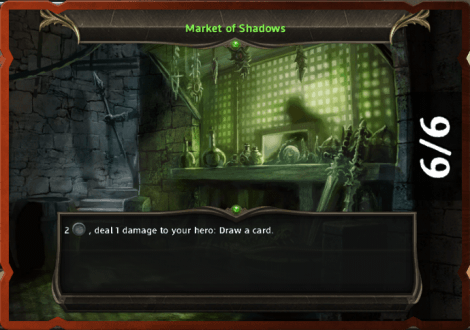
Market of Shadows
Another solid option, can be as good as Celebrations, and sometimes even better. Taking damage is not ideal, but one damage is rarely a big deal and there are even ways to turn it to your advantage (more on that later).
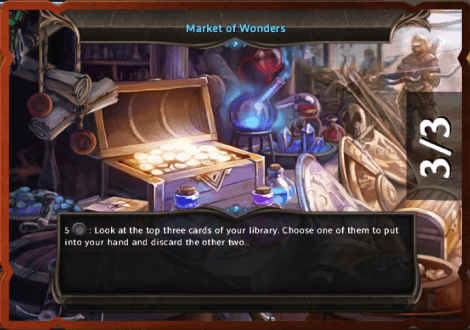
Market of Wonders
Expensive activation and rarity make this a somewhat undesirable option, but it can be very useful in particularly long games where the pressure is on and you really need to dig for that one last card you need to finish them off.
Cards:
Alright, the real heart of the deck. The 50 cards that will make or break it all. Rather than splitting this into Creatures, Spells, and Fortunes, I will instead be splitting cards by utility, in other words their purpose in the deck. Some cards may appear more than once. This is to be expected, as some cards have more than one use in the deck (those are the best ones!). In those instances, I will copy the summary word for word. Also remember this is not a deck list, it’s a guide to which cards can be used in this deck. The finer details of building the deck are up to you (and your collection).
Dra-oh wait, I almost forgot. I said I was going to explain why Stronghold. Let’s just get that out of the way first.
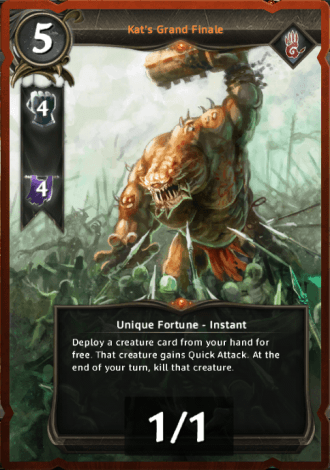
The ingredients required for a control deck are as follows: a method of exerting control (removal and stall are common options), a way of maintaining control (almost always card draw of some sort), and a way to finish off the opponent (direct damage is a favorite, but even just good ol’ fashioned creatures can do the trick). Stronghold heroes usually have access to earth magic, which provides both mass removal tools and stalling tools (more on that later), as well as Arena, which can either cycle or do direct damage. Finally, the aptly named Kat’s Grand Finale (an Epic, I know, I know) is an ideal finisher from the base set, and synergizes well with other Stronghold creatures and fortunes. Card drawing tools are almost all universal, so faction choice is mostly irrelevant for that one. For making a control deck, Stronghold is not really ideal, but for making a cheap control deck? It’s perfect. Now where were we? Oh right…
Drawing and Fetching:
As this deck will be relying on a combo-finisher (commonly referred to as OTK, standing for One Turn Kill), we’ll want ways of getting our combo together, not to mention keeping a steady supply of our control cards. Most of the card drawing is already covered with events and the hero, but there are a few other options, such as…
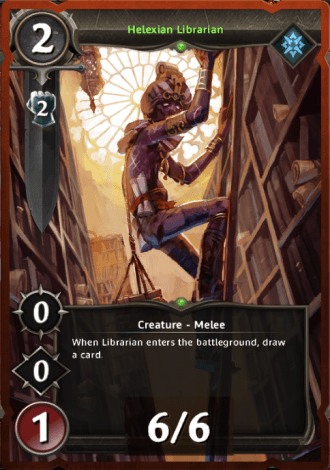
Helexian Librarian
This guy is neat! He replaces himself with a new card when he comes into play, after which he can be thrown under a bus (or Ravager) to save your own hide for a turn. Not normally a great addition to low-creature control decks, but on our budget, we will take what we can get. Besides, we play a pretty fair number of creatures anyway. He synergizes well with Broken Bridge, letting you draw even more cards! What a bro.
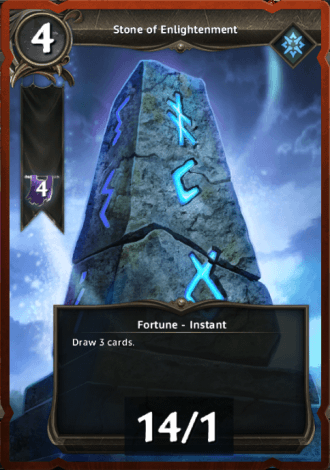
Stone of Enlightenment
This is a fairly expensive one-shot card drawing fortune. It’s certainly a strong effect, but it’s resource cost is quite high. Generally this is more drawing than is really necessary, and often times it’s high cost makes it unsafe to use. 1-2 of this card could potentially provide an edge digging for answers, though, and it’s hard to argue with a common.
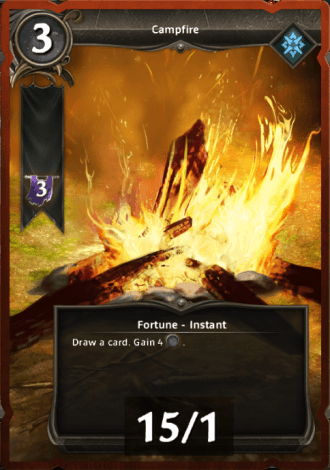
Campfire
This card is fantastic! If the opponent doesn’t have an active Week of Taxes, it will actually net you 1 extra resource while cycling itself, providing much-needed card draw. If you somehow manage to get your combo together particularly early, this card can be used to get the resources you need to actually play it. I definitely recommend running 4.
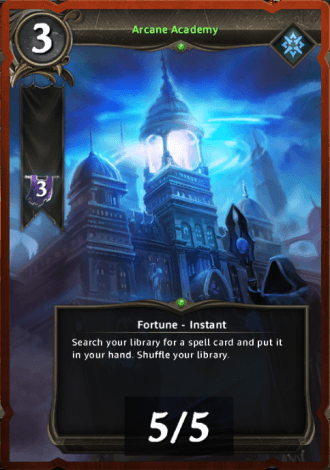
Arcane Academy
Grab a spell out of your deck, put it into your hand. In MTG terms, this is a simple tutor card. It fetches a specific type of card for you. Very useful for the more spell-heavy builds, grabbing important cards like Earthquake, Insect Swarm, and Stone Shield.
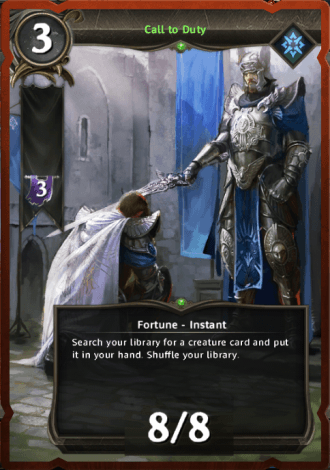
Call to Duty
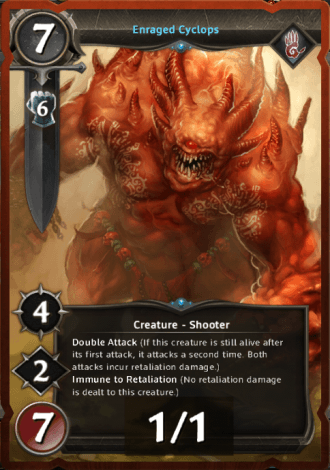
Like Arcane Academy before it, this card can be used to pull a specific type of card out of your library and into your hand. .In this case, it’s creatures. Generally, creatures are not the most important thing in this deck, so it may seem like a strange thing to include, but part of our finishing combo is a strong creature, ideally Enraged Cyclops (a rare). This card can be used as a placeholder for extra copies of our finisher creature (that way we only need one in the deck).
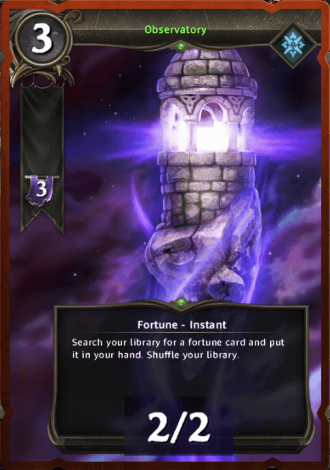
Observatory
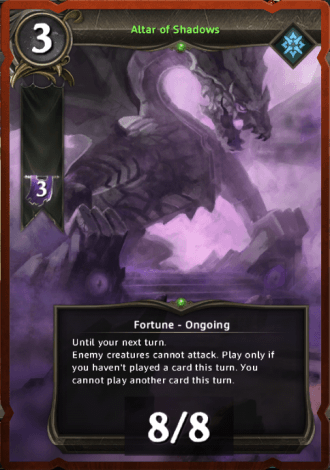
You know the drill, it’s fortunes this time. This card is actually probably the most important of the “tutors” (though still totally optional. As of writing this, I don’t actually own any) since our finisher is not only epic, but unique. So only one can even be in the deck in the first place. This can help us get it faster, not to mention other useful targets like Blood Shaman Hut, Broken Bridge, or Altar of Shadows.
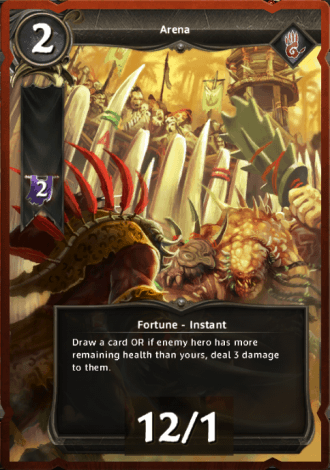
Arena
A pretty simple card with some not-so-simple applications. It’s primary use is to soften up your opponent to set them up for your finisher. If your opponent is already low enough, or you are desperate for answers you can pay to cycle it and draw a new card. Since you can only damage an opponent with it if their life is higher than yours, you can be sneaky and use a Market of Shadows to bring your own life total down, or just let them hit you (hopefully not too hard).
Stalling and Removal:
Helexian Librarian
This guy is neat! He replaces himself with a new card when he comes into play, after which he can be thrown under a bus (or Ravager) to save your own hide for a turn. Not normally a great addition to low-creature control decks, but on our budget, we will take what we can get. Besides, we play a pretty fair number of creatures anyway. He synergizes well with Broken Bridge, letting you draw even more cards! What a bro.
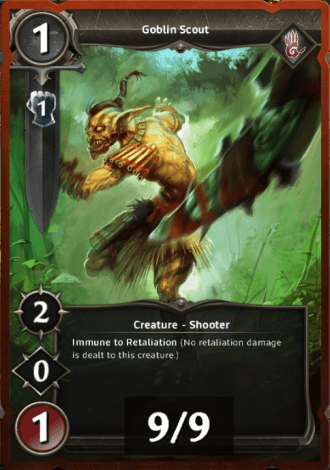
Goblin Scout
Yup. Goblin Scout. His job is to stand in front of enemy creatures. Maybe throw a boomerang or two at your opponent’s head if he gets the chance. He doesn’t add much to the deck, but as a 1 resource common, he’s a good card to use if you are running short in other areas. Don’t underestimate the power of throwing dudes under the bus early game.
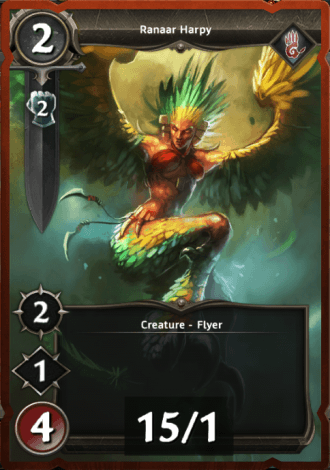
Ranaar Harpy
Same idea as the gobbo, here. Pretty much just there to stand- er, fly in front of enemy creatures. A little sturdier than the goblin scout. Good at softening enemies up for an Earthquake or Insect Swarm. Also good at not dying to Earthquake.
Earthquake
There is no more subtle way to tell your opponent that they have too damn many creatures on the table than killing them all. Sadly this won’t kill most things, but it does synergize well with Insect Swarm and…itself, I guess to stack up enough damage to finish off the more stubborn creatures. Be careful, though. This spell doesn’t hit fliers at all.
Insect Swarm
Even more subtle than Earthquake (and by more I mean less). This does one more damage and also hits those pesky fliers. Still not enough to kill hardier creatures, but it can be combined with Earthquake or more Insect Swarms to finish off opponents. Remember to attack with your creatures first!
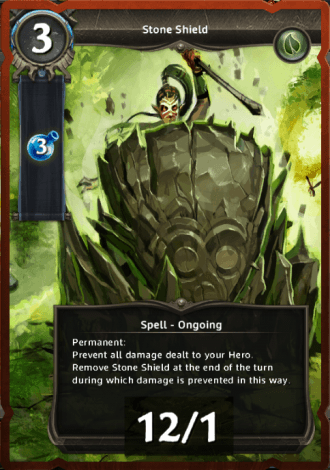
Stone Shield
This card is one of the cornerstones of the deck. And it’s a common! No reason not to run as many as you can get. Prevents damage for one turn, and is even kind enough to stick around in the event that no damage is actually done, how generous. Just be careful if using Market of Shadows, as self-inflicted damage will break the shield. You can stack multiples of this card, and only one will be broken in a single turn no matter how many times they damage you. Stacking them like this can be useful against those pesky dispels.
Altar of Shadows
If Stone Shield is the bread, then this is the butter. Prevents the opponent from attacking for one turn…but prevents you from playing any other cards that turn. You can still use events and hero abilities, though, so you can get a turn of card drawing with no risks. At Uncommon it’s a bit harder to get than Stone Shield, but run as many as you can.
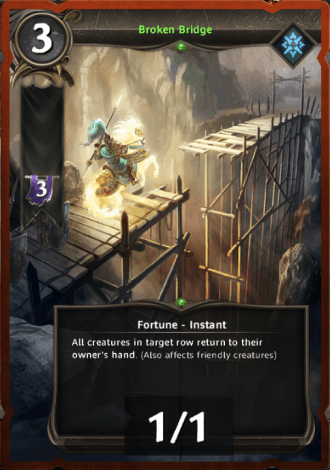
Broken Bridge
Bouncing a whole row of creatures back into the hands of their owners. This card serves two purposes in the deck. First it can be used to stall, bouncing the more threatening and/or expensive creatures on the opponent’s field during your moments of vulnerability. Second, it can be used to facilitate the combo, forcing open a hole in their defences for you to slam that cyclops through.
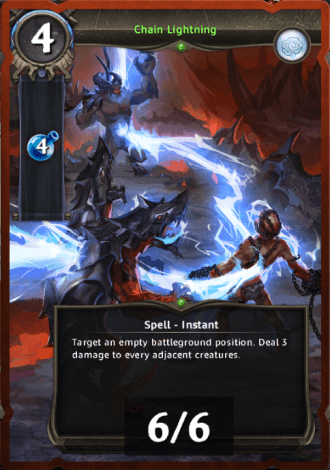
Chain Lightning
A tricky spell to use properly, but can be used fairly effectively. It’s outclassed completely by Insect Swarm for this deck’s purposes, but could possibly be used in a pinch. At 4 Magic it is not recommended, since the deck already needs 4/0/4 for Kat’s Grand Finale. 4/4/4 is a pretty rough max.
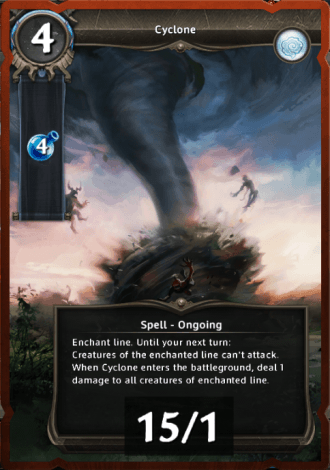
Cyclone
A great card which does some small damage and stalls a whole line for a turn. At common, this can be a very useful card to include in very early builds, but its high resource and magic costs make it a poor choice overall. Only use this if you are really hurting for stalls.
Finish Him!
Goblin Scout
Yup. Goblin Scout. His job is to stand in front of enemy creatures. Maybe throw a boomerang or two at your opponent’s head if he gets the chance. He doesn’t add much to the deck, but as a 1 resource common, he’s a good card to use if you are running short in other areas. Don’t underestimate the power of throwing dudes under the bus early game.
Ranaar Harpy
Same idea as the gobbo, here. Pretty much just there to stand- er, fly in front of enemy creatures. A little sturdier than the goblin scout. Good at softening enemies up for an Earthquake or Insect Swarm. Also good at not dying to Earthquake.
Arena
A pretty simple card with some not-so-simple applications. It’s primary use is to soften up your opponent to set them up for your finisher. If your opponent is already low enough, or you are desperate for answers you can pay to cycle it and draw a new card. Since you can only damage an opponent with it if their life is higher than yours, you can be sneaky and use a Market of Shadows to bring your own life total down, or just let them hit you (hopefully not too hard).
Broken Bridge
Bouncing a whole row of creatures back into the hands of their owners. This card serves two purposes in the deck. First it can be used to stall, bouncing the more threatening and/or expensive creatures on the opponent’s field during your moments of vulnerability. Second, it can be used to facilitate the combo, forcing open a hole in their defences for you to slam that cyclops through.
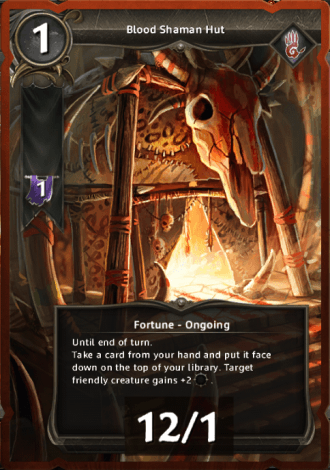
Blood Shaman Hut
This card has only one use, but it’s an important one. With this we can buff up the creature we punch through their defences for the kill. It forces you to put a card from your hand on top of your deck, which is bad, so only use it to finish off the opponent. It is particularly effective when used on a creature with Double Attack. Speaking of which…
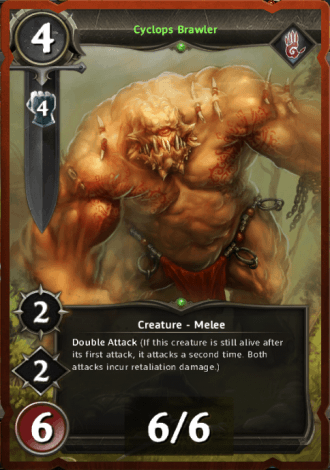
Cyclops Brawler
If you absolutely cannot seem to open Enraged Cyclops, this guy will do in a pinch. He still has double attack, so he will synergize with the Blood Shaman Huts. Just make sure you stack a few up before deploying this dude. If possible avoid using this in favour of Enraged Cyclops.
Enraged Cyclops
Here he is. The star of the show. The card that we have no intention of ever playing except by cheating it into play with another card. The only rare necessary to the deck. There is not a lot to say about him, except that he does a butt-ton of damage. If you happen to stack 3 Blood Shaman Huts on him (which happens more often than you might think, and I only run three huts in my deck) he will deal 20 damage in one turn. Yes, you read that correctly. If you combo off with this card, you can one-shot your opponent. Not bad.
Kat’s Grand Finale
Just in time to upstage our only rare, is our only epic. Unfortunately, this deck really doesn’t work at all without it. The combo is to Broken Bridge a row open (if there isn’t one open already) play this card to cheat our Enraged Cyclops into play on that row (remember he’s a shooter!), pump him up with some Blood Shaman Huts, and unleash. There isn’t much else to say, except that this card is unique, which means that you only get one in your deck no matter what (even if you are lucky enough to get more than one) so you’ve only got one shot at it. Make it count.
Chapter the Third: What now?
You’ve now seen everything you need to create a perfectly functional control deck. Using nothing more than the cards listed here, you could easily get to 1200 to 1300 ELO as long as you play your cards right. But where do you go from there? You could improve this deck, and I will list some options for harder to acquire cards that could find a place in this deck. More likely, though, you’ll want to expand, move on to bigger and better decks. Don’t limit yourself to just this deck, or even just this strategy. Remember that there are as many different ways to play control as you can imagine.
Hey! You promised more cards!
So I did. Here are some other cards that can be useful in the deck, not included because they are either too rare, or from other sets.
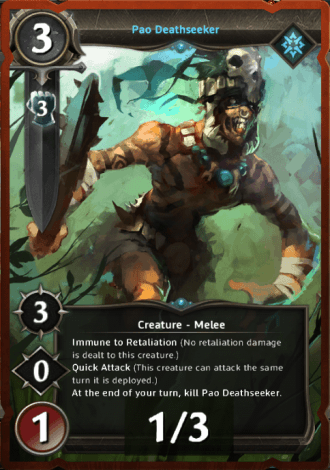
Pao Deathseeker
Well duh.
Void Wraith
Another chump blocker. He zaps the opponent for 3 damage if he dies on their turn. Handy!
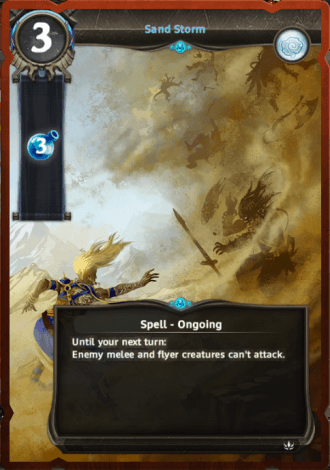
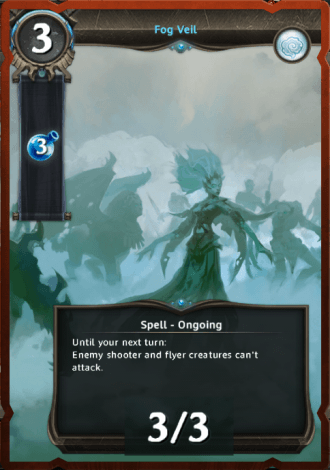
Sand Storm and Fog Veil
More stalling effects. Slightly limited, and tough to obtain, but they can be useful.
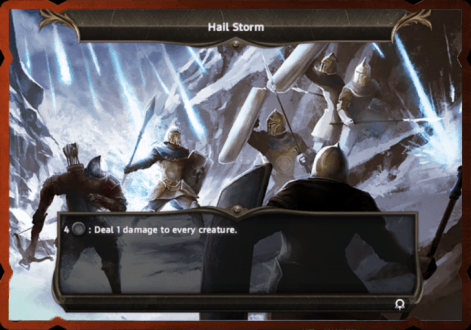
Hail Storm
Can be useful to help soften enemies up for a board sweeper. A bit over-costed, though, and I prefer card-drawing events anyway.
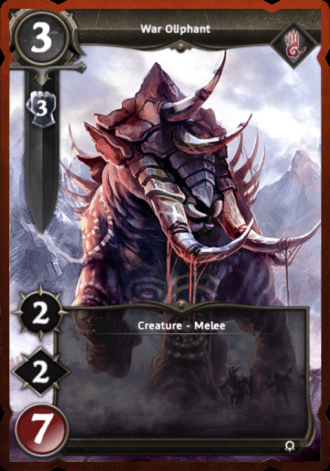
War Oliphant
This HotV common is probably the best non-base addition that this deck can use. It’s one of the most efficiently costed tanks in the entire game. Can take a beating like no other 3-drop and dishes it out, too. Fantastic addition to the deck.
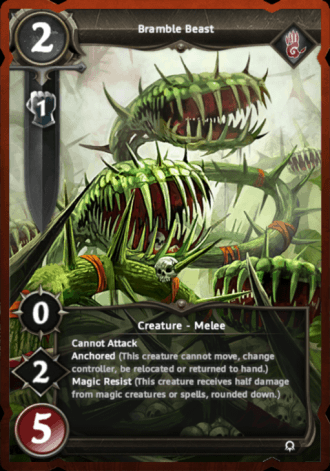
Bramble Beast
Another cheap tank. This one is anchored and can’t attack, though. Personally, I don’t like using this card because it gets in the way of Broken Bridge. Still, could be good I guess.
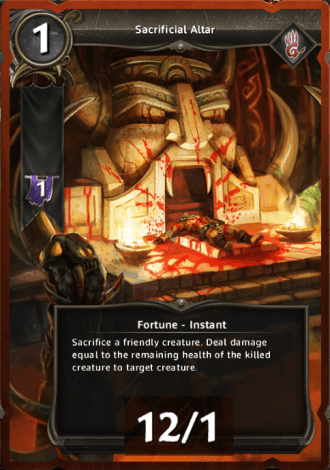
Sacrificial Altar
If you are using Elephants and/or Brambles, this card can be great for scrubbing out those particularly stubborn stains on the enemy’s side of the playing field. Remember to attack first!
Chapter the Final: Closing words
Well that’s all I’ve got. I hope this guide is enjoyed. Feel free to let me know what you think (even a tl;dr is fine, I just like getting feedback). If you find the guide useful, you should post your decklists. I’d love to see how differently people build this.

Recent Comments