Atlanta Online Leveling Guide
Atlanta Online Leveling Guide by Zanpakutou
This is a new guide I’m writing for grinding in Atlantica Online after the introduction of TBS. Since you level a lot faster in skirmish and TBS now, it’s best to take advantage of them. I doubt I will make it to 150 at this point, so the guide will probably stop here. The grind is just way too much for me to handle, but the general idea now is to just stick to skirmish and TBS missions.
Level 1-12 (Forest of Spirits):
There’s not much to do here but follow the quest chain. As you complete the quests, you will gain levels and by the time you complete the quest chain, you will be ready for the Ruins of Yellow River. You will get a Viking at the end of the quest chain and if you want one on your team, it is best to just replace one of your existing frontline mercenaries and level them up now rather than later. It is far more difficult to level frontline mercenaries later on. The items you find can be sold for money on the market to pay for better gear. Keep your Spirit Equipment Box and enchant stones for yourself to upgrade your gear. Keep in mind that you can do the Basic Training Quest while working on the Forest of Spirits quest chain. It is recommended that you take a Shaman at level 10.
Level 11-16 (The Yellow River):
This is the first real dungeon of the game where the previous area was more of a tutorial area. The soldiers in the first area can be hurt by heals. I recommend you get Ashen Crystals in your jackpot and just let it build as you complete the area. Hopefully, you will get enough to pay for an upgrade or two by the time you reach level 20. The enemies here die fairly easily and you can continue to upgrade your Spirit Equipment. While it is appealing to upgrade to the Sea King set at level 15, Spirit that has been upgraded to +2 or more is better so you won’t need to replace it as quickly. You need to be careful in second area because the archers can deal damage to mercenaries that aren’t in the front. Make sure everyone is equipped before you face the boss. It is possible to freeze the boss in order to make it skip its turn.
Level 16-24 (Sea Palace):
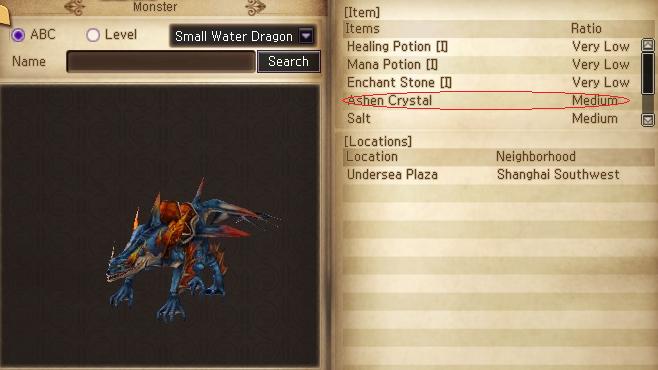
The Sea Palace has enemies that can attack your mercenaries in the back as well so remember to keep your mercenaries healed. You may want to consider buying food items to heal between fights now. The small ones such as the Dumpling and Grilled Pork are good enough. They tend to be cheaper than buying potions. The Small Water Dragons are worth farming because they drop Ashen Crystals at a good rate. You want to be able to upgrade your mercenaries while you are still here. In order of importance, Shaman and Monk should be upgraded first followed by your front line and then your ranged mercenaries. Shaman can heal a row after the first upgrade and Monk can awaken a row after the first upgrade.
The Monk can be obtained by a level 18 quest back at the Ruins of Yellow River. It is recommended that you party because you will fight multiple groups of mobs in the Shadow Dungeon. Once you reach level 20, you can add the Monk to your team. You can add a different mercenary to your team if you wish, but the Monk is essential for dealing with status effects and basically a requirement for PvP. If you want to wait until level 30 to get a Monk, you can recruit a wandering one by paying them and you don’t have to do the quest.
There are a few side quests available, but I recommend you skip them until you reach level 20 and recruit the 6th for your team. This will allow them to get a bit of exp quickly so that they can gain exp with the rest of your team.
At level 20, your first skirmish becomes available. However, you should stick to your main quest and only do the skirmish if you don’t have enough exp to unlock the next quest chain. A quest will introduce you to a mission based Skirmish, but those aren’t available until later on. Skirmish are great for grinding in a group. The enemies will almost always come at you in a group of 3. Due to how skirmish damage is calculated differently, your characters and your enemies will deal a lot more damage. They also give a lot more experience, but you do not receive gold for grinding there. You will have to rely solely on your drops. Luckily, they have a higher rate of goodies in there so as long as you sell your loot on the market, you should have a small amount of money.
Level 24-32 (Angkor Wat):
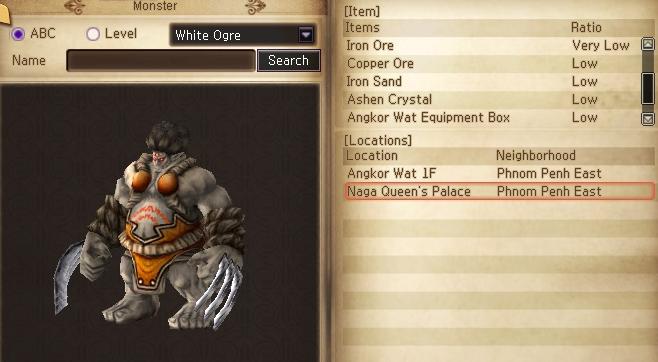
Angkor Wat holds the first set of annoying enemies of the game. In the first area, there are 2 sets of Monks. The flying ones cast posion and can be very deadly. The other ones are not as much of a problem. There are also 3 types of Ogres. The White Ogres are strong vs physical attacks so you have to use skills on them. The Moss Golems on the 2nd floor also cancel status effects and heal by casting Holy Guard. This makes them waste a few turns so you can take advantage of it. The enemies here overall are fairly weak if you know what you’re doing. It is recommended that you recruit a ranged mercenary such as Gunner or Archer at level 30 because you will have to deal with flying enemies soon.
The skirmish here is available at level 30.
If you’re lucky, you will get some Asura Equipment Boxes which give you better weapons. If you have not replaced your Spirit Equipment, now is the best time. Angkor War equipment are the highest tier equipment that you can upgrade using Enchant Stone I. Higher tier equipment require higher Enchant Stones which are very expensive. It is more practical to upgrade the Angkor Wat set to +5 than to get new gear at level 35 and upgrade those.
Level 32-40 (Nest of Insects):
In the first area of Insect Nest, the enemies sometimes are in groups of 2 so it is recommended that you party. You can tell if they’re together by how they walk. If they follow one another, then they’re partied. If not, then they are on their own. The Wasps are probably the most difficult enemies here. They fly, can poison you (drains AP) and can hit multiple targets. If possible, set your team in rows rather than columns. Be careful when you are in Spider’s Nest because the Hell Tarantulas can cast Deadly Shot on multiple targets at once and it hurts bad. It is recommended that you recruit another ranged mercenary here because there are more flying enemies in the next area and a flying boss coming up.
The skirmish here is available at level 35.
Level 40-48 (Mohenjodaro):
The Harpies here are flying, burn mana, and can self destruct. This makes them very annoying. If you have recruited ranged mercenaries, you can probably take them without much trouble. If you don’t, it is recommended you party to deal with them. The Rakshasha Soldiers are strong vs normal attacks so you have to skill them. They are the blue ones. Lastly, if you are not high enough level once you complete the quests here, the Yama Sorcerers at the area before the boss often waste turns healing each other so they are easy to grind on.
If you want your first C grade mercenary, you can do the Beast Trainer quest at level 44. However, the Beast Trainer requires Giant Crystals to upgrade which are more expensive and harder to obtain. You need a party to do this quest because of the Shadow Dungeon. You will frequently end up fighting 3 groups of mobs at once. If you need money, you can usually sell the Beast Trainer Summon for a good price.
The skirmish here is available at level 45.
Level 48-54 (Bran Castle):
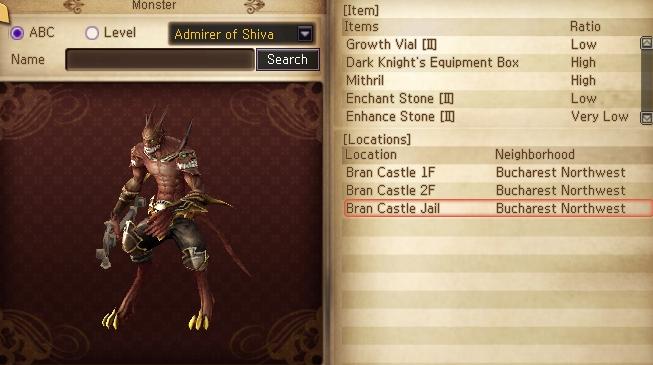
The bats are annoying and aren’t worth training at. At Bran Castle there are some side quests that run parallel to the main quest chain. You will also get a huge increase in gold reward per fight as well. One is the main story quest, and the other is a side story that parallels the main quest so you can do both at once. The side story offers good rewards on the side in addition to money and experience. The side story gives you 300 Iron Doll summons for your Beast Trainer. You should consider upgrading to Bran Castle equipment. There is a more powerful Dark Knight variant of weapons that can be obtained from the Admirer of Shiva miniboss here. There is also the Blood Knight set which is craft only. It has high stats for its level, but it is very expensive and usually not worth it.
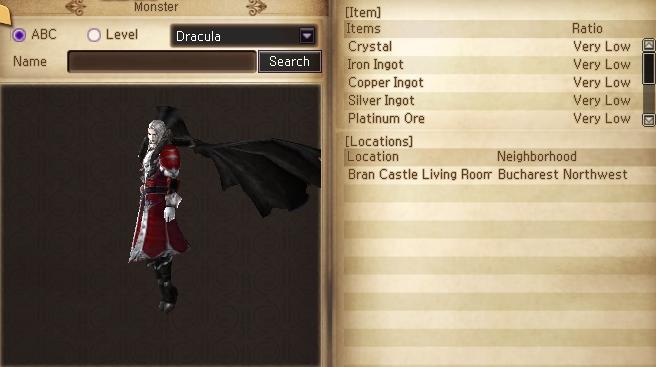
You will also encounter mini boss mobs on occasion that have a high drop rate for boxes but have a large amount of HP and a decent attack power. They also tend to be about 10 levels higher than the recommended level of the dungeon. The first good training spot is at the Hell Hounds and Cerberus near the entrance to the second floor. The mobs here have low damage and low HP. The second spot is in the Bran Castle Jail. The Iron Doll Magicians and Iron Doll Warriors have low damage and good drops. The Magicians are weak against physical while the Warriors are weak against skills. Take out the Magicians first because they can use Beast Summon. The Shadow Jail is a fairly good place to train too. If you have a group of 3 the final section before the boss is good. Alloy Dolls follow the same set up as the Iron Dolls. If you’re in a group of 2 the second floor is the best because those guys are weak but the drop rate is noticeably lower. If you did not need to grind before, chances are this will be the first time you need to grind before you can fight the boss or go to the next dungeon. The boss here (Dracula) is flying and if you don’t have a few good ranged mercenaries, you will have a very hard time beating him. He is also the last boss that can be frozen.
At level 50, you can access the Abyss of Taj Mahal. It is similar to the set up of a Shadow Dungeon yet it isn’t really one. The point of it is to obtain your level 50 main character only ring. The problem is you need 30 multi hued crystal shards which can set you back millions of gold. Its good, but probably too expensive for most players at this level unless you have been winning PvP consistently for a while. The mobs here aren’t as great as Bran Castle either but if you’re doing the quest in a party, but the ring is very powerful for your level.
Level 54-59 (Cretan Labyrinth):
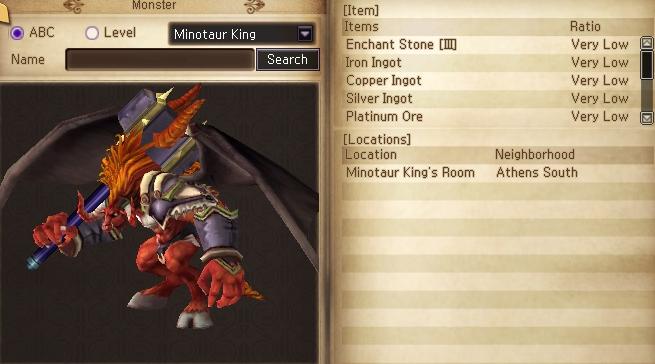
Make sure you have a Monk with Holy Guard. You will need it to protect your guys from Freezing Axe. The Lionmen Sorcerer use it. Chief Lionmen are weak to skills and strong against normal. The side quest here is a good one. It gives you 3 rock shards that can turn into different types of Enchant and Enhance Stones. The first floor is a terrible place to grind because the mobs here have poison. The second floor on the other hand is probably the best place to train here. The Lionmen have a chance of dropping Still Beating Hearts which you can sell nicely. If you PvP a lot, you can trade your Battle Points for Warrior’s Signs and ask people to craft you Blood Knight equipment which isn’t a bad idea if you can make it +3. Otherwise just trade 500 points for mercenary 7 day and sell it on the market for money to buy better equipment. You will need good equipment later on and this is the best time to save up the money you need later on. The miniboss here is a large Wolf King. He can attack 2 targets in a column so be on your toes when you fight him. A Witch behind the first target will not be hit because the Witch counts as flying. The Minotaur on the last floor aren’t bad for farming, but they have high damage and low HP. If you can take them out fast then its no big deal, but if you can’t then its going to hurt if they self destruct on you. If you are fairly wealthy, you might want to consider obtaining upgraded (+3 or more) Blood Knight armor for your mercenaries or start saving up for Osiris boxes at level 70.
The boss here will also start spamming an area skill that hits all your mercenaries. All bosses from this point on can also do it.They also cannot be frozen and cannot be targetted by silence. However, if they are a Staff type, you can Magic Seal them with an Exorcist. If you get an Elementalist you can use Freezing Atmosphere to disable Melee types.
There is also a title quest from Kleio for using Chardin’s Perfume. It is possible to accept and cancel his quest multiple times to get more perfume. Just accept the title quest before using the Perfumes. You can also recruit an Exorcist at level 57. His quest chain is long and the drop rate for the quest items is very low. However, the Exorcist is very good for PvP and heals and gives AP to all staff type mercenaries as long as he is active in your team with the Speed Cast skill.
The skirmish here is available at level 55.
Level 59-67 (Hanging Gardens):
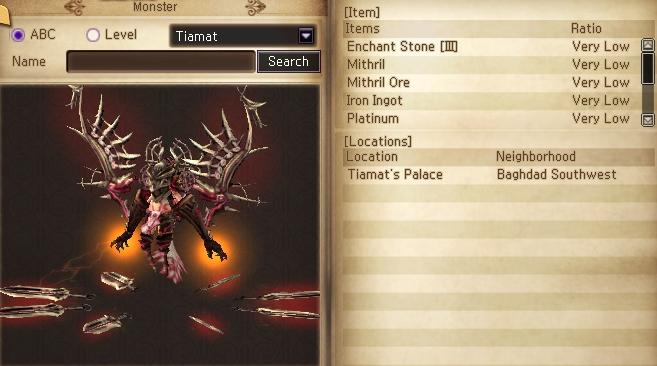
For the first time in a while, you will encounter some easy enemies with one or two exceptions. Almost any enemies here are good for farming with the exception of the Keysha enemies. I personally recommend the Slave mobs. They’re relatively weak but still give decent experience and drops. Most of the enemies here are fairly weak and worth training on. The first miniboss here is the Iron Doll Reaper and it only appears in the entrance area. It attacks like an axe would so that means your entire row could be dead in a few hits so keep that in mind. The second one here is like a giant Lionman. They tend to drop a Secret Material Chest. Something that lets you pick from either Growth Vials or Mandragora. A lot of people are willing to pay high for Mandragora, but Growth Vials are much more useful to you in the long run. The Prophet quest does not begin until level 70 so in order to obtain it you will need to revisit here later. The boss here (Tiamat) is fairly tough as well. I recommend you get Osiris gear or Judgment scrolls before coming back for a serious fight with it. It can attack an entire column and has a powerful area skill as well. A Monk is pretty much a must.
At level 63, you can do the Princess quest. The Princess provides a boost to all ranged type mercenaries by boosting their defense and accuracy. While she is good, she tends not to fit in well outside of PvP. You must train up a Princess to level 50 if you wish to obtain an Inventor through quests later on.
Level 67-75 (Valley of the Kings):
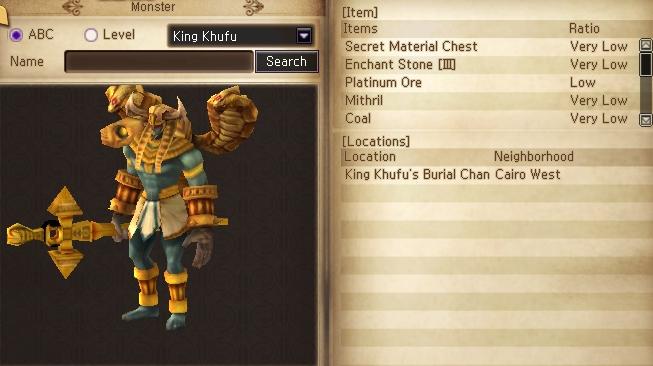
If you have not partied up to this point, you will start having trouble. Enemies here are aggressive sometimes and mob very frequently. The Mummies on the first floor are very troublesome. The Mummy Magician use a super powerful poison that will kill fairly quickly. The best mobs to grind on are the Anubis on the second floor. The magic types have a high damage if they use the skill, but they can be Mana Sealed and die quickly. The Sphinx on the third floor have Marble weak against skills and the other weak against physical. You can deal with that but its more annoying than just dealing with the Anubis types. There are multiple mini bosses in the Valley of Kings. The first floor has a large dog but I don’t remember the name. It only hits 1 target but deals insane damage. The second floor and on has the Silent Cannoneer. If you skill it it will die fast but regular attacks are just as good. It hits 5 targets but is very weak. Both have a good chance of dropping Osiris boxes that you should stock up on if you can. Your goal should be to make +3 Osiris gear for all your mercenaries. They continue to drop in the next dungeon, but the enemies there are more annoying. This equipment will last you until level 90 or so. The boss here is King Khufu. The difference between the previous boss (Tiamat) and King Khufu is how they attack. King Khufu attacks a row instead of a column and is a bit stronger. Other than that not much else is different.
The skirmish here is available at level 70.
Its worth doing the Prophet and Oracle quest if you haven’t. The Oracle’s Healing is much better for normal training but the Shaman’s Noble Sacrifice is much better for PvP purposes. The Oracle quest is quite difficult with 2 extremely tough bosses at the end. Even with a group of 3, you fight a single boss and his group but the boss can wipe out 1 mercenary a turn (or more) if you aren’t properly equipped or prepared for it. For PvE purposes, the Oracle is better than the Shaman in every way with Seth Will and Healing being much better than Brutal Will and Blessing of Life.
Level 75-80 (Machine Shrine):
The Sunken Machine Shrine has a nice set of quests. They are fairly simple and straightforward. The only difficult part is with the Machine Beasts. The blue ones can attack all targets for a good amount of damage and a large group of them can be lethal. The best place to farm here is on the second section. The Machine Fighter type mobs are weak and easy. The only thing to watch out for is that they self destruct. The first floor has Crystal Guards that attack like spears so your middle row will take heavy damage. If your middle row is tough, they aren’t bad. The third floor has Machine Arachne. They attack like archers and that is undesirable. They’re still weak, but the Machine Fighter types on the second floor are the best overall. They also go down with 1 Judgment Scroll at level 80 and it is very possible to scroll until level 90 there if you wish to do so. The mini boss here is primarily the giant mummy. Compared to the other ones, it is weaker and not as much trouble. The boss here is the Machine Goddess and it is unlike anything you have faced before. If Tiamat got powered up several times over, you would have the Machine Goddess. I recommend you obtain level 80 stuff in the Shogun Castle of Death before returning to face her. Either that or get all your mercenaries the level 80 upgrade. Unlike the other upgrades,from level 80 on, you will need Jewels (which can be crafted from Crystals of the same type) to upgrade your mercenaries.
At level 80, there is also a quest chain to obtain another ring for your main character. You need 5 Multi-Hued Jewels to begin the quest which can be expensive. However, the rings are definitely worth it.
Level 80-90 (Shogun Castle of Death):
This will be by far the most grinding you will need to do. There is a 10 level gap between this dungeon and the next and the dungeon here will only get you to about 86 so you will need to grind heavily to get to the next dungeon. There are 2 sets of mobs on each floor. You will need to be careful because 1 group is much more powerful and is meant for the Cannoneer quest so they act like shadow dungeon enemies would. The Ashigaru mobs on the first floor are fairly easy but you need to watch out because they are Spearmen and Gunners. That means if a battle lasts for more than 2 turns, expect to be stunned. Otherwise they’re easy. The second floor has Ninjas. They are trouble and use a powerful poison. Avoid them if possible. The third floor have the various Dancer and Samurai mobs. The Dancers are weak and easy. There are 3 types of dancers but they’re all easy. Its nice to farm them since they have good drops for crafters. The Samurai mobs are a bit stronger but just as easy. The Samurai spam Dark Seed and the Kagemusha can spam Hex of Darkness. If you’re not careful you can get Hell Fire used against you. Otherwise they’re easy. Chances are you’ll be farming here until you can get to the next dungeon.
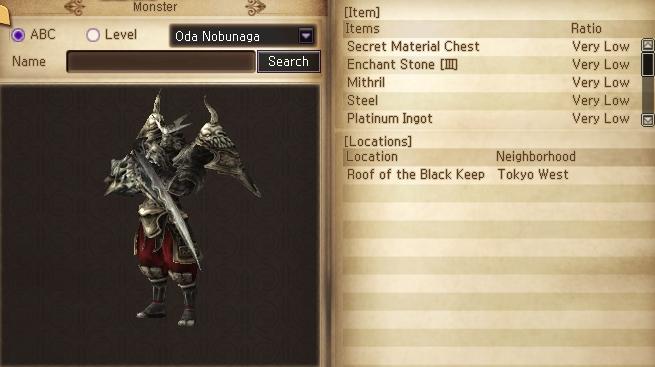
You will need to farm the Kagemusha type for the Black Keep Key. Without it you cannot face the boss of this dungeon. Nobunaga Oda is a very tough boss. He attacks all targets in a column and his attacks are powerful. His area skill is also one of the strongest. Its recommended that you don’t face him without either scrolls or a fully upgraded and equipped level 80 team.

The problem here is there is a big gap between this dungeon and the next. One of the things you can do is the Inventor quest if you have a level 50 Princess or do the Cannoneer quest. The Cannoneer quest has mobs with very high attack but low HP. If you can deal with this then the quest is fairly easy. The Inventor quest has a nice place to farm in the last section of the Hidden Machine Shrine. Some of the enemies are immune to freeze here. There’s also several side quests but either way you will need to end up grinding up to the next dungeon. The first main character only weapon also appears through the quests here, the Cursed Sword Muramasa for Sword Mains. The Staff Main can also obtain the Noble Staff though it can also be used by a Shaman.
At level 80, you also gain access to your first TBS mission that are actually worth doing because you will certainly need to grind for the next dungeon. A new one unlocks every 5 levels or so. a TBS mission is based on skirmishes except you only get a few mercenaries (2 in Troy, 3 in Three Kingdoms) and you have to accomplish a mission. It is fairly simple if you go with a team of 3, but you have to divide the loot between the participants. Each individual loot chest is quite valuable so even 3 people together make a decent amount of money. You also gain an exp reward at the end based on how well you preformed in battle. The more damage you dealt, the bigger the exp reward. At high levels, it is possible to earn hundreds of millions of exp towards all your mercenaries in just a solo run.
Level 90-93 (Lost Volcano Valley):
After the previous few levels of mindless grinding, you end up at the Lost Volcano Valley. There are numerous side quests here and the next set of main character only weapons start appearing. There is one for Axe Mains The enemies here start mobbing more often and start using more area skills. One of the raptors use a poison and AP drain damage. Lots of enemies spam different area skills. The best place to train here, has to be with the Flame and Fire Spirits. They are weak but give decent experience. You might have trouble if your front line is composed of axe users since they spam skills. Their drops aren’t that great but they’re very easy to train on. If you wish to do so, the Flame Giants and Dragons are also good to train on but they spam an all targetting weak meteor skill similar to Beast Summon. Its not strong, but it can quickly add up in terms of damage. The first miniboss you encounter here is the Broken Beast Machine. Its a powered up version of that evil spamming mob from the Sunken Machine Shrine. The second miniboss is the Yoruichi which is one of the Dancer type mobs from the Shogun Castle of Death. This one uses high damage to a single target but other than that its fairly easy. There are several bosses in the Lost Volcano Valley and they require keys, but you get the keys through quests and you can get more through farming. They’re fairly easy compared to the previous bosses you have fought.
The skirmish here is available at level 85.
At level 90 you can also start doing the daily Goonzu quest. All you need to do is go to Moscow and kill 50 Blazing Lizards nearby then turn in a Brush. Doing this 3 times will grant you access to the Goonzu dungeon for 2 hours. The Goonzu quests are difficult but the drops in the dungeon is great. The dungeon itself is only open on weekends but you can collect the passes any time. All of the rare craft mats (Still-Beating Heart, Warrior Sign, Crazy Lord’s Seal, etc.) can drop from mobs inside the dungeon. It is very difficult for anyone with mercs below 100 to survive here even if they are in a team.
At level 90, you can also start doing the first Individual Dungeon. Individual Dungeons are instance dungeons generated for a party. They have a cooldown timer like all other instance dungeons. There is a bit over 40 mobs including 1 boss. You are only allowed to use 6 people in your team instead of 9. The mobs give about 3 times the exp of other mobs of the same level and have a good drop rate of equipment boxes. There are basically 2 split paths with mobs on them eventually converging on the boss. The mobs have very high damage though. In general you can expect something like about 800k exp to all your mercs if you fight together although someone will have to split up and solo if you want to be able to clear it in time. Clearing the dungeon will also reward you with a box that will allow you to pick from 1 of several powerful weapons. These weapons only have a level requirement of 90 as well and are stronger than Conqueror +1 weapons. The boss also has a low chance of dropping the said boxes. Each dungeon also has a special drop that you can collect and trade in for one of the possible items from the box you obtain for clearing the dungeon of your choice.
ID90 gives you a choice of Spear, Cannon, Bow or Staff.
Level 93-96 (Yggdrasil):
One thing to watch out for here are that enemies from the Shadow Dungeon and regular now appear on the same map. The enemies also start to have more attack in addition to a fair amount of life. In the first region, the Seals are where the Shadow Dungeon enemies are at. Be careful of Trolls because they have cannon style attacks and can stun your team if you don’t have a Monk and cannot finish them quickly. In the second one its the Jormungand type enemies. You will need to farm here for World Tree Keys. There are 3 bosses and you have to fight all of them. They are pretty much all very similar and not as strong as previous ones. They just have quite a bit of life. If you need money, the enemies from this point on start dropping fairly valuable crafting items that you can sell. At level 95, the grind begins but you also gain opportunities for daily bonuses that grant you a fixed percentage of exp towards your next level.
The skirmish here is available at level 98. Unlike the other ones, this isn’t quite worth it.
ID94 gives you a choice of Sword, Axe, Gun, or Shield.
Level 96-98 (Constantinople Battlefield):
In Constantinople Battlefield, all the enemies are grouped together so it makes it more difficult to fight them. However, there are some Byzantine Warriors and Captains near the entrance of the 2nd area. They have a strong magic attack, but have very low HP and defense. They should be easy to kill with just your normal attacks. The miniboss here is a giant orc lady from the Lost Volcano Valley. She is fairly strong and can be annoying since she can get in 3 attacks in a row on rare occassions and 2 hits will kill most of your mercs. The other enemies here are very strong and it is recommended that you party to deal with them. The Bynzantine Knights in the second area have concentrate which heals other melee type mobs and can be very annoying to deal with. It is highly recommended that you party from this point on. The boss here is the Byzantine Emperor. While he is not very strong, he has tons of HP which makes it more of a test of endurance than an actual fight. Just bring Elixirs and keep yourself healed to deal with him.
At this point you should be able to handle Individual Dungeon 90 without much trouble so you should try to do it daily. Individual Dungeon 94 and 98 are still a bit tough and I don’t recommend it until level 100 and above.
ID98 randomly gives you one of 4 different rings for each Strength, Dexterity, Vitality, and Intelligence. However, the boss has a chance of dropping the Three Headed Dragon Ring which is very powerful.
Level 98-100 (Frozen Advilun):
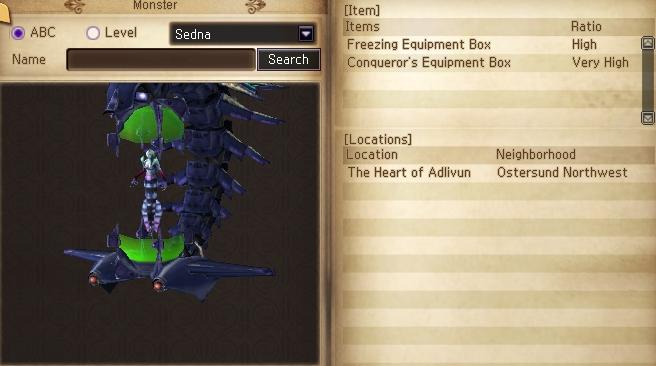
Enemies in Frozen Advilun start getting tougher. If you have Blessing activated, you won’t notice much of a difference but if you don’t, you will feel it. At level 98, you can start spamming the Knud quest chain. Each run will give you about 3 million exp across your mercs and this is a good way to level to 100. One run can be completed in about 40 minutes by a good group. Just be sure to keep some quest resets in handy. The boss here (Sedna) is quite tough with a huge amount of HP. It is highly recommended that you just skip it and come back later. At this point you no longer need to do the quests in order to get through the various level caps anymore.
The skirmish here isn’t available until level 103.
At this point you should also be able to do Individual Dungeon 94 and 98 in a party. Keep doing the Individual Dungeons at every opportunity since it is good exp and items. Equipment is also getting very expensive at this point so substituting items form the Individual Dungeon instead is a good move.
Level 100-102 (Dallas):
Dallas is pretty tough since the enemies have high damage and HP. However, the miners in the Mines are good to train on as long as you keep an eye out for their skill. Knud is still good to spam at this point if you still can. You should also be able to participate in all of the Guild and Nation Dungeons for good exp. Just remember to party up. Machine Gun Brooks is a very tough boss that you should probably just ignore altogether until very later on. He just isn’t worth the trouble of dealing with.
You will be able to access the Individual Dungeon 101 at this point. It is easy and the enemies give a large amount of experience but are weak for their level. You should farm this as much as possible to get your team Darkest Night equipment due to the high cost of Divine Equipment. This will prepare you for what is to come. With some luck you will receive Dark Library Keys or Velver Room keys from the bosses. This will give you access to another part of the Individual Dungeon 101 with more drops. However, the rate for them is fairly low so don’t keep your hopes up and make sure everyone has item info on the bosses. An equipment box here will randomly give you a box for either melee, range, or magic type equipment. You can choose which piece you want from it. It has the base defense of a Divine piece of armor, but the magic defense of a Freezing type armor.
Level 102-104 (Silent Detroit):
The enemies here are fairly tough. They mainly have high HP so you need decent weapons to deal with them. However, the Wanted Board also becomes available here. It resets 3 times a week and if you complete it, you get 3.6 mil exp to all your mercs and 8 mil gold which makes it very good. For the most part you should be leveling up through Individual Dungeons and TBS.
The skirmish here isn’t available until level 109.
Level 104-108 (Aztec):
The Aztec areas open up to the player before this, but I recommend you don’t go there until level 104. This place will works well if you either have a strong party or bewitching scrolls to spare. Stay outside of the dungeon and bewitch the various types of hounds around. Engage other groups. The area skills used by the hounds can wipe out an entire group in 2 attacks due to their weakness against skills. If you don’t have bewitching scrolls, it is recommended you stay away from this area and stick to leveling in Individual Dungeons and Guild or Nation Dungeons.
At this point, just leveling through skirmish is a much better option. You don’t need to use the item to reduce damage from enemies in order to train there because of how skirmishes are balanced. You gain exp much faster this way. It is also recommended to do TBS as much as possible to start saving up for better equipment. It is almost always better to craft your own (or through guild craft) than to buy off of someone else.
If you have gotten your first B grade mercenary by now, you will have realized that they need Soul Crystals to be upgraded. Unlike the other ones, you need to obtain a lot more Crystals in order to craft them into Jewels, then Soul Crystals and eventually Soul Jewels. The best way to amass a lot of Crystals is through use of the jackpot system. What you should do is get only the Crystal that you want to jackpot in the first slot. It is recommended that you get a friend to help you. Have them fill up their jackpot and their inventory with all the possible drops from the monsters except the Crystal. Then set the party drop to Leader and then when the Crystal drops, it should be the only item in your jackpot. Afterwards, go to the Guild Dungeon Valley of Oblivion. Every box from Babylon to Divine can drop in there and if you also get Freezing Atmosphere and Blazing Earth to drop, your jackpot should be exactly full. Afterwards, just run the IDs and collect boxes and when you think you have enough boxes, activate the jackpot challenge for your Crystal.
You can also do ID105 at this point. ID105 gives you the choice of a Bow or Axe that are lvl 105, but have the stats of their lvl 110 Depraved counterparts.
Level 108-112 (Women’s Lijiang Village):
Women’s Lijiang Village is another place where bewitching is wonderful.The experience is better and the enemies are not as strong and the drops are also very nice. At this point you should have a good set of Darkest Night gear. If not you need to do so to prepare for the next area. They also drop some items needed to craft Phoenix equipment. On average the amount you spend on bewitching scrolls will be less than what you earn through drops from the place.
The skirmish here is available at level 115.
Depending on how good your equipment is, you might be able to do Individual Dungeon 105. The enemies have a lot of AP draining skills so you have to be careful. The skills are also quite powerful so try to keep characters with low AP gains and magic defense away from the fights.
Level 112-120 (Bulguksa):
I recommend this place for leveling beyond 112 but decent equipment and a party is needed. It is also possible to do the Hwarang quest chain which rewards over 100 million gold and an absurd amount of experience per merc. It is possible to do this quest until level 120 provided you have the money to spare. It is a costly quest to do since it requires 500 collection points (from Mount and Clothing Collection Books) and a spare Hackney mount to complete. If not, grinding in Bulguksa is a nice alternative. Each fight rewards a few million experience but the problem is that most enemies need to be killed twice. However, skirmishes are still better.
There are other Individual Dungeons and Squad Dungeons available but they are absurdly tough and the rewards are generally not worth it unless you have a purpose to achieve in those dungeons such as obtaining the Druid mercenary. The Haunted Tatami is quite good for working your way towards obtaining an Empress at this point. If you don’t want one, just sell the Evil Slaying Arrows for a good amount of money and use it towards things you need. Unlike Individual Dungeons, the goal of Squad Dungeons is to get as many kills as possible while protecting an NPC. The NPC is fairly weak on its own so you have to provide support. If the NPC dies you fail. There is a trick though. If the NPC dies, have the player with the NPC just keep 1 enemy alive and stall out the timer. This way it will still count as a win. In the mean time, you have to get enough kills. For each kill milestone you get boxes. The more you kill, the more boxes you get.
Level 115-120 (Ghost Town):
Like Aztec and Women’s Village, it isn’t worth grinding here due to the need of the special item to reduce damage from enemies. It is recommended you stick to Hwarang and TBS to get the exp necessary to move beyond this point. You will however, have to face the Tiger Lord for your level 120 quest, but that can be dealt with once you get there.
The skirmish here is available at level 122.
Level 115+ (Women’s Village Skirmish):
At lvl 115, you are allowed to enter the skirmish area in the 108 dungeon. It is highly recommended that you train here because you get a lot of crafting materials for Phoenix equipment. They cover the Oriental Mushrooms, Ingots, and Phoenix Feathers. They drop at a decent rate. Don’t expect to solo here, the enemies are quite strong and almost always come in groups of 3.
Level 120-124 (Mysterious Saloon):
You can come here earlier and it is not a big deal as long as you can survive enemies that self destruct and have strong damage over time skills. The Mysterious Saloon is filled with enemies that need to be killed twice, but the experience rewards from regular fights are incredible for parties. Assuming you have a decent group of 3, you can grind here for nice experience at least until you can access the Grand Canyon areas. However, compared to skirmishes, the battles are more difficult because enemies need to be killed twice. Individual Dungeons are still nice for experience and drops unless you can obtain good Phoenix gear for low prices but Darkest Night armor is still the easiest to obtain since you can just run ID101 every other day. You must do the level 120 upgrade quest in order to level up beyond 120 otherwise you will never gain that level regardless of how much exp you have.
If some of your mercs have the 120 upgrade, you can try ID118. There are 3 minibosses that can be quite tough but the exp is nice. The mobs regenerate HP and the bosses are deadly if they are sethed. If you can do it, the exp is nice otherwise you should stay out of it. The equipment drops are extremely poor as well. Overall, I recommend you just skip this one.
Level 120+ (Hero Dungeons):
Hero Dungeons are new skirmish based dungeons that are gradually replacing the Shadow Dungeon. You encounter mobs by taking a certain number of steps. The exp rates are higher in Hero Dungeons than they are in other places. Unfortunately, enemies will always get the first turn. The purpose in Hero Dungeons is to hunt down the quest monsters in the area. They reset on Monday and Wednesday and are well worth the trouble due to the enormous amount of experience you get from the quests. If you are lucky, you can find a chest that has spawned in the Hero Dungeon.
Level 122+ (Ghost Town Skirmish):
Ghost Town Skirmish is where a lot of people grind. It has a nice drop rate for Dragon God crafting materials except the Dragon God’s Wishstone. the Wishstone seems to be extremely rare so you will need some luck to get one. They’re not too expensive on the market on most servers so it might be a better idea to buy the Wishstones you need sometimes. Like the other skirmish areas, it is recommended that you party. The mobs here have quite a bit more HP than the other skirmish areas. The defense debuffs such as Ravaging Melody and Deep Insight are quite useful here. There’s an extremely low chance that you might get some Odysseus books or even a Sealed Phoenix Equipment Box.
Level 124+ (Van Gogh’s Gallery):
The enemies here are quite easy compared to the previous dungeon except that bosses continue to hurt like hell. The experience here isn’t as great as skirmish, but the rare Van Gogh’s Soul Stone has a chance of dropping here. While it is rare, it is necessary for Level 125 necklaces and each Soul Stone is worth almost 100 million each because people no longer train here due to the availability of skirmishes. It is recommended that you grind in Ghost Town Skirmish instead because of Dragon God’s Ire and Dragon God’s Wishstone drops. You need these to craft level 121 gear. You should aim for at least +2 Dragon God gear (get weapons first) for your entire team because it is a long way to to level 130 and Evil gear.
The skirmish here is available at level 131.
Level 126+ (Huarong Pass Skirmish)
The Huarong Pass is a decent skirmish area. The enemies are just as tough as the ones in Ghost Town, but they come in larger numbers and are mostly ranged enemies. Their HP is fairly low. They drop the same stuff as Ghost Town skirmish, but with a few other items as well. The fact that they come in larger numbers makes them more painful to deal with, but if you have a lot of ranged mercenaries in your formation, you can probably pick off 2/3 of a group on the 1st turn if you are strong enough to kill them in 2 or 3 hits.
Level 128+ (Grand Canyon)
The Grand Canyon area consists of several outlying dungeons. However, the wolves in the waterfall section seem to be the best to train on. You just need to pay attention for the lightning attack and AP drain that results from it. Travelling in a group makes them very easy as long as you don’t get attacked by 3 groups at once. The good part is that the enemies do not need to be killed twice which makes them better for training on than the Myserious Saloon as long as you can deal with their high damage. If you have a party you might want to consider training at the Train Interior instead of Eagle Mountain. If you’re lucky, you can obtain Dragon God equipment, but overall it isn’t so great once you can do Ghost Town Skirmish.
At level 130, you will need to do another upgrade quest in order to level beyond 130. This one requires you to play through much of the TBS missions.
Level 129+ (Ban Chao)
Near the northwest end of Central Asia is an NPC called Ban Chao. He gives a repeatable quest that gives over 90 million exp per run. With the exception of the Diabolic Swordsman it is possible to party and do the quest making it quite easy. The only hard part is that 2 of the bosses (Desert Soul Fighter and the final boss) have powerful AoEs. Otherwise, it is a fairly simple chain of loot and kill quests. It takes roughly 1 hr 30 min or so to do a run making it very good exp. Your mercenaries need to be lvl 120+ in order to receive full exp from the quest though.
Level 130+ (Troy/Three Kingdoms TBS)
At this point, you should be able to solo TBS missions. You need very well upgraded weapons and Blessing to be able to solo. You can only bring 2 mercenaries with you in the Troy ones, but you can bring 3 with you in the Three Kingdom ones. The ones worth doing are Fleeing Betrayer (105), all of the Alisha ones (110, 115, 120), Spy Hunt (120), Trojan Flamethrower (125), and Escort Xiao Qiao (125). The other ones aren’t as easy to solo. It helps to have Gun Main or Cannon Main. I personally recommend a Bow Main and Sheriff along with an Oracle to heal yourself for Troy. Bring a few Resurrection Scrolls just in case your healer dies. It helps to use Seth Will before each of the bosses to kill the boss as soon as possible. I find Troy missions harder to solo because of the need for catapults to destroy summon gates and the fact that you are 1 mercenary short. In Escort, you can avoid the summon gate altogether.
The great thing about TBS missions is they reward experience based on your level and how well you do in combat. Since you basically solo a mission, you get all the contribution and at the end you basically earn about 45-50 million experience towards all of your mercenaries in addition to several loot boxes.
The missions that you should really avoid are Troy’s Last Battle (quite long), 100k Arrows (ship based), and Scourge (boss stalks you). Troy’s Last Battle is meant for 6 players and at best, you can barely duo it in the amount of time available. 100k arrows relies on 3 players on a boat and it is very costly to do it. Scourge has you being chased by a boss mob while you try to take out several large groups of mobs. They are just very painful and annoying to deal with.
Level 131+ (Van Gogh Skirmish)
The Van Gogh skirmish area is available at level 131+. The area has a much better drop rate for Dragon God’s Ire and Wishstone, but the enemies are much tougher. The exp is pretty much 2x that of Ghost Town Skirmish. Enemies are extremely strong by comparison and you shouldn’t really try without a party that has the equivalent of base Evil gear or higher. Each party member starts directly across from the enemy and can directly rush to the other side fairly quickly in this layout. However, it is recommended that you spread out your team as well. The enemies tend to be just out of reach for you, but they can rush over to you on their first turn. Your melee team should form a wall with 1 space behind them empty and your other members anywhere behind them. Some enemies fire like a Gun type and hit 3 in a row so you need to watch out for them.
Level 133+ (Thesus Quest Chain)
The Thesus quest chain is a repeatable quest from lvl 133+. It gives more exp than Ban Chao, but it takes longer to do and you have to fight several bosses that are quite tough. It gives around 170 million for the quests, but you need to be level 130+ to receive the full exp. Unless you have close to 1.8 million might without buffs, it is going to be quite hard for you to do. There is also one part where you must fight annoying Harpies that self destruct and are flying. The first 2 bosses have a special attack proc that activates by chance. If it does, odds are anything in your front row will die in 1 hit so you have to keep them under Holy Guard or Empress’ Blessing at all times. The 3rd boss has a cross shaped freeze skill that deals have DoT as well as preventing all frozen mercenaries from acting so you need to keep your front row under protection at all times as well. The last 2 bosses have powerful AoEs that can easily deal 15k+ to your entire team so you have to protect your team every 3 turns to prevent the AoE from wiping you out. It is recommended you keep your healers and main in the back and just heal them and protect the first two rows from the skill.
Level 135+ (Grand Canyon Skirmish)
For the most part, this place is actually easier than Van Gogh. The enemies cannot all gang up on you at once because the 2nd group appears far to the left and most enemies will take an extra turn to be able to reach you. The skills of enemies are quite strong but overall they are not much stronger than the enemies in Van Gogh skirmish. The problem here is the miniboss called Dainty Beauty. Her AoE skill hits a huge area and it hurts like hell. It can easily wipe out your entire team if you are not careful. It is also quite possible to encounter several Dainty Beauties in a single fight. My record was 5 in 1 fight and they are quite hard to take down. Other than that, it is a great place to grind and it gives great exp.
Level 138+ (Africa TBS Missions)
At lvl 138, you can do Africa TBS missions. You will not get the full exp reward for completing a mission until level 140 though. Journey Home and Dogon Defense are the hard ones, requiring the use of traps and the others are fairly easy once you figure out how to do them. You have to watch out for bosses and the enemy Blazing Earth and Freezing Atmosphere. They hit a 5 x 5 area and will instantly kill all vehicles and it affects everyone in the area, not just melee. Freezing Atmosphere also seals skills. In Africa TBS missions, completing an objective will not give you an extra turn like Troy and Three Kingdoms. However, Tarkan is immune to everything but a direct stun from being attacked 4 turns in a row, so having one helps a lot.
Level 140+ (Louyang Skirmish)
For the most part, the enemies here are just stronger versions of the enemies at Huarong Pass. In general though, level 140+ skirmishes are much easier. They have the same drops except that they also drop Evil Imprints now. They give a huge amount of experience. Make sure you at least have your lvl 130 upgrades and good Evil equipment (+3 weapons preferred) otherwise things could get real ugly fast since you will not be able to kill them fast enough. Bosses no longer appear with the regular mobs so you do not have to worry about it, but the bosses are a lot stronger if you do fight them.
Level 144+ (Spirit Pasture Skirmish)
Enemies here are again a bit stronger than the enemies at Louyang Skirmish. If you can handle Louyang, then the enemies here should be fine as well. They just hit a bit harder. Just be careful to avoid the bosses in the area. You can actually see them on the map this time around rather than them appearing from out of nowhere. It is recommended that you have Pegasus gear (+2 or something equivalent) and some lvl 140 upgrades by the time you get to this point. It helps a lot if you do.

Recent Comments