Legend of Edda New Player’s Guide
Legend of Edda New Player’s Guide by dheisy
Hi hope this Guide can help you guys!
CHARACTER CREATION
1. click the “create” button.
2. there’ll be a god selection, the OLYMPUS and the TITANS.
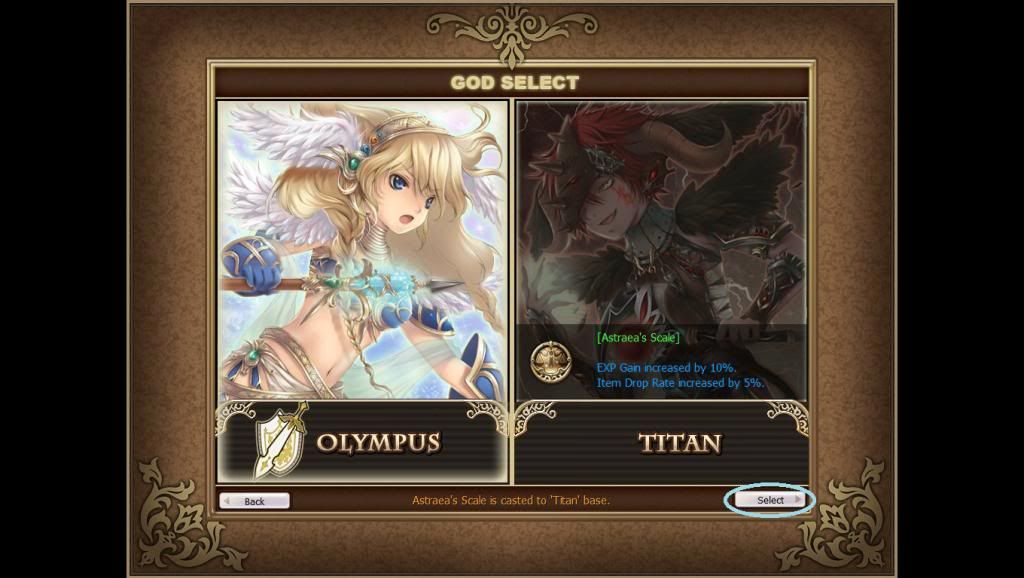
3.after choosing your own god click the button “select” and then now you can customized your own character.
including:
Name- the one that you will use on game.
Gender- your character gender on game.
Class- what job you want to be on game. (Fighter, Rogue, Mage)
*The most important choice is your class, which will determine your characters abilities and role in battle throughout its your adventure. You can see the class window description window on the left side of the screen gives a brief summary of a chosen class, the role it plays in combat, and the possible advanced classes that it can becometwo paths the class can become more specialized in.
4. Next is the appearance of you character. you can customized you own hairstyle, hair color, your character face and eye color. then click” Create” button.
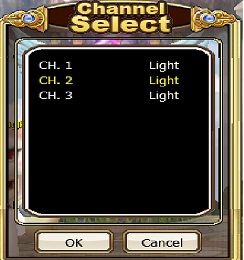
5.Lastly you may choose the channel that you want. Channel can be a Normal,Light, and Heavy and then you can now enter in the world of Edda. ![]()
![]()
GAME INTERFACE
Manual Movement
(W) (A) (S) (D) keys or you can use arrow keys to move forward, backward, strafe right and left.
Automatic Movement ( will make your character to move the the certain spot)
*left-clicking anywhere
*clicking on the map- a red circle will appear on your map to show the selected destination.
HOTKEYS AND SHORTCUTS (you can find it on Key Interface (H) i just put some description for you to know whats the uses and what to find on each keys.)
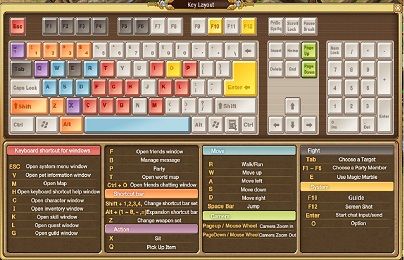
Default Interface Hotkeys
(H) Key Interface
(P) Party/Squad Tab- manage the settings of the party/squad
(L) Quest Log- where all your current quest will be listed
(M) Map- opens the region map.
(O) Options- where you can manage the setting of your game and chat
(K) Skills- where you can view your active and passive skills tab, god power tab, actions and emotions tab
(I) Inventory- where you can check your character equipped gear, weapon, attire and loots. Also your golds and coins.
(B) Mailbox- where you can see the messages, trade post and gifts
(U) Find Party- used to find players to team up with for certain quest, scenes, or just in general.
(Y) Achievements- where you can see all your game achievements (quest,duel,life,dungeon,secret)
(V) Pet Sheet- where you can find you pet information
(T) World Map
(F) Social- where you can manage you friend list and blocklist
(C) Character Sheet- where you can find you basic info tab (level, class , guild, hero and your skills) god info tab (god, god rank, rank points and available points) and duel info tab.
(ESC) Main Menu- adjust your system settings, game preferences, switch characters, or quit the game and key mappings
(R)- walk/run
(Space Bar)- jump
(X)- Sit down Action
(Q)- Pick Up Item
(Z)- change weapon set
Battle Hotkeys
(TAB)- choose a target
(F1-F6)- choose a party member
(E)- use magic marble
Camera Hotkeys
(F12)- screen shot
(PG UP/Mouse Wheel)- camera zoom in
(PG DN/Mouse Wheel)- camera zoom out
Chat Hotkeys
(/A)- shout/all
(/playername)-whispering
(/G)- guild
(/P)- party
(/S)- says/normal
Additional Hotkeys
(F10)- guide
(ENTER)- start chat input/send
COSTUMES
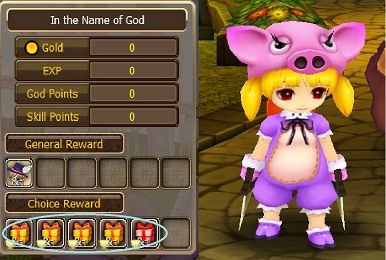
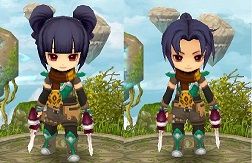
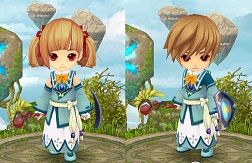
Dressing your character is one of the great features of every game. First costume that u will get is by finishing the Tutorial Game after that you can get your very 1st own 1-day animal costume.
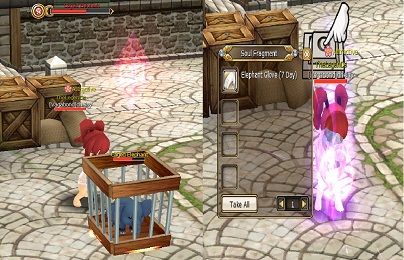
The next that i will show you is the other way on how to hunt a 7-day free costumes. To hunt a costume you must find a CAGED ANIMAL where you will released the prisoned animal. I can say that the CAGED ANIMAL can drop piece of costume by a 90-100% but some piece of costume are more rare than the other part. So you better be patient to complete your own set ![]()
![]()
QUEST
What is Quest?— it is the one of the main task for you to do to help your character leveled. Quest has it’s own difficulty rhat will based on your level. Some quest can be a solo which you can do it by yourself, but some other quest is prepared to do by a team on which you need to look or build a your own Party.
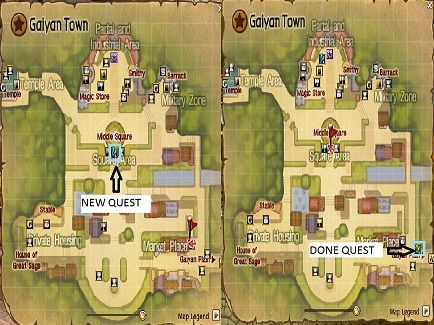
How to get a Quest— you can get it from NPC which they will be required you to finished the given task before you can get their Rewards and go to the next quest. For you to know if you have a quest in one place simply click your map (M) if you have a new quest you will able to see a BLUE Exclamation Mark Icon on each NPC. You will also know if you have already finished on your quest by there you can see on your map a GREEN Exclamation Mark Icon on the NPC.
CLASS
FIGHTER
(LV.20) SWORDMAN- eqquiped with one-handed sword and shield. Strong defensive skills, the ability to generate large amounts of hate to draw foes’ attention away from the rest of the party, and a leadership-oriented attitude are what help make Warrior excellent tanks.
(LV.20) WARRIOR- eqquiped with two-handed sword. This class specializes in the destruction of enemy defenses. they are able attack many enemies at once with high damage.
ROGUE
(LV.20) ASSASIN- wield duel Katar that pierces enemy’s weak, they can deal more damage than other classes in most circumstances.
(LV.20) ARCHER- it has ability to kill opponents at long distances.
MAGE
(LV.20) CLERIC- using scepter and shield ,master of supportive and recovery spells which makes them invaluable to any party, they’re traditionally built with low physical defense. Also they can curse their enemies to reduce their defense, speed or attack damage.
(LV.20) WIZARD- have developed an array of long-ranged and high power magic, they’re vulnerable while casting but once the casting is complete they deal great damage to enemies.
NOTE:
You should finish your advancement quest first before you can change your job.
SKILLS
Only you can learn your class new skills by simply reaching the required Level. You can find which skills is able to your level in two ways.
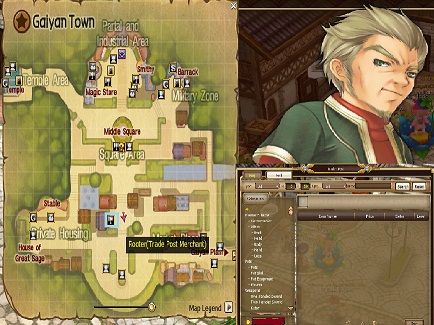
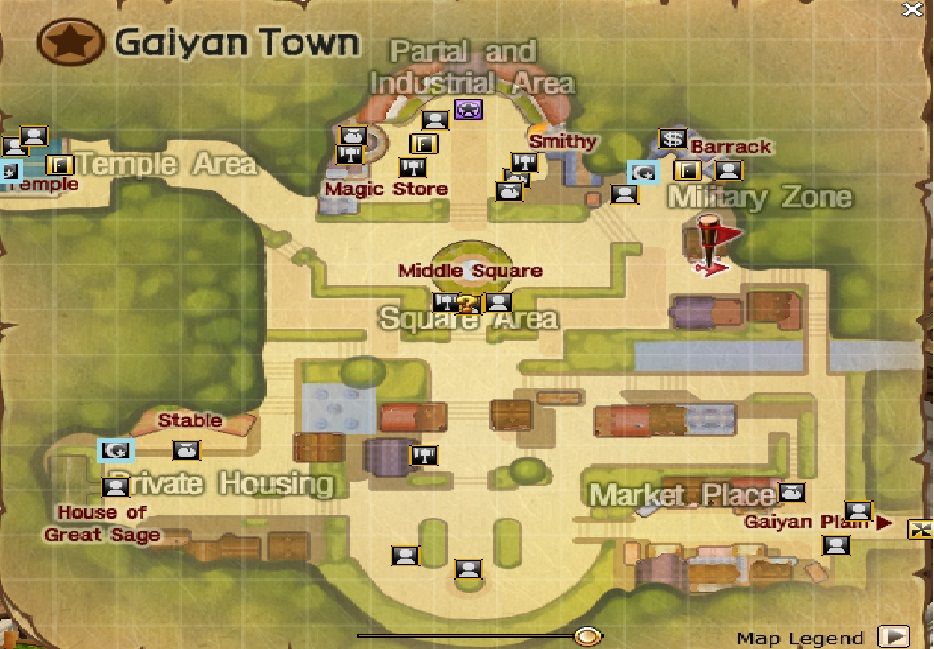
One is through NPC depends on which class you choose. For Fighter you must see Magellan at Military Zone, for Rogue you must see Nestia at Private Housing and for Mage you must see Cristina at the Temple Area
http://i1290.photobucket.com/albums/b53 … 3/ex10.jpg (see for details)
Second is by clicking the small (+ ) pink tab which you can find it at the hotkeys tab
http://i1290.photobucket.com/albums/b53 … 3/ex11.jpg (see for details)
GUILD
1.Why join a Guild— it is the great way to stay connected to your new and old friends. You can also access to a Guild Perks (ex. Lv.1 Guild Blessing, Lv.1 Guild Encouragement) where all member of the guild can increase % of EXP and GOLD rate.
NOTE:
You may able to learn Guild Perks Skills when your Guild Lv. reached on 3rd level
2.How to form a Guild— go to Barack at Military Zone in Gaiyan Town. There you can find HARVIS the Guild Manager. Talk to him and there he will asked you if you like to Create a guild.
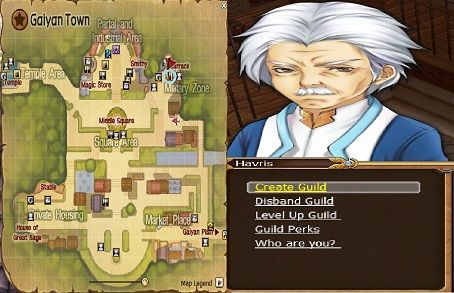
NOTE:
There are some requirements before you can form your own Guild. You must be at least Lv.10 and have 10,000.
From HARVIS you can also Disband and Level Up your Guild if you want to but only Guild leader can do this. Also from here you can seethe Guild Perks.
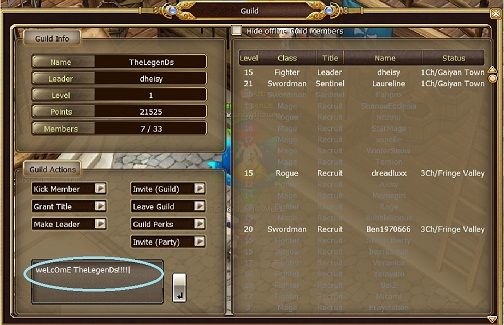
Guild Interface
By clicking (G) hotkeys you can see your Guild Info including: Guild Name, Leader, Level, Points and Member. From Here you can also see the Guild Actions where Leader may able to Kick Member, Grant Title, Make Leader etc… at the button of Guild Action Leader can leave a notes where every member can read it everytime they’re log-in. At the right side of Guild Info and Guild Action you can find your members info.
ENTERING DUNGEONS
Like other MMORPG games LoE have Dungeon which you can simply access from the Dungeon Gate at Gaiyan Town. From there you can find the Dimension Gooddes.
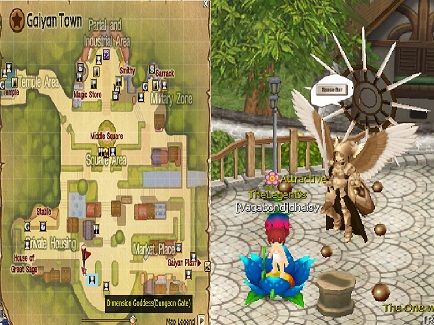
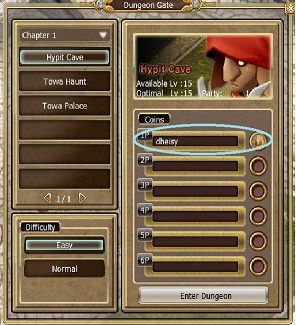
At there, you can see which Dungeon you can go to. There are require level on each Dungeon:
By Difficulty
Easy
*Hypit Cave is available for level 15 optimal level 15 (party needed (1))
*Towa hunt is available for level 25 optimal level 26 (party needed atleast (2))
*Towa Place is available for level 25 optimal level 28 (party needed atleast (2))
Normal
*Hypit Cave is available for level 15 optimal level 18 (party needed atleast (4))
*Towa hunt is available for level 25 optimal level 28 (party needed atleast (4))
*Towa Place is available for level 25 optimal level 29 (party needed atleast (4))
NOTE:
Only the leader can click the Enter Dungeon when you are on party.
NPC
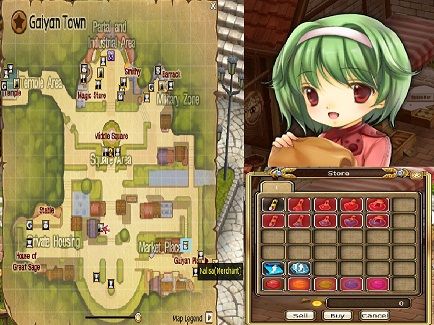
Where you can buy and sell your items respectively. Most of them can be found in town. I will only post the common merchant that you could find at one place.
**Remember: You can SELL your item at any merchant.
Who are they:
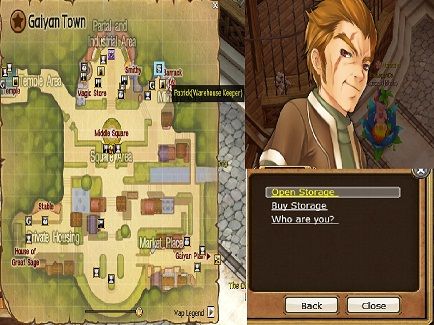
1. Warehouse Keeper- from here you can buy your chest which you may able to keep your valuable item and gold from the house keeper.
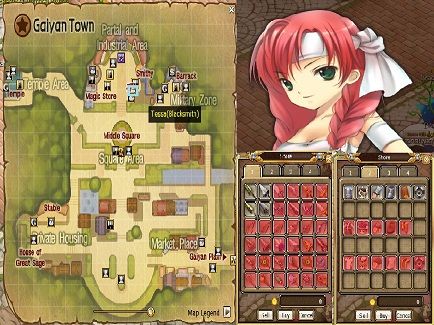
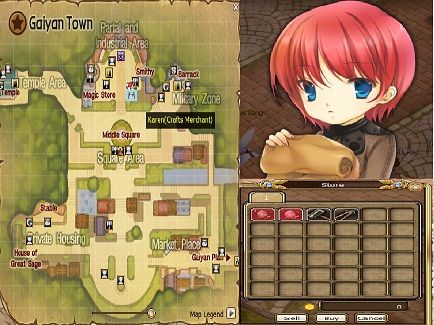
2.Blacksmith- these where you buy your armor and weapon.
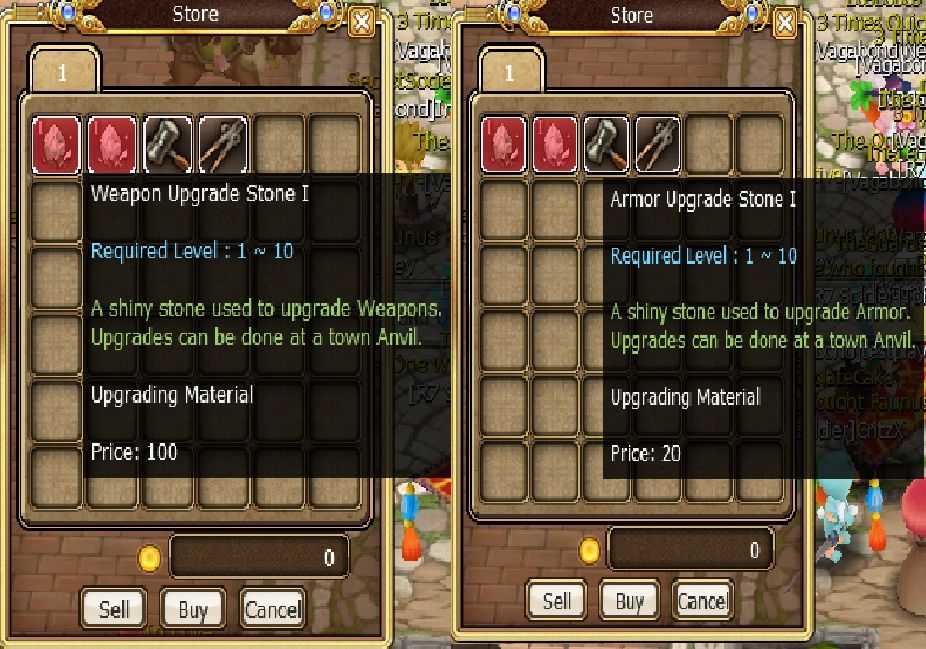
3. Town Anvil- here where you can upgrade your armor and weapon.
4. Crafts Merchant- where you can buy armor stone, weapon stone and tome item.
5. Crafter- one who can make accessories, potions and more.

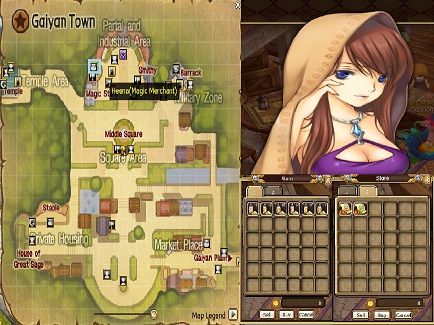
6. Magic Merchant- you can buy in here the Enchanting Item that you need.
7.Enchanter- where you can Enchant your weapon and armor.
8. Trade Post Merchant- where you can fetch great items and sell your unwanted ones at the great price.
9. Merchant- where you can buy Health potions and Mana potions, Marble and Warp Scroll.
UPGRADING
Why to Upgrade— it’s the one of the most important to do on most of the game aside for the other reason that you can think is to have a great weapon and armor for you to be prepared on your battle. You can always have your choice whether you like to upgrade your Weapon and Armor on the maximum (+). But always remember not everyone have a luck to upgrade their weapon/armor on its maximum (+). But theres another way for you to get a chance of it there you must have a Protector.
How to Upgrade
1. You must check in your inventory if you have the needed stone for upgrading Armor and Weapon.
*if you dont have you can buy it always at the CRAFT MERCHANT.
http://i1290.photobucket.com/albums/b53 … 3/ex16.jpg (see for details)
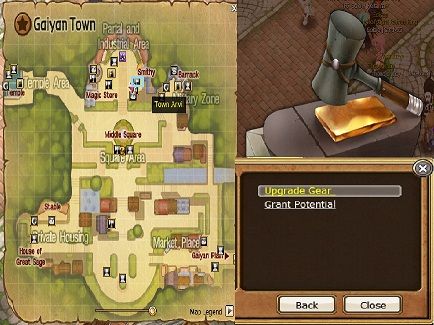
2. You go to the Town Anvil where you can start to upgrade your armor and gear. You can always find Town Anvil near to Blacksmith and Craft Merchant on every Town. And there simply click the Upgrade Gear.
3. Your Inventory and Upgrade Gear box will appear. Simply drag your Armor or Gear on the 1st box then next to it is the stone needed.
4. After dragging it on simply click the “Upgrade” button and wait until the Notification come up. Notification can be “Successful” or “Failed”. Once you got successful you can notice it on the (+) at the lower right of your armor/weapon icon. There you done upgrading you items.
NOTE:
Don’t panic when your item lost during upgraded your item. Its beacause item can be destroy once you failed on upgrading it. So better be carefull next time you may used a Protector too.
http://i1290.photobucket.com/albums/b53 … 3/ex17.jpg (see for details)
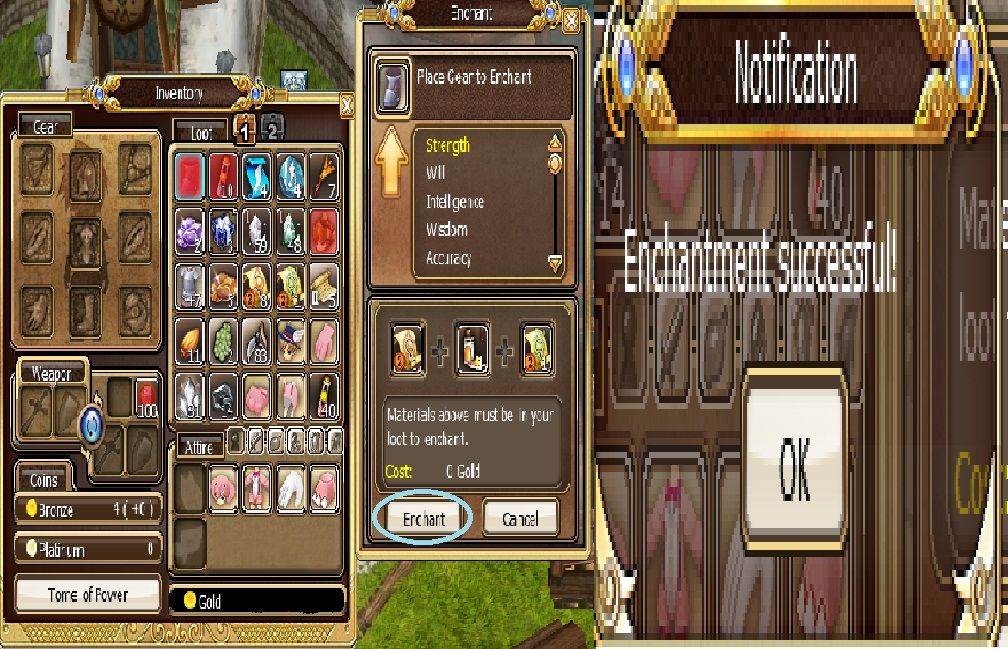
ENCHANTING
Echanting gives additional points on your stat. From here you can build your class stat on your own.
How to Enchant
1. You must check in your inventory if you have the right item for enchanting your armor and weapon.
*if you dont have you can buy it always at the MAGIC MERCHANT.
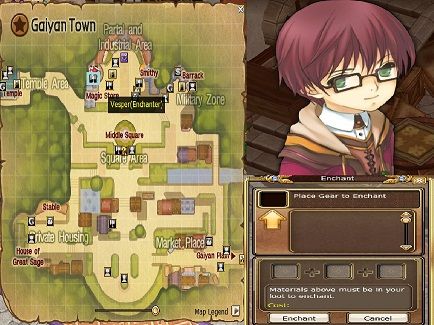
2. You go to Enchanter where you can start Enchanting your armor/weapon. You can always find Enchanter near to Magic Merchant on every town. And there simply click the Enchant Gear.
3. Your Inventory and Enchant box will appear. Simply drag your armor/weapon you like to enchant on the box that the arrow is pointing in and then select the attributes that you want then the needed item will appear below the attributes.
4. After dragging all the items that needed simply click the “Enchant” button wait until the notification come up. There you done Enchanting you items.
http://i1290.photobucket.com/albums/b53 … 3/ex18.jpg (see for details)

Recent Comments