Cosmic Break Skin Editor Guide
Cosmic Break Skin Editor Guide by Cassidy
A TON of people have been asking me how to skin their bots. The problem with most of them is that they don’t even try, but a few of them genuinely can’t understand the skin editor so I’m putting this together for you guys. I know there are a lot of things to click on, so I’ll just show you the things that i mess with.
—————————————-
Hope fully you already read cosmic break’s paint guide Here and know what each button does.
Question: “Cass how do i color a part? I’m clicking it but it’s no doing anything. ![]()
![]() ”
”
Well, 1st off, stop clicking the preview window. If you look at that map on the right side, that’s your part. To color, you have to pick a color, then a tool, and then draw directly onto the map. As you draw on it, you can see your work on the preview window to the left.
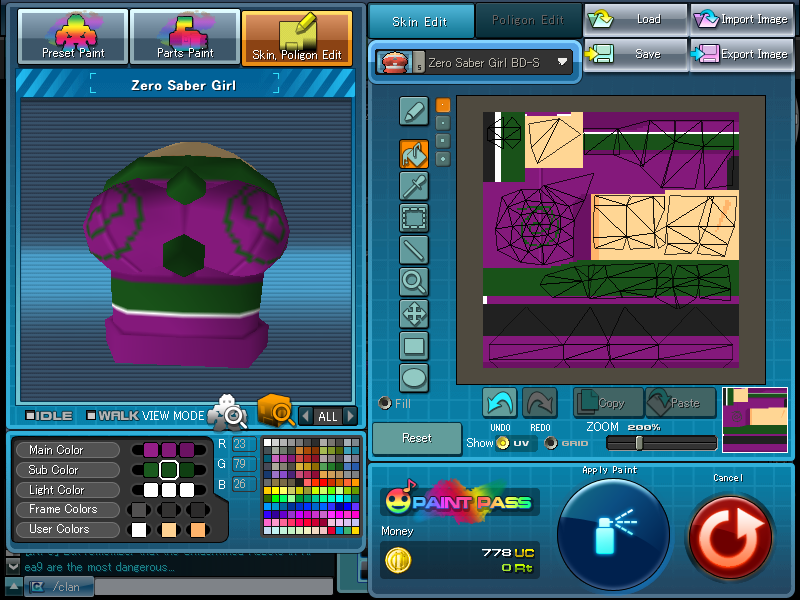
As for colors, you can have up to 9 colors(divided into 5 categories) on one part.
- Main Color – This is the color you will see the most for this part. You can pick a color from the palette and a lighter and darker shade of your color will be selected for you. Later when your skin is complete, this color is changeable in the “parts paint” screen.
- Sub Color – This is a secondary color you may pick for this part. You can pick a color from the palette and a lighter and darker shade of your color will be selected for you. Later when your skin is complete, this color is changeable in the “parts paint” screen.
- Light Color – This is the color of all the “lights” on this part. You can pick a color from the palette and a lighter and darker shade of your color will be selected for you. Later when your skin is complete, this color is changeable in the “parts paint” screen.
- Frame Color – This is the color of mechanical places you can see between each part. You may pick up to 3 custom colors for this.
- User Color – These are 3 free colors you can use however you want.
Once you have your colors sorted out you’re ready to make a skin!

If you are looking for a certain part of the map, the easiest way to find it is to click the “Show UV” button. It places your parts on top of the map as outlines, so you can edit skins with more detail. Personally i scribble a bit on the map and see where it shows up on the preview. Once i find my spot, i hit the undo button and get to work ![]()
![]()
After you finish your skin, click the save button or export image if you’re just skinning 1 part. Then you can upload the file to the forums for everyone to see!
Hyoka wrote:How do you edit the eyes on S.Elme HD? I’ve been trying for a long time to place a red cross on it with no success.
Unfortunately the eye shape of this bot cannot be changed.
See that blue line?

That line is applied multiple times to make smaller and smaller hexagons. All together they become the eye.
You can still alter the line for strange effects.

Usually you’ll only see this kind of thing on certain bot’s heads. Another example would be the ear pieces on Crimrose’s head. There’s a hexagon shape on the ear pieces but if you look on the map you’ll see it’s just a single triangle multiplied 6 times.
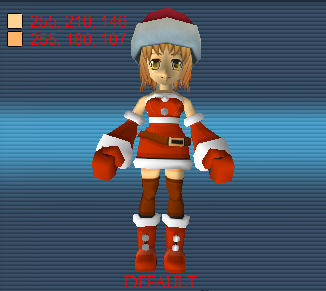
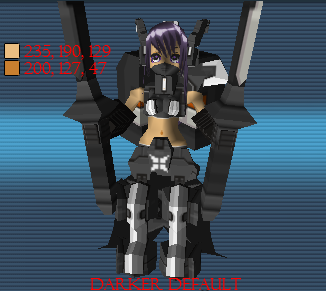
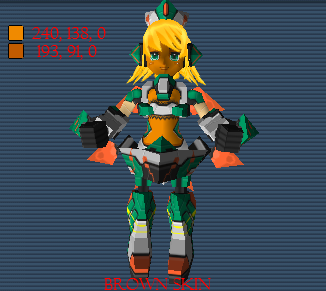
technomo12 wrote:the skin tone i cant get the proper skin tone it must be im color blind or dont have a good sense in art >_<
The skin of all the human types is made of 2 shades of a color and usually a white for things like eyes or shiny parts. I’ll give you my usual skin colors. Just change the RGB to the numbers in whichever skin color you’ll be using(if you decide to use one of these anyway XD).

 |
 |
 |
And don’t forget to put in a belly button!

Recent Comments