Mabinogi Windmill Training Guide
Mabinogi Windmill Training Guide by Kuryaka
This is kind of a general newbie guide as well as a Windmill guide, because the two go hand-in-hand. I agree that you should rank Windmill as soon as possible, but you don’t have to sacrifice storyline or even stats to do so.
Common advice is to restart your character if you haven’t trained Windmill and ranked other skills, because it means you have to kill much harder monsters, especially at the beginning.
I chose not to follow that. Rank A in all elemental bolts and masteries felt like a lot of AP and levels that I didn’t want to grind again. And even though I had Rank 8 Combat Mastery and Sword Mastery, that didn’t really stop me from trying.
There are now enemies you can easily kill for your Boss requirements, even if your stats are higher than normal. Windmill’s Skill CP will outweigh your stats near the end anyway.
I believe that this method of training works for anyone who’s comfortably under total level 250, as the difficulty of Shadow Missions spikes when your total level is 300+.
Party Finish Method:
Create a party. In the Finish Rule, change it to Anyone in the Party. Killing a monster will leave their corpses on the ground, with a “Finish” mark over their heads. This will let you kill monsters however you want and finish them with Windmill for skill credit.
Using Windmill to defend yourself from normal-sized enemies is simple. Keep mashing the skill button until your target runs into range, and they’ll be knocked back. Windmill will go off when ANY monster is within range, so it’s best to run away from everything else before you do this.
Basic Don’ts: Melee combat is straightforward. Most other combat skills can be replaced with Windmill if used correctly.
Defense: You don’t need this. In the time it takes you to load defense, you could also have Windmilled them away.
Don’t rank Counterattack. You’ll need to have Counterattack available, but rank F will suffice. Save your AP.
Smash: Save your AP. You’ll have better things to do when your enemies use Defense anyway.
Basic Dos:
When you Rebirth, choose age 17. Choose the Close Combat Talent so you spend half the time completing ranking requirements. This guide’s kill counts will assume you’re getting that double EXP.
Over the course of ranking Windmill to 9, get Heal and rank Magic Mastery to A. Healing yourself or pets will count toward the Magic Mastery skill. It won’t cost a lot of AP, and will give you Mana for Mana Shield. More about Mana Shield later.
All right. On to the actual guide.
Hold ALT when viewing enemies to check how their Combat Power (CP) is in relation to yours.
Find enemies that are your level (no marking), as well as some that are Strong and Awful. Try to kill them, just to see how their AI works and how hard they are to beat.
In ascending strength:
======
White Spider(ling): The ones in the Tir Graveyard are kinda useful.
Young Goblin/Goblin Archer: Found in Ciar Beginner. Similar CP to Gray Wolves.
Gray Wolf: Easy to kill one-by-one.
Goblin/Goblin Archer: I would not recommend fighting these. They will swarm you. Unlike Young Goblins, they hurt quite a bit.
If you’ve got ranged skills that can kill them before they run at you, it’s very easy to stack them up – just stay as far away from them as you can, and shoot them into a pile.
Red Spider: More about these later. The ones in Tir Graveyard are the only ones that matter.
Kobold/Kobold Archer: A bit stronger, but similar to goblins. Only found in Math Dungeon.
White Wolf: Useful for training Awful requirement early on. Try to kill the ones near the outside of the field so they don’t all notice you.
Skeleton: Found in Rabbie Dungeon. I love skeles. They only choose to attack you one at a time, so if you play it smart you won’t get overwhelmed.
Sickle Laghodessa: Found in Albey and Barri. They can swarm you, but they don’t hurt as much as Skeles.
Spike Laghodessa: These are slightly stronger than Sickles.
Red Skeleton: Second floor of Rabbie Normal. A bit stronger than your normal Skele.
Metal Skeleton: Found on the third and last floor of Rabbie. A bit stronger than the red Skele.
Light Armor Skeleton: Found in Albey Red and Rabbie Basic in normal, Red, and Metal flavors. They havePassive Defense, which means they have a 10% chance to automatically defend your attacks, so try not to hit them with a normal combo.
Zombie: Found in Tir Na Nog (Another World). 2000 CP means that they’ll be Boss or Awful for you.
Ranged/magic attacks deal 1 damage. They also like to spam Counterattack, so Windmill is pretty much the only thing you should use on them.
I advise AGAINST training on Zombies if they’re Awful. At rank 4 and up, an Awful kill is worth just as much as a Strong Skeleton, which also offer the opportunity for multi-kill credit. Instead… go to Iria for your Boss-level killing.
Saga Demonic Enemies: Love these. Yeah, they multi-aggro, but they only have 250-300 health on Intermediate (total level 100-299). And they’re still Boss for me, which means that their CP is probably above 3000.
Lion/Lioness: With a CP of 3k, these should be Boss the entire time too. The only advantage these have over Demonic Enemies is that they are fairly spread-out, so you can hunt them down without taking any damage. On the other hand, they hit HARD. Expect to take 100-150 damage from their combo.
=====
All right. Onto the actual training.
Set aside most of your AP for Windmill until Rank 9. You’ll be burning up AP faster than you level, and you want to hit rank 9 ASAP. You can then do other quests while effectively training Windmill, which makes it less boring.
Ignore the “Counterattack with Windmill” requirements. The way the game treats “counterattacking with Windmill” is pretty awkward, and you’re better off spending that time training/questing.
I use EXP to refer to skill training progress. I rarely refer to actual character Experience Points, but will write it out.
This guide is assuming that you’re running dungeons solo for the purpose of Windmill training.
Rank F:
Just practice your monster-stacking skills. Make your party, set finish rules to “Any” and see if you can pile up dead bodies near each other. Then Windmill the entire pile.
You’ll complete the “Attack several enemies” and “Defeat several enemies” at the same time. If you can’t rank up Windmill yet, go Windmill some things nearby.
When it says “several enemies” it means four or more. You won’t get more credit for killing more at the same time. Finishable enemies disappear after a while, so don’t wait too long. If you keep moving, you can use 3-4abilities to kill each of four targets before the first one despawns.
Rank E:
You’ll have to find monsters of similar CP to fulfill the “Defeat several enemies” requirement of this rank. You can just grind through this level – depending on your race, killing Strong enemies can get you 50 or 100% of the experience you need to rank up.
Rank D:
You’ll need to defeat several normal enemies and hit several Strong enemies. Meh. Since you’ve got to hit the Strongs in a group, pile the dead bodies up instead, and get credit for individual kills as well. It’s easier and safer to knock dead bodies into a pile than to lure everything together.
If you want to run Ciar Normal for Goblins, feel free to bail at the boss. Six Metal Skeletons and a Golem are going to be difficult to kill for quite a while. Just change channels to get yourself back in the dungeon lobby.
This is as good a time as any to go over basic Windmill combat strategy, as well as piling.
Single exclamation mark means a monster’s noticed you. It won’t start attacking you immediately, but might start charging spells. Medium priority for killing.
Double exclamation mark means a monster’s attacking you, referred to as aggro. Doesn’t necessarily mean that they will run up and hit you, but they’re out to get you.

Notice the Finish Rule set to Anyone in the Party.
Here I tried to knock two Goblins into something resembling a pile. I should have killed off all the Goblin Archers first, but a Goblin noticed me earlier so I had to run. One remaining Goblin’s aggro’d me.
However, I can stop him without using normal attacks with Windmill, loading it and just mashing the button.
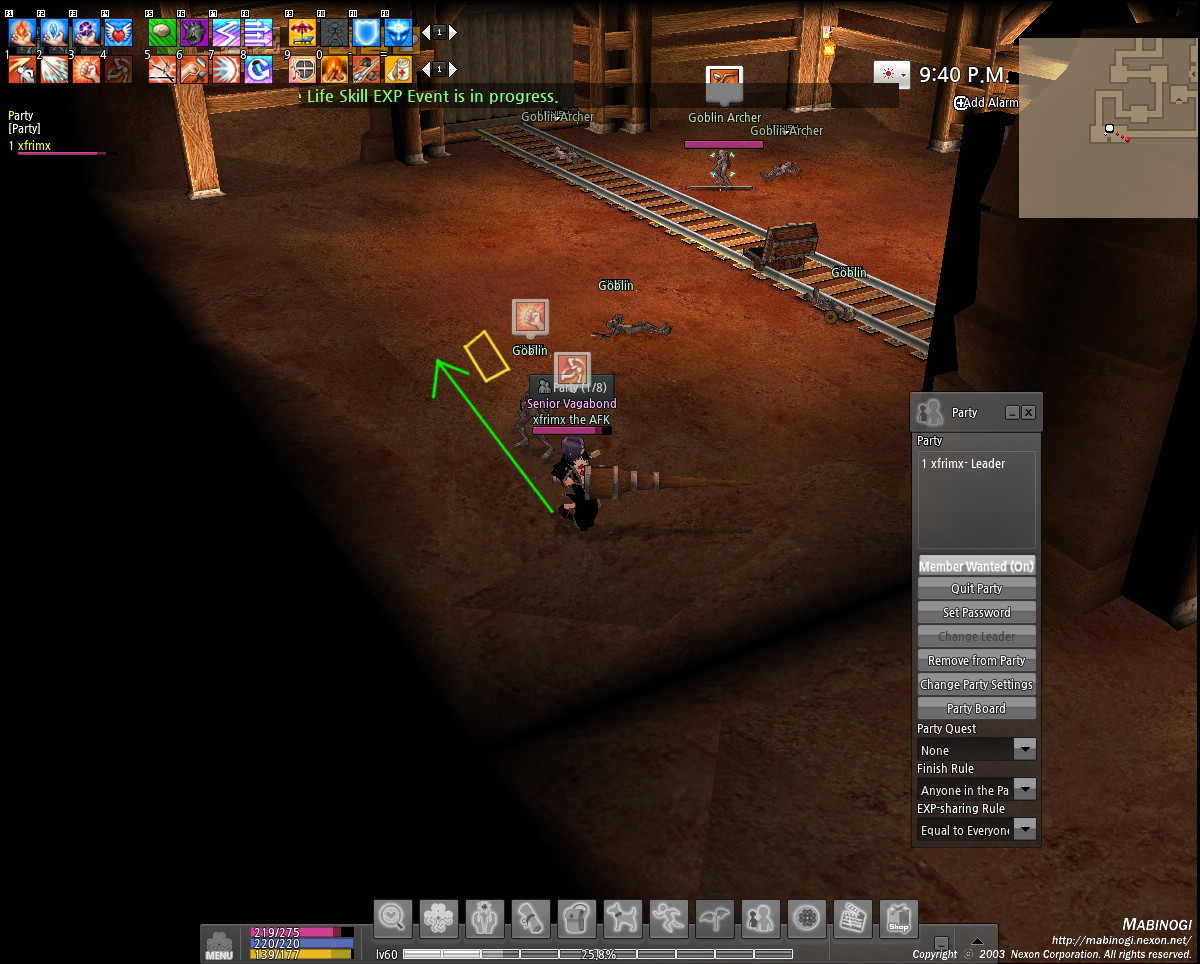
Enemies fly away from you pretty much the opposite way they came in. I’m expecting him to fly back to about the yellow box.
Rank C:
Again, defeating several Strong enemies is going to fulfill most of your requirements. This is the first time your Close Combat Talent comes in handy – killing one set of 4 Strongs will count as killing them twice.
Defeating Very Powerful Enemies = Awful enemies. You’re only getting a little bit more mileage out of these, as Strong gives 2.5 EXP while Awful gives 3, so you don’t have to do it here.
Part 2
Rank B:
I think I started running Rabbie around here.
Skeletons are actually much easier than Goblins to handle, as long as you keep a few things in mind.
They only aggro you one at a time. Hitting another one with a single target attack will cause that one to aggro you as well.
An extreme example. Poking them on purpose. But just two is bad enough, especially when they can deal over 100 damage with a critical Smash.

However, hitting the others with Windmill will NOT cause them to attack you, or even notice you.
Sometimes Skeles won’t run straight at you, and instead circle around. If you’re trying to pile them up, be patient, keep a good distance, and wait for them to run at you so you can knock them back. Otherwise, if you see them backing away, go for the kill. As long as you’ve queued up your attack before they do, you will get the hit in.

Sometimes they load Counterattack, and will stay in that stance for a good 5-10 seconds after Counterattack’s done loading. Work fast. Go and Windmill other living Skeles to damage them a bit without worrying about them trying to kill you. If you can kill a Skele in one melee combo, you can start building up a pile.
Red and Metal Skeles have bows. Metal Skeles have Windmill, but rarely use it. If you find these hard to handle, bail after the first floor.
Rank A:
Multiple Strong kills will only get you around 30 EXP, depending on your race. You’ll have to finish up with killing Strong or Awful enemies.
Rank 9: Windmill cooldown decreased to 3.5 seconds from 4.
At this point, you may want to go do other things instead of grind Rabbie. You can do G1 quests if you haven’t already, but try to get to r8 as soon as possible. Maybe pick up Evasion so you can dodge Skele arrows – talk to Gleywas in Tara Royal Castle about Skills for it. At Novice, you have a decent chance of dodging arrows, and it’s just fun.
Stockpile most of your AP – keep at least 20 AP in reserve so you can rank Windmill ASAP. R9 Windmill takes 12 AP to rank up, and you want some for the next rank.
Rank 8:
Depending on your race, Windmill EXP for killing multiple enemies either increased or stayed the same. Normal, Strong, and Awful kills are now worth less…
But Boss enemies show up, worth 2 EXP a kill. Hobgoblins should be Boss, so now’s as good a time as ever to go get Mana Shield.
http://wiki.mabinogiworld.com/view/M…ning_the_Skill
Part of the quest involves killing Hobgoblins of any kind. I recommend Lappa Village rather than rafting.
You can use your flying mount to get to Lappa Village easily. In the village outskirts they’re spread out enough for you to practice 1v1 combat skills. Hit them as hard as possible, full combo -> Assault Slash -> Counterattack. Load Windmill and wait for them to get up, then mash the button. If they run back or prepare a skill, cancel Windmill and smack them around.
=====
In general, alternating Windmill and Counter against basic attacks is the best way to survive 1v1 fights. Don’t start a fight unless you have at least 30 stamina, as both of these skills burn a decent amount of stamina, and running out means mashing the potion key or dying. Counterattack can be loaded instantly after Assault Slash, while you have to wait for the Windmill animation to finish before Counterattacking.
If you Assault Slash, follow up with Counterattack. NEVER ASSAULT -> WINDMILL. It leaves you awkwardly spinning on the ground unable to Counterattack for a few seconds while the enemy runs at you again. Windmilling too soon can even make the enemy can even get back up instantly and hit you due to game mechanics.
=====
I recommend fighting Exorcists due to their lower health compared to Warriors. Hobgoblin Bowmen have even lower health, but are nearer the village where spawns are denser. You still won’t get multi-aggroed unless you walk very close to them, but just be careful.
There is a time limit to the Hobgoblin-killing section of the quest, but it’s very lenient.
Try running Rabbie Dungeon as well, and see what Red/Metal Skeles are rated as. Metals may still be Boss, but even Awful gets you some decent EXP.
Rank 7:
Humans actually get the short end of the stick here. 26 EXP from Awful kills, while Elves get 38 EXP and Giants get 32 EXP. You’ll have to fill in with other things.
Take your pick. At 1 EXP per kill, Boss kills are worth five times as much as Awful kills for Elf/Human, and a bit more than EIGHT times as much for Giants. Awfuls are worth twice as much as Strongs.
I used normal Skeles in Rabbie for Strong requirement, and just kept moving down as far as I could. As long as you hang around waiting for a skele to aggro you instead of trying to force a fight, you’ll stay alive.
Skeles give a decent amount of experience points, and their Fomor scrolls can be cashed in for 10k or more. You’ll also run into Mimics, which drop their Fomor Scrolls pretty often.
Rank 6:
Now multi-kills take up a little more of your exp, which is good. You’ll only need to pull off five to get the full EXP from this. As a human, 35 EXP. Elf, a whopping 70. Giant, 30.
Then go to work on your Boss or Awful kills. At this point, you can go do more G1/2/3 quests or run Rabbie. Make a party, and set the finish rule to Any if you see monsters that can contribute to your Windmill. Get in the habit of doing so when you run dungeons. Give Windmill ALL relevant kills.
Start hoarding a lot of AP. Rank 5 is somewhat fast, and rank 4 is downright easy for Human/Elf.
Rank 5: Windmill Range Increased!
For one, Windmill’s starting to hit about as hard as your Smash. And its boosted range makes it easier to pile stuff up and counterattack.
Multiple kills will nab you 68.95 EXP for Human and Elf, and 40.5 for Giants. Don’t worry Giants – the rest of your hunting is about eight times easier than everyone else’s.
Iria’s Boss Hunting
I recommend you go find Boss monsters to fight. If your Rabbie runs are too tedious, go find your Demonic enemies. You can do these in any order, and Episode 2 is the one I found easiest to farm.
http://wiki.mabinogiworld.com/view/G…turn:_The_Trap
It’s the first battle of this episode. No need for a Finish here – you’re pretty much just killing every small enemy with Windmill.
The enemies will hit you for 20-30 damage, but they’re not as ridiculously aggressive as Goblins. Either kill the giant Headless monster first, or run away from it and let Milia handle it. The normal-sized enemies have around 250 health, the Warriors a bit more. The second wave’s Archers’ arrows can crit for 70-80 damage, so go for them first. You should be able to kill them with 1-2 hits followed by Windmill.
Demonic Poets are the only thing you should be worried of. If they run at you… now’s a good time to practice countering the smart way. If there are other enemies in range, wait until they get within Windmill range before tapping the Windmill button twice. Otherwise you’ll knock everyone else away, while the Poet’s Dischord chunks you for over 170 health.
Don’t be afraid of taking damage or even dying. Exit the Shadow Mission whenever you feel like bailing. If you’ve been knocked out, exit the Shadow Mission anyway. You can get back up on the spot afterward, and your items don’t actually drop on the ground until you decide to get back up. No loss except Blessing, Dura, and Experience Points.
Note that there are very little rewards from these guys – a Huge Lucky Finish only netted me 700 gold, and they’re worth less than 30 Experience Points.
You can also consider talking to Kousai in Cor Village to start the first half of the “Shamala and Nightmare: G17” quest chain. It’ll net you a good amount of experience and 20 AP when you’re done, and is not too difficult as long as you let Shamala do the work. Unlike Milia, Shamala can pretty much solo all of the Shadow Missions by herself.
In doing this, I discovered Lion and Lionesses. With a CP of 3000, they are probably going to be Boss until you max Windmill. They are also not too difficult to kill, despite having 900 HP. No Passive Defenses means that they won’t throw anything random into your combos, and they give a good 2k experience per kill. Treat these as the advanced version of wolves, staying safely out of their range and using magic/Rock Throwing to lure some out of groups. The last part of the “Shamala” quest chain needs you to kill 20 Lions/Lionesses. If you need some more AP, you can do this and get your Boss training done at the same time.
Part 3
Rank 4:
They made this rank so easy I don’t even. Attack “multiple” Skeles 20 times, and clean up a pile 15 times. If you’ve been running Rabbie a lot, their AI should be familiar to you.
=====
Around this time, Skeles/Red Skeles might not be Strong anymore.
If you don’t want to grind through two floors of these things before fighting Metals, you’ve got a few options:
Run Rundal Normal and fight Pirate Skeles. They’re not much more durable than normal Skeles, but hit much harder. Easy enough to avoid damage though – you’re just dealing with one at a time, so watch your stam and you’re fine.
Alternatively, you can take on some slightly stronger monsters. Run Rabbie Basic if you have passes. Or just go Albey Red. That is, dropping a Red Small Gem onto Albey altar as a pass.
You can get Rabbie Basic passes from Rabbie Normal runs, Brown Gremlins, or Blue Snakes.
Rabbie Basic is like Rabbie Normal. Except Skeles now have armor, and there’s two floors of Red Skeles. The boss is a slightly-harder Red Succubus, but she’s still a pushover. If you’re determined to complete this, just get through the Metal Skeles and you’re good to go.
Albey’s significantly more intense, dropping Armored Skeles of all types on you from the beginning, and multiple waves of Skeles in a row. If Armored Metal Skeles are Awful and Rundal’s Pirate Skeles are still Strong, go there instead. On the other hand, if Metal Skeles are Boss, you could go here instead of training on Demonic Enemies for a bit more profit.
The Light Armor Skeles in these dungeons should still be Strong to you even at r1 Windmill. Besides having more health, they also have Passive Defenses. Which just means you can’t melee them safely… but your Windmill should be good enough for the job.
Use Windmill or other abilities instead of using normal attacks. If they “ping” and plow through your normal attack’s stun, you’re pretty much dead.
These dungeons are what I’ve found to be the most reliable way to train the final ranks of Windmill and get a lot of profit in the meantime. Light Armor Skeles drop Fomor Scrolls a LOT more often. Expect at least 10 normal, 20 red, and 10 metal if you finish an Albey Red or Rabbie Basic run.
=====
Since you’re not using normal attacks on armored Skeles, dual-wielding loses its main advantage. If you’re not using fully-upgraded dual swords, consider getting a Two-Handed Sword for the bonus Smash damage as well. Or look into Lances. The minimum range doesn’t matter because you can Windmill enemies if they’re that close. Lance Charge lets you take care of archers simply by running through them, without sacrificing the power of a two-handed weapon.
And if you’re a Fighter running knuckles… I dunno how you made it this far. I salute you. I can’t bear having that little range on Windmill. But consider getting a “traditional” weapon for the increased Windmill range. You’ll also be able to damage clusters of mobs more effectively with the boosted range, which really comes in handy against … well, everything where you’re training solo.
=====
Rank 3:
You may want to finish G2 before you try to take on Albey Red. Paladin transformation will give you plenty of stamina to plow through monsters with pure Windmill, and bonus stats to take out Skeles more quickly. It’ll also give you a good chunk of AP and Experience Points.
This is the beginning of what I see as the true grind. Even Boss kills only net you 0.06 EXP for Human/Elf. Fortunately, you get 84 EXP off your “several powerful enemies” requirements if you’re a Human/Elf.
Giants get the same treatment as before – less total EXP for your multikills, but also much easier training on killing other things. And you even get 0.04 EXP for killing ANYTHING.
If you haven’t noticed because r4 was so simple, Awful kills are now worth the same amount as Strong kills. And Tir Na Nog’s Zombies are probably not Boss anymore. So we can let the archers/gunners take over that map.
Rank 2:
Courage. This is the rank where you must go forth and finish the grind.
Same EXP for finishing your multikills. It should be pretty routine by now – Windmill everything, use the fact that Skeles only run at Human speed to position yourself well.
Boss kill EXP only decreased slightly. Yes! You’ll have to get almost 15% of your EXP from this, because killing anything else is even slower going. I would recommend grinding almost exclusively on the Saga quest, exiting and re-entering once you’ve cleared the third wave (Demonic Archer/Poet).
Rank 1: Range Maxed!
Made it! Windmill now has a ridiculous range. Enjoy being able to hit as far as a Lance with your Windmill. Enjoy being done with one of the most grind-focused combat skills.
Skills that got me through the Goddess quests and various bosses:
Fusion Bolt. Not sure if you’d get much mileage out of this if you aren’t planning to be a mage, but if you use Fire/Ice Fusion you can fire off a good 500+ damage on a single target before going in. It might not outdamage your combo, but if you’re up against an Ogre or Golem with Passive Defense, you shouldn’t be hitting it with normal attacks anyway.
Also works beautifully against Heavy Gargoyles for your Albey Green run.
Mana Shield. Can’t say how many times this thing has saved me. I run out of health potions? Mana shield. Boss attacks for more than my health bar? Mana shield. Potion up right afterward, risking potion poisoning is preferable to dying at the end.
Transformation. Bonus health/free heals and boosted stats. What’s not to like?
Doppelganger. It’s like another fully charged Fire/Ice Fusion bolt. But physical.
You’ve got to have Adventure and Close Combat Talent both at Apprentice or higher to unlock the Vagabond Hidden Talent, which lets you unlock Doppelganger. Very easy to get Adventurer up. Campfire Rank A costs 5 AP TOTAL and has simple-to-complete quests, and as long as you have Rest at all… Apprentice Adventurer. Close Combat is a bit more difficult – you may not get this until Windmill is rank 3 or 2, even if you put a few points in other combat skills as well as Combat and Sword Masteries.
The issue isn’t about how hard it is to train those skills, but the amount of AP that they suck away from Windmill. You’ll have to complete quite a few main storyline quests, as well gain quite a few levels, just to get the 177 AP required for r1 Windmill. If you’re looking for a quick source of AP, complete G1-3, G17, or G18 storylines. Saga actually gives you a LOT of AP proportional to the effort taken, as each episode gives you 20 the first time through. Starting a different episode just cancels all the quests of the current one, but each episode is repeatable.
You may get to rebirth partway through. That’s a good time to go do main storyline quests as well. Don’t worry about the CP increase due to stats when your Windmill’s above rank 5 – each level gives you about 2.5 CP worth of stats. Rank 5 of Windmill is worth 180 CP – a good 70 levels. And that CP from Windmill increases by about 40 for each subsequent rank.

Recent Comments