Heroes of Gaia Beginner’s Guide
Heroes of Gaia Beginner’s Guide by devan69
We start from the beginning….
http://www.heroesofgaia.com/index.html
First off you will need to go to this website. Register a account. then go back to the main page after you are finish and have activated your account.

At the main site you will see the 2 yellow highlighted Play buttons. You can start Heroes of gaia by clicking either of these.

After clicking play you will come to this winder where you will choose which server you would like to begin your explorations on.
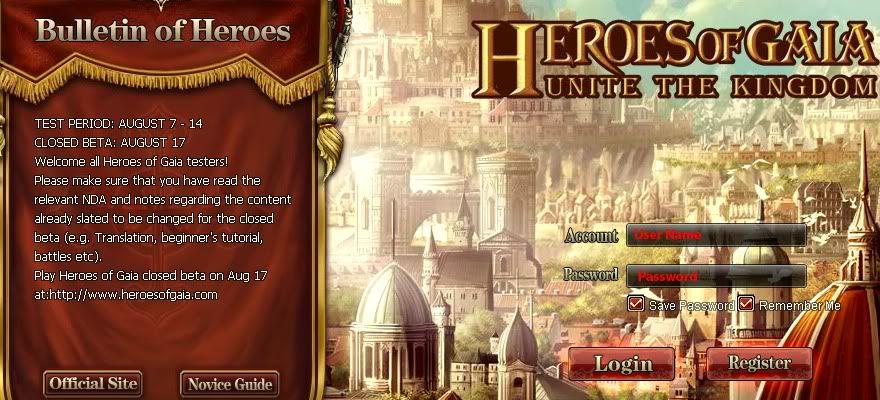
When you get to this page you will then proceed to enter your User name and Password you registered before on the website.
Official Site – This will take you to the main website.
Novice Guide – This will take you to the beginners guide on the website.
Save Password – this will save your password so when you return to the site and want to log back in your password will still be there.
Remember Me – This will save your User Name so when you return to the game your user name will still be there.
Login – after you have entered in your User Name and Password correctly you click this to log into the game.
Rigister – This will take you to the registration page. only needed if you didn’t register a account on the main website.
*** If you clear your browser history and cookies your user name and password will be erased so the next tiem you come to the site you will need to re-enter them.

Here is where you will choose you character. there is 4 races to choose from and the ability to choose from male or female. Descriptions of the races can be found on the main website. You can either click them one by one to turn the wheel and view a certain character or you can click the red highlighted arrow keeps on both side to spin the wheel one by one in that direction. Once you have decided the race and gender you want to play as you may then enter in the name you would like to be known as in the Name of Role section. After you have done this you may click Creation to proceed to the next step.
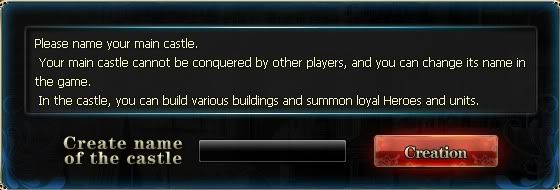
Here is where you will get to name your New Castle. After deciding what you want and entering it into the box click Creation to begin your journy into the lands of Heroes of Gaia.
Now onto ingame windows….
Player tab

1) Player Name – self explanitory
2) Race – Displays your Race (orc, human, elf, or undead)
3) Title – Shows your players current title. Titles will change as your fame goes up.
4) Camp – Part of the storyline of the game. (Not fully implemented yet)
5) AP – Attack points. These are used to attack things with your heroes. AP slowly regenerates over time or with completion of certain Daily Tasks. Also Cards can be purchased in the item shop to increase regeneration time.
6) Fame – Fame is gained from building up your castle, attacking things in the world, and training armies.
Player tab button functions
Friends – Opens your friends list.
Mail – Opens your in-game mailbox. It has a white glow effect around the button when you recieve mail.
Rank – Opens the rank window to view your rank as well as everyone elses ranking within the game.
Website – Takes you to Heroes of Gaia Main website.
Help – Takes you to the game forums
Clicking on your player face icon will bring up your player information window
Hero tab

1) Hero portrait
2) lvl – Current level of the Hero
3) Status – Current status of the hero.(Overlord,Free)
4) Heroes name
5) Deploy Units – press this to go to the Unit deployment windows. There you will be able to assign Military Units to that hero and others. You can also use this to remove units from your hero into the castle.
Clicking on the Hero picture will bring up the Heroes Profile. There you can apply any available stat points, view current assigned military units, view and equip or unequip (armor, weapons, jewelry, and skills).
Units tab

Defense Units – These are the military units assigned to the hero that is currently defending the castle. The Hero defending the castle is also refered to as Castellan/overlord.
Total Units – These are your available military units not assigned to any hero.
Multiple Castle and Leave Castle
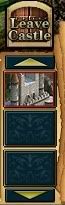
Each castle icon you see represents a castle you currently own. Clicking them will instantly move you to the respective castle.
The Arrow button allows you to circle through your currently owned castles if you own more than 3 castles.
Leave Castle – This button will take you outside your castle where you can then proceed to fight enemies and conquer things in the game.
Central Button Controls

Guild – This button brings up your guild list window
Tasks – This button brings up your Games Tasks and Daily Tasks window
Kingdom – This button brings up your Kindom List. There your will get information on various things about your castles you currently own.
Info – This button bring up your Information window. There you will get the info of all your explorations in the world from taking resource nodes to sieging other players and so on.
Shop – This button brings up the game item shop. There you will be able to purchure various cards to boost various things within the game. Things such as increase AP regeneration, instant resources, increase resource output, and chest sets.
Gold Output – The Castles gold output. (not sure it’s full details)
Bottom name bar displays your castles name.
Chat Window

This is where u can choose the chat section you want talk in, on the current window.
1) All – This chat is for global chat that everyone online can read.
2) Guild – This allows you to communicate with your fellow guild members.
3) Private – This enables you to send a private message to another player. Once you click this all you will need to do is put a / before the player you want massage’s name. ex: /Devan69 (message). This game is case sensetive, so if the player has a capital letter in their name you will need to do the same in the name for the private message.
4) Help – This is used to get help from a GM.
5) This shows the name of the last player you sent a private message too. Click the name to send a new private message without having to re-type the players name.
6) This opens up the extended chat window settings. Where you can change the window height and transparency.
7) This extends the chat window up the screen to show past text without having to scroll up.
Chat Window Tabs
All – This is your Global chat window tab along with all other chat channels. Use this when you need to see Global chat, Guild, and Private Massages in one window.
Guild – This is your Guild chat window tab. Use this when you only wanna see Guild chat and Private Messages in one window.
Private – This is your Private Message chat window tab. Use this when you need to talk to someone in private messages and not have to worry about seeing any other chat.
Help – This is your Help chat tab window. Use this when you need help from a GM.
Send – You either click this or hit the enter key on your keyboard to send the current typed message.
The bottom left box with all, guild, private, and help can be accessed by clicking the down arrow to the right of the box. The smiley face will bring up a little window of smiley expressions to use in chat. When you leave your castle to the outside castle view your chat box background goes away so you don’t see anything but your chat and no box. All you have to do is hover your mouse over the bottom chat bar to make the box visible again. Moving the mouse back away from the chat box area rehides the chat box frame.
Resource Bar and Building Queue Drop Down Window

Resource Bar
1) Obtain reward icon. If you click this it will bring up a small window where you will enter special codes from events to receave your reward.
2) Hero Status ison. If clicked on this will bring up a window that will display the status of all your heros.
3) This is the display of your lumber resource.
4) This is the display of your ore resource.
5) This is the display of your sulphur resource.
6) This is the display of your crystal resource.
7) This is the display of your gold resource.
Resources are desplayed like this ex: XXX/YYY/ZZZ
XXX – current ammount of the resource you own in that castle.
YYY – the max capacity of that resources for that castle.
ZZZ – current output rate of that resource for that castle.
hovering your mouse over the resources will drop a small window down with more info about that resource.
Building Queue Drop Down Window
To bring this window down all you need to do is click the red down arrow and the same for raising it back up is click the up arrow.
Build – This shows all the buildings that you are currently constructing along with the remaining building time. This also includes when you upgrade buildings.
Magic – This shows all the castle spells and hero spells your are currently researching in your magic tower.
Troops – This shows all the the troops you are currently creating in your barracks.
Items – This shows all the current item buffs you currently have active. (things from the item mall such as faster AP regeneration or increased ore output. Things like that.)
+ – This is what you click if you want to apply a acceleration card. clicking this will bring up the appropriate selection of cards for selected building, spell, or troop.
X – This is what you click if you want to cancel the selected Building, spell, or troop.
Now onto inner castle building windows….
Townhall Window

Upgrade – Click this to upgrade your Townhall to the next level once you have aquired the resources to do so. Once clicked 2 new buttons will appear accelerate and cancel. if you wish to speed up the building process with a card from item shop click this and then click the appropreate card. If you wish to stop the building process simply click cancel.
Rename Castle – As the name states this is where you will want to go to rename your castle.
Kingdom List – This is where you go to for information on all the castles you own.
In the construction work in list you will see the buildings you are currently constructing or upgrading. When you are done with this window you can click close at the bottom or the red X at the top right to close the window.
Barracks Window

Upgrade – This is wehere you upgrade the barracks building itself.
Soldier – This is the tab to view all the military units you are able to create to fight for your side.
Defence – This is the tab to view the defensive structures you are able to make to help defend you castle.
Train – This is used to build that spacific unit it will bring up the window you see below…

Here you will see the units potriat, Name, Stats, and other details. You will also wind in the middle section details about each units cost and time needed per unit to create. in the middle u will see a slide bar use this to increase the number of units you want to create. It will only allow you to slide til you hit the maximum limit you can create. To the right you can view the total cost and time it will take to make the amount of units you have set to create. Below that section you will see the amount of resources you will consume to make the set of units you are wanting to make. If you just want to set to the maximum you can click the Maximum number button on the bottom left and it will automatically set it to the max and then click Train to begin the process.
Warehouse, Blacksmith, and Horse Stall Windows
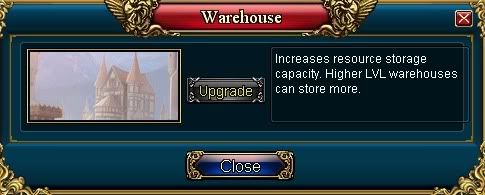
the Blacksmith, Horse Stables, and Warehouse all use the same windows. Just click upgrade to begin the upgrade process on any of the buildings. After clicking upgrade you will see the same buttons as said previously accelerate and cancel. Same features and previously discribed.
Hero Tower Window

Appoint Castellan – This is what you use to appoint one of your currently owned heroes as the defender of that castle. This not only helps with the defense of the city but gives the city a bonus in gold output based on heroes knowledge and other bonuses from skills learned in your magic tower.
Upgrade – this is used to upgrade the building. after clicking this accelerate and cancel will appear.
as seen in the picture 2/7 indicates I own 2 heroes out of a possible 7 heroes i can control.
Ex. X/Y
X – currently owned heroes
Y – maces heroes allow to be owned
At the bottom of the window u will see the heroes you own’s stats and potriat and also there statue. this will be discuss further later.
Arena Window

Upgrade – This is to upgrade the arena to the next level.
Allocate for – This will take you to the Deployment of Units window where you will get to assign you units to a commanding hero.
Infirmary – This is where you go to revive falling military units. When units die in battle they have a chance of only being wounded and will then be sent to the infirmary to be revived.
Disband – This is where you can go if you want to completely delete units that you don’t want. this doesn’t just remove them form that hero back into you unassign unit pool this completely deletes them.
Arena – This is where you go to pvp in a set match against other players. Winning Arena matchs gives you honour points in which you can spend in a special Honour Shop.
Market Window

Upgrade – This is to upgrade the Market to the next level.
1) This is where you go to trade your resources you own for resources you need from the game itself.
2) This is where you go to sell resources you have for gold from the game itself.
3) This where you go to buy resources from other players in the game.
4) This is where you go to sell resources to other players in the game.
5) This is where you go to buy equipment to other players in the game.
6) This is where you go to sell equipment to other players in the game.
Resources trade information – this section shows detailed information of resources you have up for sell for other players to buy.
Equipments trade information – This section shows detailed information on equipment you have up for sell for other players to buy.
Your only allowed to do 1 trade every 4 hours. If you would like to trade more in short time then you will need to purchace a resource trade card from the item shop and click the Use resource trade card or equipment trade card button depending on what you doing.

Buy Resources window
This is the window you see when you go to buy resources. The left box is for the amount of the resource you are wanting. The middle drop down window is the choices of the other remaining resources that you would like to give away for the resource you want. The right box is for the amount of the resource you are giving away. You will only need to enter a number in the first box and chose which resource you wantin to exchange for it. The third box will automatically be adjusted. Then click confirm to finish the transaction. The 4 boxes on the bottom are the amount of each resource you currently own.

This is the window you will see when you go to sell resources for gold. The middle box is for the amount of that resource you want to sell. As you enter that number in you will notice the 3rd box adjusting to those numbers. The 3rd box is where you will see how much gold you will receive for the amount of resources you are wanting to sell.

Recent Comments