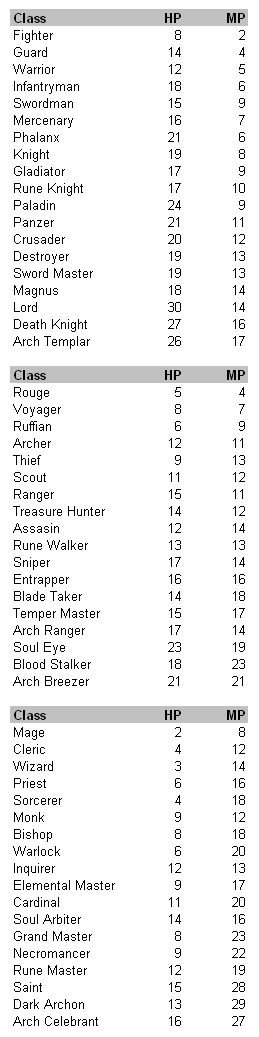
Luna Online Plus Fighter Class Choosing Guide
Luna Online Plus Fighter Class Choosing Guide by dialaurel
This is a compilation of the information I’ve collected from playing LUNA Online in other servers regarding the Fighter class to help people create their own Fighter build.
Fighter is one of the 3 job you can become in LUNA Online. They focus on close-range combat and mob-training.
There are many classes a Fighter can become which are
Class1 (lv1)
– Fighter
Class2 (lv20)
– Guard
– Warrior
Class3 (lv40)
– Swordman
– Mercenary (Human Only)
– Infantryman
Class4 (lv75)
– Phalanx
– Knight
– Gladiator (Human Only)
– Rune Knight (Elf Only)
Class5 (lv105)
– Paladin
– Crusader (might be Human only*)
– Destroyer (Human Only)
– Sword Master (might be Elf only*)
– Magnus (Elf Only)
– Panzer
Class6 (lv120**)
– Lord
– Death Knight (Human Only)
– Arch Templar (Elf Only)
**Note: Some sources say that the 6th Tier class change might be at lv130 or lv135
There is no official announcement for this (yet), so please hold off any planning towards the 6th Tier for now.
*Note2: It has yet been finalized whether Crusader and Sword Master would be Human/Elf only jobs. Currently on Korean and Thai server, both race can change their class to Crusader and Sword Master. We’ll have to wait and see if our version would allow this or keep the restriction.
The difference between an Elf and a Human is the class you can become, so choose wisely before creating a character. Human is more focused on Offense, while Elf is more focused on Defense. Also, their starting stat is a bit different.
Human Fighter starts with
80STR 50DEX 70VIT 30INT 35WIS
Elven Fighter starts with
65STR 60DEX 65VIT 35INT 40WIS
The stat different isn’t very significant, and should be neglected when choosing your race. The class you can become is more important. (Along with the preference of character sprite. …Elves are cute, btw)
Fighter has several choice of weapon which can be considered from 2 perspective
Hand
1. One Hand Weapon
This type of weapon uses up only 1 of your hand, so you can equip a shield. The attack power of 1H Weapons are quite low, and 1H skills have low damage multiplier, so you won’t be doing much damage with them. However, the ability to equip a shield helps increase your survivability by a lot. Shield gives more damage reduction than the number of Physical Defense it gives to the status windows, and it also enable your character perform a Block where the damage is further reduced.
2. Two Hand Weapon
This type of weapon uses up both of your hand, so you cannot equip a shield. The sacrifice of that defense is, however, rewarding. 2H Weapons have high attack power, and 2H skills has high damage multiplier with good status effect. You’ll still be doing a lot of damage with 2H weapons even for a build without STR.
Type
All types of weapon of the same level has the same attack power, but the difference lies in the passive skill.
1. Sword
Sword Mastery gives the lowest attack bonus, and Sword Rapidity gives Attack Speed bonus which is not quite good when you’re casting skills almost all the time. (Note that Attack Speed doesn’t affect skill casting in any way.) However, some of the fighter skills require Sword, so many people still use Sword as their weapon. Rare Swords usually give some nice skills or buffs.
2. Axe
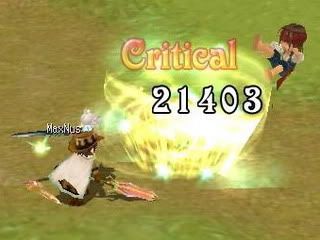
Axe Mastery gives the second highest attack bonus, and Axe Mortality gives Critical bonus, so people choose Axe because of this. Rare Axes usually give a lot of Critical and STR bonus, and have much higher attack power than Rare weapons of the other types around the same level.
3. Mace
Mace Mastery gives the highest attack bonus of the 3 types of weapon, and Mace Protection gives Physical Defense bonus. Maces are typically regarded as being uncool and are usually chosen by only Mob-Trainers who need that extra defense. Rare Maces usually give VIT or Def bonus, but rarely have any attack-related bonus
Weapon choice is entirely dependent on the player’s style, so there is no best one. Try experimenting with all of them (and use the skill reset scroll in the cash shop to reset back) to find the most suitable one for you.
Regarding stat
STR gives Attack and Accuracy
VIT gives Physical Def and HP
both covers pretty much everything a Fighter needs.
DEX gives Accuracy, Evasion and Critical
INT gives Magic Attack and Magic Critical
WIS gives Magical Def and MP
the other stats are not important, and should only be gotten when you can’t get STR or VIT.
Status building for Fighter must be considered from 2 aspects, the status from leveling up and status from equipment. Both kinds of status effect your character equally — 1 STR from your level and 1 STR from your equipment is the same.
For leveling up stat, there are only 2 options that are recommended.
1. Pure STR for Damage Dealers
2. Pure VIT for generally everyone else that doesn’t focus on dealing damage
The reason for going pure is that it allows your character to go to one extreme (aka. Max damage for pure STR, and Max defense for pure VIT). Also having your stat distribution concentrated on only 1 stat, makes the decision on the latter part (stat from equip) much easier.
For equipment stat, there are several ways to do it.
1. Follow your leveling up stat
Get the same kind of equipment as the stat you chose to go in the leveling up part, in order to maximize your potential in that area.
2. Find the break even point, then pour the rest into another stat
First get the equipment to support your primary stat to a certain point, then after you feel that it is overkill to put any more in this stat (you can 1-hit-kill with that much STR, or you’re already getting 1 digit damage from that VIT), get the rest of your equipment in another kind of stat. (This one is recommended in most situations)
3. Use set items
Some set items gives really nice bonus for their level, and is recommended over the constructed version; or when some low level set item gives very good bonus which is still useable at high level. (i.e. +18 STR lv55 Heavy Armor set with +5% Phy.Attack set bonus)
4. Follow the market trend
Get the one that has a lot of supply in the market (i.e. just grab that +18 VIT boot, rather than looking forever for a STR boot.)
5. Take whatever available
Just get anything that come across to you; be it a drop or a really cheap garage sale. (this is usually done only in low levels when you’re still too poor to be thinking of maximizing your character potential)
But really, in the end, everything comes down to your common sense and play experience to see which piece of equipment fits your character the most. If you have the Inventory Expansion Scroll, you can carry more than one set of equipment to be switched on the fly, so that you can become more flexible.
Special for Tanker
At later stage, the most problematic kind of attack is not Physical attacks, but rather the Magical ones. Some high level Phalanxs choose to go full WIS and enchant their +MDEF accessories to the max to deal with this
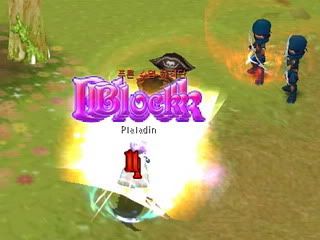
Shield Blocking
There are two values associated with Shield Blocking
Probability of Shield Block
= Passive + Buff skill (%)
= +0.1% for each 10 Dex
= Fighter +15%, Rouge +10%, Mage +5%
Shield Training (All shield-based classes) and Iron Shield (Paladin) increase this
Damage Reduction of Shield Block
= 40% base reduction
= +0.1% for each 4 VIT
For Example
Shield Training lv20 = +53% Block Chance
Iron Shield lv2 = +5% Block Chance
So a Paladin can have 15% + 53% + 5% = 73% Block Chance (not counting DEX)
Each block would reduce damage by 40% Reduction (not counting VIT)
Note that Block works only on Physical Attacks.
**Note: The information regarding Solid Shield has not been confirmed yet. (not sure whether Solid Shield gives Shield Damage Reduction or secondary Shield Block Chance) I’ll remove them from the above section for now.**
Heavy Armor VS Light Armor
Armor is one of the major concerns of every Fighter players, since Fighter is a melee-based class which cannot avoid getting hit by the monsters. Eventhough Fighter can wear any kind of armor, the choice comes down to either Heavy Armor and Light Armor.
1. Heavy Armor
Heavy Armor has the highest initial defense of all kinds of Armor, but it is still pretty low without Heavy Armor Expertise skill. HAE is available to defense-based classes only (Guard/Infantry/Knight,etc.), so this is the main reason many damage dealer players choose to sacrifice their offense during some stages to hybrid into defensive classes. Also, Heavy Armor is available to Fighter class only, so the quantity of Heavy Armor available in the market might be low, as not many people can use it. But the price would be low also, due to low demand.
2. Light Armor
Light Armor has moderate defense, but with some SP spent in Light Armor Expertise, the defense it provides is pretty decent for classes that don’t have access to Heavy Armor Expertise. (Fighter/Swordman/Gladiator,etc.) From a rough test, Heavy Armor+Expertise is about 1.5 times more effective then Light Armor+Expertise of the same Expertise level. Or to look it in another way, the extra DEF gained from HAE seems to be approximately the same as x2 level of LAE (i.e. lv10 HAE roughly equal to lv20 LAE) Since many classes can use Light Armors, the demand for them might be quite high.
Next is a brief description of each job
Class 1
1A Fighter
– Your standard melee character
– Support both 1H and 2H
– Has STR buff
Class 2
2A Guard
– Support 1H and Shield
– Has Def buff
– Has HP Regen passive (Blood Leak)
– Has Heavy Armor Expertise (5)
– Has 1 AOE (Bloody Sky)
2B Warrior
– Support 2H
– Has Attack and STR buff
– Has Attack passive (Risk Taker)
– Has NO Heavy Armor Expertise
– Has 1 AOE (Wheelwind)
Class 3
3A Swordman
– Support both 1H and 2H
– Support Sword
– Has MP Buff
– Has MP Regen passive
– Has self-Heal
– Has Sleep
– Has ranged Attack skill
– Has NO Heavy Armor Expertise
– Has 3 AOEs (Bloody Sky for 1H, Earthquake for 2H, Sword Storm for both)
3B Mercenary (Human Only)
– Support 2H
– Has Attack and STR buff
– Has Attack passive (Risk Taker)
– Has NO Heavy Armor Expertise
– Has AOE -Def Debuff
– Has 3 AOEs (Wheelwind, Earthquake, Blazing Body)
3C Infantryman
– Support 1H and Shield
– Has Def and Shield Block buff
– Has HP Regen passive (Blood Leak)
– Has AOE taunt (This is what enables you to mob train more than 6 monsters)
– Has Shield stun
– Has short-duration massive Def/Mdef buff
– Has Heal skill (weak but fast)
– Has Heavy Armor Expertise (10)
– Has 2 AOE (Bloody Sky, Holy Avenger)
Class 4
4A Phalanx
– Support 1H and Shield
– Has Def and Shield Block buff
– Has HP Regen passive (Blood Leak, Relaxation)
– Has AOE taunt
– Has Shield stun
– Has short-duration massive Def/Mdef buff
– Has short-duration self Invincibility buff
– Has Heal skill (weak but fast)
– Has Heavy Armor Expertise (20)
– Has 3 AOE (Bloody Sky, Holy Avenger, Shield Charge)
4B Knight
– Support 1H and Shield
– Has Def and Shield Block buff
– Has AOE taunt
– Has Shield stun
– Has short-duration massive HP Regen buff
– Has unique buff and passive (+Attack, +Movespeed, +Attackspeed)
– Has Heavy Armor Expertise (15)
– Has 3 AOEs (Bloody Sky, Doom Burst, Sword Storm)
4C Gladiator (Human Only)
– Support 2H
– Has Attack and STR buff
– Has Attack passive (Risk Taker)
– Has Attack Speed / Critical Damage buff
– Has NO Heavy Armor Expertise
– Has AOE -Def Debuff
– Has 3 AOEs (Wheelwind, Earthquake, Blazing Body)
– Note: Insane Damage Output
4C Rune Knight (Elf Only)
– Support both 1H and 2H
– Support Sword
– Has MP Buff
– Has MP Regen passive
– Has self-Heal
– Has Sleep
– Has ranged Attack skill
– Has ranged Stun skill (Very good)
– Has AOE -Attack -Magic Debuff
– Has Aura skills (work for you and people around you)
– Has NO Heavy Armor Expertise
– Has 3 AOEs (Bloody Sky for 1H, Earthquake for 2H, Sword Storm for both)
Class 5
Not much information regarding 5th class. (Not many people reaches lv105 outside the test server yet)
5A Paladin
– Upgraded version of Phalanx
– 1H and Shield
– Has Heavy Armor Expertise (20)
5B Crusader
– 1H or Staff
– Magic Caster
– Has NO Heavy Armor Expertise
5C Destroyer (Human Only)
– Upgraded version of Gladiator
– 2H
– Lots of Attack Skills with Stun and Paralysis
– Has NO Heavy Armor Expertise
5D Sword Master
– Dual Wield
– Lots of new Attack Skills
– Has NO Heavy Armor Expertise
5E Magnus (Elf Only)
– Upgraded version of Rune Knight
– Dual Wield
– Has party Invulnerability buff
– Has Heavy Armor Expertise (15)
5F Panzer
– Gunner
– All attack skills require a Gun (Rifle) to be equipped
– Has Heavy Armor Expertise (20)
Class 6
Not released yet. The following information is still unconfirmed.
6A Lord
– Continuation of Paladin
– Ultimate Tanker
– Has Holy-based magic attack skill & Healing
6B Death Knight (Human Only)
– Continuation of Destroyer
– Ultimate Attacker & AOEer
– Has highest damage raw damage output of all classes
6C Arch Templar (Elf Only)
– Continuation of Magnus
– All round Attacker & Supporter
– Has lots of party buff skill
As you can choose only 1 class to become in each stage, try choosing the ones that fits with your play style, and gives good overall balance. Note that you can still learn all the skills from previous class beside the current one. You don’t have to have that skill in the class before.
For example
Fighter > Warrior > Infantryman
can learn Wheelwind lv5 (from Warrior)
and Heavy Armor Expertise lv10 (from Infantryman)
eventhough Warrior has 0 Heavy Armor Expertise
Also note that each class has different HP/MP multiplier.
The recent Korean LUNA rebirth patch introduce a passive unique to each class, so the class path you take will influence you character stat. (LUNA rebirth patch would come around 1 year after the server opened, so just think of this as something from the far future.)

How the table works out:
Sum the level of each skill according to your class and look up the skill level in the list below
[Vocational] Physical Damage
lv1 +1% Physical Attack
lv2 +3% Physical Attack
lv3 +6% Physical Attack
lv4 +10% Physical Attack
lv5 +15% Physical Attack
[Vocational] Physical Defense
lv1 +1% Physical Defense
lv2 +3% Physical Defense
lv3 +6% Physical Defense
lv4 +10% Physical Defense
lv5 +15% Physical Defense
[Vocational] Hit Chance
lv1 +3 Accuracy
lv2 +9 Accuracy
lv3 +18 Accuracy
lv4 +30 Accuracy
lv5 +45 Accuracy
[Vocational] Crit Chance
lv1 +30 Critical
lv2 +90 Critical
lv3 +180 Critical
lv4 +300 Critical
lv5 +450 Critical
[Vocational] Max HP
lv1 +1% Max HP
lv2 +3% Max HP
lv3 +6% Max HP
lv4 +10% Max HP
lv5 +15% Max HP
For example
Fighter > Warrior > Infantry > Knight > Destroyer
would get
Attack 1 + 0 + 1 + 2 = lv4 = +10% Physical Attack
Defense 0 + 1 + 1 + 0 = lv2 = +3% Physical Defense
Accuracy 1 + 0 + 0 + 0 = lv1 = +3 Accuracy
Critical 0 + 0 + 0 + 1 = lv1 = +30 Critical
Max HP 0 +1 + 1 + 0 = lv2 = +3% Max HP
Update: Fixed some wordings and added the skill list that each class can learn.
**Note** Heavy-Armor Expertise, Attract Circle, Invulnerability buffs, and disable skills (stun/paralyze/sleep) are in bold font. Race-specific skills are colored in blue (Human) and green (Elf).
Fighter Skill Tree
Class 1
Fighter

Crash Blow – 5
Uppercut – 5
Windy Slash – 5
Strike Attack – 5
Attract – 5
Fighter’s Heart – 1
One-Handed Training – 5
Two-Handed Training – 5
Light-Armor Expertise – 5
Enhanced HP – 5
Sword Training – 5
Axe Training – 5
Mace Training – 5
Burning Rage – 1
Boost Light Sword – 2
Boost Heavy Sword – 2
Sword Rapidity – 5
Axe Mortality – 5
Mace Protection – 5
Nature’s Shield – 1
Class 2
Guard
Windy Slash – 10
Strike Attack – 10
Bloody Sky – 5
Blunt Shield – 5
Attract – 10
Blessing Guard – 2
One-Handed Training – 5
Light-Armor Expertise – 10
Heavy-Armor Expertise – 5
Shield Training – 5
Enhanced HP – 10
Sword Training – 10
Axe Training – 10
Mace Training – 10
Blood Leak – 2
Burning Rage – 2
Boost Light Sword – 2
Sword Rapidity – 10
Axe Mortality – 10
Mace Protection – 10
Nature’s Shield – 2
Warrior
Crash Blow – 10
Uppercut – 10
Bleeding Blow – 10
Wheel Wind – 5
Windy Slash – 10
Strike Attack – 10
Battle Shout – 10
Body Check – 10
Fighter’s Heart – 2
Warrior Form – 2
One-Handed Training – 10
Two-Handed Training – 10
Light-Armor Expertise – 10
Heavy-Weapon Accuracy – 4
Sword Training – 10
Axe Training – 10
Mace Training – 10
Risk Taker – 2
Burning Rage – 2
Boost Light Sword – 2
Boost Heavy Sword – 2
Sword Rapidity – 10
Axe Mortality – 10
Mace Protection – 10
Nature’s Shield – 2
Class 3
Infantryman
Cross Slash – 5
Double Strike – 5
Bloody Sky – 5
Blunt Shield – 15
Shield Edge – 15
Shield Barrier – 2
Attract – 15
Attract Circle – 15
Blessing Guard – 4
One-Handed Training – 10
Light-Armor Expertise – 15
Heavy-Armor Expertise – 10
Shield Training – 10
Enhanced HP – 15
Sword Training – 10
Axe Training – 10
Mace Training – 10
Blood Leak – 4
Magic Barrier – 5
Burning Rage – 2
Lash – 1
Boost Light Sword – 3
Sword Rapidity – 10
Axe Mortality – 10
Mace Protection – 15
Troopership – 2
Solid Shield – 1
Heal – 5
Holy Avenger – 15
Holy Strike – 10
Nature’s Shield – 2
Nature’s Mind – 1
Swordman
Cross Slash – 5
Double Strike – 5
Sonic Boom – 15
Bloody Sky – 10
Burning Crash – 5
Earthquake – 5
Bleeding Blow – 15
Spirit Sword – 10
Spirit Aid – 10
Attract – 5
Sword Storm – 10
Mana Storm – 4
One-Handed Training – 15
Two-Handed Training – 15
Light-Armor Expertise – 15
Sword Training – 15
Sword Accuracy – 3
Mana Control – 5
Burning Rage – 2
Lash – 1
Boost Light Sword – 3
Boost Heavy Sword – 3
Sword Rapidity – 15
Fighter’s Heart – 2
Warrior Form – 2
Nature’s Shield – 2
Nature’s Mind – 1
Mercenary (Human Only)

Burning Crash – 5
Earthquake – 5
Bleeding Blow – 15
Wheel Wind – 10
Cross Slash – 5
Double Strike – 5
Battle Shout – 15
Battle Cry – 15
Body Check – 15
Blazing Body – 10
Fighter’s Heart – 4
Warrior Form – 4
One-Handed Training – 15
Two-Handed Training – 15
Light-Armor Expertise – 15
Heavy-Weapon Accuracy – 7
Sword Training – 15
Axe Training – 15
Mace Training – 15
Risk Taker – 4
Rage Burst – 2
Burning Rage – 2
Lash – 1
Boost Light Sword – 3
Boost Heavy Sword – 3
Sword Rapidity – 15
Axe Mortality – 15
Mace Protection – 10
Class 4
Phalanx

Cross Slash – 10
Double Strike – 10
Bloody Sky – 10
Blunt Shield – 20
Shield Edge – 20
Shield Charge – 20
Shield Barrier – 4
Attract – 20
Attract Circle – 20
Blessing Guard – 6
Invulnerable – 1
Solid Shield – 3
One-Handed Training – 15
Light-Armor Expertise – 20
Heavy-Armor Expertise – 20
Shield Training – 15
Enhanced HP – 20
Axe Training – 10
Mace Training – 10
Axe Mortality – 20
Mace Protection – 20
Blood Leak – 6
Troopership – 4
Relaxation – 2
Magic Barrier – 10
Burning Rage – 2
Lash – 2
Boost Light Sword – 4
Heal – 10
Holy Avenger – 20
Holy Strike – 20
Nature’s Shield – 2
Nature’s Mind – 2
Knight

Cross Slash – 10
Double Strike – 10
Sonic Boom – 20
Bloody Sky – 15
Blunt Shield – 20
Shield Edge – 20
Doom Burst – 20
Attract – 15
Attract Circle – 15
Sword Storm – 15
Blessing Guard – 5
Solid Weapon – 2
Divine Justice – 1
One-Handed Training – 15
Light-Armor Expertise – 20
Heavy-Armor Expertise – 15
Armor Synchro – 1
Weapon Synchro – 1
Shield Training – 10
Sword Training – 15
Axe Training – 15
Mace Training – 15
Sword Rapidity – 20
Axe Mortality – 20
Mace Protection – 20
Magic Barrier – 10
Burning Rage – 2
Lash – 2
Boost Light Sword – 4
Nature’s Shield – 2
Nature’s Mind – 2
Gladiator (Human Only)

Burning Crash – 10
Earthquake – 10
Wheel Wind – 15
Bleeding Blow – 20
Flame Smash – 20
Earth Wave – 20
Cross Slash – 10
Double Strike – 10
Battle Shout – 20
Battle Cry – 20
Body Check – 20
Blazing Body – 15
Fighter’s Heart – 6
Warrior Form – 6
Berserker – 2
One-Handed Training – 15
Two-Handed Training – 20
Light-Armor Expertise – 20
Heavy-Weapon Accuracy – 10
Sword Training – 20
Axe Training – 20
Mace Training – 20
Sword Rapidity – 20
Axe Mortality – 20
Mace Protection – 15
Risk Taker – 6
Rage Burst – 4
Burning Rage – 2
Lash – 2
Boost Heavy Sword – 4
Rune Knight (Elf Only)
Cross Slash – 10
Double Strike – 10
Sonic Boom – 20
Bloody Sky – 15
Burning Crash – 10
Earthquake – 10
Bleeding Blow – 20
Spirit Sword – 20
Spirit Aid – 20
Rune Cry – 5
Rune Impact – 20
Attract – 15
Sword Storm – 15
Mana Storm – 6
Accuracy Aura – 2
Shield Aura – 2
Rampage Aura – 2
One-Handed Training – 15
Two-Handed Training – 15
Light-Armor Expertise – 15
Heavy-Armor Expertise – 10
Shield Training – 10
Sword Training – 15
Sword Accuracy – 10
Sword Rapidity – 20
Mana Control – 10
Boost Heavy Sword – 4
Axe Mortality – 10
Fighter’s Heart – 2
Earth Wave – 10
Nature’s Shield – 2
Nature’s Mind – 2
Class 5
Paladin
Bloody Sky – 10
Rage Sword – 5
Blunt Shield – 25
Shield Edge – 25
Shield Charge – 25
Shield Barrier – 6
Attract – 25
Attract Circle – 25
Saint Shackle – 5
Saint Heal – 5
Blessing Guard – 8
Invulnerable – 2
Solid Shield – 5
Iron Shield – 2
Bloody Storm – 2
One-Handed Training – 20
Heavy-Armor Expertise – 20
Shield Training – 20
Enhanced HP – 25
Axe Training – 20
Mace Training – 20
Axe Mortality – 20
Mace Protection – 20
Blood Leak – 8
Troopership – 5
Relaxation – 4
Magic Barrier – 15
Burning Rage – 3
Lash – 3
Nature’s Shield – 3
Nature’s Mind – 3
Panzer

Standing Fire – 5
Iron Night – 5
Kneeling Shot – 5
Musket Proximity – 5
Musket Blast – 5
Bleeding Blow – 25
Blessing Guard – 10
Solid Weapon – 4
Divine Justice – 2
Reloading – 2
Heavy-Armor Expertise – 20
Armor Synchro – 2
Weapon Synchro – 2
Musket Accuracy – 3
Musket Training – 5
Burning Rage – 3
Lash – 3
Nature’s Shield – 3
Nature’s Mind – 3
Crusader

Cross Slash – 15
Double Strike – 15
Sonic Boom – 25
Bloody Sky – 20
Dark Illusion – 5
Shock Wave – 5
Thundering Death – 5
Mental Vertex – 5
Blunt Shield – 25
Shield Edge – 25
Doom Burst – 25
Sword Storm – 20
Solid Weapon – 4
One-Handed Training – 20
Light-Armor Expertise – 25
Sword Training – 20
Axe Training – 20
Mace Training – 20
Sword Rapidity – 20
Axe Mortality – 20
Mace Protection – 20
Burning Rage – 3
Lash – 3
Nature’s Shield – 3
Nature’s Mind – 3
Destroyer (Human Only)
Burning Crash – 15
Earthquake – 15
Wheel Wind – 20
Bleeding Blow – 25
Flame Smash – 25
Earth Wave – 25
Fearful Blow – 5
Cruel Sword – 5
Battle Shout – 25
Battle Cry – 25
Body Check – 25
Blazing Body – 20
Despair – 5
Fighter’s Heart – 8
Warrior Form – 8
Berserker – 4
Fatal Force – 2
Two-Handed Training – 25
Light-Armor Expertise – 25
Heavy-Weapon Accuracy – 10
Sword Training – 25
Axe Training – 25
Mace Training – 25
Sword Rapidity – 25
Axe Mortality – 25
Mace Protection – 25
Risk Taker – 8
Rage Burst – 6
Burning Rage – 3
Lash – 3
Sword Master

Cross Slash – 15
Double Strike – 15
Sonic Boom – 25
Sword Storm – 20
Fearful Massacre – 5
Double Sonic Blast – 5
Spinning Sword – 5
Dual Blow – 5
Fighter’s Heart – 6
Warrior Form – 6
Berserker – 4
One-Handed Training – 20
Dual Wield Training – 5
Dual Wield Accuracy – 3
Light-Armor Expertise – 20
Burning Rage – 3
Lash – 3
Dual Wield Mastery – 10
Nature’s Shield – 3
Nature’s Mind – 3
Magnus (Elf Only)
Cross Slash – 15
Double Strike – 15
Sonic Boom – 25
Bloody Sky – 15
Shield Punch – 5
Burning Crash – 10
Earthquake – 10
Bleeding Blow – 20
Dual Blow – 3
Double Sonic Blast – 3
Spirit Sword – 20
Spirit Aid – 20
Rune Cry – 20
Rune Impact – 20
Attract – 15
Sword Storm – 15
Mana Vampirism – 3
Accuracy Aura – 3
Shield Aura – 3
Rampage Aura – 3
Protection Aura – 1
One-Handed Training – 20
Two-Handed Training – 20
Dual Wield Training – 5
Heavy-Armor Expertise – 15
Shield Training – 15
Sword Training – 20
Sword Accuracy – 8
Sword Rapidity – 20
Dual Wield Mastery – 5
Nature’s Shield – 3
Nature’s Mind – 3
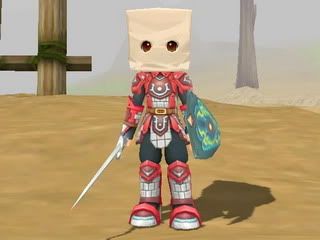
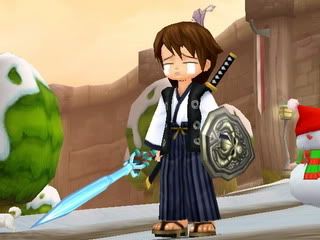
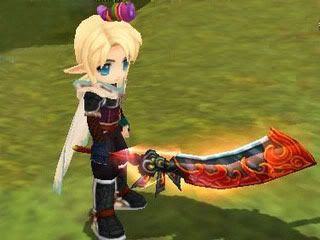
Class 1-3 images are from my characters
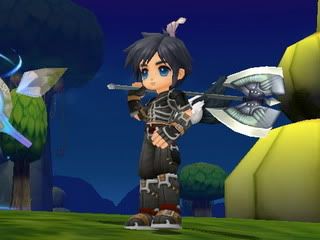
Class 4 images are taken from Thai LUNA forum
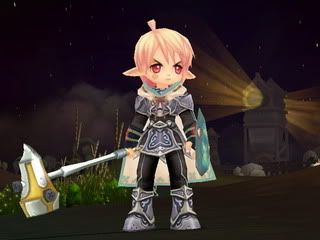
Class 5 images are taken from Nagashi’s threads at sstwclub.com

Recent Comments