Dark Orbit Beginner’s Guide
Dark Orbit Beginner’s Guide by Razor
Welcome to the Dark Orbit Bible. Your journey into the vast reaches of space starts here. This is not meant to be read from top to bottom. Find what your looking for in the menu and follow the link. Remember this is only a guide. As the game develops we will have to make changes to this work. It will evolve as the game evolves. I hope it helps you all.
Main Menu
Dark Orbit Introduction
Backpage
– Gold Info Bar
– Main buttons
– Info Blocks
The Hangar
|Overview||Equipment||Ships||Drones||Weapons|
|Ammo||Generators||Extras||Boosters||Designs|
Tech Center
Space Map Buttons and Functions
Galaxy Gates
Outfits
Honor
The Raw Materials
Account Security
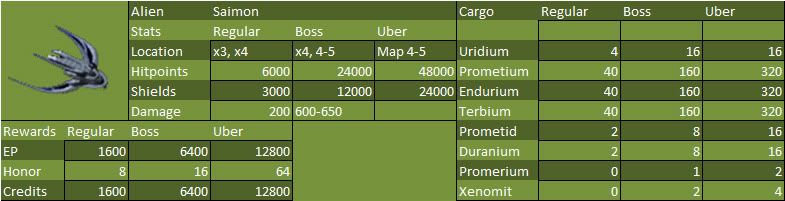
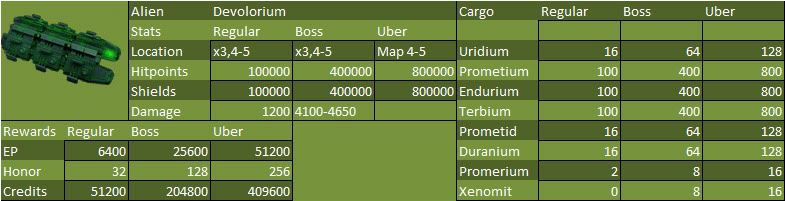
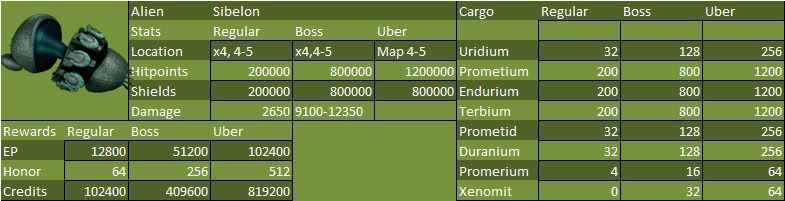
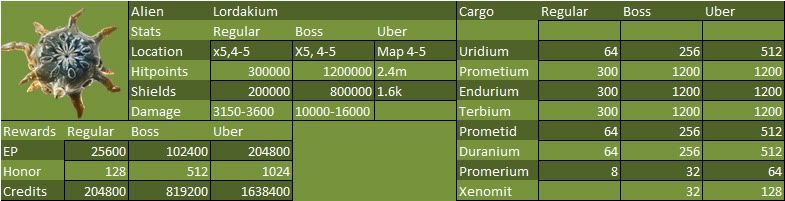
List of Aliens
The Bonus boxes, and cargo boxes.
Intergalactic connections and Battle Maps
Ingame Chat
Happy Hours
The Football Betting System
Jackpot Battle
Game Terminology
Everything you need to know about getting started is in here. The Bible is a continuous ongoing project. Buried in Black and Whitelazer have both created versions of the Bible and some of their hard work is still contained in these pages. I hope I have been able to gather the information in a manner that is easy to read and to follow. Enjoy!
Dark Orbit
During the third century, Earth witnessed massive upheaval. Not only did the climate change drastically, but the very nature of the planet was slowly and inexorably altered.
Human civilization had developed between two ice ages and reached its golden age during this warmer period in the Earth’s climate.
But the dramatic change in climate forced mankind to seek out new habitats. Naturally their gaze turned to the stars.
In outer space they found a large abundance of raw materials and were able to establish colonies on planets far, far away, adapting quickly to the alien conditions. There followed a time of prosperity.
In the end, human nature prevailed: Peace was threatened by the formation of three large companies that fought for control of the universe’s resources.
These three mighty companies have been waging war in outer space for centuries now. The stories you heard growing up inspired you to enroll in the Space Academy and do your bit to end this war.
Exploring unknown galaxies and discovering strange space phenomena is what you’ve always wanted to do. Now that you’ve graduated, you can fulfill your dreams and join a company.
Serve your company well and fight bravely for power, energy and resources. The fate of the universe rests in your hands!
Gold Information Bar

This contains all important info about your account.
UID
This is YOUR User ID. Very important. It would be wise to keep this saved somewhere in case something happens and you can’t log in. It is the best information to give support so they can help with your account.
Experience
How do I receive experience points (EP)?
– By attacking aliens (NPC)
– By completing Quests: Depending on difficulty, you will either have to complete more or less quests.
– By shooting down other ships (Warning: shooting down ships by your own company will also result in EP, however they also result in credit and honour loss!)
Why should I level up?
– Access to other maps: For example, you may only access certain maps (with bases) at Level 16
– The battle maps are accessible at Level 10
– Access to quests: Not all quests can be completed with one level, you must level up for certain quests.
What do I need EP for?
– Level-ups
Level 01: Access to Maps X-1 and X-2 of own company
Level 02: 10.000 Exp, Access to Maps X-3 of own company
Level 03: 20.000 Exp,Access to Maps X-4 of own company
Level 04: 40.000 Exp
Level 05: 80.000 Exp, Access to Maps X-3 or X-4 on enemy territory
Level 06: 160.000 Exp
Level 07: 320.000 Exp
Level 08: 640.000 Exp, Access to PvP maps 4-1, 4-2, 4-3
Level 09: 1.280.000 Exp, Access to PvP map 4-4
Level 10: 2.560.000 Exp, Access to Map X-5 own company
Level 11: 5.120.000 Exp, Access to Maps X-6 and X-7 own company
Level 12: 10.240.000 Exp, Access to Map X-8 own company
Level 13: 20.480.000 Exp,Access to Maps X-2 on enemy territory
Level 14: 40.960.000 Exp, Access to Map X-5 on enemy territory
Level 15: 81.920.000 Exp, Access to Maps X-6 und X-7 on enemy territory.
Level 16: 163.840.000 Exp, Access to Maps X-1 on enemy territory. Invade enemy Base !
Level 17: 327.680.000 Exp, Access to all known maps so far !
Level 18: 655.360.000 Exp
Level 19: 1.310.720.000 Exp
Level 20: 2.621.440.000 Exp
Level 21: 5.242.880.000 Exp
Level 22: 10.485.760.000 Exp
– Placing: the EP goes 1/1’000 into the Hall of Fame(EP/1000 + Honour / 100), so 10’000 EP will result in 10 Ranking-Points.
Level
As you increase in levels you get access to more maps. More maps means more quests. This is outlined in the table above under Experience. The levels continue to increase by doubling the EP points. There is no limit.
Jackpot
Refers to the number of dollars you have accumulated to date. Once a month, a Jackpot Battle is hosted. This is a PvP battle (Player vs. Player) Anyone can participate and the winner is awarded the accumulated jackpot dollars from their user account
Credits
Credits are game currency earned, by selling ore, killing aliens, doing quests and picking up bonus boxes. This is the basic standard of currency in the game.
Uridium
Uridium is the second currency type in Dark Orbit. This is also acquired the same way as Credits, and can also be purchased with cash.
Users online
This is the number of users currently connected to your server. Some servers are much busier than others.
Logout
When leaving the game always logout. This takes you out of the game until next time you’re ready to play. If you don’t logout, you will receive a warning window the next time you log in that reminds you to log out each time.
Help
This will launch a small window with links to useful resources
Main function buttons
HOME
This is where you begin when you first log in to the game each time. As you navigate through the back page, this button will bring you back to where you started.

HANGAR

The hangar is one of the most important places on your back page. This is where you buy ships, extras, weapons, ammo and much more. You also equip your ship with your gear and set up your drones. In the main menu there are links to each section of the hangar.
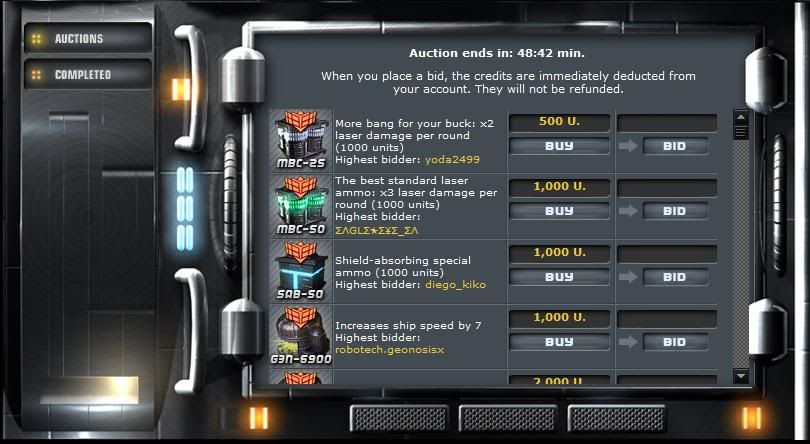
TRADE

This is the auction site where you can bid on items for credits that would normally cost Uridium in the Hangar. The Auction is based on the All Pay system of auction. If you lose the bid you will still pay for the bid. This image shows the trade screen.
SKYLAB

From the Skylab, you can control and administer all installations and modules.
These include:
Basic module
Solar module
Storage module
Three ore collectors for Prometium, Endurium and Terbium
Two class 1 refineries for the creation of Prometid and Duranium
One class 2 refinery for the creation of Promerium
One class 3 refinery for the extraction of Seprom
Xeno module
Transport module
For more information, click on the individual installations/modules. A module menu will open, and you’ll be able to monitor the upgrade/refining progress and activate/deactivate the module. Please note: The basic module can’t be deactivated! There are more modules in the Skylab. Some will need to be built before you can use them.
For more information, please review the Beginner’s Guide to the Skylab
CLAN

Clans are all over the orbit. Some of them work together some work against each other. Clans are great support networks, usually they offer assistance with doing quests, some help with credits for bidding in trade. While life can be profitable on your own it is usually easier and more fun in a clan. Clans are a great way to find help or friends.
URIDIUM

Uridium – This link takes you to the banking area. In here you can buy uridium with cash, do cash for action to try for some free uri, you can also check your account balance in here to see what you have spent uri on or what you have received it for. There is also an Exchange tab in here that will allow you to trade uri for credits if you find yourself really short on credits.
QUESTS

The quests button opens up the quests window. This is where you can select the quests you wish to work on, up to three at a time. Once you get used to where aliens are you will be able to keep three quests running most of the time.
HELP

This will launch a small window with links to useful resources
GALAXY GATE GENERATOR

The Galaxy Gates are another very important area. The gate area looks like this:
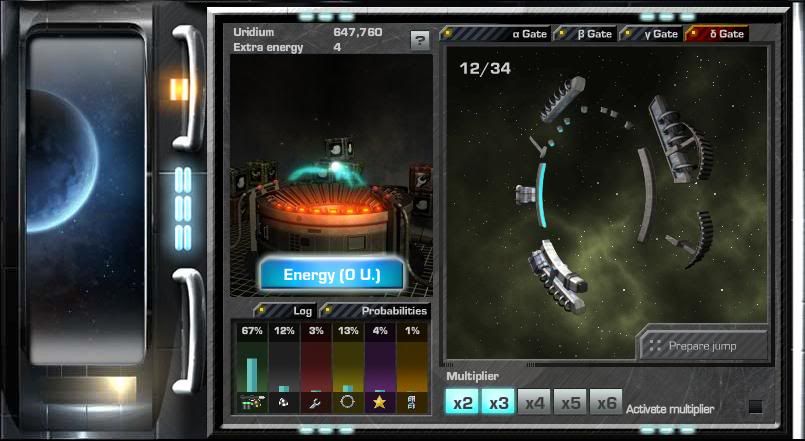
The energy button will cause the materializer to make either a gate piece, repair credit, ammo, xenomit or even log disks. As gates are built you can open them on your home map and enter them. Gates are a test of your mettle, they are wave after wave of increasingly harder aliens. If you succeed, the rewards are great.
PILOT BIO

The pilot bio is another critical section of the backpage. This allows you to add certain skills that will benefit you in the future of your career. You will want to spend some time studying the guide before you start building this. If you decide you don’t like the path you’re taking, you can always reset the pilot points and start again.
START
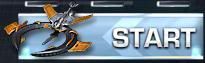
Click the “START” button to open a new window.
Make sure that you don´t have a pop-up blocker active.
If this still doesn’t open the new window, try the F5 button on your keyboard to refresh the page.
If you are still having problems:
Clear your Cache
Optimise your Flash Player
Open in another Internet Browser
From this page you only need to click on “START”.
Info Boxes
BREAKING NEWS
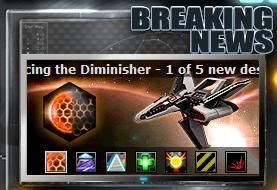
The breaking news is where you will find out about new items, upcoming events, and more. This area is always changing and you should check it daily.
USER INFO
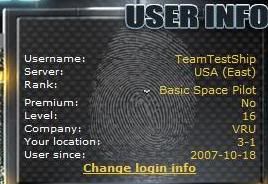
This section is self explanatory.
Username : The username is the username you selected when you signed up.
Server: This is the server you selected when you signed up.
Rank: Your Rank is calculated by your rank points.
A value is calculated for all active Users of the last four weeks. This is done by this formula:
+ Experience points / 100.000
+ Honor points / 100
+ Level * 100
+ Days since registration * 6
+ Own ship type (Phoenix=1, …, Goliath=10) * 1000
( + Alien kills in the old System / 2
+ killed enemies in the old System * 3 )
+ New kills of other company members sorted by ship type * 3
(Phoenix=1, Yamato=2, Leonov=4, Defcom=6, Liberator=8, Piranha=10, Nostromo=12, Vengeance=16, Bigboy=14, Goliath=20)
+ New alien kills sorted by Alien type / 2 (Bosses count *4, UBER count *8)
(Streuner=1, Lordakia=1, Saimon=2, Mordon=2, StreuneR=2, Sibelonit=3, Kristallin=3, Devolarium=4, Sibelon=5, Lordakium=6, Kristallon=8, Cubikon=10)
+ Completed Quests * 100
– own company kills * 100
– killed by other company * 4
– Destruction by radiation zone * 8
– Phoenixes of other companies killed * 2
1 General (max. 1 per company)
2 Basic General (0,01%)
3 Chief Colonel (0,10%)
4 Colonel (0,50 %)
5 Basic Colonel (1,00%)
6 Chief Major (1,50%)
7 Major (2,00%)
8 Basic Major (2,50%)
9 Chief Captain (3,00%)
10 Captain (3,50%)
11 Basic Captain (4,00%)
12 Chief Lieutenant (4,50%)
13 Lieutenant (5,00%)
14 Basic Lieutenant (6,00%)
15 Chief Sergeant (7,00%)
16 Sergeant (8,00%)
17 Basic Sergeant (9,00%)
18 Chief Space Pilot (10,0%)
19 Space Pilot (12,39%)
20 Basic Space Pilot (20,00%)
This table is recalculated daily.
This is another important area to watch.
HALL OF FAME
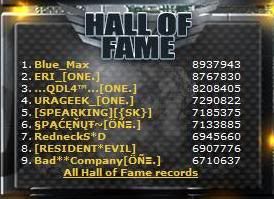
This shows the top users for your server. At the bottom is a link that says “All Hall of Fame Records” Clicking this will take you to your current ranking. Then below that will be a dropdown with many links for top scores for that server. From user ranks, ep ranks, honor ranks, clan ranks, event ranks and more. There is lots of fun information here.
LOGBOOK
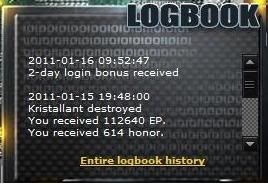
This section gives you a record fo the last couple of things you have done. If you click on complete logbook you will see your entire history. If your not sure if you recieved a reward for killing something keep in mind you can go back here and have a look at your history.
The Hangar
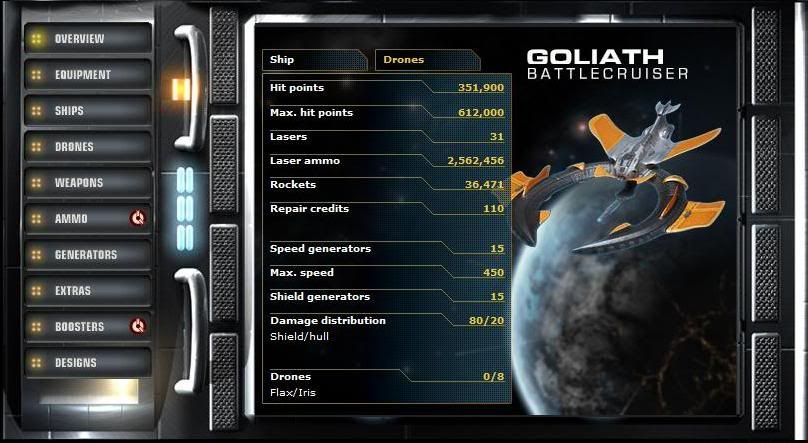
This is the main screen of the hangar. Down the left you can see the different areas that are in here. It opens automatically to the Overview.
HP : This is your current HP
Max HP: This is the maximum HP your ship can have, usually double the base HP.
Lasers: This is the number of laser on board.
Laser Ammo: This is the total amount of laser ammo you have on board that counts towards inventory.
Rockets: This is total number of rockets on board that count toward inventory.
Repair Credits: This shows you the number of Repair credits you have. These are obtained via the Galaxy Gate Materializer.
Speed generators: Number of Engines on board.
Max Speed: This is the max speed of your ship in your current configuration.
Shield Generators: The number shields on board.
Damage distribution: Different shields block certain amounts incoming damage. This shows how the damage is distributed shields over hull.
Drones: This just shows two numbers 0/8. In this case there are 0 flax drones and 8 iris drones.
You will see a Drones tab on this screen as well. If you click on that you will see a small listing for each drone.
1. Iris/Flax Level 5. Shows what drone it is and what level it is at.
2. Damage 37%. Shows the amount of damage done to the drone. At 100% the drone will explode.
3. Points 300 . Shows the number of level points the drone has.
4. Next Level 1600. Shows the number of level points to get to the next level (6 in this case)
Equipment Page
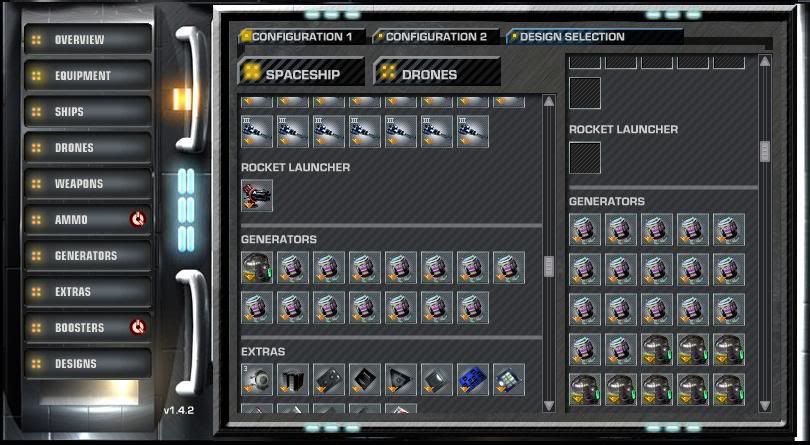
This page allows you to set up the equipment on your ship. You will see three buttons at the top of the right screen. They are Configuration 1, Configuration 2 and Design Selection. Below these are two more buttons, Spaceship and Drones.
Basically you drag items from the right side onto the ship or drones in the appropriate slots. If you want to move all of an item over you can push CTRL key and click on the item and it will move all of that item over.
Each ship has two configurations. Make sure you load up both configurations with engines, shields, weapons, and extra’s.
Design selection is for the ships that have special designs. Most of the designs can be bought for uri, and some are available in trade area. You have to have the original ship of that type (Goliath or Vengeance) to be able to use a design.
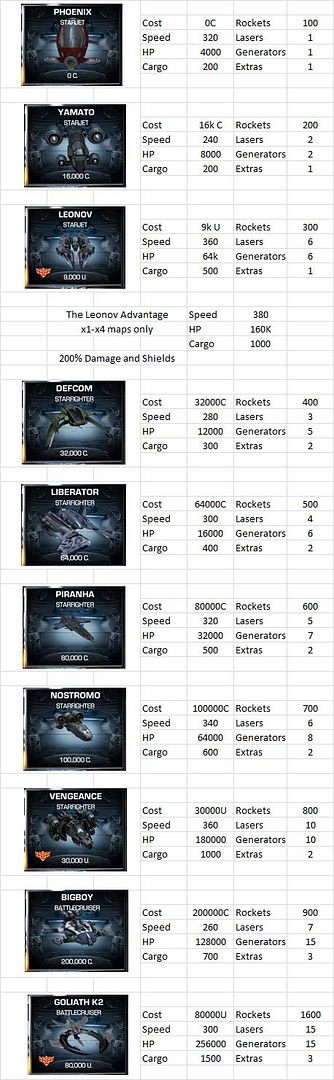
Ships
Every trainee pilot starts his career in a Phoenix. There are many great ships to choose from and you will probably find yourself sitting in each one of them as you build up through your career. There are to two kinds of ships, the regular class and the elite class. Regular ships are bought with the readily available credits, and the Elite ships cost Uri.
Below is a listing of all the ships you have to choose from. Remember when you buy a new ship the old one is lost to you. You can only own one ship at a time.
The Drones – Flax and Iris
The drones circle your ship and support you in what ever way you equipped them, extras, lasers or shield generators. It is on you to decide if you want to have a battle cruiser or all shield generators as protection.
You can buy the drones in the hangar section drones. The drone price goes up with every drone you purchase.
There are two kinds of drones, the credit drone and the Uridium drone
The drones differ in number of slots and design
The credit drone is called Flax
The Uridium drone is called Iris
The Flax has one slot
The Iris has two slots
What can I do with the drones?
In the hangar section equipment you can equip your drones with lasers, shield generators and extras. You can not equip them with speed generators, since the drones are an escort ship it would not make any sense. With a higher drone level the strength of the laser or the shield generator will increase by a certain percentage.
How much is a drone?
The prices for drones are:

For the Flax:
1. Drone 100.000 Credits
2. Drone 200.000 Credits
3. Drone 400.000 Credits
4. Drone 800.000 Credits
5. Drone 1.600.000 Credits
6. Drone 3.200.000 Credits
7. Drone 6.400.000 Credits
8. Drone 12.800.000 Credits
Amount needed to purchase all 8 credit drones: 25.500.000 Credits
For the Iris:
1. Drone 15.000 Uridium
2. Drone 24.000 Uridium
3. Drone 42.000 Uridium
4. Drone 60.000 Uridium
5. Drone 84.000 Uridium
6. Drone 96.000 Uridium
7. Drone 126.000 Uridium
8. Drone 200.000 Uridium
Amount needed to purchase all 8 uridium drones: 647.000 Uridium
How much does it cost to repair the drones and how often do I have to do that?
The repair costs 500 Uridium for a regular player, a premium member only has to pay 250 Uridium per drone and repair.
When to repair is your choice, when the drone reaches 100% destruction it will be destroyed and you will loose the drone. The destruction of your drone will rise when your ship is destroyed. If you repair your drones they will loose one level.
What happens to the items on my drones?
If your drone is destroyed or you sell it, the items will go back into your hangar. You will not loose any generators, lasers or extras.
Can I have multiple extras?
You can not use the same extra at the same time. You can not use two repair bots or ammo doublers. Through the drones you can use more different extras at the same time.
What is the level of the drone and how do I get it higher?
The level of your drone consists of the experience the drone could collect, since you bought it. Every level of your drone gives it a different look. There are 6 different levels. A higher level gives your drone more fire power or shield strength, depending on how you equip them.
Do the drones fire on their on?
No. The drones only fire when you shoot an enemy. If you dont fire the drone wont fire.
Are my drones cloaked when my ship is cloaked?
Yes. When your ship is cloaked, your drones is also cloaked.
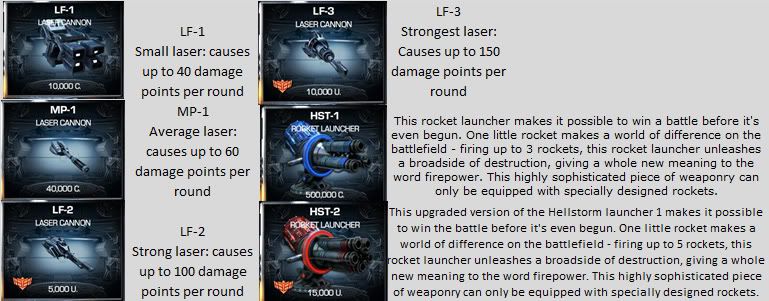
WeaponsThe ships of Dark Orbit can be outfit with various lasers and rocket launchers. Work your way up to a full selection of only the best and nothing out there will want to mess with you. This table is a quick look at the laser and launcher available to you. You ship has an on board rocket launcher as well that is not upgradable. The Hellstorm is a second launcher that fires multiple rockets at a time.
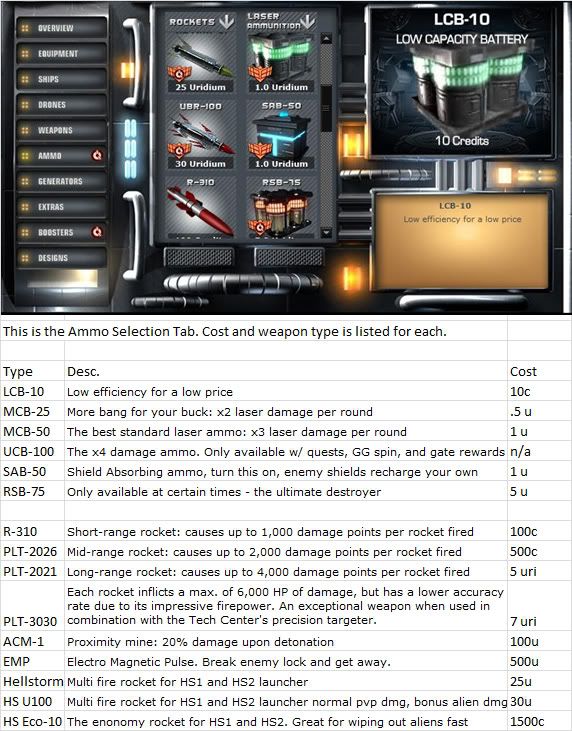
Ammo As your ship grows and you move on to harder missions the need for stronger ammo will arise. There are several laser batteries to choose from and several rockets as well. You will find that a selection of each is makes life much easier in the Orbit. Keep in mind that not all the ammo choices are available all the time. So check back often to make sure you get your share of the elite ammo. X4 or whites as many pilots call it can only be acquired through reward for quests, or gates and from the Galaxy Gate Materializer.
The chart below will outline at a glance the ammo you will be working with.
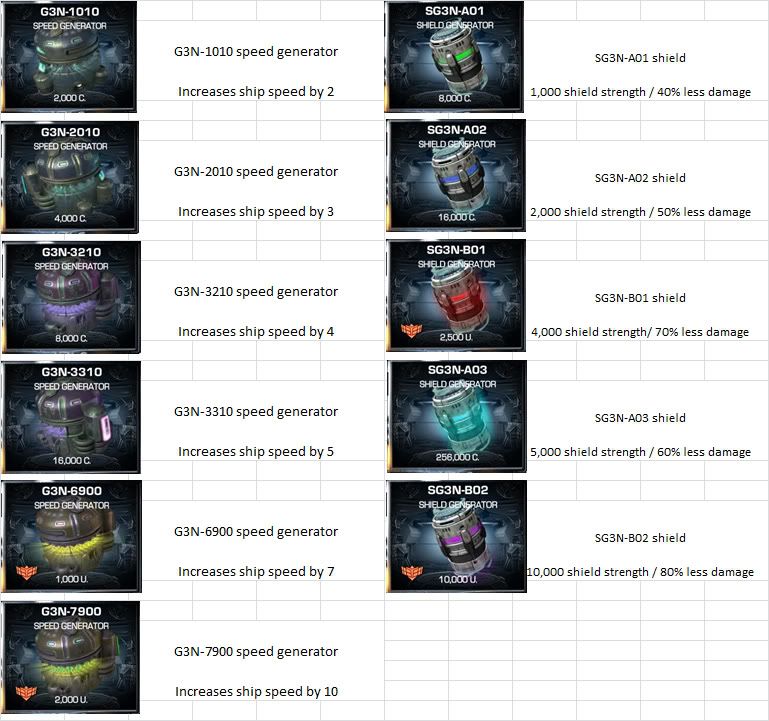
Each ship is equipped to handle two types of generators. Engines to make your escape possible when needed, and shields to protect you in a dog fight. Each ship has a set number of generators it can hold, but don’t despair. If you would like more shielding than your ship will allow then equip your drones with shields as well. Engines can not be outfitted on shields. All extra’s from your hangar can also be equipped on your drones if you so desire.
Below is listing for both the speed generators and the Shields available to you.
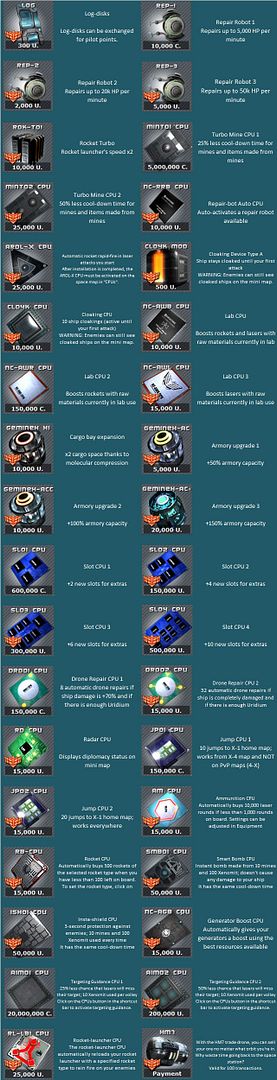
Extras are items that are used to enhance your ship for battle. Everything from repairing faster, radar, smartbombs and much more. Equip yourself with these items and be a one ship armada.
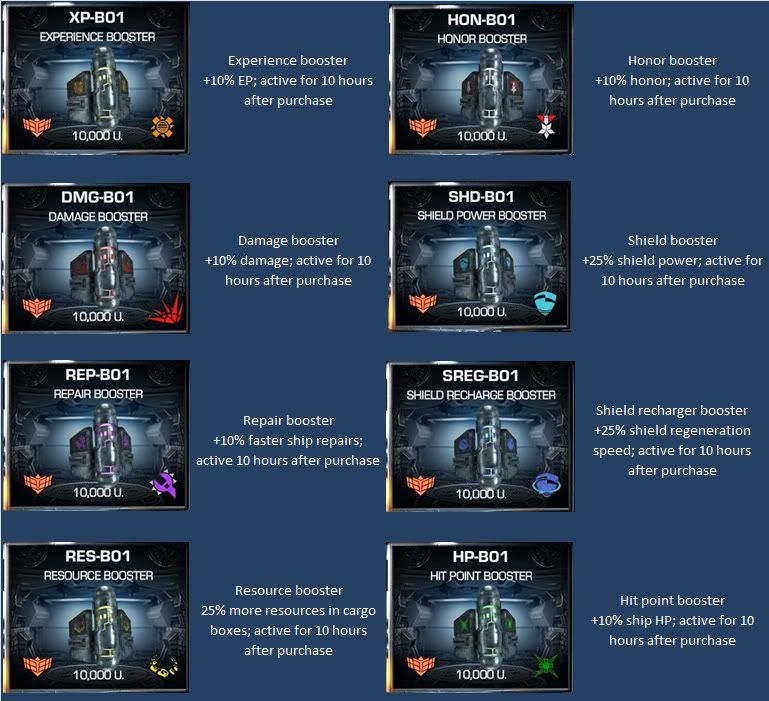
What exactly are boosters?
Boosters give you the extra support you need in order to play the game well and with no effort at all.
Each booster increases (boosts) the value of your account or ship.
– Boosters can be bought for Uridium or can be subscribed to for a fee. They can also be bid on through the trade section.
– Each booster lasts for 10 hours of playing time. When you log out the timer stops.
How many boosters can I buy?
– Every user can have all types of boosters active at the same time.
– As long as there is enough Uridium in your account, you can buy as much of one type of booster as you want.
– If a booster is bought which is already active, the time for the booster which was just bought will be added to that of the old booster which is already active.
How can I see if a booster is active?
– If a booster is selected from the booster menu in the hangar, you’ll be able to see if it is active and how much longer it will be active for in its description.
How can I subscribe to a booster?
– If you have a subscription to a booster, a new booster will automatically be bought as soon as the time for the active booster runs out.
– The Uridium required to buy such a booster will automatically be withdrawn from your game account.
– If there is not enough Uridium in the account at the time of withdrawal, a booster won’t be able to be purchased. The subscription will remain in effect as long as it is not canceled by the user. As soon as there is enough Uridium in the account, the subscribed boosters will be automatically bought.
How do I end my subscription to a booster?
– If a booster is selected from the booster menu (the place where you buy boosters), you can use the Cancel subscription button in its description to cancel your subscription.
– If a subscription is canceled, the booster which is active will remain active until its time runs out, and a new one won’t be bought afterwards.
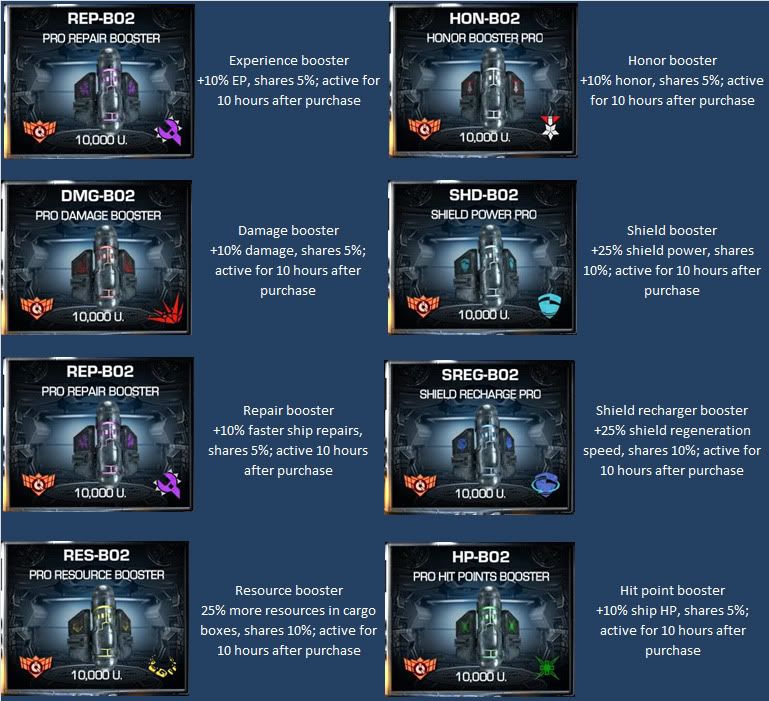
Pro Boosters
Pro Boosters are basically the same as regular boosters with one difference. They share their effects with other members of you company that are near by. Also if you have regular boosters and the pro boosters their effects will stack. So you would have a total of 20% damage increase, plus share 5% with members near by. Here is the chart for the pro boosters.
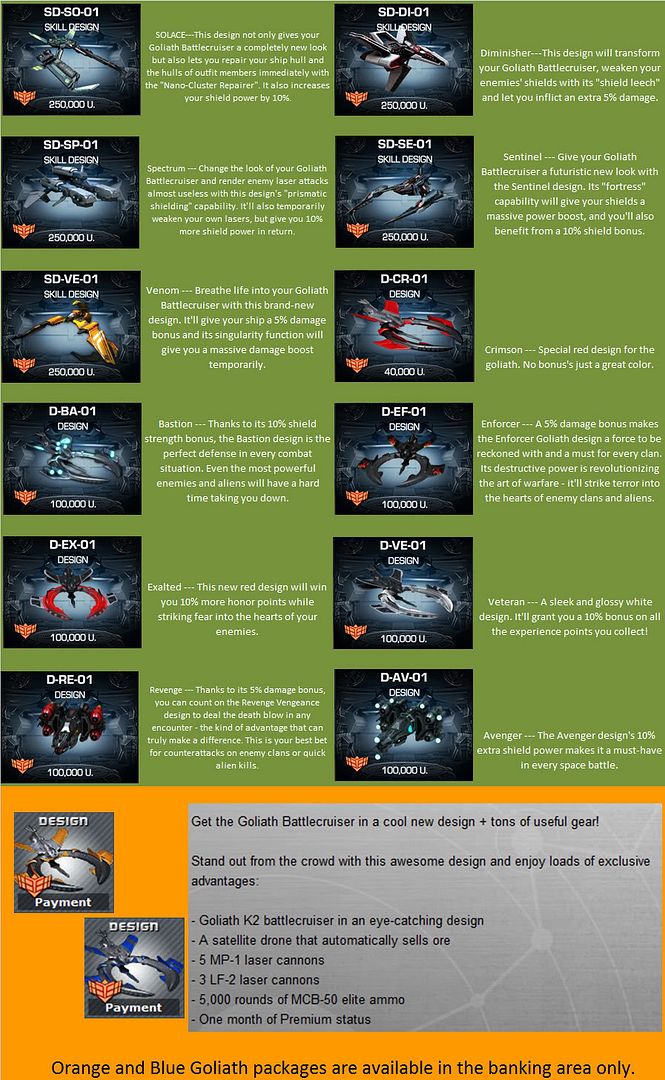
There are several different designs to change the skin on your Goliath or Vengeance. Some skins totally change the look of the ship while offering some great bonus’s, others just carry the bonus with minor appearance changes. Whatever your preference there is probably a design to suit you.
What are the galaxy gates?
- The galaxy gates are four portals to go to different galaxies and take on the task of killing many waves of different aliens.
- These gates are Alpha, Beta, Gamma and Delta.
What is the purpose of the galaxy gates?
[list][*]Completing galaxy gates affect your rank points and statistics such as aliens killed, honour and experience. The amount of rewards you get from each gate varies from gate to gate.
- Alpha Gate –
- 20,000 Uridium
- 20,000 Type 4 (x4 damage) ammunition
- 100,000 Honour
- 4,000,000 Experience
- 2 Repair credits
- 2 Logs Disks
- Beta Gate –
- 40,000 Uridium
- 40,000 Type 4 (x4 damage) ammunition
- 200,000 Honour
- 8,000,000 Experience
- 4 Repair credits
- 4 Log Disks
- Gamma Gate –
- 60,000 Uridium
- 60,000 Type 4 (x4 damage) ammunition
- 300,000 Honour
- 12,000,000 Experience
- 6 Repair credits
- 10 Log Disks
- Delta Gate –
- 45,000 Uridium
- 45,000 Type 4 (x4 damage) ammunition
- 225,000 Honour
- 9,000,000 Experience
- 5 Repair credits
- 8 Log Disks
- You will also find that when you complete galaxy gates you are given a symbol above your rank for the amount of gates that you have done. These look like the following:
- 1 gate complete :
- 2 gates complete :
- 3 gates complete :
- 4 gates complete :
How do you set up and use the galaxy gates?
- Galaxy gates are set up by obtaining galaxy gate pieces. These can be collected through the galaxy gate generator, which is found on your back page (the window that isn’t the space map). By clicking energy you are essentially taking a go at recieving one of the many prizes on offer. Each spin will cost 100 Uridium (95 uridium for premium members) and you can collect free spins through collecting bonus boxes – the thing you are looking for are “Free galaxy gate energy“
- When you have all of the parts for your galaxy gate(s) you click on the Galaxy Gates part of your backpage again and select the gate that you wish to set up which is found at the top right of that page. Each gate requires a different amount of pieces to be fully set up:
- Alpha gate
- Needs 34 pieces to be completed
- Beta gate
- Needs 48 pieces to be completed
- Gamma gate
- Needs 82 pieces to be completed
- Delta gate
- Needs 128 pieces to be completed
How do I use the galaxy gates?
- Once you have a galaxy gate set up, they will appear on your home map. Your home map is the map that has the number 1 at the end of the map number.
- MMO
- 1-1
- EIC
- 2-1
- VRU
- 3-1
- When you get to your home map, close to your base (blue square on your mini-map) you will see that the gate has been set up (that is, if you have set it up). Simply approach the gate, click jump and you will jump into the first wave of the gate (if newly set up) and that is you starting the gate.
- After each wave of aliens you can jump out of the gate by hovering over the normal jump portal (on the right) and pressing the ‘J’ button. The gate will save your progress ready for the next time you’re ready to jump.
Additional Information
- FAQ for the Galaxy Gates
- Gives answers to many of those fequently asked questions about galaxy gates. Is not a strategy guide but more of a how to thread.
for ‘newbies’ to the galaxy gates.
- Galaxy gate strategy guide
- A series of videos made on a players methods of doing the different galaxy gate waves. Many methods are more popular than others, but a good resource.
- The complete guide to delta gate
- Contains some very useful methods and statistics on the delta gate. Was one of the first threads made on the gate and still is known as a fairly useful one.
- What is in the galaxy gates
- Provides a lot of statistical data on the first three galaxy gates (Alpha, Beta and Gamma). Was posted quite a while ago however a lot of the information is still valid.


Thanks to Whitelazer, this is direct from her work.
Honor is very important in Dark Orbit. The higher your honor the higher your rank, and the more credits you earn selling ore, at the station.
When you 500,000 honor you will get double the amount of credits for each piece of ore than when you started. This is the maximum you can make. When your high enough level you can also sell at enemy bases, but you will receive the base amount, not your bonus amount.
Your ranking is affected by honor, the calculation goes like this 1/100 for the „Hall of Fame“ (EXP/1000 + Honor/100), 1000 honorpoints are 10 rankingpoints.
You get positive honor for the following:
1 : By killing NPCs NPCs (Alienships controlled by the system / non player characters )
2 : By killing ships of other companys
3. Completing quests
Negative Honor will affect you in adverse ways, it will lower your attack damage as follows:
Honor < -200 = 10% lower damage ( 90% basic damage)
Honor < -500 = 20% lower damage (80% basic damage )
Honor < -1000 = 40% lower damage (60% basic damage )
Honor < -2000 = 70% lower damage (30% basic damage )
Honor < -10000 = 90% lower damage (10% basic damage )
You will lose honor by doing the following:
1. Killing own company ships. This is penalized by -100 honor for first offense, -200 for second and so on, doubling each time.
2. Stealing cargo’s that are not free. When you see cargo boxes on the screen there are two colors, gray and orange. Gray belongs to someone else, and orange is free to take. This will negate honor in the same manner starting at 20, 40, etc.
There is no limit to losing honor and because it doubles every time it will cost you a lot in a hurry. Once you hit -500 honor you become an outlaw and get a target beside your name for your rank.
After 24 hours the counter will reset.
If you kill a member of your company that shoots you first Positive honor is given.
Tip : Outlaws who want to get back to plus honor should try the quest “An offer you can´t refuse” (only visible for people with -500 honor points or less.
Note: No deduction of honor if the ship of own company gots honor below -500.
Raw Materials and Refinery
What sorts of resources are there?
There are 8 types of resources:
– 4 (raw) resources: Promethium (red), Endurium (blue), Terbium (yellow), Xenomit (silver, but cannot be found in space)
– 4 processed resources: Prometid (pink), Duranium (green), Promerium (yellow/orange) Seprom (Blue – ONLY PRODUCABLE IN SKYLAB)
How do I receive resources?
1. Promethium, Endurium, Terbium
Collect: They float in space and can be collected with your ship.
– Map X-1: Promethium, Endurium
– Map X-2: Promethium, Endurium, Terbium
– Map X-3 / X-4: Endurium, Terbium
By shooting down space ships
– Strainer: each 10 Promethium, Endurium
– Lordakia: each 20 Promethium, Endurium, Terbium
– Saimon: each 40 of all 3 resources as well as 2 Prometid and 2 Duranium
2. Xenomit
Can be auctioned with credits or bought instantly with Uridium in the store.
Shot down spaceships may also drop xenomit.
3. Prometid, Duranium, Promerium?
Process: these resources can be processed by the 4 raw materials mentioned above. The recepies can be found in the Hangar under the Laboratory. They can also be obtained by shooting down enemies.
“Where are resources stored?”
All resources are always in the cargo hold of your ship. The stored amount can be seen in the lab. Resources can be lost if your ship is destroyed.
Xenomit is special as it can be obtained by shooting down spaceships, which however is not always the case.
What can I do with resources?
– Sell them for credits in your own company base (Map X-1): al l resources except Xenomit
– Process in the lab (located on the space map represented by a + sign with a rocket.
– Upgrade your weapon with processed resources.
What are the advantages for processing resources, selling and weapon upgrades?
– Processing results in less cargo space requirements (as more raw materials are processed into less processed ore).
– Selling processed resources will result in less income than selling the required raw resources.
– Weapon upgrades:
1. Prometid: one unit will increase the firepower of lasers and rockets by 15% for 10 shots (up to 1000 shots can be improved).
2. Duranium: one unit will increase the generator performance of either the propulsion or shield by 10% for 10 minutes.
3. Promerium: one unit will increase the firepower by 30% or the generator performance by 20%.
There is also a new premium ore that you can use on Lasers and Rockets for a 60% boost and Shields for a 40% boost. This ore is called Seprom. Currently you can only get it from your Skylab or from destroyed enemy ships. It is too powerful for engines, so you can not boost them with it at this time.
Account Security
We’ve noted a rising number of providers offering hand out free uridium and more, if you sign up there with your login informations of darkk orbit.
We did also note a rising number of chat messages which are telling you to get free uridium by sending a text message to a special number.
There is no official website that has any connection to Bigpoint which will ever ask you for your login data.
For text messages, it’s always the User ID of the account we need,
where you want the Uridium to go, never anything else.For all things bigpoint can do to your accounts
( hand out uridium, restore missing stuff and so on ),
we only need your User ID, nothing more.
In addition to this:
We noted a rising number of users who ask other ones for trading their accounts.
they do ask them for the account data : Username and Password.
We’re not saying they’re all fakers, but we ask you to be very careful with this.
Most of those offers are fakes and serious trys to steal your account information.
Even if those offer to make your account premium or book Uridium on it,
do not trust them.
If you read the forums here, you’ll see that we have had a lot of complains about stolen accounts in the past.
Most of them are the result of the above mentioned things.
So again,
Never give your password to anyone.
Please make sure that your password is not the same like your username. Also “test123” isn’t safe and all other information, which can be figured out by your portal profile shouldn’t be part of your password.
Furthermore never ever tell your password to third persons. When you give your password to another player – even when it’s a friend of yours – you can’t be sure to whom he may pass it on. Even if someone pretends to be an employee of Bigpoint and ask you to give your password to him – don’t do so, because we will never request the passwords of our users.
So again be careful with your passwords and keep them secret.
When you pay attention to these advice and use safe passwords you don´t have to be afraid of your account being hacked or stolen.
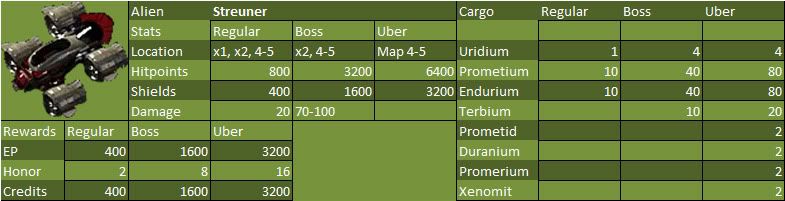
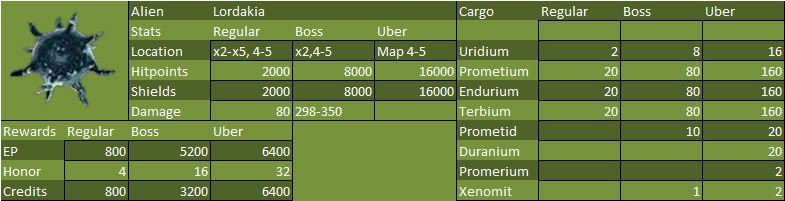
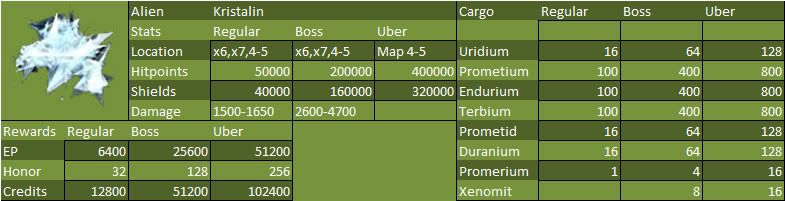
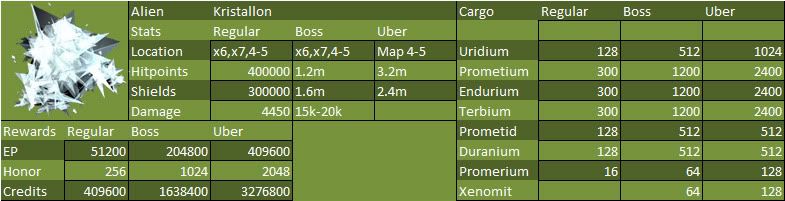
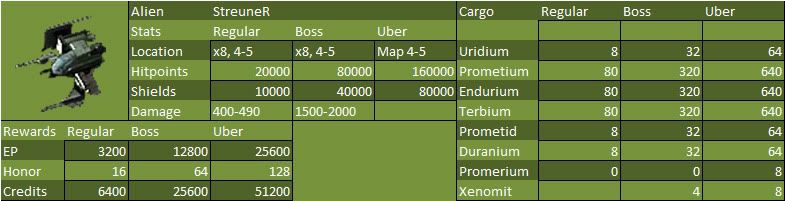
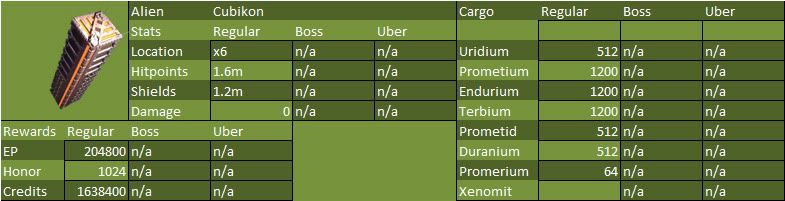
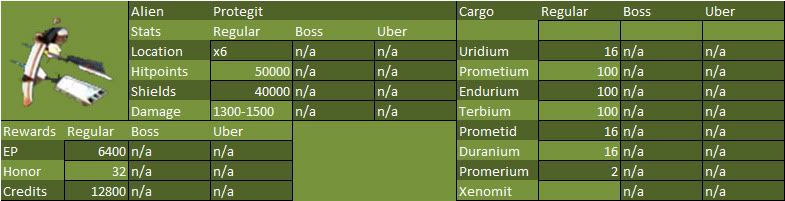
Ok so your flying around in space, great. But what is out there? Here is a list of most fo the aliens and all their stats and rewards. We have also given you the locations to find each one.


Bonus Boxes and Cargo Boxes
Bonus boxes are blue boxes found floating in most of the maps. They are free to take, and actually should be taken any chance you get. They contain loads of valuable stuff, such as ammo, credits, uridium and more. You might even be lucky and get free Gate Energy from a box. Well worth that second to stop and get them.
Also Bonus Boxes in the battlemaps (4-1 ,4-2 ,4-3) give out 1.5x what you would normally get!. Here’s a list of what you can get from a bonus box
Cargo Boxes are found floating in space when an alien or enemy ship explodes. They glow orange or gray. Gray are NOT free to take, orange are free. The contents of boxes vary in player kills, and are dependent on the alien for alien kills. The alien section of the Bible has the all the rewards for the Aliens.
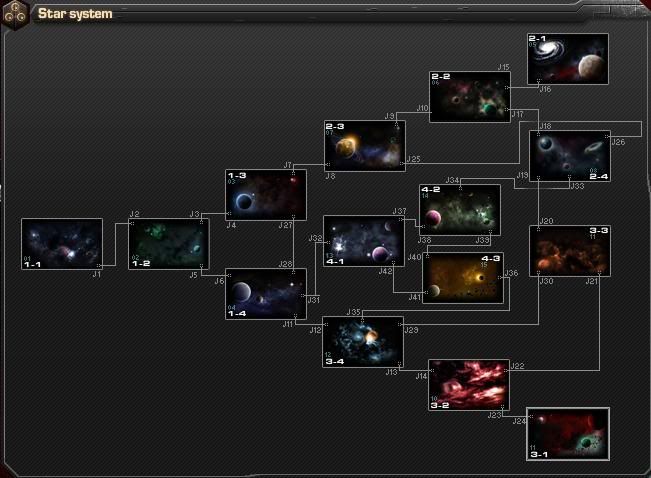
The Intergalactic Maps
There are 4 maps for each company in the lowers and 4 in the uppers. These are usually called x1-x8, x being your company, 1, 2 or 3. For Example the MMO home map is 1-1.
There is one map in the lowers for each company designated as 4-1, 4-2, and 4-3, that are battle maps. In the middle of these 3 maps is a gate that takes you to a bright red map called 4.4 in the middle of the uppers galaxies.
This is the lowers.
This is the uppers.
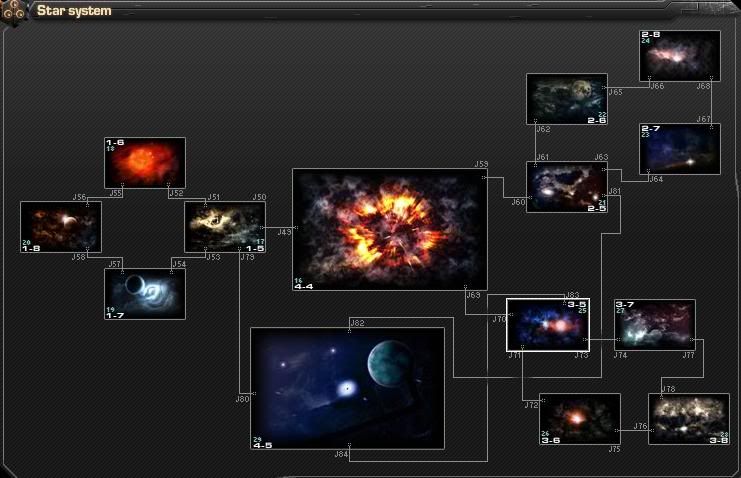
The uppers also contains a base in the x8 maps for you to sell ore at. When you hit level 12 you will have access to this map.
There is also a map called 4-5 that has a port in it from all 3 companies x5 maps. This is the uber map, all aliens except cubes and prots can be found in all 3 styles, regular, boss and uber. This is also a pvp map.
The battle maps (4-1, 4-2, 4-3 and 4-4) are special PvP (player v/s player) maps.
Here you will receive 50% more experience for every shot!
The bonus crates also contain 50% more on battle maps.
The battle maps have no NAZs (Non-Attack-Zone), which means, if attacked, you will not be able to flee, as map changes can not be achieved under fire.
1. When you are in a Neutral Zone (i.e. jump gate or base) in your own company area, other ships cannot fire upon you.
2. Ships from your own company cannot fire upon you when you are in sector x-1 or x-2. When you enter any other sector (x-3 and up), it’s open season and your own company may sometimes open fire (especially if you steal cargo). Be careful though, ships from enemy companies can open fire on you in any sector, including x-1.
3. If you attack another player or an NPC while you are in a Neutral Zone, you waive your neutrality. In other words, if you open fire on anyone in a Neutral Zone, then everybody else can attack you. In essence, your own aggression begets aggression from others. —Even if you attack another player outside your Neutral Zone and then flee to the Zone for protection, the other player can still engage in battle because you have violated the neutrality by being currently in combat.
4. When entering an enemy Neutral Zone from a jump gate, you get a grace period of 20 seconds. During that time, the enemy cannot fire on you. After that time is up, you best be ready to fight or flee.
5. There are NO Neutral Zones in the PvP boards (4-x). In those boards, you cannot jump away if you are currently in combat and there are no protections offered by proximity to the gates. You have to battle through it to get where you want to go.
NAZ work until you fire at an enemy first, they are then able to shoot back. If you get attacked outside NAZ, then run to it, they are still able to attack you as long as you don’t jump. There are no NAZ in the battle maps. You cannot jump if being attacked in battle maps.
In Game Chat
The in game chat is your chance to communicate with everyone on that server (Global chat), your company (MMO, EIC, VRU chat), your clan (clan chat) your outfit ( outfit chat).
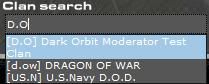
There is also a special chat for searching for clans, or members for clans. This is appropriately called Clan Search.
Remember, here we have the same rules as in the forum, that means : insults, death threats, repeating the same message (flooding), advertising for clans, using capital letters etc are strictly prohibited and can and will get you banned.
In order to fuly take advantage of all the chat features, please check out these commands:
/create Create a chat room
/close Close the chat room
/invite Invite a user into the current chat room
/w Whisper something to a user
/ignore Ignore a user
/allow Allow ignored users to chat again
/users Put all users in the current chat room in a list
/rooms Show a list of all existing chat room
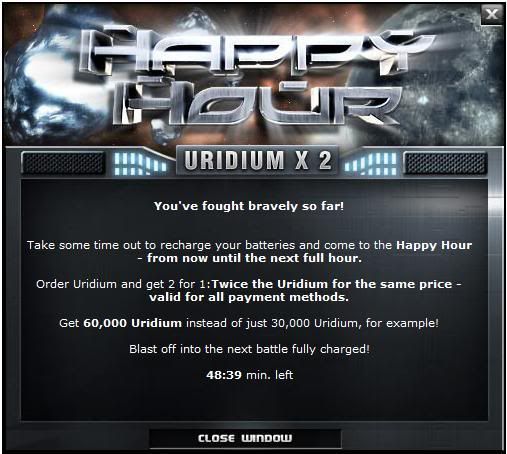
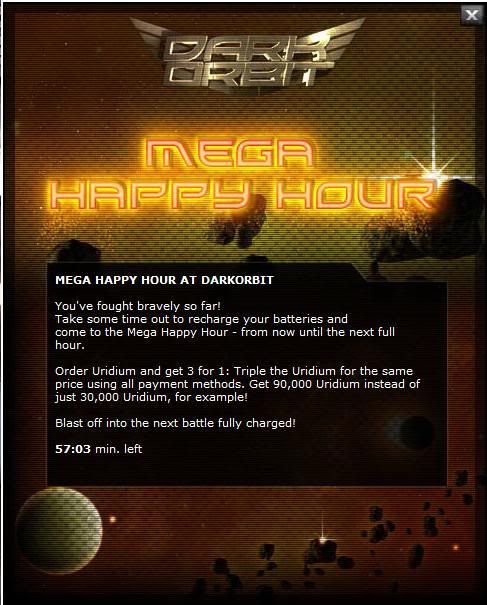
Happy Hour and Mega Happy Hour are your chance to really cash in on your money when purchasing Uridium. Both of these are announced on the back page during the one hour at a time they are on. They are totally random and no one can tell you when they are going to occur. Please don’t ask CM’s in chat as they will tell you the same thing.
The Jackpot Battle
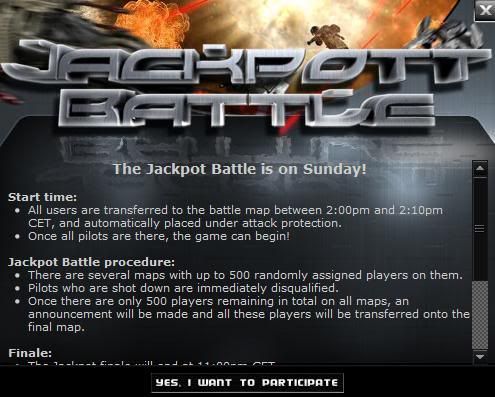
There is a Jackpot Battle on the second Sunday of every month. All players having reached the age of 18 may participate in these battles. Players who have been destroyed cannot return to this map.
The total amount in the winner’s jackpot will be paid out to the winner in real GBPs. Should the amount collected be zero, the winner will receive nothing. The winnings will be transferred to the winner’s bank account by direct transfer. This is why the players are asked to enter their bank information upon registration.
Three days before the Jackpot Battle, an invitation (event) layer will be displayed. You can enter your information in this layer in order to participate in the battle.
As soon as the battle is over for you, your spaceship will be transported back to the X-1 map, regardless of where it was before the battle.
This info is taken from the Jackpot FAQ. For complete information follow the link.
In Game Terminology
Experience- It is gained by killing aliens and players of opposing companies, as well as doing quests. As you gain experience you will gain levels. Higher levels will allow you access to more areas and unlock more quests for you to do. (eps)
Honor-It is gained by killing aliens and players of opposing companies. Honor can be lost by attacking players of the same company, and stealing cargo from another players kill. The more honor that you have the more credits you will get for selling your resources.
Jackpot Dollars- Can be found only in bonus boxes. Each month there is a battle contest. The winner of the battle contest gets the amount of Jackpot Dollars they have.
Credits-Can be gained from killing aliens and players of opposing companies, by completing quests, and it can be given to you from your clan. If you wish to get credits from your clan, send a message to the leader of the clan or the Advisory Council that includes the amount requested and a reason for needing it. Credits can be use to purchase midlevel equipment, or to bid on in the auction.(creds)
Uridium-Can be gained from killing aliens and players of opposing companies, by completing quests, or it can be purchased for real money. Uridium can be used to purchase elite equipment and ships, or to repair a destroyed ship. It takes 500 Uridium to repair a ship, if you don’t have it, you will lose your ship and have to start over with a phoenix. It is a good idea to keep at least 1500 Uridium just in case you get destroyed a few times.(Uri)
Here are a few abbrevated sayings you might need to know.
Kcr= thousand Credits
Gen= Generator
Cred= Credits
Urid= Uridium
NPC= Non player character
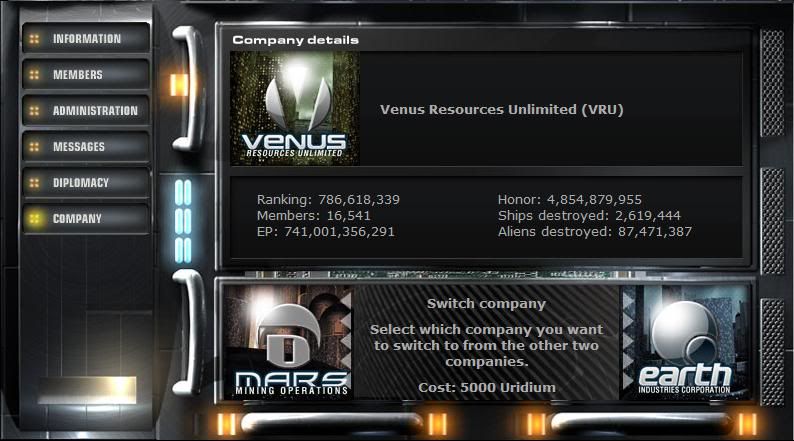
VRU = Venus Resources Unlimited
MMO = Mars Mining Operation
EIC = Earth Industries Corporation
TAG = Clan abbreviations, normally 3 letters before the name
Dmg= Damage/Hit strength
Spd= Speed
Jg= Jump gate
Omw= On my way
Ammo= ammunition
Locked on= Weapons locked onto an NPC or enemy in order to keep them in view on mini map.
Ref/Refine = refineing ore in lab screen
rep= Repairing/repair
Baserun/unload = Go to base to sell Resources
mil= million
Sib – Sibelon
Dev – Devolorium
BK – Kristalon
LK – Kristalin
LS – Sibelonit
Cube – Cubikon
Prot – Protegit
Star Map Function Buttons
This is a sample of the starmap.
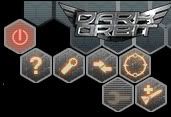
Top right corner buttons.
![]()
![]() This is your Logout button. When you wish to leave the game, fly to base or a DMZ and press this button to properly log out. If you don’t click this button and just close your browser window, your ship will be left in map for 10 minutes. If you do this while not in a DMZ, your ship could be destroyed by aliens or another player.
This is your Logout button. When you wish to leave the game, fly to base or a DMZ and press this button to properly log out. If you don’t click this button and just close your browser window, your ship will be left in map for 10 minutes. If you do this while not in a DMZ, your ship could be destroyed by aliens or another player.
![]()
![]() This is the Help button. Clicking on it will take you to BigPoint’s main Dark Orbit Help Page. Hovering your mouse pointer over this button will display info on all open sub-windows withing the star map.
This is the Help button. Clicking on it will take you to BigPoint’s main Dark Orbit Help Page. Hovering your mouse pointer over this button will display info on all open sub-windows withing the star map.
![]()
![]() This is the Settings button. Clicking on this will bring up the in-game settings options:
This is the Settings button. Clicking on this will bring up the in-game settings options:
Gameplay Tab
Automatic weapons upgrade by activating lab CPU – If you own one of the 3 available Lab CPUs (NC-AWB CPU, NC-AWR CPU or NC-AWL CPU) placed in an Extras slot, selecting this will turn on the feature. This will upgrade your weapons automatically using the ore that you have pre-selected. If you have no ore of this type, nothing will happen.
Change ammo/rocket type automatically – Having this checked will enable to the game to switch your selected ammunition/rocket type should you happen to run out of what is currently selected. Unchecking this means that when you run out of the selected ammunition/rocket type, you will stop firing (if you run out of x1, you will only be firing rockets) until you manually select another type.
Auto-refine raw materials – If your account is Premium, you have the ability to automatically refine the ore you pick up throughout the maps. If your account is not Premium, this option is still selectable, but has no effect.
Start and stop attacks using the shortcut bar – Having this selected enables you to attack or stop firing by clicking on the ammunition type you have selected in the shortcut bar.
Log into client automatically – When first selected, it will bring up a warning; “Use this setting carfully. When the game is loaded, you will automatically be logged in to the client, and other pilots will be able to attack you immediately.”
Double click to to launch attack – Pretty self-explanatory. If you double-click a target in the space map, you will begin attacking it. Be careful as this also applies to players from your own company!
Display Tab
Resolution: Allows you to adjust the resolution of the UI (User Interface or Client). Some of the options visible may not be available to all players as you are limited by the Display Settings of your personal computer.
Show Player Name: This will display or turn off the player names below each ship.
Show Resources: This will display or turn off the resources in the Lowers maps (Prometium, Endurium & Terbium).
Show Bonus Boxes: This will display or turn off the Bonus Boxes (glowing purple boxes) in the maps.
Show Increasing Hit Count: This will display or turn off the visual indicator of a hit being made to an NPC or a ship (including your own damage that you take).
Show Drones: This will display or turn off the visual of each ship’s drones (yours and other players). If un-selected, below each ship will be an F: or an I: with dots. The dots will indicate the number of each type of drone (F: = Flax, I:= Iris).
Show Cargo Boxes: This will display or turn off the ability to see cargo boxes in the maps.
Show Cargo Boxes Which Are Not Free: This will display or turn off the ability to see cargo boxes which belong to other members of the same company. These boxes will appear blue (some say grey). Picking up these boxes will result in negative honor, so be careful as you can quickly attain Outlaw status if you pick up too many!
Show Chat: This will display or turn off the in-game chat window.
Show Explosions: This will display or turn off the visual indicator of a ship or an NPC exploding upon destruction.
Show Background: Will display or turn off transparencies for the windows within the UI.
Always Allow Dragable Windows: This will enable or disable the ability to re-size or move the windows within the UI.
Preload Ships: This will enable or disable the pre-loading of ship images as the space map loads. Disabling this feature may speed up the loading of the space map, but it may cause temporary visual discrepancies within the game (you may see a triangle instead of an NPC or ship, or an incorrect image may temporarily be applied to an NPC or Ship).
Simplify Ships: If selected, you will have a more 3D view of the individual ships. De-selecting this will give a more “flat” top-down view of the ships.
Show Engine Tracks: This will enable or disable the visual trail from the ship’s engines.
Sound Tab
Play Music: This will enable or disable the playing of background music.
Play Sound Effects: This will enable or disable the audio effects from the game (lasers, rockets, etc.)
![]()
![]() Trade raw materials. Unless you own the Trade Drone, this option will be disabled unless at the Space Station. Level 17 and higher will be able to sell cargo at any station, not just the ones in their own company. Selling at an enemy station will not give you the Honor Bonus however.
Trade raw materials. Unless you own the Trade Drone, this option will be disabled unless at the Space Station. Level 17 and higher will be able to sell cargo at any station, not just the ones in their own company. Selling at an enemy station will not give you the Honor Bonus however.
![]()
![]() This is your Jump button (hotkey “J”). If within a DMZ, activating this will jump you to the next map.
This is your Jump button (hotkey “J”). If within a DMZ, activating this will jump you to the next map.
![]()
![]() This is the “Fast Repair” button. To use this, you must have a minimum of 10 Repair Credits as it utilizes 10 Repair Credits to instantly repair your ship after you have popped. NOTE: Does not repair shields, only the ship hull.
This is the “Fast Repair” button. To use this, you must have a minimum of 10 Repair Credits as it utilizes 10 Repair Credits to instantly repair your ship after you have popped. NOTE: Does not repair shields, only the ship hull.
![]()
![]() This will bring up your refining window. Players who do not have Premium can manually refine their ore this way.
This will bring up your refining window. Players who do not have Premium can manually refine their ore this way.
Outfits
The following is just a simple overview.
The outfit is a group system. It will help promote teamwork with your clan or with friends. You can have up to 5 people in an outfit. You will share rewards for all except PVP kills. What does this mean to you? Simply if your in a group needing to kill Lordakium’s. Then each one that your outfit kills will count towards your quest. The only catch is you have to be active in the maps yourself. You can’t be idle or their kills won’t count.
You can also tell when a person in the outfit is in trouble. The ship icon beside his name will turn red, at the bottom is a button called fly to, you can click that button and then the persons name to fly directly to them to help them out. There are even more features that are covered in the FAQ.
Quite simply outfits are one of the greatest things to ever come to the orbit.
Left Menu
![]()
![]() This is your log. Will display 25 latest occurrences; You received 10 LCB-10 laser ammo, Banking Doubler active, etc.). If you need to look further back into your log, you will need to go to your back page and open your log book.
This is your log. Will display 25 latest occurrences; You received 10 LCB-10 laser ammo, Banking Doubler active, etc.). If you need to look further back into your log, you will need to go to your back page and open your log book.
![]()
![]() This is your Star System Map. Will show the connections between all maps for your present location (Uppers or Lowers).
This is your Star System Map. Will show the connections between all maps for your present location (Uppers or Lowers).
![]()
![]() This is your User Information. Shows: Experience, Current Level, Honor, Credits, Uridium & Jackpot Dollars.
This is your User Information. Shows: Experience, Current Level, Honor, Credits, Uridium & Jackpot Dollars.
![]()
![]() This will display any boosters that are currently being applied to your ship.
This will display any boosters that are currently being applied to your ship.
![]()
![]() This will display your ship stats; Hit Points, Shields, Cargo Bay, Ammo, Rockets & Current Configuration.
This will display your ship stats; Hit Points, Shields, Cargo Bay, Ammo, Rockets & Current Configuration.
![]()
![]() This is your mini-map.
This is your mini-map.
Star Encircled with Wreath: This is your Quests Log. Will display all active quests. You can have a maximum of 3 quests active at one time.
3 Men: This is your Outfit window. Will enable you to accept or decline invitations. If in an outfit, will provide you with ancillary functions as well as the ability to see the current status of other outfit members.
![]()
![]() This is the in-game chat window.
This is the in-game chat window.

![]()
![]() Clicking the lock will allow you to move most things around on your screen to suit how you view your spacemap.
Clicking the lock will allow you to move most things around on your screen to suit how you view your spacemap.
![]()
![]() Under this you will be able to select what laser ammo you want to use when you fire.
Under this you will be able to select what laser ammo you want to use when you fire.
![]()
![]() This selects the rockets that will be fired, you can also select which rockets to fire with the hellstorm launcher.
This selects the rockets that will be fired, you can also select which rockets to fire with the hellstorm launcher.
![]()
![]() This is for special ammo such as smart bombs and emp’s.
This is for special ammo such as smart bombs and emp’s.
![]()
![]() If you have a cpu that can be set you will find it under here.
If you have a cpu that can be set you will find it under here.
![]()
![]() This is a handy button, if you run low on ammo, instead of parking somewhere and going to back page etc, all you have to do is click this, then follow it through to buy the ammo you desire.
This is a handy button, if you run low on ammo, instead of parking somewhere and going to back page etc, all you have to do is click this, then follow it through to buy the ammo you desire.
![]()
![]() This is where you trigger the techs that you are building in the Tech lab.
This is where you trigger the techs that you are building in the Tech lab.
The last button is for the special features on the 5 newest design Goliaths.

This bar is totally customizable. This is just an example of what it could look like. To customize it, just click the lock on the gold menu, then drag the item you want on it to the location you want on this bar. As you get more goodies for your ship you will probably change the contents of this bar quite a few times. The numbers on the bottom of each cell are your hotkey numbers. So you would just hit number 1 to 0 to select the weapon you have set.
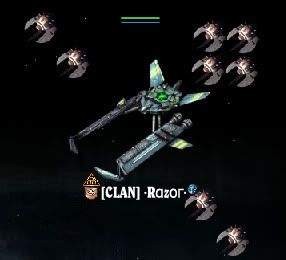
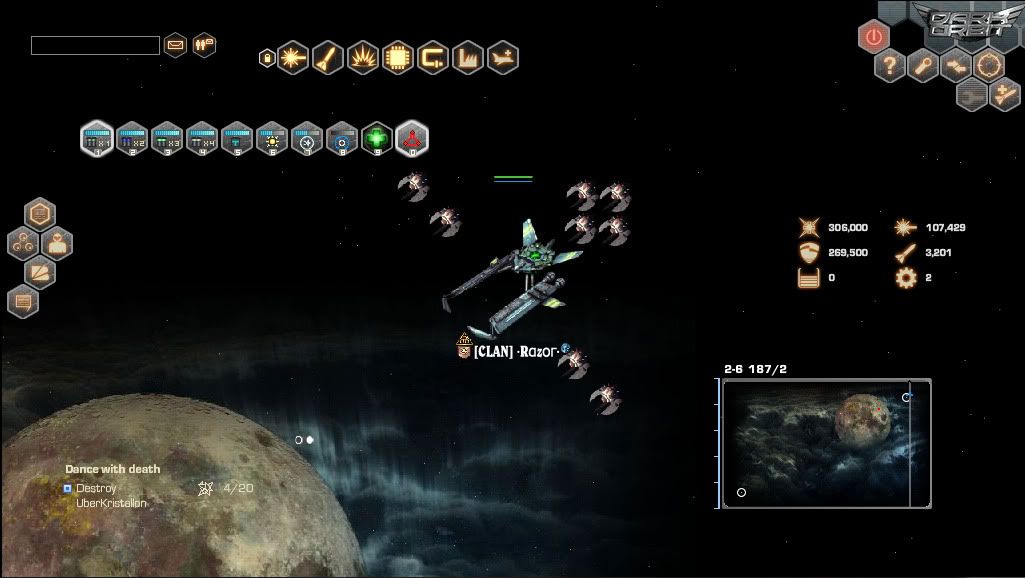
Last but not least. The whole reason we are here. In the middle of the map is YOUR SHIP. This particular is shown with all 8 iris drones at level 6. From left to right under the ship you will see Rings/Triangle representing what gates the pilot has done. The rank badge for that pilot, the clan name, the players name and finally the company icon for the company he works for.
Clan guide
1. Creating, applying & clan info.
Joining a clan:
If you do not feel like creating a clan yourself, you can always join one that already exsists. That’s how you send an application:
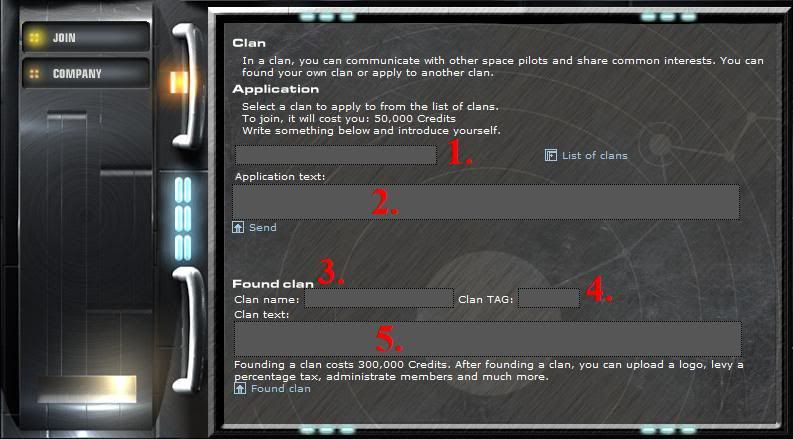
1. You use this bar to find the clan you’d like to join. You can also use full clanlist which is on the right side.
2. Here you input your application text. Make sure you describe yourself as a player and so on, to give the clan leaders an image of a player you are, so they can decide whether to accept you or not.
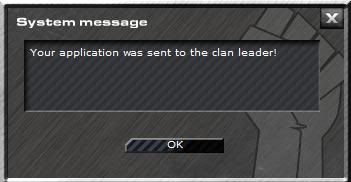
You’ll get a confirmation of your application being sent.
If you do not have 50.000 credits on your ship, you won’t be able to apply. Instead, you’ll get this message:

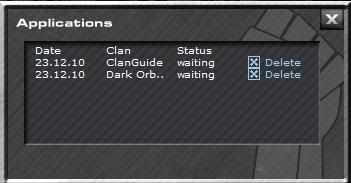
After you applied for one or more clans, you’ll be able to view and delete any of the applications by clicking on “open applications”. A window will come up:
Clicking on “delete” will cancel the chosen application and you’ll get confirmation:
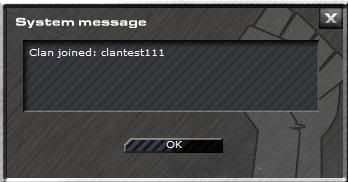
If a clan accepts your application, it will be noted in your logbook:
If you had more active applications for other clans, they automatically get deleted. 50.000 credits application fee gets deducted from your account after an application has been accepted.
The fee, clan tax and clan payments are noted in your uridium/credits balance:

Founding a clan:
Everyone can create a clan. Are you a leader type? Looking for new challenges? It’s simple. All you need is 300.000 credits as a one time fee when creating a clan.
Here you can choose your future clans:
3.Clanname
4.Clantag
5.Description of your clan
After you have done filled those in, simply click on “Found clan”.
Congratulations, you now are the clan leader of your own clan!
After founding a clan, you’ll have following entries in your logbook and uridium/credits balance overview:
Logbook:
Balance:

This is how the frontpage of a clan looks like:
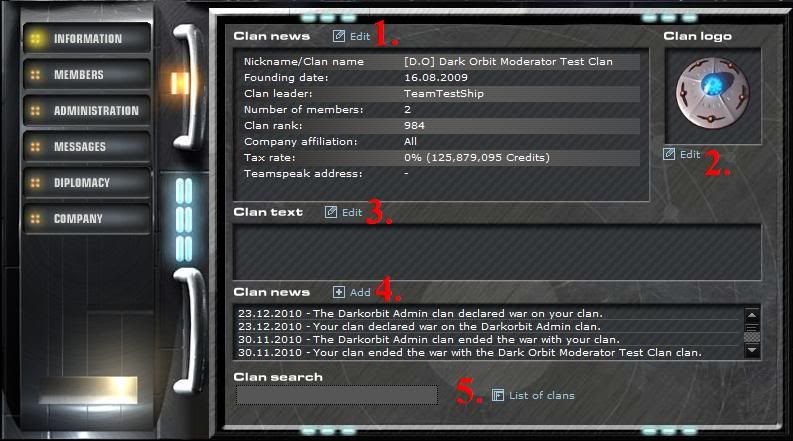
Here you can:
Note: 1, 2 and 3 can be used by clan leader and clan leader only!
1. Change clan name/tag, company affilation and more. Clicking on “edit” will bring this window up:
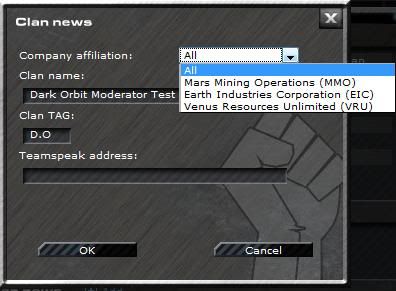
Simply enter desired changes and press “ok” to save. Also, note that if you enter a teamspeak adress, it will be only visible to clan members; people outside the clan won’t be able to see it until they apply and get accepted into your clan.
2. Lets you edit the clan description visible for other players. Clicking “edit” will bring this window up:

Again, all you have to do is enter desired changes to the clantext and press “ok”.
3. Allows the clan leader and members with certain permission (will be discussed a little later) post clan news – short messages visible for all clanmembers on the frontpage. Clicking on “add” brings following window up:
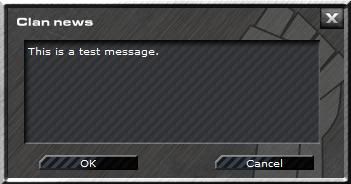
It allows you to enter a message which after clicking “ok” will be visible for all clan members.
4. Allows you to change the clan logo. Simply click on “edit” and this window will come up:
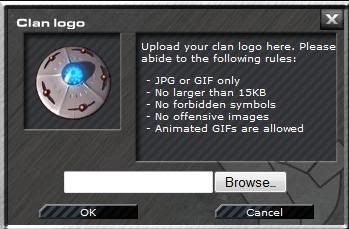
All you have to do is click on “browse”, find desired picture for the logo on your computer and then press “ok”.
5. Lets you to search for the clans & show full clan list.
The clanlist looks like this:
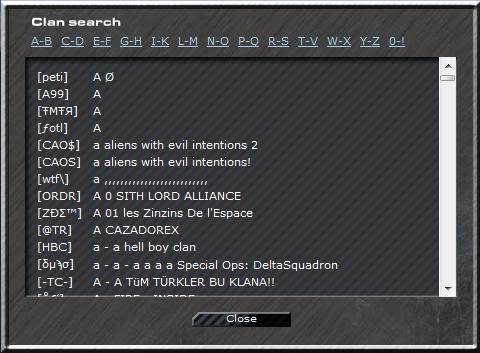
The clans are sorted alphabetically after their names (not tags).
To search for clans, simply enter any combination of symbols, numbers or letters and the system will show you suggestions.
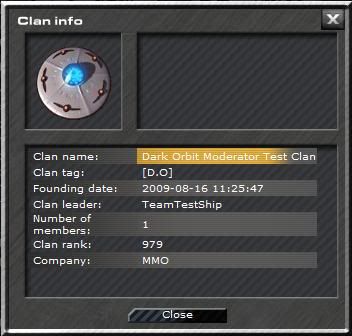
Clicking on a clan name/tag found either by search bar or full clan list will bring a box with information about it:
The search function and the full list of clans can be used when being clanless too – obviously before a person applies to a clan, they’ll want to know as much as possible about your principles and so on, so try to make a nice clan description which will encourage users to apply.
2. Members.
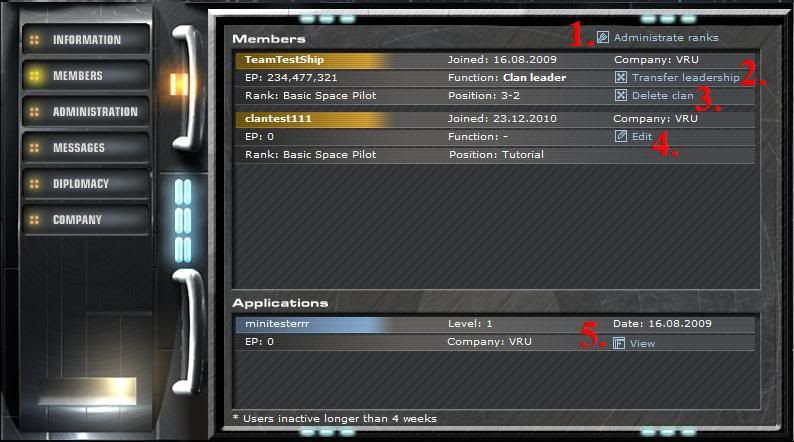
Here you can:
1. Administrate ranks. Here you can create ranks for your members and assign them different rights in clan. Clicking it will bring following window up:
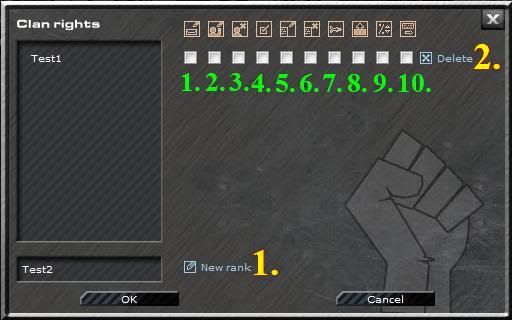
You have two main options:
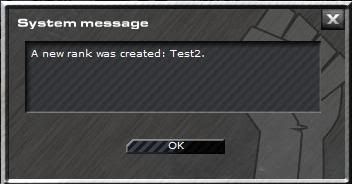
1. Creates a rank with a name of your choice.
After you create a rank, you’ll get a confirmation window:
2. Deletes the rank.
The white squares are where you assign rights for the ranks.
1. Create newsletter. This option lets users to send a message to all clan members.
2. View and edit applications. This option lets users to accept or decline new clan applicants.
3. Dismiss members. This option lets users kick every (not clan leader) other member of the clan, regardless of their rank. Give this rank only to people you trust.
4. Edit ranks. This option lets users do exactly what you are doing now – assign the ranks to other members, change the permissions and so on. This one has to be given only to people you absolutely 100% trust.
5. Diplomacy: view requests, start diplomatic agreement. This option lets users to accept the pact and NAP requests sent by other clans, as well as send these request to other clans.
6. Diplomacy: end alliances. This option lets users to cancel any current NAPs or pacts with other clans.
7. Diplomacy: declare wars on other clans. Pretty self explanatory, this option lets the users declare a war on any chosen clans.
8. Payment from clan treasury. This option lets users to make a payment from clan treasury. Be careful when assigning this rank; only give it to people you trust 100%.
9. Change tax rate. Taxes are collected once a day; this option lets the users assign the % tax rate.
10. Create clan news. This option lets users post messages on the “clan info” on the clan front page.
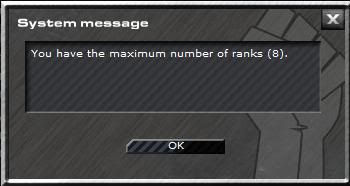
After assigning permissions to the ranks, simply click “ok” to save changes. You can create up to 8 different ranks. If you are trying to create more, you’ll get this message:
Many times people say their clan was “hacked”; someone stole credits or kicked the members. This can only happen if they are given permissions to do so. The most crucial ones are payment from clan treasury and edit ranks permissions. If you assign “edit ranks” permission to a rank, you practically give that rank all other permissions too, because person having this permission can go into “administrate ranks” and assign permissions however they want to.
2. Transfer leadership. You can transfer clan leadership to any of the members. Clicking on this button brings following window up:
![]()
![]()
Simply choose a member from the list and press “ok”. Remember, this decision cannot be reversed – only way to get leadership back is to have the user currently having it, transfer it back.
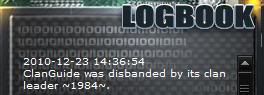
3. Delete the clan. This option allows deletion of the clan. All credits in the treasury will be lost, the decision cannot be reversed. This option is only available for the clan leader. Normal members will have an option to leave the clan instead. After a clan is disbanded, the members will see a message like this in their logbook:
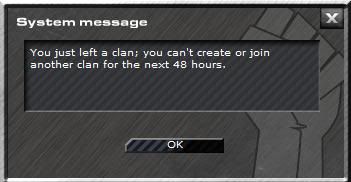
After the clan is disbanded or after you have left the clan, you will have to wait 48 hours to apply for a new clan or create one. If you try to do it before this time has gone, you’ll end up getting this message:
4. Allows you to assign a rank for the clan member. After clicking “edit”, a window will pop up:
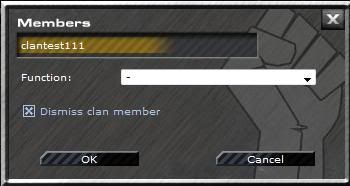
Simply choose a rank from the list and press “ok”. If you do not assign any rank to a member, they won’t have any special rights.
You have earlier created some ranks & given them permissions in point 1. – by assigning the rank to a member, you hereby grant them any permission you have set for it. Remember to follow the tips – the crucial permissions should be only given to the people you really trust!
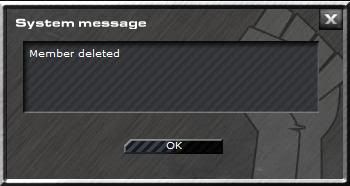
By clicking “dismiss member”, you are able to kick the chosen user out from the clan. You’ll be asked for confirmation of your decision, if you do confirm, you’ll ger this message:
5. Lists current applications to the clan. Click on “view”. You’ll see what the applicant wrote and you will have an option to accept or decline the application:
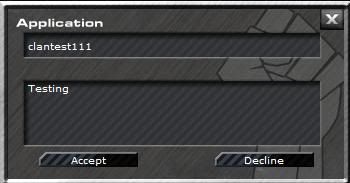
If you accept an application, you’ll get a confirmation window:
If you decline the application, you’ll get this message:

3. Administration & messages.
This section is heart of your clan’s finances. It looks like this:
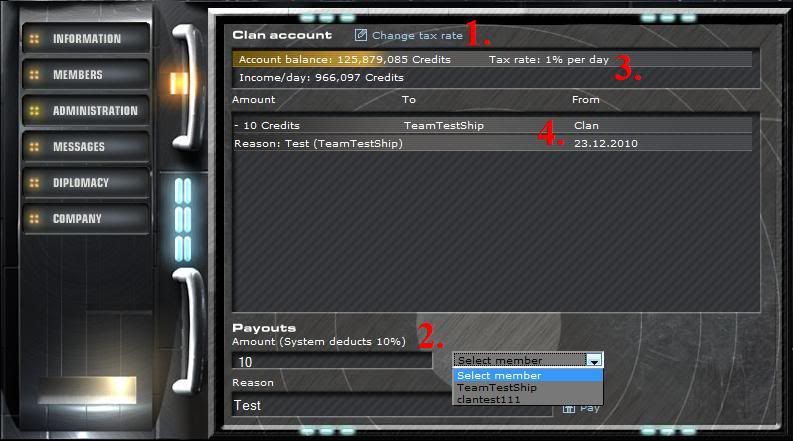
In this section:
1. You can change the tax rate. Clicking this will bring a window up:
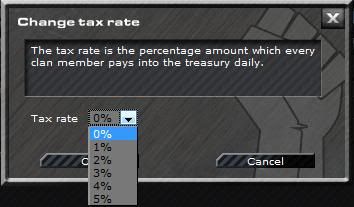
You can assign the daily tax rate to be 0-5%. After choosing the rate, press “ok” and you will get following confirmation message:
You can change tax as many times as you want during the day. The taxes are collected around 40 minutes after the daily server reset, which happens at 5:30 am of the server time. Each time the taxes are collected, you’ll have it noted in your credit/uridium balance page.

2. Here you can pay credits out to any member of the clan. Simply input the desired amount, select the member from the drop down menu and then you might want to enter the reason for payout. After that, simply press “pay” button. After payment is completed, you’ll get a confirmation window:
Please note, that for every payout, the system will deduct 10% of the amount. So, say you pay 10 credits out to a member. 10 credits will be taken from clan treasury, the member will only receive 9 though, 1 credit (10%) is taken by system and hereby lost in the process.
3. In this window you’ll see information about the current tax rate, current amount of clan funds and income per day with chosen tax rate.
4. This is the list of all recent transactions. It shows the income from the taxes by every single member, as well as all payouts.
Next section in the clan menu is: messages.
You and other clan members can send messages to each other in this section. It looks like this:
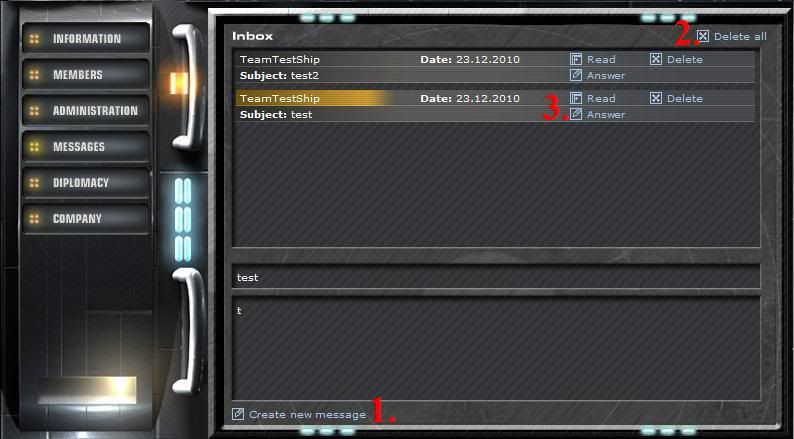
1. Create new message. This option lets you send a message to a single clan member or to all clan members. Clicking on it will bring this window up:
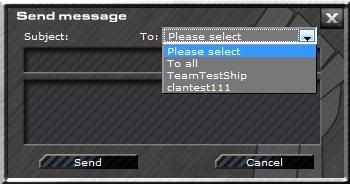
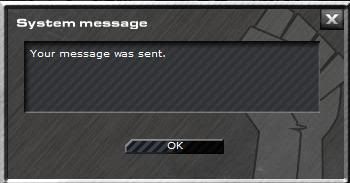
To send a message, simply choose a single member to receive it (or all members), then enter message topic & text. After that, you can simply click “ok” to send it. You’ll get a confirmation after sending it:
2. Lets you delete all messages from the list.
3. Options to read, answer and delete a single message.
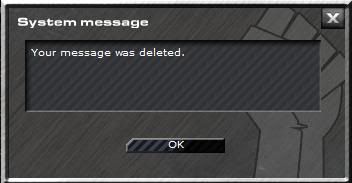
After you delete messages(s) you’ll get a confirmation window:
4. Diplomacy & company change.
This section is heart of diplomatic relations of your clan. Pacts, NAPs, wars and requests all are handled here. This is how this section looks like:
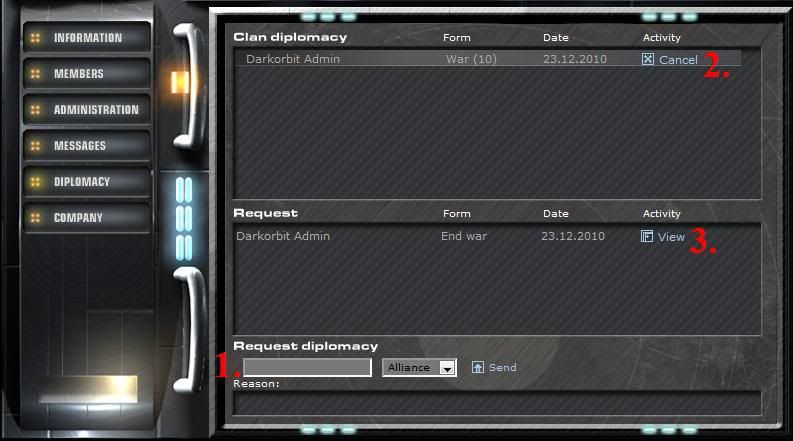
1. Sending a NAP or alliance request. Simply find the clan you want to request the diplomatic relations with, enter the reason for your request, choose the form (NAP or alliance) in the drop down menu and click on “send”. This will bring you a confirmation window:

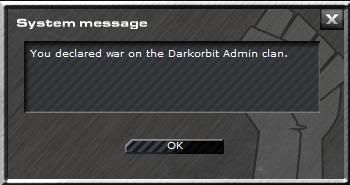
Declaring war – same as before – choose a clan, pick “war” from the drop down menu, you might want to enter something in the “reason” box, although it is not required. After sending the war pact, you’ll get a message:
2. Sending end war pact. Find the war you want to end in the clan diplomacy list, click on “cancel”. This will bring up this window:
Simply click “ok” and your request is sent. The other clan has to accept your request in order to end the war. Until it’s done, the war continues. Normal pacts (NAP & alliance) can be cancelled same way, you just do not need the confirmation from another alliance. Once you decide to cancel a pact, you can do it right away. You also get a confirmation message like this:

All diplomacy requests you sent and which are waiting to be approved or declined by another clan are shown on a list after clicking on “open applications”:
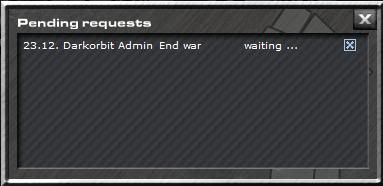
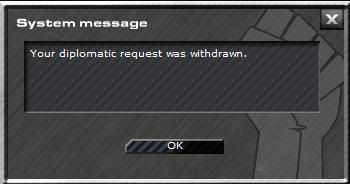
If you decided to withdraw one of them, simply click “cancel” and you’ll get this message:
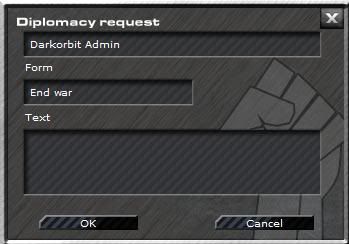
3. Requests from another clans. Other clans can send you requests – they will all be listed here. To manage a request click on “view” and you’ll be able to accept or decline the request.
If you accept a:
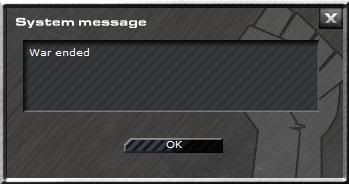
a) End war pact, you’ll get this message:
b) NAP, you’ll get this message:

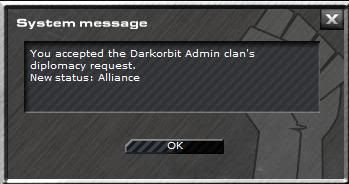
c) Alliance request, you’ll get this message:
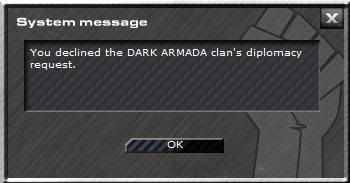
If you decline a request, you’ll see:
Change company
You can change company of your own ship at any time – it costs 5000 uridium and half of your honor. To switch, you will also have to cancel all quests you have running. Simply click on an icon of the desired company & confirm the change.
This guide should cover all questions about how the clan system works. Are you a born leader? Or do you just want to join a clan and follow others inctructions? It’s all your choice – good luck, space pilot!
Thanks to .Anneliese. for writing this part.
The Football Betting System
So you’ve logged onto the game and got a pop-up that looks very similar to this one.
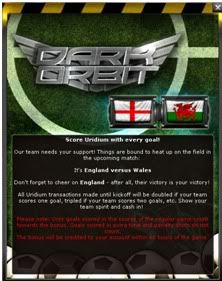
But What does it mean?
Well, depending on what server you are on, you will get a line of text like this :
Don’t forget to cheer on England – after all, their victory is your victory!
As you can see the bet is for England.
Great so What Am I Betting on?
Well quite simply it works like this:
- If your team doesn’t score – you will just get the uridium you paid for.
- If your team scores 1 goal – we will double the amount uridium you bought
- If your team scores two goals – we will Triple the amount of uridium you bought
And etc etc.
Sounds brilliant, Anything else I should know?
Well Yes.
Only transactions made before kick-off will count
Only goals in normal time and added time will count (So none in extra time or a penalty shoot out will count).
And you’ll get your bonus uridium within 48 hours of the game.
All that is left is to wish you good luck and enjoy the game.

Recent Comments