Shaiya Priest Guide
Shaiya Priest Guide by GreenieEm
The idea to make this guide actually came from two other players .WheresLupers and Aes. Both have fabulous guides, detailing everything you’ll ever need to know about fighters and archer/mage, respectively. After contemplating the idea and how much effort and work that would need to be put into a guide such as this, I decided to make a guide also, except this one for the priests of Shaiya!
I currently have two priests, both HM, at level 54 and level 15. Over the course of my leveling, I have voraciously sought out all info pertaining to the priest class and now have compiled it all in one neat little package for all who want to or do play this class.
Quick little note on my word use: Battle is short for Battle Priest and Healer is short for Healing Priest.
As I have only minimally played on the Fury side, this guide is mainly for the Light Side, though most of the skills and also builds should work for both sides.
Note: Originally posted prior to Ep4’s release, I have updated it to include new details. I believe I have added everything in. Please don’t hesitate to let me know if I’m missing something :]
Thanks in advance for reading and I hope this answers any questions you have about the priest class. ^^ Please don’t hesitate to leave questions, comments, concerns or suggestions.
*NOTE: If you use my pictures, PLEASE CREDIT. It took a long time for me to collect them all, so if you would like to use them, just give me a shout before and credit me wherever you post them. Thanks!
Thanks a bunch to: KataraOfWater, -Charm-, Avyn and Sil3nt_healer
Without your SS or info, I’d be missing a bunch of things x.x
Lots and lots of thanks to: Aes
Your guides inspired me to make one and also I was able to get some much needed info from you :]
A big THANK YOU to: Kat-
Without your tireless help and information, this guide would be moldering on my hard drive :]
Finally BIG BIG “omg thank youuuuuu SO much” to: [GS]WheresLupers
Not only did he give me the idea for this, the format and a lot of the info came from him <3
Table of Contents
I. Why a Priest – Reasons why you should or should not play this fabulous class
II. The Modes – NM and HM and UM, oh my!
III. Builds – This is the way we build a priest, build a priest…
IV. Skills – Can’t look this cool by mere posing
V. Mobs – Wheee! Time to kill me some monsters!
VI. Elements – Pretty colors, dangerous mobs
VII. Grinding – How to properly level up and which parties are best
VIII. PvP – How to effectively kill those tricky Furies
IX. Armor – Pretty clothes…functional too!
X. Weapons – To staff or to dagger? That is the question
XI. Capes – Does this make my butt look fat?
XII. Mounts – Sit tall and proud on your mount of choice
XIII. Maps – A true priesty never gets lost
Why a Priest
Although Lady is not my first priest, she is the one I’ve spent the most time on. While priest may not be the BEST class to start off on, they still have their undeniable merits.
Pros:
-The Priest class is the ONLY class that can heal and resurrect dead players. Enough said.
-A priest is the most versatile class. She (or he) can duo with all other classes or join in bigger parties, keeping them healed and safe.
-A priest is also one of the fastest leveling classes. Not only can they party with any class, they can also be several levels below other members (as long as under 7 levels*) while still being able to successfully keep the party alive.
-A priest is always needed. No matter the class of the other player, a priest will always be needed to keep that player or players alive during PvE or PvP.
-Can either be a Battle or Healer. Since priests also have AOE spells, they can choose to be a supporter or an attacker and can play both roles effectively. In reference to a Battle, you can also become a REC priest, tanking and using Hail Storm as your “taunt”.
Cons:
-Unless you are a Battle priest, you will need a party to level. Most priests have a high Wis count, allowing them for support rather than damage.
-Priests are generally one of the squishiest classes in the game. As the most common build contains a high content of wis, this lowers your defense greatly. This makes them ideal targets in PvP maps and are usually the first to be taken out in an ambush.
*In Ep 4, the level cap between players was removed, so now players in their 50s can easily party with players in their 30s. However, the level cap on the mobs (colors) still holds, so powerleveling is easier, but regular partying with a high level and a low level while still come with mob experience penalties
The Modes
In Shaiya, in addition to having six different classes, there are also 4 different modes at which to play. When you first begin, two modes are available, while the other two remain locked until you reach level 40 on the prior mode. For example, Hard Mode can be unlocked when a Normal Mode character reaches level 40. The highest mode you can achieve is Ultimate mode. All modes end at level 60, excepting Easy Mode.
*Note, new information has been released about levels. In an update patch around episode 4.5, the level cap will be raised to 70. However, this is not due to happen for at least another year or so.
-Easy Mode: Only allows player to reach level 30 and special skills are unattainable in this mode. It does not unlock anything as it merely a tutorial mode. You can safely skip this.
-Normal Mode: This is the mode that everyone normally starts at. When you first begin, it is the highest mode you are allowed to play until you are able to unlock the next mode. In this mode, each level up, you receive 5 stat points and 3 skill points. Since the skill point amount is limited, a thorough perusal of the skills will show you the skills you most need and the ones you can safely bypass. Most NM players want to get to HM as fast as possible and so skim through this class with nary a glance. With the right build, lapis and knowledge, a NM player can be as strong as a HM player. This class can wear armor and wield weapons up the Dread level.
-Hard Mode: This is the second mode and the first to be unlocked. In this mode, each level up, you receive 7 stat points and 4 skill points. You can experiment more freely with your build in this mode. Many players stop at this mode, as they are stronger than NM, but do not have the death penalty like UM. While stronger than NM, this mode requires more experience for each level. At the low levels, you need about 2.5x more exp; this amount grows to approximately 5x more exp at the higher levels. Also, with unlocking HM, you also unlock a few more skills and can also equip Legend armor and weapons.
-Ultimate Mode: Upon reaching level 40 in HM, you have successfully unlocked the highest mode of the game. This mode allows for the strongest characters, aside from one fatal flaw: ONCE YOU DIE, YOU HAVE 180 SECONDS TO BE RESSED OR THAT TOON IS DELETED.
This is not always the case though. There are 4 ways to prevent the deletion of your toon.* For this mode, you receive 9 stat points and 5 skill points each time you level. Certain skills will now become unlocked, such as the coveted level 60 UM skill. A player with this mode can now don Goddess armor and use Goddess weapons.
*They are: Regular Res Rune, Continuous Res Rune, Target Res Rune, or Level 31+ priest with Resurrection level 2. The regular res runes will activate upon your death and will be used up after you are ressed. Conti res runes can be equipped and last a certain amount of time, such as 3 hours or 7/15/30 days. Target res runes are items that a party member can use to resurrect you. A priest with level 2 res (level 31) can resurrect you, but I advise not relying on them as you have a very short time to be ressed.
*Recently, the ability to resurrect a dead UM has opened. A promo will be run where you can buy a UM Res for 7500 AP ($75). It was rare in the past, but now seems to be opening up in the more recent past.
Builds
One of the best things about this game is the ability of its players to choose and use different stat builds successfully. There are different builds for either priest path and there are different builds for each mode. Below are the 6 stats and how they affect a player.
-Stats-
Strength: [STR] Physical damage and shooting attacking power increases
For a priest, either healing or battle, strength is not good. Skip it.
Rec: [REC] Physical defense power, shooting defense power and HP increase
Having a little rec in a build is a good thing. It adds HP and defense, allowing you to withstand hits better. If you choose a healing priest, depending on your build, you may not need this at all. As for a battle priest, rec is a definite factor in your build
Intelligence: [INT] Magic attack power increases
For a battle priest, Int is a must. It adds magical attack power, which strengthens your battle spells.
Wisdom: [WIS] Magic defense power, magic accuracy, and MP increase
This is the most important for a priesty. This is what gives you your magical defense and also increases your MP. The more you have of Wis, the better and longer you can heal.
Dexterity: [DEX] Physical, shooting attack-power increases slightly. Its rate of evasion, success increase and so does SP.
Just like with strength, Dex isn’t really needed for healing nor battling. Dex may add to your evasion rate, but at the rate of evasion given, it really isn’t worth it. Skip it.
Luck: [LUC] Shooting attack power, critical hit rate, critical damage, critical evasion rate increase slightly
Every five points increases your critical hit % by 1%. While there have been some priests to try a Luc build, as of yet, there are no documented successes. It may add to your hit rate as a battle priest, but for the amount needed, it really isn’t worth it. Skip it.
*Note, for leveling – (P) = requires a party, (NP) = does not require a party
For Normal Mode:
Since you are just beginning the game, this is NOT a time to experiment with builds. You’ll be able to do in later modes. You get 5 stat points per level. I recommend the Full Wis build.
-Full Wis (5) – This is the most common NM build and the safest. It allows you to heal the most and the more you heal, the faster your party can kill and allow you to level. (P)
-Wis/Rec (3/2) – This is a possible build, though not highly recommended as it lowers your healing amount. You’ll be able to withstand hits better, allowing for soloing, albeit slowly. (P)
-Full Int (5) – This is the rarest of the NM builds. As a Battle, you’ll be able to solo constantly, but your healing will greatly suffer. (NP)
For Hard Mode:
In this mode, your options open up a bit more, allow for some experimenting. You can explore your options, testing these builds without the possible death penalty from UM. You get 7 stat points per level. I recommend the full wis or wis/rec build.
-Full Wis (7) – The most common of the HM builds. This allows you to heal the most, but also leaves your without high defense or able to defend yourself effectively. (P)
-Wis/Int (5/2) – This build combines the full healing of a NM with a bit of magic attack. This would be a good build in PvP, allowing you to act as a normal Healer, but still defend yourself should something attack. You also can solo, but it would be extremely slow. (P)
-Wis/Rec (5/2) – This build is also viable for PvP, as it allows you to heal competently while also being able to withstand hits better than your full wis counterpart. This build allows for possibly soloing, but like wis/int, it would be very slow. (P)
-Full Int (7) – This build allows for extensive soloing. While your magic attack is great, your healing is non-existent. (NP)
For Ultimate Mode:
Finally! A chance to experiment with all possible builds, allowing you to find the one that suits your best. Be wary though, you have the death penalty to think about when trying these builds. You get 9 stat points per level. I recommend the full wis or wis/rec build.
-Full Wis (9) – One of the two most common UM builds. This build allows you to heal the greatest, but also forces you to rely on others for your protection. (P)
-Wis/Int (6/3) – This build combines good healing with semi-good magic attack. This could be a good PvP Healer build, though wis/rec is more recommended. Soloing is possible, but would be slow. (P)
-Wis/Rec (6/3)/(5/4) – This build is the second of the two most common UM builds. You can heal sufficiently while having a good amount of defense. This is the most common PvP Healer build. Soloing is possible, but slow. (P)
-Rec/Wis (7/2)/(6/3) – TBA.
-Int/Rec (7/2) – This build is the most rare of the UM builds. As a Battle, you would have HM magic attack, while still leaving the chance for your defense to grow. This is the second of the PvP Battle builds. (NP)
-Full Int (9) – The most common PvP Battle build. You may not have great defense, but your magic attack is rivaled by only a few. (NP)
-Full Rec (9) – TBA.
Remember, these are just suggestions to help you get you on your way as a Priesty. Some of these are tried and true builds, while others are still being tweaked. Just remember to watch your health, especially if UM, whenever you try out new builds. Most importantly, have fun!
Skills
*Ep4 Information added/edited*
-Passive-

Dagger Weapon Power Up
Raises your attack power when a dagger is equipped. I’ve never noticed a viable difference, so it’s safe to skip.
Level 1 – Passive ability that raises a player’s attack by 5 when a dagger is equipped (level 5 – 2 pts)
Level 2 – Passive ability that raises a player’s attack by 12 when a dagger is equipped (level 16 – 3 pts)
Level 3 – Passive ability that raises a player’s attack by 20 when a dagger is equipped (level 25 – 4 pts)

Mana Training
Anything that adds to your mana count is good. Max it.
Level 1 – Passive ability that raises the player’s maximum MP by 110 (level 5 – 2 pts)
Level 2 – Passive ability that raises the player’s maximum MP by 255 (level 16 – 3 pts)
Level 3 – Passive ability that raises the player’s maximum MP by 448 (level 25 – 4 pts)

Relax Body
This allows for a faster regen of your HP/MP/SP. Max it.
Level 1 – Passive ability that regenerate HP, MP, and SP by 4% each for 3 seconds during the break (level 6 – 1 pts)
Level 2 – Passive ability that regenerate HP, MP, and SP by 6% each for 3 seconds during the break (level 16 – 2 pts)
Level 3 – Passive ability that regenerate HP, MP, and SP by 8% each for 3 seconds during the break (level 26 – 2 pts)

Backpack Upgrade
More room = more space to hold items. Not necessary, but good nonetheless. Max if wanted.
Level 1 – Passive ability that raises the limit of purchasing backpacks to 3 (level 12 – 1 pts)
Level 2 – Passive ability that raises the limit of purchasing backpacks to 4 (level 26 – 2 pts)
Level 3 – Passive ability that raises the limit of purchasing backpacks to 5 (level 46 – 2 pts)

Interpretation
If you get this, get level 2 as the bare minimum. Max if you are an avid pvper or Karis maps’ grinder.
Level 1 – Allows player to understand 30% of what opponent says (level 13 – 1 pts)
Level 2 – Allows player to understand 60% of what opponent says (level 22 – 2 pts)
Level 3 – Allows the player to understand everything an opponent says (level 51 – 3 pts)
-Basic-

Magic Ball
First skill you start out with. Whether healing or battle priest, you will be doing soloing in your early levels. Max it.
Level 1 – (Magic Ball) Magic that shoots a non-elemental Magic Missile with the player’s magic attack power plus 29 damage (level 1 – 2 pts)
Level 2 – (Magic Arrow) Magic that shoots a non-elemental Magic Missile with the player’s magic attack power plus 60 damage (level 10 – 2 pts)
Level 3 – (Magic Missile) Magic that shoots a non-elemental Magic Missile with the player’s magic attack power plus 118 damage (level 20 – 3 pts)

Body Protector
More defense = lives longer. Max it.
Level 1 – Buff that increases player’s physical defensive power by 12 points and evasion rate against physical attack by 2% for 5 minutes (level 2 – 3 pts)
Level 2 – Buff that increases player’s physical defensive power by 24 points and evasion rate against physical attack by 4% for 5 minutes (level 17 – 4 pts)
Level 3 – Buff that increases player’s physical defensive power by 47 points and evasion rate against physical attack by 7% for 5 minutes (level 34 – 4 pts)

Ice Ball
Damages and slows the target. Good for lower levels, not so much for the higher one. Also good for slowing opponents down in PvP. Either max then restat or only go up to level 2.
Level 1 – (Ice Ball) The basic water magic that wounds a target for the player’s magic attack power plus 34 damage and slows the target for 3 seconds (level 3 – 2 pts)
Level 2 – (Ice Arrow) The basic water magic that wounds a target for the player’s magic attack power plus 80 damage and slows the target for 5 seconds (level 14 – 3 pts)
Level 3 – (Ice Pole) The basic water magic that wounds a target for the player’s magic attack power plus 175 damage and slows the target for 7 seconds (level 27 – 3 pts)

Detection
Great skill to have in when you are in any PVP map, though it’s only needed if an assassin stealths. Max (if wanted) it to level 2, as level 3 isn’t really needed.
Level 1 – Skill that detects a character in Stealth Mode within 10 meters of the player for 30 seconds. That character’s Stealth will be released automatically (level 8 – 2 pts)
Level 2 – Skill that detects a character in Stealth Mode within 20 meters of the player for 30 seconds. That character’s Stealth will be released automatically (level 23 – 3 pts)
Level 3 – Skill that detects a character in Stealth Mode within 30 meters of the player for 30 seconds. That character’s Stealth will be released automatically (level 36 – 3 pts)

Dispel
Dispels all ailments/debuffs that can be cast upon you or your party mates. Max it.
Level 1 – Magic that dispels the target’s poison, illness, delusion, fear, doom, dull and bad luck (level 9 – 2 pts)
Level 2 – Magic that dispels the target’s poison, illness, delusion, fear, doom, dull, bad luck, sleep, unconsciousness, silent, darkness, pause and slow (level 19 – 3 pts)
Level 3 – Magic that dispels the target’s soul extinction, trace mark, transformation, death sentence, and non-elemental condition (level 34 – 3 pts)

Magic Spot
Like Magic Ball, only more powerful. Max it for low-level soloing and PvP battle priesting.
Level 1 – Non-elemental magic that instantly wounds the target for basic magic attack power plus 130 damage (level 14 –3 pts)
Level 2 – Non-elemental magic that instantly wounds the target for basic magic attack power plus 217 damage (level 24 –3 pts)
Level 3 – Non-elemental magic that instantly wounds the target for basic magic attack power plus 343 damage (level 34 – 4 pts)

Stamina Leakage
Strict PVP skill. Priests don’t really need SP except for buffs, but against a fighter, it could really help. Max if wanted.
Level 1 – Debuff that makes an opponent’s SP leak. Affected target will deplete 520 SP over 30 seconds (level 16 – 3 pts)
Level 2 – Debuff that makes an opponent’s SP leak. Affected target will deplete 810 SP over 30 seconds (level 28 – 3 pts)
Level 3 – Debuff that makes an opponent’s SP leak. Affected target will deplete 1780 SP over 30 seconds (level 40 – 3 pts)
-Combat-

Healing
First healing spell you get. Max it.
Level 1 – The most basic healing magic that regenerates HP equivalent to the player’s WIS plus 60 HP (level 2 – 2 pts)
Level 2 – The most basic healing magic that regenerates HP equivalent to the player’s WIS plus 130 HP (level 11 – 2 pts)
Level 3 – The most basic healing magic that regenerates HP equivalent to the player’s WIS plus 300 HP (level 26 – 2 pts)

Magic Protector
Both a PVP and PVE skill, this spell basically doubles your magic attack andand protects you from an amount of magic damage equal to that number. (It does NOT double your actual magic attack, just doubles the possibility, then protects your from that amount) Max if wanted.
Level 1 – Skill that invalidates 2 times magic damage the player deals. Its effect will end in 1 minute is case of no damage after triggered (level 4 – 3 pts)
Level 2 – Skill that invalidates 3 times magic damage the player deals. Its effect will end in 1 minute is case of no damage after triggered (level 17 – 3 pts)
Level 3 – Skill that invalidates 4 times magic damage the player deals. Its effect will end in 1 minute is case of no damage after triggered (level 30 – 3 pts)

Instant Heal
Instant heal is a lifesaver if you or your party mates are in a bind. Max it.
Level 1 – Healing magic that will instantly heal the target’s HP for 71 plus the player’s WIS (level 6 –3 pts)
Level 2 – Healing magic that will instantly heal the target’s HP for 255 plus the player’s WIS (level 27 –3 pts)
Level 3 – Healing magic that will instantly heal the target’s HP for 712 plus the player’s WIS (level 54 – 4 pts)

Hail
First AOE spell you can get. Battle or solo, it’s a good spell to have. It’s also your “taunt” if you are tanking. Max it.
Level 1 – (Hail Storm) Water magic that drops hail 10 meters around the target, dealing the player’s magic attack power plus 69 damage (level 8 –3 pts)
Level 2 – (Cold Hail Storm) Water magic that drops hail 10 meters around the target, dealing the player’s magic attack power plus 181 damage (level 23 – 3 pts)
Level 3 – (Deadly Hail Storm) Water magic that drops hail 10 meters around the target, dealing the player’s magic attack power plus 305 damage (level 33 – 4 pts)

Mana Slug
Strict PVP skill. Although MP is your lifeblood, this is only usable with physical attacks and as a priest, you want to heal/damage from afar. Skip it.
Level 1 – Skill that absorbs 700 MP from an opponent’s wound. Only usable with melee attacks (level 13 – 3 pts)
Level 2 – Skill that absorbs 1500 MP from an opponent’s wound. Only usable with melee attacks (level 29 – 4 pts)
Level 3 – Skill that absorbs 2000 MP from an opponent’s wound. Only usable with melee attacks (level 44 – 4 pts)

Healing Fall
At first, I didn’t see the point of this, but if your party needs to get buffed then run, after casting AOP and Prayer, cast this (and Blank if applicable) to get healed on the run. Also, I use this and Great Healing Pool A LOT after I’ve been hit by a DOT/AOE hit. That way I can get healed without having to turn focus from my def/fighter.
Level 1 – Healing magic that constantly increases HP of the player’s party members within 15 meters by 186 points for 18 seconds (level 18 – 4 pts)
Level 2 – Healing magic that constantly increases HP of the player’s party members within 15 meters by 360 points for 18 seconds (level 30 – 4 pts)
Level 3 – Healing magic that constantly increases HP of the player’s party members within 15 meters by 678 points for 18 seconds (level 45 – 4 pts)

Blizzard
The second of the water AOE spells. This damages and slows the target, allowing you time to cast any other non-instant spells. Max if Battle, level 2 for healing.
Level 1 – (Blizzard) Water magic that creates a blizzard 10 meters around the target dealing the player’s magic attack power plus 187 damage and lowering its moving speed for 3 seconds (level 21 – 4 pts)
Level 2 – (Blizzard Storm) Water magic that creates a Blizzard 10 meters around the target dealing the player’s magic attack power plus 301 damage and lowering its moving speed for 3 seconds (level 31 – 4 pts)
Level 3 – (Revolution Blizzard) Water magic that creates a Blizzard 10 meters around the target dealing the player’s magic attack power plus 455 damage and lowering its moving speed for 3 seconds (level 41 – 4 pts)

Elemental Shock
As a Battle, it’s the best AOE skill to have, max it. If a Healer, skip it.
Level 1 – Magic that wounds enemies within 10 meters of target for the player’s magic attack power plus 262 damage (level 28 – 4 pts)
Level 2 – Magic that wounds enemies within 10 meters of target for the player’s magic attack power plus 421 damage (level 39 – 4 pts)
Level 3 – Magic that wounds enemies within 10 meters of target for the player’s magic attack power plus 690 damage (level 53 – 4 pts)

Healing Prayer
I use this skill a lot. It has the longest cast time, but out heals healing and instant. Max it.
Level 1 – Powerful healing magic that regenerates the target’s HP by 494 plus the player’s WIS (level 37 – 3 pts)
Level 2 – Powerful healing magic that regenerates the target’s HP by 712 plus the player’s WIS (level 47 – 4 pts)
Level 3 – Powerful healing magic that regenerates the target’s HP by 972 plus the player’s WIS (level 57 – 5 pts)

Surge Choir (HM+)
With a 4 second cast time and 60 second cool down, this skill is not really worth it to a Healer. As a Battle, it will take a nice chunk of HP from your opponent. Max if Battle, skip if Healer.
Level 1 – Powerful water magic that deals the player’s magical attack power plus 1101 damage (level 38 – 4 pts)
Level 2 – Powerful water magic that deals the player’s magical attack power plus 1564 damage (level 48 – 5 pts)
Level 3 – Powerful water magic that deals the player’s magical attack power plus 2108 damage (level 58 – 5 pts)
![]()
![]()
Great Healing Pool (HM+)
Similar to Healing Fall, but more powerful. Good skill to have when your party need to buff and run. Also, I use this and Healing Fall A LOT after I’ve been hit by a DOT/AOE hit. That way I can get healed without having to turn focus from my def/fighter. Max it.
Level 1 – Healing magic that constantly increases HP of the player’s party members within 15 meters by 1080 points for 18 seconds. (level 48 – x pts)
Level 2 – Healing magic that constantly increases HP of the player’s party members within 15 meters by 14xx points for 18 seconds (level 53 – 5 pts)
Level 3 – Healing magic that constantly increases HP of the player’s party members within 15 meters by X points for 18 seconds (level 59 – 6 pts)
-Special-

Aura of Peace
Increase HP of anyone it is cast upon. Max it.
Level 1 – Spell that increases the target’s max HP to 200 for 30 minutes (level 7 – 3 pts)
Level 2 – Spell that increases the target’s max HP to 500 for 30 minutes (level 24 – 4 pts)
Level 3 – Spell that increases the target’s max HP to 850 for 30 minutes (level 35 – 5pts)

Resurrection
One of the most important skills in the ENTIRE game. It resurrections dead players. Other players will get mad if you are above the level and do not have the most recent addition, especially UM players and you are 31+. Max it ASAP.
Level 1 – Spell that brings a dead character back to life (level 10 – 3 pts)
Level 2 – Spell that brings a dead character back to life. Shorter recharge time than Lv1 and works on UM characters (level 31 – 4 pts)
Level 3 – Spell that brings a dead character back to life. Shorter recharge time than Lv2 and works on UM characters (level 56 – 5 pts)

Prayer
Increases STR, HP and MP of all party members, making them stronger and able to last longer. Max it.
Level 1 – Spell that increase the STR, REC, and WIS of party members within 100 meters of the player by 8 points each for 10 minutes (level 12 – 4 pts)
Level 2 – Spell that increase the STR, REC, and WIS of party members within 100 meters of the player by 20 points each for 10 minutes (level 25 – 5 pts)
Level 3 – Spell that increase the STR, REC, and WIS of party members within 100 meters of the player by 40 points each for 10 minutes (level 40 – 6 pts)

Evolution
Interesting skill, though not completely necessary. It does have its merits in allowing players to slip past mobs or guards in PvP. Max if wanted.
Level 1 – (Fox) Spell that Evo levels a selected friendly force into a monster. Evo leveled target will have that monster’s ability for 1 minute (level 15 – 3 pts)
Level 2 – (Wolf) Spell that Evo levels a selected friendly force into a monster. Evo leveled target will have that monster’s ability for 1 minute (level 35 – 4 pts)
Level 3 – (Golem) Spell that Evo levels a selected friendly force into a monster. Evo leveled target will have that monster’s ability for 1 minute (level 55 – 5 pts)

Hypnosis
Puts target to sleep, allowing you to flee, cast spells or prevent an oracle from healing their party in PvP. A good combination is to use Hypnosis, then use Surge Choir without fear of being attacked. Max if Battle, skip if Healer.
Level 1 – Skill that puts an opponent to sleep for 8 seconds with an 80% success rate, but will awaken if attacked (level 16 – 4 pts)
Level 2 – Skill that puts an opponent to sleep for 15 seconds with an 80% success rate, but will awaken if attacked (level 32 – 5 pts)
Level 3 – Skill that puts an opponent to sleep for 30 seconds with an 80% success rate, but will awaken if attacked (level 50 – 6 pts)

Potential Motive
This will save your LIFE. If your HP dips below a certain %, all spell cool downs will be wiped for 30 seconds, allowing you to spam Instant heal for example. Max it.
Level 1 – Passive ability that clears the recharge time of magic that takes less than 500 seconds when HP falls below 10 % (level 17 – 1 pts)
Level 2 – Passive ability that clears the recharge time of magic that takes less than 500 seconds when HP falls below 17 % (level 29 – 2 pts)
Level 3 – Passive ability that clears the recharge time of magic that takes less than 500 seconds when HP falls below 25 % (level 50 – 3 pts)

Diversion
Converts all your SP into MP. Gives you MP, but no SP to buff. Max if wanted, though I suggest level 2 tops.
Level 1 – Skill that diverts all the player’s SP to refill 715 MP (level 18 – 3 pts)
Level 2 – Skill that diverts all the player’s SP to refill 1619 MP (level 37 – 4 pts)
Level 3 – Skill that diverts all the player’s SP to refill 2582 MP (level 57 –5 pts)

Health Assistant
This will also save your LIFE. It will eat away at you MP/SP before eating away at your HP. Max to level 2, so you can still use your SP to buff.
Level 1 – Ability that will consume SP first and then HP for damage the player receives for 1 minute (level 18 –4 pts)
Level 2 – Ability that will consume MP first then HP for damage the player receives for 1 minute (level 29 – 5 pts)
Level 3 – Ability that will consume MP first, followed by SP, and then HP for damage the player receives for 1 minute (level 47 – 6 pts)

Degeneration
Turns opposing force into an animal, allowing for an easier target to damage. Only works on Furies making it a strict PvP skill. Max if wanted.
Level 1 – Magic spell that degenerates the target by changing it into a certain animal with an 80% success rate. It lasts 5 seconds and doesn’t affect monsters (level 20 – 2 pts)
Level 2 – Magic spell that degenerates the target by changing it into a certain animal with an X% success rate. It lasts 12 seconds and doesn’t affect monsters (level 33 – 3 pts)
Level 3 – Magic spell that degenerates the target by changing it into a certain animal with an X% success rate. It lasts 20 seconds and doesn’t affect monsters (level 46 – 4 pts)

Magic Mirror
This is like melee reflector for defenders, except it reflects magic damage instead of physical damage. Seeing as its magic damage, not physical, it reflects, you can probably safely skip this, as your wis adds magic resistance.
Level 1 – Skill that reflects all magic damage received for 8 seconds (level 22 – 7 pts)
Level 2 – Skill that reflects all magic damage received for 10 seconds (level 32 – 8 pts)
Level 3 – Skill that reflects all magic damage received for 15 seconds (level 43 – 9 pts)

Frozen Ice (non-targeted skill)
As a non-targeted skill, you can cast this while still keeping your fighter or defender targeted. Not really needed on Healer; more so on Battle. Max if Battle, skip if Healer.
Level 1 – Water magic that damages enemies within 10 meters of the player. It deals the player’s basic magic attack power plus 426 damage and the affect target will be frozen for 3 seconds (level 30 – 6 pts)
Level 2 – Water magic that damages enemies within 12 meters of the player. It deals the player’s basic magic attack power plus 700 damage and the affect target will be frozen for 3 seconds (level 42 – 7 pts)
Level 3 – Water magic that damages enemies within 14 meters of the player. It deals the player’s basic magic attack power plus 987 damage and the affect target will be frozen for 3 seconds (level 52 – 8 pts)

Recovery (HM+)
The most powerful healing spell in the game. Heals quite a large chuck of a target’s HP. Ep4 increased its cast time to 3 seconds (also no cooldown), so make sure you have enough time to cast it without your fighter/defender dying. Max it.
Level 1 – Powerful healing magic that regenerates the target’s HP with 1631 plus the player’s WIS (level 31 – 4 pts)
Level 2 – Powerful healing magic that regenerates the target’s HP with 2338 plus the player’s WIS (level 41 – 5 pts)
Level 3 – Powerful healing magic that regenerates the target’s HP with 3164 plus the player’s WIS (level 51 – 6 pts)
-UM Skills-

Self Heal
This spells allows you to spam healing with a low mp cost. Be wary though as it uses SP, which you will have little of as a priest. Use only when necessary. Max it.
Level 1 – Healing magic that immediately regenerates the player’s HP by 75 plus the player’s WIS (level 4 – 3 pts)
Level 2 – Healing magic that immediately regenerates the player’s HP by 230 plus the player’s WIS (level 21 – 5 pts)
Level 3 – Healing magic that immediately regenerates the player’s HP by 560 plus the player’s WIS (level 44 – 5 pts)

Etains Blessing (HM/UM now)
If you leveled all the way to 60 and DIDN’T get this skill, it was all for naught. Max it.
Level 1(HM) – Skill that increases attacking speed, critical hit rate, and max MP of all party members within 15 meters of the player by spending all of the player’s SP and MP (level 60 – x pts)
Level 2(UM) – Skill that increases attacking speed, critical hit rate, and max MP of all party members within 15 meters of the player by spending all of the player’s SP and MP (level 60 – 9 pts)
-Ep4 Skills-
Thanks to Kohana (Whitewatersfire) and Theaitetos for this information!!

Party Dispel (UM+)
Just like the title says, it dispels your party. It’ll be very useful when your entire party gets hit with a debuff. Max it.
Level 1 – Dispels party members (except you) congruent with Dispel level 1, within 15 meters (level 39 – 3 pts)
Level 2 – Dispels party members (except you) congruent with Dispel level 2, within 15 meters (level 49 – 4 pts)
Level 3 – Dispels party members (except you) congruent with Dispel level 3, within 15 meters (level 59 – 5 pts)
Party Heal (HM+)
Just like the title says, it heals your party. It’ll be very useful when your entire party gets hit with dmg. Max it.
Level 1 – Heals party members (except you) regenerates HP equivalent to the player’s WIS plus 491, within 15 meters (level 38 – 4 pts)
Level 2 – Heals party members (except you) regenerates HP equivalent to the player’s WIS plus 708, within 15 meters (level 48 – 5 pts)
Level 3 – Heals party members (except you) regenerates HP equivalent to the player’s WIS plus 967, within 15 meters (level 58 – 6 pts)

Town Portal
Ports you to the nearest town. /town still works, however it stays at 10 seconds while level 3 of this is only 8 seconds. It’s also free. Max it.
Level 1 – Transports you to the nearest town in 10 seconds. (Level 1 – 0 points)
Level 2 – Transports you to the nearest town in 9 seconds. (Level 20 – 0 points)
Level 3 – Transports you to the nearest town in 8 seconds. (Level 40 – 0 points)

Beserker
As a Healer, you probably won’t use this a lot. As a Battle, you’ll probably use this more. Max if wanted.
Level 1 – Sacrifices some SP and MP to increase chance to hit with physical, ranged, magic attack by 3 percent for 90 seconds (level 1 – 0 points)
Level 2 – Sacrifices some SP and MP to increase chance to hit with physical, ranged, magic attack by 5 percent for 120 seconds (level 20 – 0 points)
Level 3 – Sacrifices some SP and MP to increase chance to hit with physical, ranged, magic attack by x percent for 180 seconds (level 40 – 0 points)

Staff Mastery
Increases attacking speed when a staff is equipped. Max if using a staff.
Level 1 – Increases speed at which you can cast using a staff (Level 25 – 6 pts)

Surge(Surgy) Shock (UM)
Spammable and it slows the enemy down. The minute long cooldown is a bit of a flaw, but still good nonetheless. Max if wanted.
Level 1 – Instant Water spell that deals basic magic damage plus 414 to target and slows movement speed by 3 levels for 12 seconds (level 35 – 5 points)
Level 2 – Instant Water spell that deals basic magic damage plus 690 to target and slows movement speed by 3 levels for 12 seconds(level 55 – 4 points)
Mobs Colors
As you grind your way through the levels, the mobs you can attack will have different levels. These levels are shown through the color of their names.
-White: Many levels below your level. You will receive no exp for killing these.
-Light Blue: Several levels below you. You will receive little exp for killing these.
-Dark Blue: Reasonably easy to kill but you will receive semi-ok exp.
-Green: The mob is right about your level. These mobs are good to grind on for NM or easy HM.
-Yellow: These mobs are 2-3 levels above your level and you will receive good exp. These are the best mobs for HM/UM.
-Orange: 4-5 levels above you. These mobs are harder to kill, but you will receive better exp than yellow mobs.
-Red: These mobs are 5-6 levels above your level. With limited damaging spells, you will have difficult time killing these mobs, even more so if they are elemental. Great exp if you succeed.
-Purple: These mobs are practically impossible to kill, especially if they are elemental. If you succeed though, you will receive amazing exp.
-Gray: Don’t even bother with these mobs. They are so far above your level, they can practically kill you just with a look. Even if you do manage to kill them, there is an exp penalty and you will receive none.
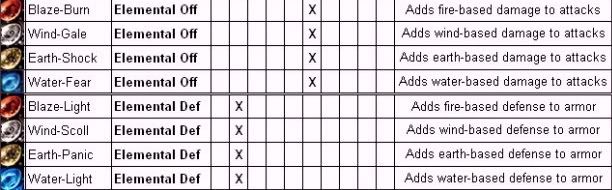
Elements
Just like in the real world, in the world of Shaiya, there are four elements. Each has its strength and weakness against the other elements. The strength/weakness line up is fire > wind > earth > water > fire.
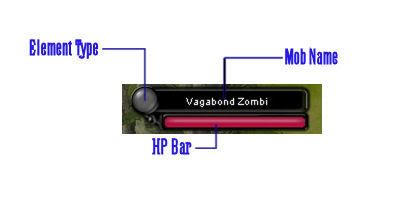
When you first click on a mob to attack, it’s name, HP and element will appear in you target bar. Like so:

-Non-Elemental
This has no element so attacks will all be the same no matter the element of your attack.

-Earth
This element is strong against water mobs (or water elemental armor) but weak against wind.

-Fire
This element is strong against wind mobs (or wind elemental armor) but weak against water.

-Water
This element is strong against fire mobs (or fire elemental armor) but weak against earth.

-Wind
This element is strong against earth mobs (or earth elemental armor) but weak against fire.
In addition to mobs being elemental, your armor can become elemental also through the use of elemental lapis. There is an offensive and defensive lapis for each element.
The Defensive elemental lapis can only be linked into a chest piece while the Offensive elemental lapis can only be linked into a weapon. All “eles” have 24% chance to link at full bless, but that is bumped up to 48% with a 2x Linking Hammer and 50% with the use of an Op Linking Hammer.
How to Grind
For a priest, while there are two ways to go, there is really only one way to grind for the Battle path and one way for the Healer path. The only time both paths have the same grinding strategy is in the lower levels when you are more inclined to solo.
-Healer: After your brief stint as a soloist, once you reach mid to late teens levels, you’ll be invited, and want to be invited, to parties. In these parties, although you may not be the party leader, you are the one holding everything together. Without you, the defender cannot tank, the mage cannot cast and the fighter, archer and ranger cannot attack, without gaining aggro and sustaining heavy damage. The higher the level, the more you have to focus on healing. A dead defender/fighter is not a happy one and if the party is unhappy, you may be booted and left to solo once more.
When you first get into a party, immediately buff everyone. By your mid-teen levels, you have AoP and Prayer, two important buffs that will keep your party mates alive longer.
*IMPORTANT – Be sure to keep your party up to date on their buffs! A dying/dead AoP at the wrong time can suck a chuck of HP away and give the mobs or Furies the opportunity to kill your party mates and yourself.
As a Healer, you will have the opportunity to be in 3 different party sets. There is the AOE party, the Duo party, or the Random party
~AOE – stands for Area of Effect and consists of the priest, defender and mage classes. This party, depending on the mobs they are after, can be as small as one priest, one defender and one mage, or as big as one priest, one defender and five mages (though I doubt this one would get good exp). Your job in this party if to keep the defender alive through healing and dispelling. That is your ONLY job! If the defender dies, the mobs will turn their attention to either the mage or you and with nobody to protect you, your squishy little butt is toast. If the mage(s) insists on attacking before the defender taunts, (this may sound mean) let them die. It is easier to resurrect one or two disobedient mages, then for the entire party to die. That is not to say let your mage(s) die if something should happen. If a random mob has spawn and starts attacking or he/she was caught in an AOE debuff, DO heal them. Without a mage, the mobs will not die and your party will gain no exp. If you focus 90% on the defender with one eye and the other 10% and other eye on your damage dealers, the AOE party should run smoothly.
~Duo – This party consists of you, the priest, and one other player of the attacking class, such as a fighter, mage, ranger or archer. In this party, the other member attacks the mobs, as if he/she were soloing, except you are in the background healing and dispelling to keep them alive. With only one person to watch, you can easily focus your extensive healing arsenal and dispel, allowing for fast leveling.
~Random – This party usually consists of a random mix of members, such as two mages, a fighter, a ranger and you. Just like in the other parties, you’ll want to focus most of your attention on the main damage dealer as he will be the one collect all the mobs and taking most of the damage. Just don’t forget to keep one eye on the other members, keeping them dispelled and healed. This sort of party, while a good mix of classes, is probably the slowest leveling of the three.
*Also, regardless of the party set, many mobs have AOE debuffs which WILL catch you if you are too close. Not only do these debuffs interrupt your casting, they may also drain your HP or MP. Most of your healing spells have a range of 30m (which is the farthest any spell in game can be cast from) and Dispel has a range of 24 meters, so there should be no reason to be right up close and personal with the mobs. A good rule to follow is to stand in the doorway of a room (if you are in a dungeon) and inch up, if need be, until you can safely heal them while staying safe yourself.
One more valuable skill to have is Evolution. With this skill, you can transform yourself or a party member into a fox, wolf or golem (depending on level of spell). Once transformed, you can easily slip through mobs to rejoin your party deep in a dungeon, or sneak through to lower levels then summon the party, skipping though mobs attacks and annoying debuffs. This skill can be cast on yourself, a party member or a random player. *CAUTION – Do NOT randomly fox anyone, or fox a player out of anger or to punish. Foxing a player for the second reason can result not only in their death (and the potential cost of a rune if they are UM) but also a ban for you. A good rule to follow is to never fox anyone unless THEY ask.
-Battle: (Int or Int/x based)
Unlike a Healer, as a Battle, you have to ability to party with other players or solo your way through the levels. Depending on the party you are in, you will either assume the role of a mage or dual role as a mage and priest.
Just like a Healer, when you join a party, you need to buff, excepting in the occasion of an AOE party, where the healing priest will do so. Keep an eye on the buffs though as the healing priest may become too busy to buff.
As a Battle, you will have the opportunity to be in 2 different party sets. There is the AOE party and the Duo party.
~AOE Party – Most AOE parties are the same, consisting of a priest, a mage and a defender. In this instance, you will be taking the place of the mage. As a battle priest, you can also heal the priest if they are getting attacked which makes it easier if the defender is stuck or not paying attention. Also if the priest is forced to non-stop heal, you can dispel the defender in between spell casting.
~Duo Party – This is best done with a defender, though it will be hard as you are forced to take on dual roles as a priest and a mage. It will most likely have you going: heal, cast, heal, dispel, cast, heal, cast etc. Though it is hard, it is fast leveling as there are only two in your party and it is an AOE party. This type of party is really only feasible at level 21+ as this is when you get Blizzard which has no cool down time and thus makes it spammable.
Remember to be wary of AOE debuffs as they do seriously affect your casting. Since your AOE spells are either at 24 or 30 meters, you should have no problem standing next to the priest, simultaneous killing effectively and keeping a watch on the Healer.
PVP
As a priest, just like with grinding, in PvP, you have the unique ability to either be a healing or a “Water mage” as I like to refer to them as. The three PvP zones are both similar and different. The three zones are:
~Delphinian Fortress (1-15)
~Cantabilian (Blessian) Fortress (20-30)
~D-Water Borderland (Karis) (1-60)
-Healer:
You first begin your PvP experience in the 1-15 zone, like most everyone else. As a Healer, you are important in general to any PvP party set. The HP most players have, regardless of their class, isn’t as proportional in this zone as it is in the other PvP zones. In this zone, the lines are drawn very clearly, making it easy to stay in the back and heal without fear of being attacked. Here, your evolution skill is one of the best to have, as it allows other players slip by the guards to attack the opposing force. This not only increases their defense, but also their attack power is boosted. Many fighters will constantly call out for priests to fox them, so having this skill here is very beneficial. Most players in this zone will be right at level 15. Their armor is usually well-lapised and some players are frequently nossed. It may be a bit hard to get a party when you are first starting, but once you do, be sure to stay close to your party members. A widespread party will gain no kills, especially if you are not there to heal.
In the second zone, as a Healer, you are just as important as in the 1-15 zone as players won’t be able to survive long without getting healed. In this zone, however, you will also want to have a bit of REC in their build. With REC, you will be able to withstand more hit and survive longer than those who have full WIS. Evolution in this zone is also important as well as your level 2 AoP and Prayer buffs. Players are not often as buffed as in 1-15, but their armor is extremely well lapised, which boosts their attack and defense greatly.
In the final zone, 1-60, as a Healer, WIS takes a backseat to REC, as many of the opposing faction are extremely high leveled and well lapised. WIS may add to your defense, but since most players will die too fast for you to keep them all healer sufficiently, the HP REC adds to your stats will keep you alive longer. The higher your HP, the higher chance you have to flee to a safe place before returning to resurrect your fallen party members.
-Battle:
You first begin your PvP experience in the 1-15 zone, like most everyone else. As a Battle, you actually have the advantage of having Magic Spot, as your main damage spell, in your arsenal. Magic Spot is the single most powerful spell to have in this game, as it has no cool down and no cast time. The addition of the automatic +1wis you gain per level makes it difficult for your spells to miss and also adds to your defense. A good idea would be to lapis your armor and weapon with INT and REC. Lapising it this way will make it hard for the opposing faction to kill you and also allows you to damage them more effectively than they can damage you.
In the second zone, as a Battle, you still have the advantage of having Magic Spot in your arsenal. Only now, your spells have grown to include Blizzard, an AOE spell that has no cool down. Your WIS level has continued to grow with the +1 WIS per level and now with your 2 or 3 slot armor, you can lapis more INT, to make your spells more powerful, and more REC, which will boost your HP greatly.
In the final zone, 1-60, as a Battle, you are very powerful here. By this time, your REC lapis count has almost doubled, depending on your armor and lapising techniques, so you have quite a bit of HP for the opposing faction to eat through before they can kill you. In addition, your spells are more powerful than the mages spells, one of them being Elemental Shock, which is your most powerful AOE spell. As a Battle, although your heals are not great, you can still heal for about half the amount a full WIS priest can heal for. You can also buff with AoP and Prayer the same as these buffs are not affected by the amount of WIS you possess. In addition, Battles are particularly effective against the fire mobs in the new maps as their spells are mostly Water based. Many parties will leave these mobs alone as mages do not have the necessary water skills to kill them efficiently.
Armor
Finally, we get to the pretty clothing! As of yet, I have collected a screenshot of every armor except the Loxe Helm, Anor Helm, Fiddess and any Goddess armor. If anyone can provide me with screenshots of these armors, I would be very appreciatory. Any help this guide receives will also help any new priest that needs information :]
*With the introduction of Ep4, armor has been given new (orange) stats, that can be edited to better suit its owner. These orange stats can be added for free to Ep3 armor ONLY one time; If you want to edit these orange stats, you must use a recreation rune. Note! – No orange stats can be added to items that were bought or received from quests
First off, there are 7 levels of armor that can be worn. Note, some modes can only wear up to a certain level of armor. The 7 levels are as follows:
~Regular: This armor has 0 slots for lapis and can be attained from merchants in various cities across the maps. These also drop from mobs and I would suggest hanging onto them, at least until you can get the slotted armor to replace them. For selling, NPC them as most players will not buy unslotted armor.
~Noble: This armor has 1 slot for lapis and can be attained from either quests or mob drops in Cornwell Dungeon. Aside from AP promo items, this armor is the best you can get for 1-15 PvP.
~Worship: This armor has 2 slots for lapis and can be attained (rarely) from Graveyard Loca or Asmo* (both in Cornwell Dungeon) or in Fedion Dungeon.
~Heroic: This armor has 3 slots for lapis and can be attained (rarely) from Graveyard Loca (in Cornwell Dungeon), Fedion Dungeon or Maitreyan Dungeon. If possible to attain, this armor is the best for 20-30 PvP.
~Dread: This armor has 4 slots for lapis and can be attained from the Dread Quests, Ajuha (Fedion Dungeon) and mini-bosses in Maitreyan Dunegon. This is the highest set of armor a NM can wear.
~Legend: This armor has 5 slots for lapis and can be attained from Ankylul* (Maitreyan) or in Stable Erde/Deep Desert maps. This is the armor that most HM/UM players will use as Goddess is extremely rare. This armor is colored differently than Dread and is easily recognized. This is the highest set of armor a HM can wear.
~Goddess: This armor has 6 slots for lapis and can be attained from Freezing Mirage, Cloron Dragon (Cloron’s Lair) or Cryptic Throne Bosses. It appears drastically different than any other armor, colored different and appearing to be the set of armor right below it. (Goddess Anor appears to be Goddess Sephiroth). This is the highest set of armor a UM can wear.
*Note, these are quest bosses and farming them can result in a ban. If you are going to try to kill him, make sure you have the quest or your party members have the quest
-Under Armor


-Cotton Armor


Cotton Gauntlets
Level 2
Regular: Bought from merchant in Beika or Aelbeageu.
Noble: Obtained from Map 1 quest.
Cotton Boots
Level 3
Regular: Bought from merchant in Beika or Aelbeageu.
Noble: Obtained from “Batan’s Armor” quest.
Cotton Pants
Level 4
Regular: Bought from merchant in Beika or Aelbeageu.
Noble: Obtained from “Kei’s Armor” quest.
Cotton Armor
Level 5
Regular: Bought from merchant in Beika or Aelbeageu.
Noble: Obtained from Map 1 quest.
-Dendron Armor


Dendron Gauntlets
Level 8
Regular: Bought from merchant in Keolloseu.
Noble: Obtained from Map 1 quest.
Dendron Boots
Level 9
Regular: Bought from merchant in Keolloseu.
Noble: Obtained from a Zombie quest, received west of Keolloseu, at the Tower, will give these as a reward.
Dendron Pants
Level 10
Regular: Bought from merchant in Keolloseu.
Noble: Obtained from Map 1 quest in the Hunter’s Camp, south of Aelbegeau
Dendron Armor
Level 11
Regular: Bought from merchant in Keolloseu.
Noble: Obtained from “Robbed Woodpile” quest, received northwest of Keolloseu, at Arbor Farm. Obtain 15 woodpiles instead of the 5 required in order to receive this armor.
-Quine Armor


Quine Gauntlets
Level 15
Regular: Bought from merchant in Keolloseu.
Noble: Obtained from Vagabond Big Brown Bears quest.
Quine Boots
Level 16
Regular: Bought from merchant in Keolloseu.
Noble: Obtained from Map 1 quest.
Quine Pants
Level 17
Regular: Bought from merchant in Keolloseu.
Noble: Obtained from Map 1 quest.
Quine Armor
Level 18
Regular: Bought from merchant in Keolloseu.
Noble: Obtained from Map 1 quest.
-Tathar Armor


Tathar Gauntlets
Level 22
Regular: Bought from merchant in Keolloseu or Arktuis Vill.
Worship: Rarely drops from Graveyard Loca, a mini-boss outside Asmo’s room in Cornwell Ruin, and also from Asmo.
Heroic: Rarely drops from Graveyard Loca, a mini-boss outside Asmo’s room in Cornwell Ruin, and also from Asmo.
Tathar Boots
Level 23
Regular: Bought from merchant in Keolloseu or Arktuis Vill.
Worship: Rarely drops from Graveyard Loca, a mini-boss outside Asmo’s room in Cornwell Ruin, and also from Asmo.
Heroic: Rarely drops from Graveyard Loca, a mini-boss outside Asmo’s room in Cornwell Ruin, and also from Asmo.
Tathar Pants
Level 24
Regular: Bought from merchant in Keolloseu or Arktuis Vill.
Worship: Rarely drops from Graveyard Loca, a mini-boss outside Asmo’s room in Cornwell Ruin, and also from Asmo.
Heroic: Rarely drops from Graveyard Loca, a mini-boss outside Asmo’s room in Cornwell Ruin, and also from Asmo.
Tathar Armor
Level 25
Regular: Bought from merchant in Keolloseu or Arktuis Vill.
Worship: Rarely drops from Graveyard Loca, a mini-boss outside Asmo’s room in Cornwell Ruin, and also from Asmo.
Heroic: Rarely drops from Graveyard Loca, a mini-boss outside Asmo’s room in Cornwell Ruin, and also from Asmo.
-Loxe Armor
Loxe Gauntlets
Level 29
Regular: Bought from merchant in Arktuis Vill, Silvaren, and Apulune.
Worship: Obtained from mobs in Fedion Dungeon.
Heroic: Unknown at the moment.
Dread: HM/UM quest only. Kill the mob priest “Julia Dillun” until she drops “Poemas Mandolin”. She can be found on the island in the lake to the south east of Arktuis Vill. Once you receive the drop, it should take you back to Haldeck where the NPC Poema will continue your quest. If too low for the quest, keep the mandolin and level up a few more levels before clicking on it again.
Loxe Boots
Level 30
Regular: Bought from merchant in Silvaren and Apulune.
Worship: Obtained from mobs in Fedion Dungeon.
Heroic: Unknown at the moment.
Dread: HM/UM quest only. Kill the mobs “Sealakel Fighter” until they drop the “Monkey Skull”. They are just south of Arktuis Vill. Once you receive the drop, click on it and the quest will start automatically. If too low for the quest, keep the trunk and level up a few more levels before clicking on it again.
Loxe Pants
Level 31
Regular: Bought from merchant in Silvaren and Apulune.
Worship: Obtained from mobs in Fedion Dungeon.
Heroic: Unknown at the moment.
Dread: HM/UM quest only. Kill the “Orc Robber” until they drop the “Empty Trunk”. They can be just east of Arktuis Vill, on the path. Once you receive the drop, click on it and the quest will start automatically. If too low for the quest, keep the trunk and level up a few more levels before clicking on it again.
Loxe Armor
Level 32
Regular: Bought from merchant in Silvaren and Apulune.
Worship: Obtained from mobs in Fedion Dungeon.
Heroic: Unknown at the moment.
Dread: HM/UM quest only. Kill the sealekel Priest Dempnum until it drops the “Lens Bow”. He is among the Sealekel Fighters just south of Arktuis Vill. Once you receive the drop, it should take you to the NPC Lens will continue your quest. If too low for the quest, keep the trunk and level up a few more levels before clicking on it again.
Loxe Helm
Level 30
Regular: Obtained from the level 29 quest in Arktuis Vill. Collect 30 spirit cores for the helm. Spirit cores can be found from the Sealakels just south of the town or the Goblin camp to the southeast.
Dread: This item can only be obtained from AP events and is particularly wanted for 20-30 PvP.
-Wilarin Armor


Wilarin Gauntlets
Level 36
Regular: Bought from merchant in Apulune and Karis Castle.
Heroic: Obtained from mobs in Fedion Dungeon.
Dread: This armor drops from Ajuha, a mini-boss in the bottom of Fedion Dungeon
Wilarin Boots
Level 37
Regular: Bought from merchant in Apulune and Karis Castle.
Heroic: Obtained from mobs in Fedion Dungeon.
Dread: This armor drops from Ajuha, a mini-boss in the bottom of Fedion Dungeon
Wilarin Pants
Level 38
Regular: Bought from merchant in Apulune and Karis Castle.
Heroic: Obtained from mobs in Fedion Dungeon.
Dread: This armor drops from Ajuha, a mini-boss in the bottom of Fedion Dungeon
Wilarin Armor
Level 39
Regular: Bought from merchant in Apulune and Karis Castle.
Heroic: Obtained from mobs in Fedion Dungeon.
Dread: This armor drops from Ajuha, a mini-boss in the bottom of Fedion Dungeon.
Wilarin Helmet
Level 37
Regular: Obtained from the level 36 quest in Silvaren. Collect 30 nightmare cores for it. These cores drop from most Map 3 mobs.
-Fiddess Armor
Fiddess Gauntlets
Level – x
Regular: Does not exist.
Fiddess Boots
Level – x
Regular: Does not exist.
Fiddess Pants
Level 40
Regular: This armor is two-slotted but does not carry the Worship name. It appears the same as Wilarin armor except in darker shades of blue. This drops from the mini-bosses in Maitreyan Dungeon and in Cloron’s Lair. It also drops from Ankylul*
*This boss is a quest boss, so farming him will result in a ban. Make sure to have at least one player in your party who needs the quest.
Fiddess Armor
Level 40
Regular: This armor is two-slotted but does not carry the Worship name. It appears the same as Wilarin armor except in darker shades of blue. This drops from the mini-bosses in Maitreyan Dungeon and in Cloron’s Lair. It also drops from Ankylul*
*This boss is a quest boss, so farming him will result in a ban. Make sure to have at least one player in your party who needs the quest.
-Sephiroth Armor


Sephiroth Gauntlets
Level 43
Regular: Bought from merchant in Apulune and Karis Castle.
Heroic: Obtained from mobs in Maitreyan Dungeon and Cloron’s Lair (level 1)
Dread: Obtained from the mini-bosses in Maitreyan Dungeon.
Legend: Unknown at the moment.
Goddess: Unknown at the moment.
Sephiroth Boots
Level 44
Regular: Bought from merchant in Apulune and Karis Castle.
Heroic: Obtained from mobs in Maitreyan Dungeon and Cloron’s Lair (level 1)
Dread: Obtained from the mini-bosses in Maitreyan Dungeon.
Legend: Unknown at the moment.
Goddess: Unknown at the moment.
Sephiroth Pants
Level 45
Regular: Bought from merchant in Apulune.
Heroic: Obtained from mobs in Maitreyan Dungeon and Cloron’s Lair (level 1)
Dread: Obtained from the mini-bosses in Maitreyan Dungeon.
Legend: Obtained from the boss of Maitreyan, Ankylul. This boss is a quest boss, so farming him will result in a ban. Make sure to have at least one player in your party who needs the quest.
Goddess: Obtained from the dragon form of Freezing Mirage. He is located in a big lagoon, south of Arktuis Vill and just west of the lighthouse. He is extremely difficult to kill so I suggest making a full party of level 60’s before attempting to kill him.
Sephiroth Armor
Level 46
Regular: Bought from merchant in Apulune.
Heroic: Obtained from mobs in Maitreyan Dungeon and Cloron’s Lair (level 1)
Dread: Obtained from the mini-bosses in Maitreyan Dungeon.
Legend: Obtained from the boss of Maitreyan, Ankylul. This boss is a quest boss, so farming him will result in a ban. Make sure to have at least one player in your party who needs the quest.
Goddess: Obtained from the dragon form of Freezing Mirage. He is located in a big lagoon, south of Arktuis Vill and just west of the lighthouse. He is extremely difficult to kill so I suggest making a full party of level 60’s before attempting to kill him.
Sephiroth Helm
Level 44
Regular: Obtained from the level 43 quest in the Huigronn Stronghold on Map 3. Collect 30 pint cores for it. They drop from most Map 3 mobs.
5-Slot: While it has 5 slots, this is NOT a legend helm. It can be worn by NM players and offers no MP/SP/HP or defense stats. It is only available from AP promos.
-Legend Sephiroth Armor


Sephiroth Gauntlets
Level 43
Legend: Unknown at the moment.
Sephiroth Boots
Level 44
Legend: Unknown at the moment.
Sephiroth Pants
Level 45
Legend: Obtained from the boss of Maitreyan, Ankylul. This boss is a quest boss, so farming him will result in a ban. Make sure to have at least one player in your party who needs the quest.
Sephiroth Armor
Level 46
Legend: Obtained from the boss of Maitreyan, Ankylul. This boss is a quest boss, so farming him will result in a ban. Make sure to have at least one player in your party who needs the quest.
-Goddess Sephiroth Armor
 (Thanks to Iskeirka for the Top/Pants SS!)
Sephiroth Gauntlets
Level 43
Goddess: Unknown at the moment.
Sephiroth Boots
Level 44
Goddess: Unknown at the moment.
Sephiroth Pants
Level 45
Goddess: Obtained from the dragon form of Freezing Mirage. He is located in a big lagoon, south of Arktuis Vill and just west of the lighthouse. He is extremely difficult to kill so I suggest making a full party of level 60’s before attempting to kill him.
Sephiroth Armor
Level 46
Goddess: Obtained from the dragon form of Freezing Mirage. He is located in a big lagoon, south of Arktuis Vill and just west of the lighthouse. He is extremely difficult to kill so I suggest making a full party of level 60’s before attempting to kill him.
-Anor Armor


Anor Gauntlets
Level 50
Regular: Obtained from mobs in Aquilus Tor.
Heroic: Obtained from mobs in Elemental Cave, Cloron’s Lair and Cave of Stigma.
Dread: Obtained from mobs in Cave of Stigma.
Legend: Obtained from the boss of Maitreyan, Ankylul. This boss is a quest boss, so farming him will result in a ban. Make sure to have at least one player in your party who needs the quest.
Goddess: Obtained from the Cryptic Throne bosses. The Cryptic Throne in the same lagoon as Freezing Mirage and only opens after FM has been killed.
Anor Boots
Level 51
Regular: Obtained from mobs in Aquilus Tor.
Heroic: Obtained from mobs in Elemental Cave, Cloron’s Lair and Cave of Stigma.
Dread: Obtained from mobs in Cave of Stigma.
Legend: Obtained from the boss of Maitreyan, Ankylul. This boss is a quest boss, so farming him will result in a ban. Make sure to have at least one player in your party who needs the quest.
Goddess: Obtained from the Cryptic Throne bosses. The Cryptic Throne in the same lagoon as Freezing Mirage and only opens after FM has been killed.
Anor Pants
Level 52
Regular: Obtained from mobs in Aquilus Tor.
Heroic: Obtained from mobs in Elemental Cave, Cloron’s Lair and Cave of Stigma.
Dread: Obtained from mobs in Cave of Stigma.
Legend: Obtained from the Cloron Troll (mini boss) or the chests that drop after the Cloron Dragon or the Freezing Mirage Dragon is killed.
Goddess: Obtained from the Cryptic Throne bosses. The Cryptic Throne in the same lagoon as Freezing Mirage and only opens after FM has been killed.
Anor Armor
Level 53
Regular: Obtained from mobs in Aquilus Tor.
Heroic: Obtained from mobs in Elemental Cave, Cloron’s Lair and Cave of Stigma.
Dread: Obtained from mobs in Cave of Stigma.
Legend: Obtained from the Cloron Troll (mini boss) or the chests that drop after the Cloron Dragon or the Freezing Mirage Dragon is killed.
Goddess: Obtained from the Cryptic Throne bosses. The Cryptic Throne in the same lagoon as Freezing Mirage and only opens after FM has been killed.
Anor Helm
Level 50
Regular: Obtained from the level 50 quest in Apulune near the docks to the east. Collect 3 level 3 endure lapis and 15 Dark Mage Stones for it. The level 3 endure lapis can be found from 1-60 PvP mobs or in the Dungeons (D1 or D2). The Black Mage Stones can be found in Karis and also dropped from the Beholders in Aquilus Tor.
-Legend Anor Armor


Anor Gauntlets
Level 50
Legend: Obtained from the boss of Maitreyan, Ankylul. This boss is a quest boss, so farming him will result in a ban. Make sure to have at least one player in your party who needs the quest.
Anor Boots
Level 51
Legend: Obtained from the boss of Maitreyan, Ankylul. This boss is a quest boss, so farming him will result in a ban. Make sure to have at least one player in your party who needs the quest.
Anor Pants
Level 52
Legend: Obtained from the Cloron Troll (mini boss) or the chests that drop after the Cloron Dragon or the Freezing Mirage Dragon is killed.
Anor Armor
Level 53
Legend: Obtained from the Cloron Troll (mini boss) or the chests that drop after the Cloron Dragon or the Freezing Mirage Dragon is killed.
-Goddess Anor Armor

Anor Gauntlets
Level 50
Goddess: Obtained from the Cryptic Throne bosses. The Cryptic Throne in the same lagoon as Freezing Mirage and only opens after FM has been killed.
Anor Boots
Level 51
Goddess: Obtained from the Cryptic Throne bosses. The Cryptic Throne in the same lagoon as Freezing Mirage and only opens after FM has been killed.
Anor Pants
Level 52
Goddess: Obtained from the Cryptic Throne bosses. The Cryptic Throne in the same lagoon as Freezing Mirage and only opens after FM has been killed.
Anor Armor
Level 53
Goddess: Obtained from the Cryptic Throne bosses. The Cryptic Throne in the same lagoon as Freezing Mirage and only opens after FM has been killed.
-Ophiston Armor

*Ophiston looks exactly the same at the noble, dread and legend levels. There is no distinctive color differences (For more information, see this thread)
Ophiston Gauntlets
Level 55
Regular: Unknown at the moment.
Noble: Obtained from the Scorpion Mobs in Deep Desert.
Dread: Obtained from the Scorpion Mobs in Deep Desert.
Legend: Obtained from the Scorpion Mobs in Deep Desert.
Ophiston Boots
Level 56
Regular: Unknown at the moment.
Noble: Obtained from the Troll mobs in Stable Erde.
Dread: Obtained from the Troll mobs in Stable Erde.
Legend: Obtained from the Troll mobs in Stable Erde.
Ophiston Pants
Level 57
Regular: Unknown at the moment.
Noble: Obtained from the Scorpion Bosses in Deep Desert.
Dread: Obtained from the Scorpion Bosses in Deep Desert. The Scorpion bosses are significantly harder then the Troll bosses needed for the top, which means Legend and Dread Ophiston pants are expensive and rare.
Legend: Obtained from the Scorpion Bosses in Deep Desert. The Scorpion bosses are significantly harder then the Troll bosses needed for the top, which means Legend and Dread Ophiston pants are expensive and rare.
Ophiston Armor
Level 58
Regular: Unknown at the moment.
Noble: Obtained from the Troll bosses in Stable Erde.
Dread: Obtained from the Troll bosses in Stable Erde.
Legend: Obtained from the Troll bosses in Stable Erde.
Weapons
Here begins the section of weapons. As a priest, you can either equip a staff or a dagger. A staff is more powerful, but has more of a pause between castings. A dagger is a bit less powerful, but the time between each cast is shortened. This allows you to cast more healing/damaging spells in the same time that it takes a staff to cast the same spells.
*With the introduction of Ep4, weapons have been given new (orange) stats, that can be edited to better suit its owner. These orange stats can be added for free to Ep3 weapons ONLY one time; If you want to edit these orange stats, you must use a recreation rune. Note! – No orange stats can be added to epics nor items that were bought or received from quests
Just like with Armor, there are 7 levels of weapons that can be found in the maps.
~Regular: These weapons have 0 slots for lapis, add 0 stats, and can be attained from merchants in various cities across the maps. These also drop from mobs and I would suggest hanging onto them, at least until you can get the slotted armor to replace them. For selling, NPC them as most players will not buy unslotted weapons.
~Noble: These weapons have 1 slot for lapis, add 6 stats, and can be attained from either quests or mob drops in Cornwell Dungeon. These weapons are the best you can get for 1-15 PvP.
~Worship:These weapons have 2 slots for lapis, add 12 stats, and can be attained (rarely) from Graveyard Loca or Asmo* (both in Cornwell Dungeon) or in Fedion Dungeon.
~Heroic: These weapons have 3 slots for lapis, add 18 stats, and can be attained (rarely) from Graveyard Loca (in Cornwell Dungeon), Fedion Dungeon or Maitreyan Dungeon.
~Dread: These weapons have 4 slots for lapis, add 24 stats, and can be attained from the Dread Quests, Ajuha (Fedion Dungeon) and mini-bosses in Maitreyan Dunegon. This is the highest level of weapons a NM can wield.
~Legend: These weapons have 5 slots for lapis, add 30 stats, and can be attained from Ankylul* (Maitreyan). This is the armor that most HM/UM players will use as Goddess is extremely rare. These weapons glow blue, indicating their level to other players. These are the highest weapons a HM can wield.
~Goddess: These weapons have 6 slots for lapis, add 36 stats, and can be attained from Freezing Mirage or Cryptic Throne Bosses. These weapons glow red, indicating their level to other players. These are the highest weapons a UM can wield.
*Note, these are quest bosses and farming them can result in a ban. If you are going to try to kill him, make sure you have the quest or your party members have the quest
*Also a few SS and some information came from KataraOfWater. Thanks! (SS/Info from Katara are marked by a single asterisk) (Also some recent reminders about staffs!)
**Just want to point out that about half of the screenshots of these weapons came from Aes’s Mage guide, as did a lot of the information. Thanks a bunch Aes! (SS/Info from Aes is marked with a double asterisk)
Staffs
Light Staff
Level 1
Regular: Can be purchased in Aelbeageu or drops from mobs (also comes equipped when you first begin).
Noble: Obtained from mob drops in the northern part of Map 1.

Holy Staff
Level 6
Regular: Can be purchased in Aelbeageu or drops from mobs.
Noble: I believe you receive this from a quest.
Cross Staff
Level 11
Regular: Can be purchased in Keolloseu or drops from mobs.
Noble: I believe you receive this from a quest.
Absorption Staff
Level 16
Regular: Can be purchased in Keolloseu or drops from mobs.
Noble: Obtained from mob drops in Cornwell Ruin.
Sage Staff
Level 21
Regular: Can be purchased in Keolloseu or drops from mobs.
Noble: Obtained from mob drops in Cornwell Ruin.
Worship: Rarely drops from Graveyard Loca, a mini-boss outside Asmo’s room in Cornwell Ruin.
Heroic: Rarely drops from Graveyard Loca, a mini-boss outside Asmo’s room in Cornwell Ruin.

Blind Devotion
Level 25
Epic Weapon: Obtained from the Level 25 Epic Quest in Map 2. Glows orange. Has no slots but comes with +20 Wis and +10 Int.
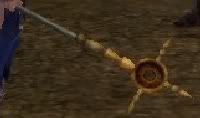
Sapphire Rose
Level 26
Regular: Can be purchased in Arktuis Vill.
Worship: Rarely drops from Graveyard Loca, a mini-boss outside Asmo’s room in Cornwell Ruin.
Heroic: Rarely from the Cornwell Ruin boss, Asmo.*
* This is a quest boss and farming him will result in a ban. Make sure you or one of your party members have this quest.
Eagle Saint
Level 31
Regular: Drops from mobs in Map 2.
Worship: Drops from Mobs in beginning of Fedion Dungeon.
Heroic: Drops from mobs in back of Fedion dungeon. **
Dread: Drops from the boss of Fedion, Ajuha. **
Success Edge
Level 36
Regular: Can be purchased in Silveran.
Worship: Unknown at the moment.
Heroic: Drops from Mobs in Fedion Dungeon.
Dread: Unknown at the moment.
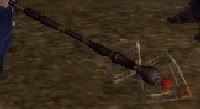
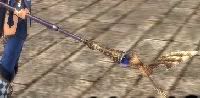
Rachroma Van
Level 40
Dual-Slotted: Does not carry the Worship name though. Appears the same as the Sapphire Rose, except it glows orange. Drops from the mini bosses in the top level of Maitreyan Dungeon.
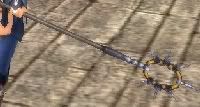
Stars Edge
Level 40
4-Slotted: Does not carry the Dread name though. This drops in from mobs in Pandorashys(Skulleron). Looks like a blue Success Edge.
Rising Phoenix
Level 41
Regular: Unknown at the moment.
Heroic: Drops from mobs in Cloron’s Lair and Maitreyan Dungeon.
Dread: Unknown at the moment.
Holy Elven Aqua Staff
Level 45
Epic Weapon: Obtained from the Level 43 Epic Quest in Map 2. Glows blue. Has no slots, but comes with +42 Wis and the element of Water.
**After you kill Ankylul and turn in the quest, you have the option of changing the element of this staff, though only once.
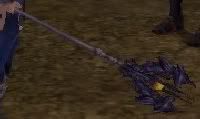
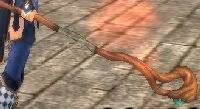
Kysyo Phoenix
Level 45
4-Slotted: Does not carry the Dread name though. This drops in from mobs in Pandorashys(Skulleron). Looks like a blue Lost Brahma.
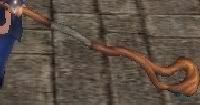
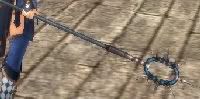
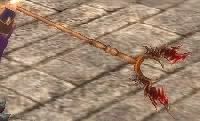
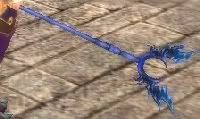
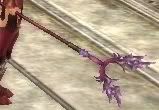
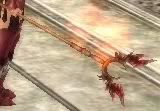
Lost Brahma (legend form shown)
Level 45
Regular: Unknown at the moment.
Heroic: Drops from mobs in Cloron’s Lair.
Dread: Drops from the mobs in the Cloron Troll room. **
Legend: Drops from Cloron Troll and Cloron dragon boxes. **
Goddess: Drops from Freezing Mirage dragon. **
* 
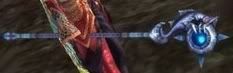
Tensyo
Level 50
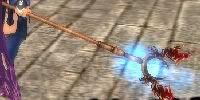
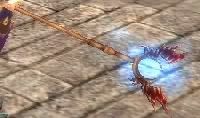
4-Slotted: Does not carry the Dread name though. Drops only from the Cloron Dragon. Looks like a purple Lost Brahma. **
Isomorph Staff of Earth
Level 50
4-Slotted: The reward for the 52 Epic Quest. Glows green, but does not carry any elemental aid. Quest Guide can be found here
* 
Red Out
Level 55
3-slotted: Does not carry the Heroic name though. Drops from the bosses of the Elemental Cave and the Cloron Troll. Looks like a Success Edge except it glows orange. *
* 
Sminion
Level 55
6-slotted: Does not carry the Goddess name though. Drops from the Cloron Troll. Looks like a Eagle Saint except it glows orange. **
* 
Brilliant Spirit (Smartan)
Level 55
6-slotted: Does not carry the Goddess name though. Drops from the Cloron Troll. Looks like a Lost Brahma except it glows orange. **
* 
Dragonic Staff
Level 56
5-Slotted: Does not carry the Legend name though. Drops from bosses in Cryptic Throne, which opens after the Freezing Mirage dragon form is killed. **
** 
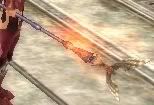
Tiamat (HM+)
Level 59
5-Slotted: Does not carry the Legend name though. Drops from bosses in Cryptic Throne, which opens after the Freezing Mirage dragon form is killed. **
Daggers

Short Sword
Level 1
Regular: Can be purchased in Aelbeageu or drops from mobs.
Noble: Obtained from mob drops in the northern part of Map 1.

Steel Short Sword
Level 5
Regular: Can be purchased in Aelbeageu or drops from mobs.
Noble: Obtained from mob drops in the northern part of Map 1.

Light Short Sword
Level 11
Regular: Can be purchased in Keolloseu or drops from mobs.
Noble: Obtained from Dwarf quest, received northwest of Keolloseu, at Antaraks Farm, will give these as a reward. (2-part quest)

Justice
Level 17
Regular: Can be purchased in Keolloseu or drops from mobs.
Noble: Obtained from mob drops in Cornwell Ruin.
Worship: Unknown at the moment. **
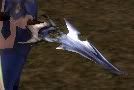
Ganesha
Level 23
Regular: Can be purchased in Keolloseu or drops from mobs.
Noble: Unknown at the moment.
Worship: Rarely drops from Graveyard Loca, a mini-boss outside Asmo’s room in Cornwell Ruin. Also you receive one from a quest.
Heroic: Rarely from the Cornwell Ruin boss, Asmo.*
* This is a quest boss and farming him will result in a ban. Make sure you or one of your party members have this quest.
** 
Absaras
Level 29
Regular: Unknown at the moment.
Worship: Drops from Mobs in beginning of Fedion Dungeon.
Heroic: Drops from mobs in back of Fedion dungeon. **
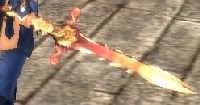
Queen Mab
Level 35
Regular: Can be purchased in Silvaren.
Heroic: Drops from Mobs in Fedion Dungeon.
Dread: Unknown at the moment.
** 
Gesowopu
Level 39
4-Slotted: Does not carry the Dread name though. This drops in from mobs in Pandorashys(Skulleron). Looks similar to a blue Queen Mab.
** 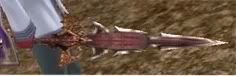 *
* 
Karma Samsara
Level 41
Regular:
Heroic: Drops from mobs in Cloron’s Lair
Dread: Unknown at the moment.
Legend: Unknown at the moment, but the only one known in existence belongs to KataraOfWater.
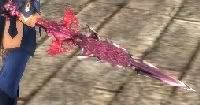
Façade Blade
Level 45
4-Slotted: Does not carry the Dread name though. This drops in from mobs in Pandorashys(Skulleron). Looks likes a pink Karma Samsara.
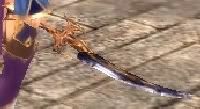
Red Blood
Level 46
Regular: Can be purchased in Stronghold and Karis
Heroic: Drops from mobs in Cloron’s Lair.
Dread: Drops from the mobs in the Cloron Troll room. **
Legend: Drops from Ankylul*, Cloron Troll and Cloron dragon boxes. **
Goddess: Drops from Freezing Mirage dragon. **
*This boss is a quest boss, so farming him will result in a ban. Make sure to have at least one player in your party who needs the quest.
** 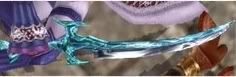
Ninez
Level 50
4-Slotted: Does not carry the Dread name though. Drops only from the Cloron Dragon. Looks like a blue Red Blood. **
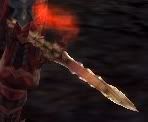
Gold Hope
Level 55
3-Slotted. Does not carry the Heroic name though. Drops from the bosses in the Elemental Cave. Looks like a Queen Mab except it glows orange. **
* 
Lucky Striker
Level 55
3-slotted: Does not carry the Heroic name though. Drops from the bosses of the Elemental Cave. Looks like a Red Blood except it glows orange. **
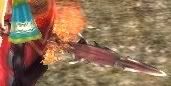
Elysium
Level 55
3-Slotted: Does not carry the Heroic name though. Drops from the bosses in the Elemental Cave. Looks like a Karma Samsara except it glows orange. **
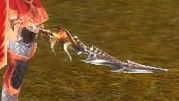
Lumi’s Tear
Level 56
5-Slotted: Does not carry the Legend name though. Drops from bosses in Cryptic Throne, which opens after the Freezing Mirage dragon form is killed. **
** 
Cultist’s Blade (HM+)
Level 59
5-Slotted: Does not carry the Legend name though. Drops from bosses in Cryptic Throne, which opens after the Freezing Mirage dragon form is killed. **
Capes
Capes, or mantles, are not just pretty decorations. They also add stats such as int, wis, and MP. There are 10 capes that a priest can possible wear; 6 for NM and 4 for HM/UM.
*I do not have the screenshots for the NM 31 Int cape nor the info or screenshots for the NM 44 capes. If anyone can provide me with these, I would be very grateful.
For Normal Mode:

-Oracular Cape – Level 31 and adds 10 Wis, 31 HP, 61 MP, 2 Def and 4 Res
*Can be bought for 40 million gold at the Cape NPC in Apulune
-Brilliant Cape – Level 31 and adds 10 Int, 31 HP, 61 MP, 2 Def and 4 Res
*Can be bought for 40 million gold at the Cape NPC in Apulune
-Wis Cape – Level 44 and adds 13 Wis.
-Int Cape – Level 44 and adds 13 Int

-Cape of Judgment – Level 52 and adds 17 Wis, 52 HP, 101 MP, 4 Def and 9 Res
*Can be found in players’ shops in Apulune.
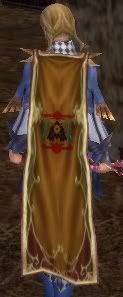
-Cape of the Sagacity – Level 52 and adds 17 Int, 52 HP, 101 MP, 4 Def and 9 Res
*Can be found in players’ shops in Apulune.
For Hard/Ultimate Mode:

-Cape of the Pristine – Level 33 and adds 11 Int, 11 Wis, 33 HP, 65 MP, 2 Def and 5 Res
*Can be found in players’ shops in Apulune.
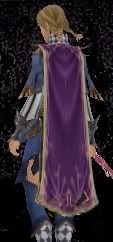
-Cape of the Incorruptible – Level 41 and adds 13 Int, 13 Wis, 41 HP, 80 MP, 3 Def and 6 Res
*Can be found in players’ shops in Apulune.

-Cape of the Virtue – Level 48 and adds 16 Int, 16 Wis, 48 HP, 94 MP, 3 Def and 8 Res
*Can be found in the Item mall (in game and on site) or players’ shops in Apulune.
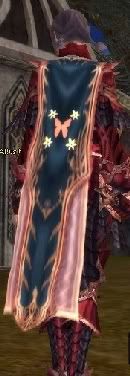
-Cape of Sanctity – Level 54 and adds 18 Int, 18 Wis, 54 HP, 105 MP, 4 Def and 10 Res
*Can be found in the Item mall (in game and on site) or players’ shops in Apulune.
Mounts
Priests, along with the other Human classes, can ride horses as mounts. They can be ridden at different levels depending on your mode. There are 7 mounts that can be ridden.
For Normal Mode:
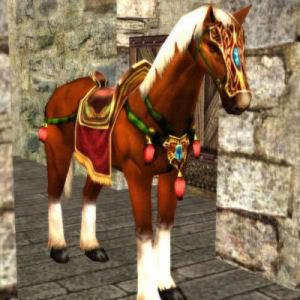
-Horse
This will be the first mount you can get and use and is known as the NM regular mount. You must be at least level 40 to ride it. It can be bought at the Mount Merchant (Stardust Knights Area of Apulune) for 11 million gold. This mount is NOT tradable and seats only ONE.

-Black Unicorn
This mount is the rare NM mount and can only be obtainable through AP Promos or from a player’s shop in Apulune. The level to ride it is also level 40 and the price of this mount will vary. This mount IS tradable and seats only ONE.
For Hard Mode:
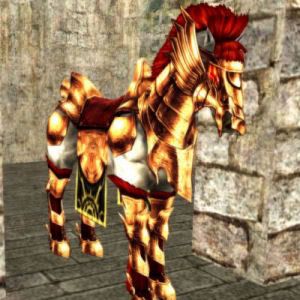
-Sunsteed
This is the HM regular mount and the one most used. You must be at least level 50 to ride it. It can be bought at the Mount Merchant (Stardust Knights Area of Apulune) for 75 million gold. This mount is NOT tradable and seats TWO.
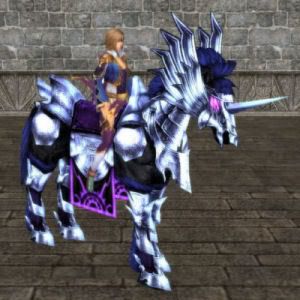
-Silverhorn
This mount is the rare HM mount and can only be obtainable through AP Promos or from a player’s shop in Apulune. The level to ride it is also level 50 and the price of this mount will vary. This mount IS tradable and seats TWO.
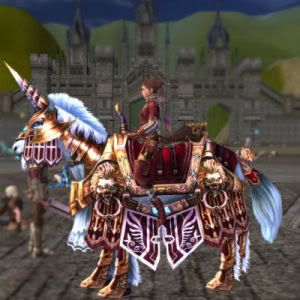
-Bearded Unicorn
This mount is the uber HM mount and can only be obtainable through AP Promos or from a player’s shop in Apulune. The level to ride it is level 50 (I believe) and the price of this mount will vary. This mount IS tradable and seats TWO.
For Ultimate Mode:
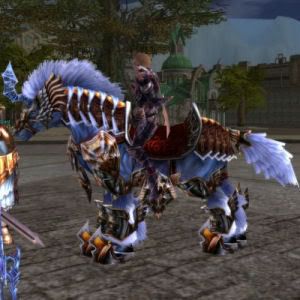
-Curved Horn Unicorn
This mount is the rare UM mount and can only be obtainable through AP Promos or from a player’s shop in Apulune. The level to ride it is level 58 and the price of this mount will vary. This mount IS tradable and seats TWO.
There is also a special mount that was released during Christmas. This mount is a reindeer mount and can be ridden at level 28 and does not have a mode cap.

-Reindeer
This mount can only be obtainable from a player’s shop in Apulune. The price of this mount will vary and it IS tradable and seats only ONE.
Maps
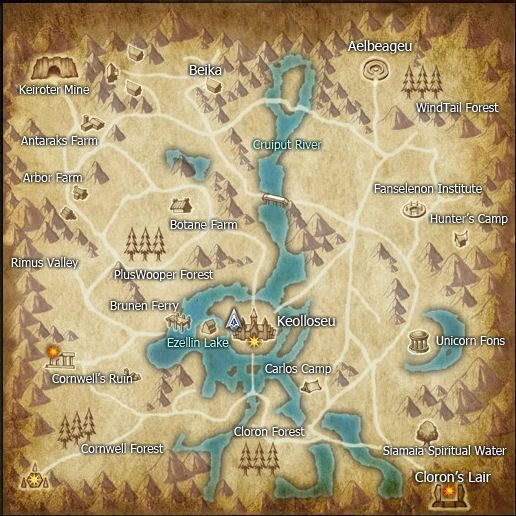
Erumana/Erina (Map 1)
This is the first map you appear on and will stay until approximately level 20/21. As a priest you will begin in the Human town of Beika. From there, you will head east to Aelbeageu, then generally south as you level up. Keolloseu is the capital city and here you will find gates/gatekeepers that will transport you to other cities/maps. As you level you will receive quests, which are marked by yellow dots, both in your radar and bigger map (viewable by pressing “M”). Once quest requirements are met, a blue dot will appear and this will indicate where you can turn the quest in.
There are two Dungeons on this map, Cornwell’s Ruins and Cloron’s Lair. You will be able to grind in Cornwell, but will not be able to go into Cloron until at least level 38 minimum. You can start in Cornwell at about level 15 and continue on until max level 21, though exp will be low.
Once you hit level 38, you can return to Map 1 and visit Cloron’s Lair. Be sure to join a party before attempting the dungeon. As with all dungeons, players gather either right outside or right inside, looking for parties. As a priest, you will have no problem getting an invite. Cloron Dragon resides in the bottom of the Lair and once killed, drops legend armor and high level weapons. It is best to only try to kill him with multiple full parties of high-level players, 55+ at the minimum.
The first zone for PvP (level 1-15) is located on this map, though a portal in Keolloseu. Most players there will be level 15, well-lapised and frequently nossed. It may be a bit hard to get a party when you are first starting, but once you do, be sure to stay close to your party members. (For more information, see the “PvP” or “PvP Map” section).
Map 2 can be gotten to by the portal in the Southwest corner, in Cornwell Forest.

Willieoseu (Map 2)
The first way you enter this map is through the Northeast portal, in Haldeck Farms (all other times, you can return by portals in Arktuis or Silvaren). On this map, you will work your way due west, then south and southeast. The main city on this map is Arktuis Vill, with the southern city of Silveran being almost as popular. From level 20 or so until about level 30, you will reside in the northern part of the map, grinding on mobs outside and inside Fedion Dungeon. As the mobs in Fedion are harder than the mobs outside, I would suggest waiting until mid to upper 20s before attempting this dungeon. It is in the north section of this map, that you will receive two or the three important quests that are given on this map. The first of which is your level 25 Epic Quest. You will receive this quest around level 23 and once completed with reward you with an impressively statted weapon. (See “Weapon” section for more information). The other important quest is actually a series of quests, known as the Dread Quests. You will be able to begin these four quests in the late 20s. (See “Armor” section for more information). Once you level into your 30’s the grinding areas to the south open up to you.
Once you level to mid-30s, you can head into Maitreyan Dungeon, located smack dab in the middle of the map. Just like Fedion, the mobs inside Maitreyan are harder than the mobs outside. Deep inside this dungeon, the 45 epic quest boss, Ankylul, resides. Once you level to 43, the final important quest of this map will appear in Silveran. This quest, unfortunately, will have you running all over the three main maps, gathering supplies to hand in for the reward. The final reward for this quest is the 45 epic staff, which is called the “Holy Elven Aqua Staff” It gives the element of Water in addition to +42 Wis. (See “Weapon” section for more information).
Also on this map, is a portal to the second PvP (level 20-30) map. This portal is set in the middle of Arktuis Vill (see the “PvP” or “PvP Map” section for more information).
Lastly, the hardest bosses reside on this map. In the lagoon in the western part of the map, the elf/dragon boss Freezing Mirage lives. It is not recommended to attempt to kill him without multiple full parties of level 58+ (58 being the very lowest). He drops the highest level of armor and his spawn time is 1 week. After Mirage is killed, the portal behind him will open and lead to Cryptic One’s Throne. This is home to the hardest bosses of the game. Do NOT attempt without some serious backup!
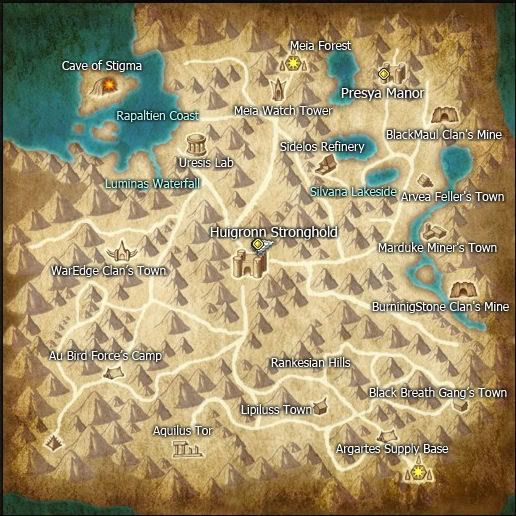
Adellia (Map 3)
The first way you enter this map is through the North portal, in Meia Forest. (all other times, you can return by portals in Stronghold or Presya). In the east is Presya Manor, which is where you will receive a few quests. Due south is the main town of this map: Huigronn Stronghold. Two gatekeepers here will port you to numerous places. This is the only place you can access Pandorashys. While grinding, you will work you way south to Stronghold, then west then southeast and southwest. You can stay on this map, grinding though levels 35 to 50. Once you reach level 50, you can head to Pando or through the southern portal, to Karis, which leads to D2, the Jungle and Desert Maps. There is one Dungeon on this map, the Cave of Stigma, which is located in the northwest. It is a high level dungeon whose named mobs drop level 5 lapis and should only be attempted by levels 55+. The mobs that surround the named mobs however, can be attempted at a lower level and drop Dread armor.
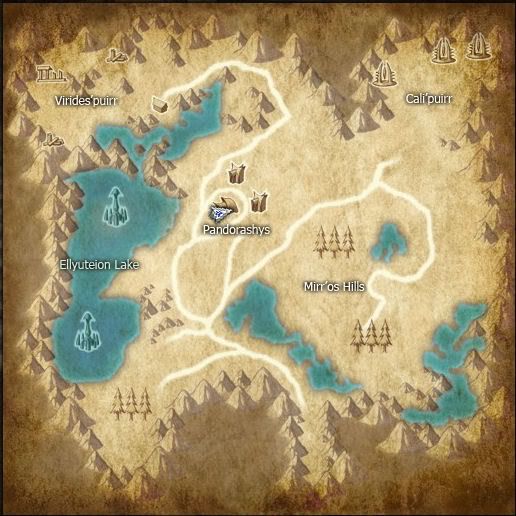
Pandorashys(Skulleron)
Most commonly referred to as Pando, this map can be reached through the gatekeeper in Stronghold. The mobs located here can keep you busy to level 58, though compared to the mobs in the jungle or desert maps they give low exp. In Pando, you will receive 3 Broken Lapis quest (Red, Blue and Yellow) at levels 50, 52/53 and 55, respectively. These quests will reward you with either a Level 4, Level 5 or Level 6 Lapis. You will need to obtain the Vail Distinguishment Mark from the monkeys just west of the town to begin each quest. Each quest requires only 10 pieces, but many players believe that the more you collect, the better lapis you get. This is actually untrue. I have completed the red, collecting 14 pieces, the blue lapis quests, collecting 36 and the yellow, collecting 20. I received a Level 6 Toxin for the first, Level 5 REC for the second and a Level 6 Slumber for the third. The amount of how many pieces you collect (as long as it is over 10) does not matter, as the reward is random.
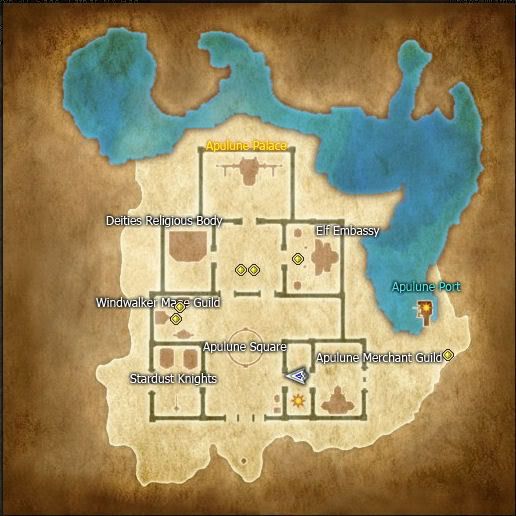
Apulune
Here is where you can buy and sell to other players. To buy, merely click on a sitting player, then right click and “View Market.” This will open up their shop, allowing your browse with ease. To sell, find a place and sit down. Press “B” and click on “Individual Market.” Drag your items into your shop, title the shop then press “Open Shop.” While in your shop form, you cannot do anything else, other than talk. Most players set up their shops while they sleep or set up two accounts on two computers so their seller toon can sell while their main toon can easily continue to grind. It is here, in the shops way to the east near the docks that you receive the quest for the Anor Helm.
*Important! Be sure to triple check your prices before you open your shop. You may accidentally have added or subtracted a 0 from your price, making it either too expensive (which won’t sell) or too cheap (which will sell fast and for a lot less than you want it to).
PvP Maps
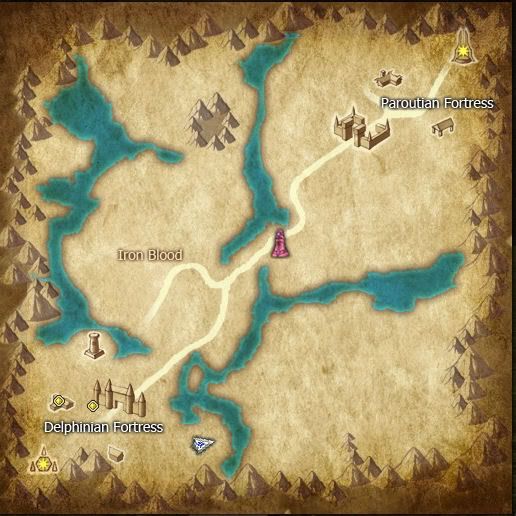
Delphinian Fortress (1-15 PvP)
This is the 1-15 PvP zone. It can be reached from the portal near the Blacksmith of Keolloseu. A few quests can be achieved here but beware of the opposing faction if you intend to complete them. There is one alter to fight over.
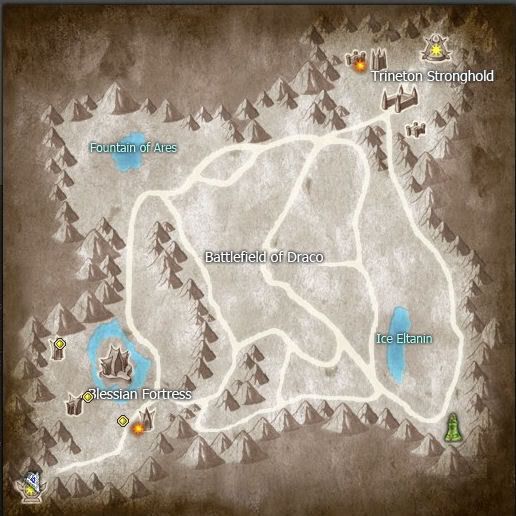
Blessian Fortress (20-30 PvP)
This is the 20-30 PvP zone. It can be reached from the portal in the middle of Arktuis Vill. There is one alter to fight over. Also, in this zone is the Dungeon of Pharos. This is an excellent place to grind in the early 20s without fear of the opposing faction attacking. The boss, Pharos, also drops good weapons. She IS a quest boss, which farming will only gain you a ban, so be sure that you or a party member has the quest.
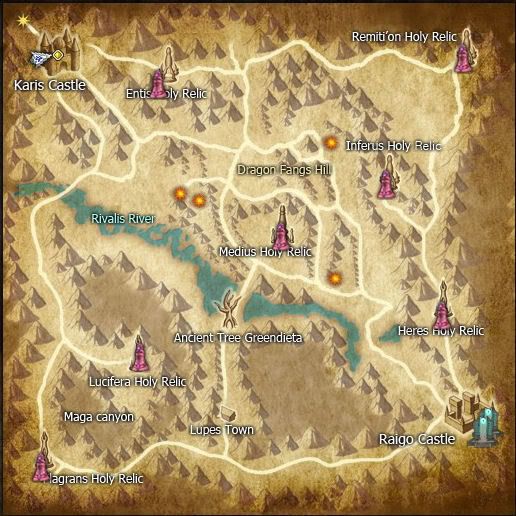
Karis Castle (1-60 PvP)
This is the 1-60 PvP zone. In addition to PvP, level 3 lapis can be farmed from the main mobs and level 3 & 4 lapis can be farmed in the main dungeons (D1 and D2). Just like out in the main map, you run the risk of running into members of the opposing faction in D1 and D2. The only boss in the game that drops Elemental lapis resides in the bottom of D2. There are seven altars to fight over.
*Note – Once Ep 4 content is installed in the game, the Jungle and Desert Maps will no longer be dependant on specific relics each faction owns. They will be open all the time for both side
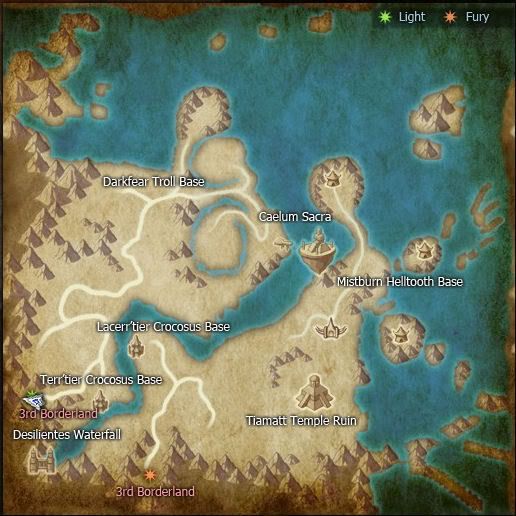
Stable Erde (Jungle/Dino Map)
This is one of two maps that only are accessible based on how many relics in Karis your faction owns. These maps are great for high level grinding, but beware, as they are also PvP maps. Since Episode 4 was integrated, the portal to this map is open 24/7. Like DD1 and DD2, this is a PvP map, so be sure to keep an eye on your radar.
This map, along with the desert, is the only place that drops Dual Lapis. The Strength, Wise and Intelligence dual lapis drop from the dinosaurs, crocodiles, turtles mobs and also the mobs surrounding Tiamatt Temple. High-level armor also drops on this map from the troll mobs and the troll bosses. The troll mobs drop level 56 noble, dread, or legend boots and the troll bosses drop level 58 noble, dread, or legend tops, though very rarely. One troll boss is located on the peninsula north of the Darkfear Troll Base while the other is located on the inland island west of Caelum Sacra. There are two more bosses, but I’m not exactly sure where they are located, only that they are in the far eastern part of the map.
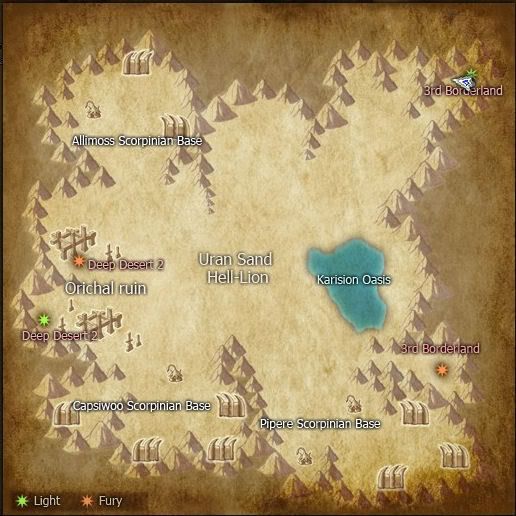
Deep Desert 1
This is the second of two maps that only are accessible based on how many relics in Karis your faction owns. These maps are great for high level grinding, but beware, as they are also PvP maps. Since Episode 4 was integrated, the portal to this map is open 24/7. Like the jungle and DD2, this is a PvP map, so be sure to keep an eye on your radar.
This map, along with the jungle, is the only place that drops Dual Lapis. The Rec, Dexterity and Luck dual lapis drop from the Desert Larvae, Spiders and Scorpians. High-level armor also drops on this map from the scorpion boss. Located in each of the 3 Scorpinian bases, he can drop level 57 noble, dread, or legend pants, though very rarely. All the way in the west is a portal to Deep Desert 2 (DD2).

Deep Desert 2
This is the second part of the Deep Desert Map. When you enter, it will be in the top right corner, but you will have to head south to the portal to exit this map, other than using /town. In this map there are the small scorpion and caterpillar mobs, along with zombies, plants, and a few mini-bosses near Aedes Sacra. I would advise to hold off on grinding here until at least level 56+. The mobs here drop the somewhat useless accessory lapis, so many people merely grind here for leveling, as opposed to obtaining valuable drops. Like the jungle and DD1, this is a PvP map, so be sure to keep an eye on your radar.

Recent Comments